Love this? Save it for later!
Share the inspiration with your friends
“I wasn’t expecting my tiny dorm room kitchenette to turn into a fiesta, but there I was, balancing a nearly empty cheese packet in one hand and a bag of tortilla chips in the other,” I recall one sweltering July 4th evening. It was my third year of college, and honestly, the usual cookout plans were out of reach—no grill, no backyard, just a cramped space and a craving for something cheesy and satisfying. That’s when I stumbled upon this easy cheesy nachos recipe that transformed my budget-friendly July 4th dorm cooking into a crowd-pleasing celebration.
You know that feeling when you’re juggling limited ingredients, a tiny microwave, and a growing hunger? Yeah, been there. What started as a late-night snack experiment (because who really wants to wait for a slow oven when you’re starving?) ended up being the go-to recipe for every dorm party, study break, or last-minute gathering. The best part? It’s ridiculously simple, affordable, and packs a punch of flavor without needing a full kitchen setup.
Maybe you’ve been there too—looking for something quick, cheesy, and definitely shareable without breaking the bank or your patience. This recipe stuck with me because it’s more than just nachos; it’s the little victory of making something delicious out of almost nothing. Plus, it’s flexible enough for any dorm dweller’s pantry, meaning you can tweak it based on what you have on hand. Let me tell you, once you try these easy cheesy nachos, they might just become the unofficial July 4th dorm party staple you never knew you needed.
Why You’ll Love This Recipe
Let me be real—this easy cheesy nachos recipe isn’t just a timesaver; it’s a lifesaver for anyone navigating dorm life or tight budgets. After testing countless versions (and yes, burning a few batches), I’ve landed on a method that’s foolproof, flavorful, and frankly, kind of addictive. Here’s why you’re going to want this recipe bookmarked for every dorm party and quick snack craving:
- Quick & Easy: Ready in under 15 minutes, this recipe is perfect for busy college nights or those last-minute July 4th celebrations when time’s not on your side.
- Simple Ingredients: No exotic items here. I’m talking basic tortilla chips, shredded cheese, and a handful of pantry staples you probably already have.
- Perfect for Dorm Life: No oven? No problem. This recipe works great with a microwave or toaster oven, making it ideal for small spaces.
- Crowd-Pleaser: Whether you’re feeding friends or just treating yourself, these nachos always get rave reviews—kids and adults alike would flip for them.
- Unbelievably Delicious: The combo of melted cheese, crunchy chips, and optional toppings hits a comforting, crave-worthy note every single time.
What sets this apart from other nacho recipes? Honestly, it’s the balance. I’ve dialed in the cheese blend for meltiness and flavor, and the layering technique helps every chip get a perfect cheesy coating without turning soggy. Plus, tossing in a little salsa or jalapeño takes it from simple snack to party star.
For me, this recipe isn’t just about food; it’s about those late-night chats, the laughter spilling into the hallway, and the joy of sharing something homemade and heartwarming—even if it’s whipped up on a dorm room budget. Trust me, once you make these easy cheesy nachos, you’ll get why I keep coming back to them.
What Ingredients You Will Need
This recipe uses simple, wholesome ingredients to deliver bold flavor and satisfying texture without the fuss. Most of these are pantry staples that don’t require a special trip to the store, making it perfect for dorm cooking or last-minute celebrations.
- Tortilla chips: About 4 cups (120g) – I recommend thick, sturdy chips like Mission or On The Border for the best crunch.
- Shredded cheese: 2 cups (200g) – A blend of sharp cheddar and Monterey Jack works wonders for melt and taste.
- Salsa: ½ cup (120ml) – Fresh or jarred, choose your favorite heat level.
- Jalapeños: 1-2, sliced (optional) – Adds a nice kick, but feel free to skip if you’re not into spicy.
- Black beans: ½ cup (120g), drained and rinsed (optional) – Adds protein and texture.
- Green onions: 2 stalks, thinly sliced – For a fresh, mild onion flavor.
- Sour cream: For serving – or swap with Greek yogurt for a healthier twist.
- Olive oil spray or butter: Just a light mist or dab to help crisp chips if using a toaster oven.
Tip: If you want a gluten-free option, make sure your tortilla chips are labeled gluten-free. For dairy-free needs, use vegan cheese substitutes and dairy-free sour cream alternatives.
Equipment Needed
- Microwave-safe plate or toaster oven tray: For melting the cheese and warming the chips.
- Small mixing bowl: For combining optional ingredients like beans or salsa.
- Sharp knife: To slice jalapeños and green onions safely.
- Measuring cups and spoons: For accuracy, especially when you want consistent results.
If you don’t have a toaster oven, a microwave works just fine. I’ve used both in my dorm and honestly, the microwave is a lifesaver when you’re short on time or space. Just be careful not to overheat, or the chips might get soggy. For those with a bit more gear, a small oven or air fryer would crisp the chips beautifully, but this recipe is designed to shine even with the bare minimum.
Preparation Method

- Preheat your toaster oven or prepare your microwave: If using a toaster oven, set it to 375°F (190°C). For microwave, no preheating needed.
- Arrange the chips: Spread 4 cups (120g) of tortilla chips evenly on your microwave-safe plate or toaster oven tray. Try to keep a single layer for even cheese coverage.
- Add the cheese: Sprinkle 2 cups (200g) shredded cheddar and Monterey Jack blend generously over the chips. Don’t be shy—every chip should get some love.
- Layer optional toppings: Add ½ cup (120g) black beans, ½ cup (120ml) salsa, and sliced jalapeños (1-2, depending on heat preference). This step is flexible based on your taste or what you have.
- Melt the cheese: Toast in the oven for 5-7 minutes or microwave on high for 1.5 to 2 minutes. Keep an eye—if the cheese bubbles and melts fully, you’re golden. Avoid overheating to prevent soggy chips.
- Finish with green onions: Once out of the heat, sprinkle 2 thinly sliced green onions over the top for a fresh contrast.
- Serve immediately: Plate with a dollop of sour cream or Greek yogurt on the side. This adds a creamy coolness that balances the cheesy heat perfectly.
Pro tip: If your chips start to get soggy, try a quick 30-second broil (if your toaster oven has that function) to crisp them back up before serving.
Trust me, these steps keep everything simple but satisfying, perfect when you’re juggling study deadlines and dorm life chaos.
Cooking Tips & Techniques
One thing I’ve learned is that nachos can go from amazing to meh in a flash if you’re not careful. Here’s what I keep in mind when making these easy cheesy nachos:
- Don’t overload the chips: Piling on too many toppings can make the chips soggy and hard to eat. Keep layers light and even.
- Cheese blend matters: A mix of sharp cheddar and Monterey Jack melts perfectly—cheddar gives flavor, Monterey Jack adds stretchiness.
- Layer strategically: Put cheese both under and over toppings to help everything stick together and melt evenly.
- Watch your heat source: Microwaves vary, so start with shorter times and add more if needed. Toaster ovens give a nice crisp but can dry out chips if left too long.
- Prep toppings in advance: Having jalapeños sliced and beans rinsed saves you scrambling when you’re hungry.
- Multitask: While cheese melts, chop green onions or prepare sour cream. It keeps things moving smoothly.
Honestly, my first few attempts were a bit soggy or dry, but after tweaking layering and timing, this recipe became a reliable winner every single time. You’ll find your own rhythm quickly!
Variations & Adaptations
This easy cheesy nachos recipe is a versatile canvas for your creativity. Here are a few ways I’ve mixed it up depending on mood, diet, or season:
- Vegetarian-Friendly: Add extra black beans, corn kernels, or diced bell peppers for more texture and nutrition.
- Spicy Kick: Swap jalapeños for pickled banana peppers or add a drizzle of hot sauce before serving.
- Protein Boost: Toss in cooked ground turkey or shredded rotisserie chicken for a heartier meal.
- Dairy-Free: Use vegan shredded cheese and coconut-based sour cream alternatives.
- Seasonal Twist: In summer, fresh diced tomatoes and avocado chunks make a refreshing topping.
One personal favorite is adding a sprinkle of smoky paprika or cumin to the cheese before melting—it adds a subtle warmth that feels like a little vacation in your mouth. Feel free to experiment and make this recipe truly your own.
Serving & Storage Suggestions
These nachos are best served warm and fresh for that perfect melty, crunchy combo. I like to plate them right after cooking with a generous spoonful of sour cream on the side and sometimes a cold cerveza or iced tea to balance the heat.
If you have leftovers (though that’s rare), store them in an airtight container in the fridge for up to 2 days. Reheat in a toaster oven or under a broiler for a few minutes to bring back the crispiness. Microwave reheating works in a pinch but might soften the chips.
Flavors tend to meld and deepen slightly if you let them sit a bit, but nachos are really best when eaten immediately. For dorm-friendly parties, make smaller batches to keep the crunch alive.
Nutritional Information & Benefits
One serving of these easy cheesy nachos (about 1 cup or 150g) roughly contains:
| Calories | 320 |
|---|---|
| Protein | 12g |
| Fat | 18g |
| Carbohydrates | 28g |
| Fiber | 4g |
With black beans and green onions, this recipe offers a modest protein and fiber boost, which is great for sustained energy—perfect during long study sessions. Using fresh salsa adds vitamins and antioxidants without extra calories.
If you’re watching carbs, you can reduce the chip quantity or swap in lower-carb options. For lactose-sensitive folks, dairy-free cheese works well without compromising flavor.
Conclusion
In the end, this easy cheesy nachos recipe is a dorm kitchen hero—affordable, fast, and crowd-loved. Whether you’re throwing a small July 4th get-together or just craving something cheesy and comforting, this recipe fits the bill without fuss or fancy gear.
I love how it brings people together without needing a full kitchen or a big grocery haul. It’s proof that simple ingredients and a little creativity can turn any small space into a celebration spot. Give it a try, tweak it your way, and let me know how your nacho night turns out!
Don’t forget to share your favorite twists or any dorm cooking hacks in the comments. Let’s keep the cheesy love going!
FAQs
- Can I make these nachos without a toaster oven?
Yes! A microwave works perfectly—just watch carefully to avoid soggy chips. - What’s the best cheese for melting on nachos?
A mix of sharp cheddar and Monterey Jack melts well and offers great flavor and stretch. - How can I make this recipe vegan?
Use vegan shredded cheese and replace sour cream with coconut or cashew-based alternatives. - Can I prepare nachos ahead of time?
It’s best to assemble and heat just before serving to keep chips crispy. - What are some good toppings to add?
Try black beans, jalapeños, green onions, diced tomatoes, or cooked chicken for extra flavor and texture.
Pin This Recipe!
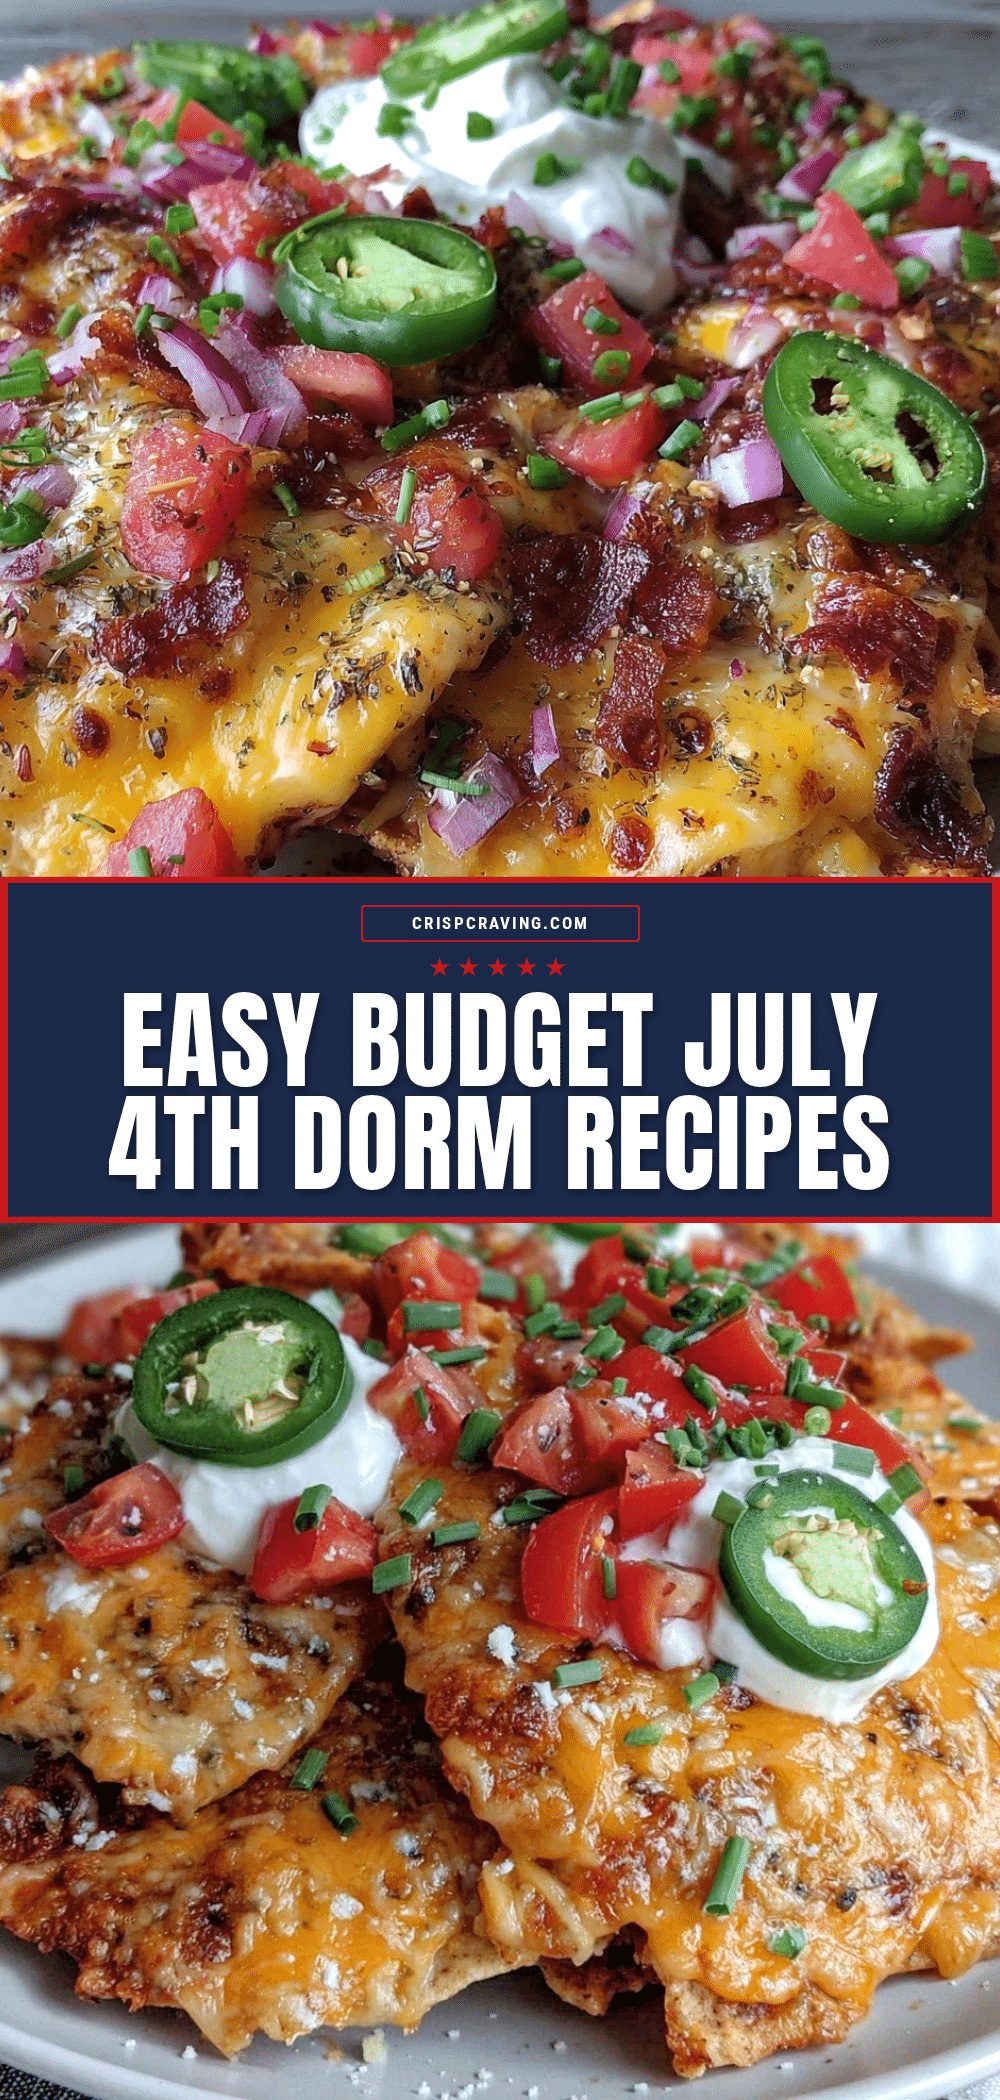
Easy Cheesy Nachos

A quick, budget-friendly, and crowd-pleasing cheesy nachos recipe perfect for dorm life or small gatherings, ready in under 15 minutes using simple ingredients and minimal equipment.
- Prep Time: 5 minutes
- Cook Time: 7 minutes
- Total Time: 12 minutes
- Yield: 4 servings 1x
- Category: Snack
- Cuisine: American
Ingredients
- 4 cups (120g) tortilla chips (thick, sturdy like Mission or On The Border recommended)
- 2 cups (200g) shredded cheese (blend of sharp cheddar and Monterey Jack)
- ½ cup (120ml) salsa (fresh or jarred, heat level optional)
- 1–2 jalapeños, sliced (optional)
- ½ cup (120g) black beans, drained and rinsed (optional)
- 2 stalks green onions, thinly sliced
- Sour cream for serving (or Greek yogurt as a substitute)
- Olive oil spray or butter (light mist or dab to help crisp chips if using toaster oven)
Instructions
- Preheat your toaster oven to 375°F (190°C) or prepare your microwave (no preheating needed).
- Spread 4 cups (120g) of tortilla chips evenly on a microwave-safe plate or toaster oven tray in a single layer.
- Sprinkle 2 cups (200g) shredded cheddar and Monterey Jack cheese blend generously over the chips.
- Add optional toppings: ½ cup (120g) black beans, ½ cup (120ml) salsa, and sliced jalapeños (1-2, based on preference).
- Melt the cheese by toasting in the oven for 5-7 minutes or microwaving on high for 1.5 to 2 minutes. Watch carefully to avoid overheating and soggy chips.
- Once heated, sprinkle 2 thinly sliced green onions over the top.
- Serve immediately with a dollop of sour cream or Greek yogurt on the side.
Notes
Do not overload chips with toppings to avoid sogginess. Use a cheese blend of sharp cheddar and Monterey Jack for best melt and flavor. If chips get soggy, a quick 30-second broil in toaster oven can crisp them back up. For gluten-free, use labeled gluten-free chips; for dairy-free, use vegan cheese and dairy-free sour cream alternatives.
Nutrition
- Serving Size: About 1 cup (150g)
- Calories: 320
- Fat: 18
- Carbohydrates: 28
- Fiber: 4
- Protein: 12
Keywords: nachos, cheesy nachos, dorm meals, quick snack, budget-friendly, microwave nachos, toaster oven nachos, easy recipe, July 4th snack



