Love this? Save it for later!
Share the inspiration with your friends
I wasn’t trying to impress anyone. Honestly, I’d stopped by my sister-in-law’s house on a random Tuesday afternoon to drop off a casserole dish she’d lent me, and the smell—wait, no, there wasn’t a smell. That’s the funny thing about no-bake treats. It was the sight that got me. She had a baking sheet covered in these little white balls with creepy blue irises staring up at the ceiling, and she was just standing there, licking melted chocolate off her finger like it was nothing. “Oh, those?” she said when she caught me staring. “Just something dumb for the kids’ party.”
Let me tell you, there was nothing “dumb” about them. I grabbed one before she could protest—not that she would have, she’s not the type—and that first bite hit me with this creamy, crunchy, chocolatey explosion that I was not prepared for on a random Tuesday. The Oreo crumb mixed with the cream cheese created this fudgy texture that melted in my mouth, and the candy coating gave it that satisfying snap. I stood there in her kitchen, probably looking like a fool, eating three more while she laughed at me.
Maybe you’ve been there. You walk into someone’s house and they’re making something that looks ridiculously complicated, but they’re acting like it’s the easiest thing in the world. That’s exactly what this was. She’d made them with her kids in under thirty minutes, no oven, no fancy equipment, just a food processor and some patience. I begged her for the recipe, and she texted it to me later that night with a single instruction: “Don’t overthink it.”
And you know what? She was right. These Spooky No-Bake Oreo Truffle Eyeballs are the kind of recipe that makes you look like a Halloween hero without breaking a sweat. I’ve made them every year since that Tuesday afternoon, and they’ve become my secret weapon for Halloween parties, classroom treats, and even just for myself when I need a little seasonal cheer. The best part? You don’t need to be a baker. You don’t need to be patient. You just need Oreos, cream cheese, and a little bit of creativity.
Why You’ll Love This Recipe
I’ve tested this recipe more times than I care to admit—probably a dozen batches over the last few years—and I can tell you with complete confidence that it’s foolproof. Here’s why you’ll fall in love with these Spooky No-Bake Oreo Truffle Eyeballs:
- No Oven Required: It’s October, and the last thing I want to do is heat up my kitchen. These come together entirely on the countertop, no baking skills needed.
- Kid-Friendly Fun: My niece helped me make a batch last weekend, and she had more fun rolling the truffles than she did eating them. It’s messy, it’s silly, and it’s perfect for little hands.
- Simple Ingredients: You probably already have Oreos and cream cheese in your fridge. The candy melts and decorating supplies are easy to find at any grocery store or craft store.
- Completely Customizable: Want green eyes instead of blue? Go for it. Prefer dark chocolate coating? Swap it out. This recipe is a blank canvas for your Halloween creativity.
- Make-Ahead Magic: These truffles actually taste better after a few hours in the fridge. You can make them two days ahead of your party and just pull them out when guests arrive.
- Always a Showstopper: I’ve brought these to three different Halloween parties, and every single time, people ask for the recipe. They look creepy and impressive, but they’re secretly the easiest thing on the dessert table.
What makes this recipe different from the dozens of other Oreo truffle recipes out there? It’s the texture. Most recipes end up too soft or too crumbly, but I’ve perfected the ratio of Oreo crumbs to cream cheese so you get that fudgy, melt-in-your-mouth consistency every single time. Plus, the candy coating technique I’ll share with you ensures a smooth, crack-free shell that looks professionally made. This isn’t just another version of a Halloween treat—it’s the version you’ll come back to year after year.
What Ingredients You Will Need
This recipe uses simple, pantry-friendly ingredients to create something that looks far more complicated than it actually is. Here’s what you’ll need to gather before you start:
For the Truffle Base
- 1 (14.3 ounce) package Oreo cookies (regular, not Double Stuf—the extra filling throws off the texture)
- 8 ounces cream cheese, softened to room temperature (I prefer Philadelphia brand for the creamiest results)
- 1/4 teaspoon vanilla extract (optional, but it adds a lovely depth of flavor)
- Pinch of salt (trust me on this—it balances the sweetness)
For the Coating and Decoration
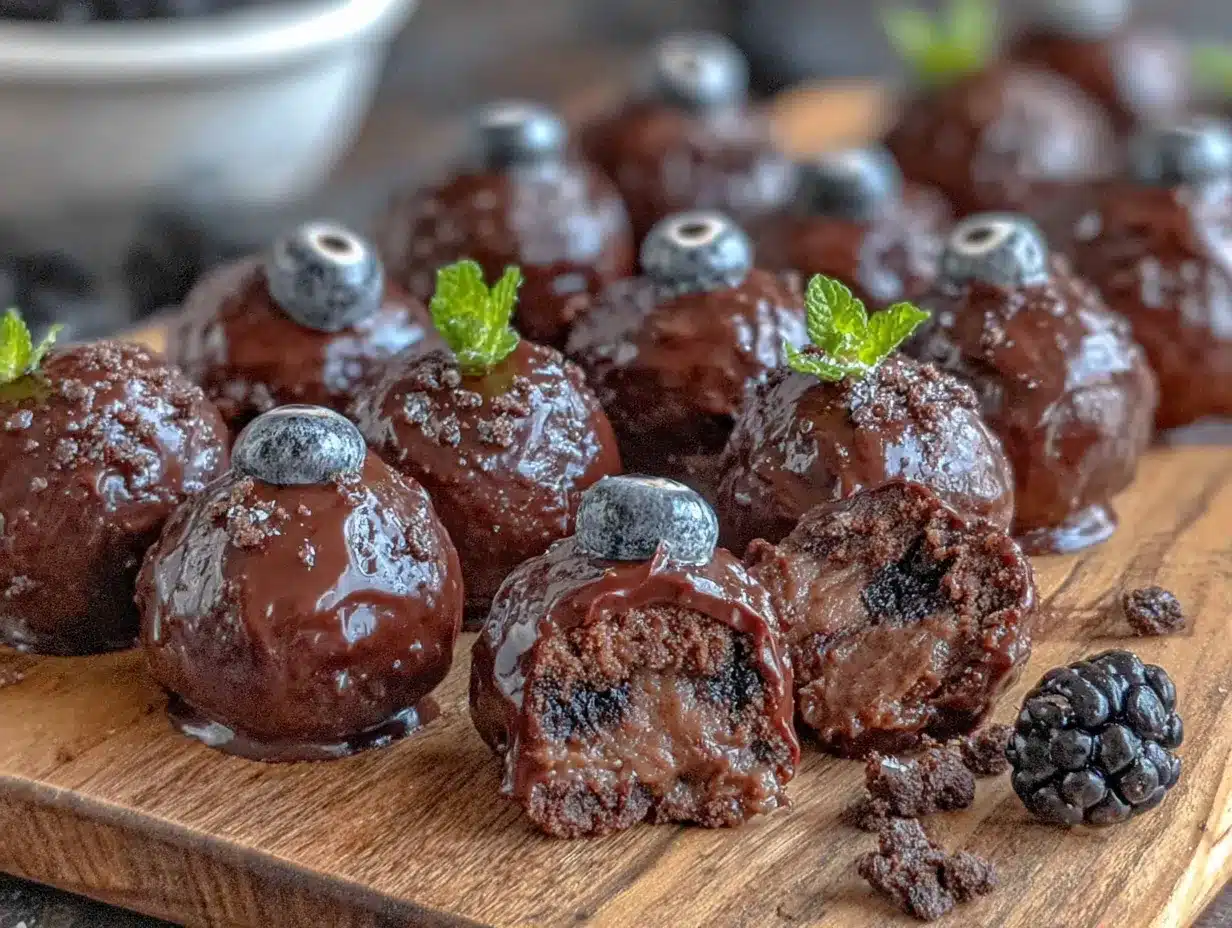
- 12 ounces white candy melts (I use Wilton brand—they melt smoothly and set firmly)
- 1 tablespoon coconut oil or shortening (this thins the candy melts for a smoother coating)
- Blue candy melts or blue food coloring (for the irises—about 2 ounces)
- Black gel food coloring (for the pupils—a small tube will last you years)
- Red gel food coloring (optional, for bloodshot veins if you want extra creepy factor)
Ingredient Tips from My Kitchen
Let me save you some trial and error. I once tried using reduced-fat cream cheese because I thought I was being healthy, and the truffles turned out soft and almost gooey. Full-fat cream cheese is non-negotiable here—it gives the truffles that perfect fudgy texture that holds its shape. Also, don’t skip the coconut oil in the candy melts. I learned this the hard way when my first batch of coating was so thick it clumped up and left ugly lumps on the truffles. A little oil makes the coating smooth and glossy, like a professional bakery finish.
For the Oreos, I recommend the classic variety. Double Stuf has too much cream filling, which makes the truffle mixture too wet and difficult to roll. If you only have Double Stuf on hand, scrape off half the filling before crushing. Yes, it’s annoying, but the texture difference is worth it.
Equipment Needed
You don’t need a fancy kitchen to make these Spooky No-Bake Oreo Truffle Eyeballs. Here’s what I use:
- Food processor (a high-speed blender works too, but a food processor gives you the most consistent crumb texture)
- Large mixing bowl
- Hand mixer or sturdy spatula (for combining the cream cheese and Oreo crumbs)
- Small cookie scoop or tablespoon (for portioning the truffles evenly)
- Baking sheet lined with parchment paper
- Microwave-safe bowl (for melting the candy coating)
- Fork or dipping tool (I use a simple dinner fork—it works perfectly)
- Small piping bags or zip-top bags (for the decorating details)
- Toothpicks (for drawing the pupils and veins)
If you don’t have a food processor, you can crush the Oreos by hand in a zip-top bag using a rolling pin. It takes longer and you’ll get a less uniform crumb, but it works in a pinch. I’ve done it before when my food processor was in the dishwasher, and honestly, the truffles still turned out great. Just make sure you crush them until there are no visible chunks left—you want a fine, sand-like texture.
Preparation Method
Let me walk you through this step by step. I’ve made these Spooky No-Bake Oreo Truffle Eyeballs so many times that I could do it in my sleep, but I’ll share every little trick I’ve learned along the way.
Step 1: Crush the Oreos
Place the entire package of Oreos—filling and all—into your food processor. Pulse until you get fine, sand-like crumbs. This should take about 30 seconds. Don’t over-process or you’ll end up with Oreo butter, which is delicious but not what we want here. You should have about 2 1/2 cups of crumbs. Set aside 2 tablespoons of the crumbs for garnish later if you want a little texture on the outside of your eyeballs.
Step 2: Make the Truffle Dough
In a large mixing bowl, beat the softened cream cheese with a hand mixer until it’s smooth and fluffy, about 2 minutes. Add the vanilla extract and salt, and beat for another 30 seconds. Pour in the Oreo crumbs and mix on low speed until everything is fully combined. The mixture will look like thick, dark cookie dough. If it seems too dry, add a teaspoon of milk. If it seems too wet, add a few more crushed Oreos. You want it to hold together when pressed between your fingers.
Step 3: Chill the Mixture
Cover the bowl with plastic wrap and refrigerate for at least 30 minutes. This step is crucial—I’ve skipped it before when I was in a hurry, and the truffles were impossible to roll without sticking to my hands. Chilling firms up the cream cheese and makes the mixture easy to handle. You can even chill it overnight if you’re planning ahead.
Step 4: Roll the Truffles
Line a baking sheet with parchment paper. Using a small cookie scoop or a tablespoon, portion out the chilled mixture and roll it between your palms into smooth balls. You want them to be about 1 inch in diameter—roughly the size of a real eyeball. Place each ball on the prepared baking sheet. You should get about 24 to 28 truffles from this batch. Pop the baking sheet into the freezer for 15 minutes. This helps the truffles hold their shape when you dip them in the warm coating.
Step 5: Melt the White Candy Coating
Place the white candy melts and coconut oil in a microwave-safe bowl. Microwave in 30-second intervals, stirring thoroughly after each interval, until the coating is completely smooth and runny. Be careful not to overheat—candy melts can seize up if they get too hot. If your coating seems too thick, add another teaspoon of coconut oil. If it seems too thin, let it cool for a minute before dipping.
Step 6: Dip the Truffles
Remove the truffles from the freezer. Working with one at a time, drop a truffle into the melted coating. Use a fork to gently roll it around until it’s fully covered. Lift it out with the fork, tap the fork gently on the edge of the bowl to let excess coating drip off, and then slide the truffle onto the parchment paper using a toothpick. Repeat with all the truffles. If the coating starts to thicken as you work, pop it back in the microwave for 15 seconds.
Step 7: Create the Eyeball Details
Let the coated truffles set for about 10 minutes—they should be firm to the touch but still slightly tacky. While you wait, melt the blue candy melts in a small bowl. Transfer the melted blue coating to a small piping bag or a zip-top bag with a tiny corner snipped off. Pipe a small blue circle in the center of each truffle to create the iris. Let these set for 5 minutes.
Using the black gel food coloring and a toothpick, draw a small dot in the center of each blue iris for the pupil. If you want to get extra creepy, use the red gel food coloring to draw tiny veins radiating outward from the iris. I like to make a few with heavy veins and a few with just a subtle hint of red—it gives the tray some variety.
Step 8: Let Them Set Completely
Place the decorated truffles back in the refrigerator for at least 30 minutes to let everything set firmly. The coating should be hard and shiny, and the decorations should be dry to the touch.
Cooking Tips & Techniques
I’ve made every mistake in the book with these truffles, so you don’t have to. Here’s what I’ve learned:
Temperature is everything. If your cream cheese is too cold, it won’t mix smoothly with the Oreo crumbs, and you’ll end up with white streaks in your dark truffle dough. If it’s too warm, the truffles will be soft and sticky. Let your cream cheese sit on the counter for about an hour before you start. I learned this after a particularly frustrating batch where I couldn’t get the mixture to come together.
Don’t rush the chilling steps. I know you’re excited—I get it. But skipping the freezer step before dipping is a recipe for disaster. The truffles will fall apart in the warm coating, and you’ll end up with chocolate soup with Oreo chunks floating in it. Trust me, I’ve been there. Give them the full 15 minutes in the freezer.
Work in small batches. If you’re making a double batch (which I often do for Halloween parties), don’t try to dip all 50 truffles at once. Keep the undipped truffles in the freezer while you work, and only take out 6 to 8 at a time. This keeps them cold and firm, which makes dipping so much easier.
The coconut oil is your friend. Some recipes call for shortening, but I prefer coconut oil because it doesn’t leave a greasy aftertaste. It also helps the candy coating flow smoothly and gives it a beautiful shine. Don’t skip it—I promise it makes a difference.
Practice your piping. The first time I tried to pipe the blue irises, I ended up with blobs that looked more like bruises than eyeballs. Take a few minutes to practice on a piece of parchment paper before you start decorating the actual truffles. It feels silly, but it saves you from ruining a whole batch.
Variations & Adaptations
One of the best things about this recipe is how easy it is to adapt. Here are some variations I’ve tried over the years:
Monster Mash Variation
Skip the eyeball decorations entirely and just drizzle the white-coated truffles with melted green or purple candy melts. Add some candy eyes on top for a quick and easy monster-themed treat. This is my go-to when I’m short on time but still want something festive.
Dark Chocolate Eyeballs
Swap the white candy melts for dark chocolate coating. The black-and-white contrast of the eyeballs against dark chocolate is actually really striking. Use white candy melts for the irises instead of blue, and you’ve got a completely different look. My brother-in-law prefers these—he says the dark chocolate balances the sweetness of the Oreo filling.
Peanut Butter Surprise
Add 2 tablespoons of creamy peanut butter to the cream cheese mixture before mixing in the Oreo crumbs. The peanut butter adds a savory note that complements the chocolate beautifully. Just make sure to use a natural peanut butter without added sugar, or the truffles will be too sweet.
Gluten-Free Option
Use gluten-free sandwich cookies instead of Oreos. I’ve tested this with several brands, and they all work well. The texture might be slightly different, but the taste is still fantastic. Just double-check that your candy melts are also gluten-free—some brands use wheat-based ingredients.
Vegan Adaptation
Use vegan cream cheese (I like Kite Hill brand) and vegan sandwich cookies. Most Oreos are actually vegan, which is a pleasant surprise. Use vegan white chocolate chips instead of candy melts, and add a teaspoon of coconut oil to help them melt smoothly. I made a vegan batch for a friend’s Halloween party last year, and nobody could tell the difference.
Serving & Storage Suggestions
These Spooky No-Bake Oreo Truffle Eyeballs are best served cold, straight from the refrigerator. The firm coating gives way to that creamy, fudgy center, and the contrast is absolutely magical. I like to arrange them on a black platter or a cake stand to really make the white eyeballs pop. Add some plastic spiders or fake cobwebs around the base for extra Halloween flair.
For a party, I recommend placing them on a tray lined with parchment paper and keeping them refrigerated until right before serving. They can sit out at room temperature for about an hour without any issues, but any longer and the coating might start to soften. If you’re serving them outdoors on a warm Halloween night, keep the tray on ice to maintain the texture.
These truffles pair beautifully with hot apple cider, pumpkin spice lattes, or even a glass of cold milk. I’ve also served them alongside a warm chocolate fondue for a double-chocolate experience that’s absolutely decadent.
Storage: Place the truffles in an airtight container, layered between sheets of parchment paper, and store them in the refrigerator for up to 5 days. They actually get better after a day or two as the flavors meld together. You can also freeze them for up to 3 months—just place them in a single layer on a baking sheet, freeze until solid, then transfer to a freezer-safe container. Thaw in the refrigerator overnight before serving.
Reheating: You don’t need to reheat these—they’re meant to be eaten cold. But if you prefer a softer texture, let them sit at room temperature for 15 minutes before serving.
Nutritional Information & Benefits
Let’s be real—these are a treat, not a health food. But here’s the nutritional breakdown for one truffle (based on 24 servings):
| Nutrient | Amount per Truffle |
|---|---|
| Calories | 165 |
| Total Fat | 10g |
| Saturated Fat | 6g |
| Carbohydrates | 18g |
| Sugar | 13g |
| Protein | 2g |
| Sodium | 95mg |
While these aren’t going to win any nutrition awards, there are a few bright spots. The cream cheese provides a small amount of calcium and protein, and the cocoa in the Oreos contains antioxidants called flavonoids. Plus, portion control is built in—each truffle is a single serving, so it’s easy to enjoy one or two without overdoing it.
For those with dietary restrictions, please note that this recipe contains dairy (cream cheese, candy melts), gluten (Oreos), and soy (often found in candy melts). Always check your ingredient labels if you’re cooking for someone with allergies.
Conclusion
These Spooky No-Bake Oreo Truffle Eyeballs are the kind of recipe that makes you look like a Halloween hero without spending hours in the kitchen. They’re fun, they’re creepy, and they’re absolutely delicious—everything a Halloween treat should be. I’ve made them for parties, classroom celebrations, and even just for myself on a cozy October evening, and they never fail to bring a smile to my face.
The best part? You can make them your own. Change the colors, experiment with different coatings, or add your own creepy decorations. That’s the beauty of a simple recipe like this—it’s a canvas for your creativity. I’d love to hear how yours turn out! Drop a comment below and let me know what variations you tried, or tag me in your photos on social media. Happy Halloween, and happy snacking!
Frequently Asked Questions
Can I use Double Stuf Oreos for this recipe?
Technically yes, but I don’t recommend it. The extra cream filling makes the truffle mixture too wet and sticky, which makes rolling difficult. If that’s all you have, scrape off about half the filling before crushing the cookies. Your truffles will still taste great, but the texture won’t be quite as perfect.
Why did my candy coating crack?
This usually happens when the truffles are too cold when you dip them. If the truffles are straight from the freezer, the sudden temperature change can cause the coating to crack as it sets. Let the frozen truffles sit at room temperature for 2 to 3 minutes before dipping. Also, make sure your coating isn’t too thick—add a little more coconut oil if needed.
Can I make these ahead of time for a party?
Absolutely! These truffles actually taste better after a day in the fridge. You can make them up to 3 days ahead and store them in an airtight container in the refrigerator. Just add any delicate decorations (like the bloodshot veins) on the day of serving to keep them looking fresh.
How do I get the coating perfectly smooth?
The secret is the coconut oil and the tapping technique. After you dip each truffle, tap the fork gently on the edge of the bowl several times to let the excess coating drip off. Then, use a toothpick to slide the truffle off the fork onto the parchment paper. If you see any bubbles or lumps in the coating, pop them with a toothpick before the coating sets.
Can I freeze these truffles?
Yes, they freeze beautifully! Place the finished truffles in a single layer on a baking sheet and freeze until solid, then transfer to a freezer-safe container with parchment paper between layers. They’ll keep for up to 3 months. Thaw in the refrigerator overnight before serving. Don’t thaw at room temperature, or the coating might get sticky.
Pin This Recipe!
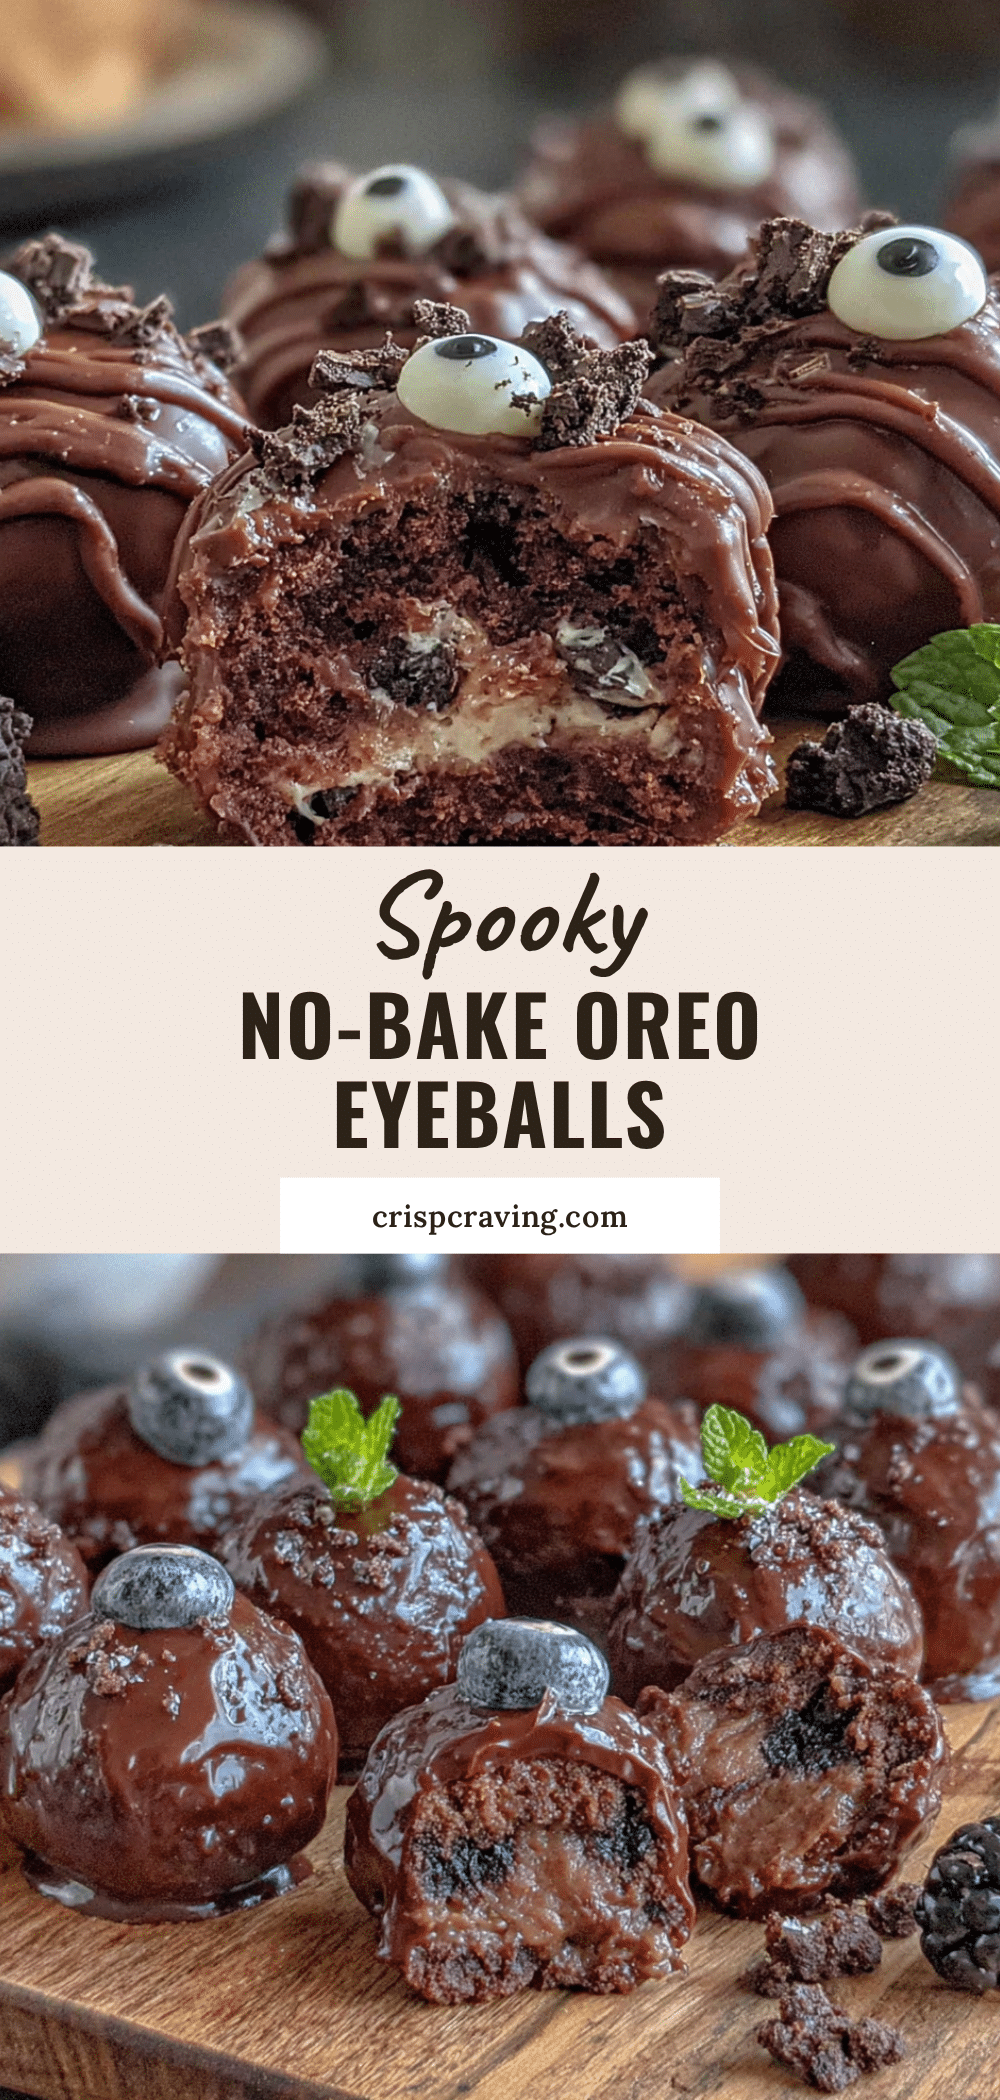
Spooky No-Bake Oreo Truffle Eyeballs: Easy Halloween Treat
These no-bake Oreo truffle eyeballs are a fun, creepy, and delicious Halloween treat made with just a few simple ingredients. Perfect for parties, they come together in under 30 minutes and are completely customizable.
- Prep Time: 20 minutes
- Cook Time: 0 minutes
- Total Time: 1 hour 20 minutes (includes chilling and setting time)
- Yield: 24 servings 1x
- Category: Dessert
- Cuisine: American
Ingredients
- 1 (14.3 ounce) package Oreo cookies (regular, not Double Stuf)
- 8 ounces cream cheese, softened to room temperature
- 1/4 teaspoon vanilla extract (optional)
- Pinch of salt
- 12 ounces white candy melts (e.g., Wilton brand)
- 1 tablespoon coconut oil or shortening
- 2 ounces blue candy melts or blue food coloring
- Black gel food coloring
- Red gel food coloring (optional, for bloodshot veins)
Instructions
- Crush the entire package of Oreos in a food processor until fine, sand-like crumbs form. Set aside 2 tablespoons for garnish if desired.
- In a large mixing bowl, beat the softened cream cheese with a hand mixer until smooth and fluffy, about 2 minutes. Add vanilla extract and salt, beat for 30 seconds.
- Pour in the Oreo crumbs and mix on low speed until fully combined. The mixture should look like thick, dark cookie dough. Adjust with a teaspoon of milk if too dry, or more crumbs if too wet.
- Cover the bowl with plastic wrap and refrigerate for at least 30 minutes (or overnight).
- Line a baking sheet with parchment paper. Using a small cookie scoop or tablespoon, portion out the chilled mixture and roll into 1-inch balls. Place on the prepared baking sheet. Freeze for 15 minutes.
- Melt the white candy melts and coconut oil in a microwave-safe bowl in 30-second intervals, stirring after each, until smooth and runny.
- Remove truffles from freezer. Dip each truffle into the melted coating using a fork, rolling to cover completely. Tap fork on bowl edge to remove excess coating, then slide truffle onto parchment paper using a toothpick. Repeat with all truffles.
- Let coated truffles set for about 10 minutes until firm but slightly tacky. Melt blue candy melts and transfer to a small piping bag or zip-top bag with a tiny corner snipped off. Pipe a small blue circle in the center of each truffle for the iris. Let set for 5 minutes.
- Using black gel food coloring and a toothpick, draw a small dot in the center of each blue iris for the pupil. Optionally, use red gel food coloring to draw tiny veins radiating outward.
- Place decorated truffles in the refrigerator for at least 30 minutes to set completely.
Notes
Use full-fat cream cheese for best texture. Don’t skip the coconut oil in the candy melts for a smooth coating. For best results, chill the truffle mixture thoroughly before rolling. If using Double Stuf Oreos, scrape off half the filling before crushing.
Nutrition
- Serving Size: 1 truffle
- Calories: 165
- Sugar: 13
- Sodium: 95
- Fat: 10
- Saturated Fat: 6
- Carbohydrates: 18
- Protein: 2
Keywords: Halloween treats, no-bake desserts, Oreo truffles, eyeball cookies, easy Halloween recipes, kid-friendly desserts



