Love this? Save it for later!
Share the inspiration with your friends
The woman at the hardware store watched me staring at the stack of red, white, and blue tablecloths for a solid five minutes. I was hosting my first Fourth of July barbecue, and honestly, I was in over my head. She finally put down the price gun she was holding and said, “You know, the best party food doesn’t come from a grill. It comes from the fridge.” Then she told me about a no-bake dessert her mother-in-law made every summer—something with layers that looked like a flag and tasted like a cold, creamy dream. I scribbled the idea on the back of a receipt, bought the tablecloth, and forgot about her recipe completely.
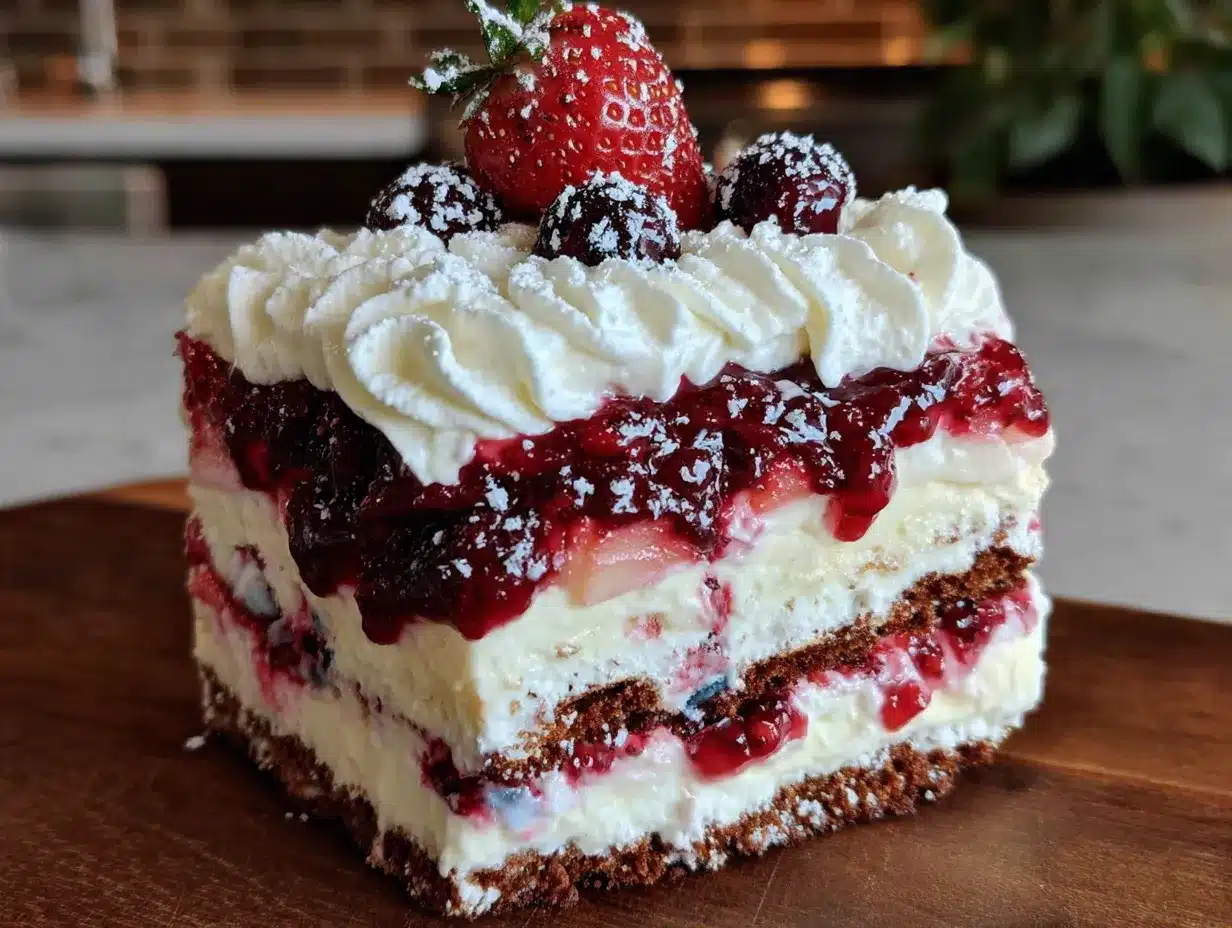
Fast forward to three days before the party. I had burnt the burgers during a test run, the potato salad was too salty, and the store was out of sparklers. I was standing in my kitchen, defeated, when I remembered her words. I didn’t remember the exact recipe, but I remembered the concept: layers of cookies, cream, and berries. So I grabbed a box of graham crackers, some cream cheese, and whatever fruit was in my fridge, and I started stacking. The result was this Perfect Red White and Blue Layered Icebox Cake, and honestly, it saved the entire party. People didn’t even care about the burnt burgers—they were too busy asking for the dessert recipe.
That’s the thing about icebox cakes. They don’t need an oven, they don’t need precision, and they somehow always turn out gorgeous. Maybe you’ve been there—needing a dessert that looks impressive but doesn’t add stress to an already chaotic day. This one is it. It’s the kind of recipe that becomes a tradition, not because it’s fancy, but because it works every single time.
Why You’ll Love This Recipe
Let me tell you why this Perfect Red White and Blue Layered Icebox Cake has become my go-to for every summer celebration. I’ve tested it at block parties, family reunions, and quiet backyard dinners, and it never fails to deliver.
- No Oven Required: It’s July. The last thing you want is to turn on your oven. This cake sets up in the fridge, keeping your kitchen cool and your stress levels low.
- Make-Ahead Magic: You can assemble this the night before or even two days ahead. The flavors actually get better as it sits, so you can cross “dessert” off your to-do list well before the party starts.
- Crowd-Pleasing Colors: The natural red from strawberries and blue from blueberries create that patriotic look without artificial food coloring. Kids love the layers, and adults love the fresh fruit.
- Simple Ingredients: You probably already have cream cheese, heavy cream, and sugar in your kitchen. The only special purchase is the graham crackers and fresh berries, which are everywhere in summer.
- Foolproof Texture: The graham crackers soften into a cake-like texture while the cream layer stays light and fluffy. It’s not too heavy, not too sweet—just perfectly balanced.
What makes this version different from other icebox cakes I’ve tried is the cream cheese layer. Most recipes use just whipped cream, but I add a touch of cream cheese for stability and a slight tang that cuts through the sweetness. I learned this trick after a disastrous attempt where my cake slid apart when I tried to slice it. The cream cheese gives it structure without making it dense. It’s the kind of small adjustment that turns a good recipe into a great one.
This isn’t just another dessert recipe. It’s the one that makes you look like a hero with almost zero effort. The first time I brought it to a potluck, someone asked if I had spent all day on it. I laughed and told them the truth—it took twenty minutes. That’s the kind of secret weapon every home cook needs.
What Ingredients You Will Need
This recipe uses simple, fresh ingredients that come together to create something truly special. Most of these are pantry or fridge staples, especially during berry season. Here’s everything you need and why each ingredient matters.
For the Cream Layer
- 8 ounces cream cheese, softened to room temperature (I prefer Philadelphia brand for its consistent texture—it blends smoothly without lumps)
- 2 cups heavy whipping cream, cold (look for cream with at least 36% milk fat for the best volume when whipped)
- 3/4 cup powdered sugar, sifted (regular granulated sugar won’t dissolve properly in the cold cream, so stick with powdered)
- 1 teaspoon vanilla extract (pure vanilla extract makes a noticeable difference, but imitation works in a pinch)
- Pinch of salt (this balances the sweetness and enhances the vanilla flavor—don’t skip it)
For the Berry Layers
- 2 cups fresh strawberries, hulled and thinly sliced (about 1/8-inch thick slices work best for even layering; choose berries that are deep red and fragrant)
- 1 1/2 cups fresh blueberries (look for firm, plump berries with a silvery bloom—that’s a sign of freshness)
- 1 tablespoon granulated sugar (optional, for macerating the berries if they’re not super sweet; I only do this if the berries are tart)
For the Base and Layers
- 1 box (about 14 ounces) graham crackers (you’ll need roughly 3 sleeves; I use Honey Maid because they’re sturdy and have a consistent size, but any brand works)
- 1/2 cup fresh raspberries (optional, for garnish on top—they add a nice pop of color and tartness)
- Fresh mint leaves (optional, for garnish)
Ingredient Notes and Substitutions
If you need a dairy-free version, you can substitute the cream cheese with a plant-based alternative like Kite Hill brand, and use coconut cream instead of heavy cream. Just make sure the coconut cream is chilled and you whip it until stiff peaks form. The texture will be slightly different—a bit lighter—but still delicious. For a lower-sugar option, you can use a sugar substitute like Swerve confectioners’ style in the cream layer. The berries will still provide natural sweetness, so you might not miss the extra sugar at all.
I always recommend using fresh berries for this recipe. Frozen berries release too much liquid as they thaw, which can make the graham crackers soggy and turn your beautiful layers into a mess. If fresh berries aren’t available, consider using freeze-dried berries instead—they’ll add flavor without the extra moisture.
Equipment Needed
You don’t need any fancy equipment for this Perfect Red White and Blue Layered Icebox Cake, which is part of its charm. Here’s what you’ll need:
- 9×13-inch baking dish or rectangular serving dish (glass is ideal because you can see the layers, but ceramic or metal works just fine)
- Electric hand mixer or stand mixer with whisk attachment (you can whip the cream by hand with a whisk, but be prepared for a serious arm workout—I’ve done it, and it took about 12 minutes of non-stop whisking)
- Large mixing bowl (make sure it’s completely clean and dry—any grease will prevent the cream from whipping properly)
- Spatula for spreading the cream mixture evenly
- Sharp knife and cutting board for slicing strawberries
- Measuring cups and spoons
- Plastic wrap or aluminum foil for covering the dish while it chills
If you don’t have a 9×13 dish, you can use a 8×8 square dish and just make fewer layers—the cake will be taller and more dramatic. I’ve also made this in a springform pan for a round, cake-like presentation, which looks stunning for a more formal gathering. The key is to have a dish with straight sides so the layers stack neatly.
Preparation Method
Follow these steps carefully, and you’ll have a stunning dessert that looks like you spent hours on it. I’ve included all the little details I wish someone had told me the first time I made this.
- Prepare your berries first. Wash and dry the strawberries and blueberries thoroughly. Any excess water on the berries will seep into the cream and make the cake runny. Hull the strawberries and slice them into even 1/8-inch thick pieces. Set the blueberries aside. If your berries seem tart, toss them with 1 tablespoon of sugar and let them sit for 10 minutes, then drain off any released liquid.
- Make the cream cheese base. In a large mixing bowl, beat the softened cream cheese with an electric mixer on medium speed until it’s completely smooth and fluffy—about 2 minutes. Scrape down the sides of the bowl with a spatula halfway through. This step is crucial because any lumps of cream cheese will remain in the final cake. I learned this the hard way when I rushed through it and ended up with little white spots in my cream layer.
- Add the powdered sugar and vanilla. With the mixer on low speed, gradually add the sifted powdered sugar, vanilla extract, and pinch of salt. Mix until combined, then increase the speed to medium and beat for another minute until the mixture is light and fluffy. Scrape the bowl again.
- Whip the cream separately. In a separate clean, cold bowl, pour the heavy whipping cream. Using clean beaters, whip the cream on medium-high speed until soft peaks form—this takes about 3-4 minutes with a hand mixer. You’ll know it’s ready when the cream holds a soft peak that flops over slightly when you lift the beaters. Be careful not to overwhip, or you’ll end up with butter. Trust me, I’ve done it, and it’s not pretty.
- Fold the two mixtures together. Add about one-third of the whipped cream to the cream cheese mixture and fold gently with a spatula until combined. This lightens the cream cheese mixture, making it easier to incorporate the rest of the whipped cream without deflating it. Add the remaining whipped cream and fold gently until no white streaks remain. The final mixture should be smooth, airy, and hold its shape.
- Start layering. Spread a thin layer (about 1/4 cup) of the cream mixture on the bottom of your 9×13 dish. This helps the first layer of graham crackers stick and prevents them from sliding around. Arrange a single layer of graham crackers on top, breaking pieces as needed to fill gaps. Don’t worry if they don’t fit perfectly—the cream will hide the seams.
- Add the first cream and berry layer. Spread about one-third of the remaining cream mixture evenly over the graham crackers. Arrange a layer of sliced strawberries on top of the cream, followed by a layer of blueberries. Press the berries gently into the cream so they stay in place. Don’t be shy with the berries—you want every bite to have fruit.
- Repeat the layers. Add another layer of graham crackers on top of the berries. Press down gently to set them into the cream. Spread another third of the cream mixture, then add another layer of berries. Repeat one more time: graham crackers, remaining cream, and the last of the berries on top. You should have three layers of graham crackers and three layers of cream and berries, ending with a top layer of cream and berries.
- Finish with a decorative top. For the final layer, spread the remaining cream smoothly over the top. Arrange the remaining strawberries, blueberries, and optional raspberries in a decorative pattern. I like to create a flag pattern with berries, or simply scatter them artfully. Add fresh mint leaves for a pop of green if you have them.
- Cover and chill. Cover the dish tightly with plastic wrap and refrigerate for at least 6 hours, but preferably overnight. The graham crackers need time to soften and absorb the cream, transforming into a cake-like texture. Don’t rush this step—I once tried to serve it after only 4 hours, and the crackers were still crunchy in the middle. The wait is worth it.
- Slice and serve. When ready to serve, use a sharp knife to cut clean slices. Wipe the knife between cuts for the prettiest presentation. Serve cold straight from the fridge. The cake will hold its shape beautifully if it has chilled long enough.
Cooking Tips & Techniques
After making this Perfect Red White and Blue Layered Icebox Cake more times than I can count, I’ve collected a few tricks that make the process smoother and the results more reliable.
Temperature matters more than you think. Your cream cheese absolutely must be at room temperature before you start. Cold cream cheese will leave lumps that no amount of mixing can fix. Take it out of the fridge at least an hour before you begin. On the flip side, your heavy cream needs to be ice cold. I pop my bowl and beaters in the freezer for 10 minutes before whipping—it makes a noticeable difference in how quickly the cream whips up and how stable it stays.
Don’t skip the folding step. I know it’s tempting to just dump the whipped cream into the cream cheese and mix on high speed, but that will deflate all the air you just worked to create. Fold gently and patiently. The goal is to combine the two mixtures while keeping as much air as possible in the whipped cream. This is what gives the cake its light, mousse-like texture.
Watch your berry placement. The first time I made this, I piled all the berries in the center of each layer, leaving the edges bare. When I sliced the cake, the middle pieces had tons of fruit while the end pieces were mostly cream. Now I make sure to distribute the berries evenly all the way to the edges of the dish. Every slice should have a good mix of cream, crackers, and fruit.
Plan for the overnight chill. This is not a last-minute dessert. The magic happens during those long hours in the fridge. The graham crackers absorb moisture from the cream and soften into something that resembles cake. If you try to rush this, you’ll end up with a crunchy, layered dessert that’s good but not great. Make it the day before your event, and you’ll thank yourself when party day arrives.
Variations & Adaptations
One of the best things about this recipe is how easily it adapts to different tastes and dietary needs. Here are some variations I’ve tried and loved.
Berry Swap: While strawberries and blueberries create the classic red, white, and blue look, you can use any berries you have on hand. Sliced raspberries, blackberries, or even chopped cherries work beautifully. In the fall, I’ve made a version with sliced apples and caramel sauce drizzled between the layers—it’s completely different but equally delicious.
Cookie Swap: Graham crackers are traditional, but you can use vanilla wafers, shortbread cookies, or even chocolate wafer cookies for a different flavor profile. If you use chocolate cookies, consider adding a layer of chocolate pudding mixed with the cream for a black forest-inspired version. I tried this with chocolate graham crackers once, and it was a huge hit with the chocolate lovers in my family.
Dairy-Free Version: As I mentioned earlier, you can make this completely dairy-free. Use plant-based cream cheese and coconut cream instead of heavy cream. The coconut cream needs to be refrigerated overnight, then whipped until stiff. The flavor will be slightly coconutty, which pairs surprisingly well with the berries. Just make sure to use a brand of coconut cream that doesn’t have added sugar, or adjust the powdered sugar accordingly.
Lemon Berry Twist: Add the zest of one lemon to the cream mixture for a bright, citrusy note that cuts through the richness. You can also add a thin layer of lemon curd between the graham crackers and the berries for an extra pop of flavor. This version has become my personal favorite for summer brunches.
Serving & Storage Suggestions
This Perfect Red White and Blue Layered Icebox Cake is best served cold, straight from the refrigerator. The texture is at its peak when the cake has chilled for at least 6 hours, but overnight is ideal. I like to serve it in the same dish I assembled it in, so everyone can see the beautiful layers.
Presentation tips: For a cleaner slice, dip your knife in hot water and wipe it dry before each cut. This helps the knife glide through the cream without dragging. If you’re serving at a party, consider placing the dish on a bed of ice or a chilled serving platter to keep it cold longer, especially if you’re eating outdoors on a hot day.
What to serve with it: This cake is rich enough to stand on its own, but a dollop of extra whipped cream or a scoop of vanilla ice cream never hurts. For drinks, I love pairing it with a tall glass of iced tea or a crisp lemonade. If you’re serving adults, a light Prosecco or a citrusy Sauvignon Blanc complements the berries beautifully.
Storage instructions: Leftover cake can be covered tightly with plastic wrap and stored in the refrigerator for up to 3 days. The texture will continue to soften over time, but it remains delicious. I don’t recommend freezing this cake—the cream can become grainy when thawed, and the berries release too much liquid. If you must freeze it, do so before adding the fresh berry garnish, and expect the texture to be slightly different after thawing.
Flavor development: Interestingly, this cake tastes even better on the second day. The flavors meld together, and the graham crackers become perfectly soft. If you can resist eating it all on day one, you’ll be rewarded on day two.
Nutritional Information & Benefits
Here’s an approximate nutritional breakdown for one serving of this Perfect Red White and Blue Layered Icebox Cake, based on 12 servings:
| Nutrient | Amount per Serving |
|---|---|
| Calories | 320 |
| Total Fat | 22g |
| Saturated Fat | 13g |
| Cholesterol | 65mg |
| Sodium | 220mg |
| Total Carbohydrates | 28g |
| Dietary Fiber | 2g |
| Sugars | 16g |
| Protein | 4g |
While this is definitely a treat, it does offer some nutritional benefits. Strawberries and blueberries are packed with antioxidants, particularly vitamin C and anthocyanins, which support immune health and fight inflammation. The cream cheese and heavy cream provide calcium and vitamin A, though they also contribute to the saturated fat content. If you’re watching your sugar intake, you can reduce the powdered sugar to 1/2 cup and skip the optional macerating sugar on the berries.
This recipe contains dairy and gluten (from the graham crackers). For gluten-free needs, use certified gluten-free graham crackers or vanilla wafers. The dairy-free substitution I mentioned earlier works well for those avoiding dairy.
Conclusion
This Perfect Red White and Blue Layered Icebox Cake has become more than just a recipe in my kitchen—it’s a summer tradition. Every time I make it, I think back to that woman in the hardware store who reminded me that the best dishes don’t come from stress and perfectionism. They come from simplicity and a willingness to try something new.
I love that this cake lets me show up to a party with something beautiful without spending hours in a hot kitchen. I love that kids and adults alike go back for seconds. And I really love that I can make it the night before and actually enjoy the party I’m hosting. If you’ve never tried an icebox cake before, this is the perfect place to start. It’s forgiving, flexible, and always impressive.
I’d love to hear how yours turns out! Did you try a different fruit combination? Did you use a different cookie? Drop a comment below and let me know your version. And if you’re looking for more no-bake summer desserts, don’t miss my no-bake lemon lasagna or this strawberry pretzel salad—they’re both crowd-pleasers that keep your kitchen cool. Happy Fourth of July, and happy baking (or should I say, happy chilling)!
Frequently Asked Questions
Can I use frozen berries instead of fresh?
I don’t recommend it. Frozen berries release a lot of liquid as they thaw, which will make your cream layer watery and your graham crackers soggy. Fresh berries are truly the way to go for the best texture and presentation.
How far in advance can I make this cake?
You can make this cake up to two days in advance. In fact, it tastes better on day two because the flavors have had time to meld. Just keep it covered tightly in the refrigerator and add any fresh garnish right before serving.
Can I use a different type of cookie instead of graham crackers?
Absolutely! Vanilla wafers, shortbread cookies, or even chocolate wafer cookies all work beautifully. Just keep in mind that different cookies soften at different rates, so you may need to adjust the chilling time. Thinner cookies will soften faster, while thicker cookies may need a bit longer.
My cream mixture seems too runny. What did I do wrong?
This usually happens if the cream cheese wasn’t fully softened before mixing, or if the whipped cream was deflated during folding. Make sure your cream cheese is at room temperature, and fold the whipped cream in gently. If your mixture is still runny, try chilling it for 20 minutes before assembling the cake—it will firm up enough to work with.
Can I make this in a round pan instead of a rectangular one?
Yes! A 9-inch springform pan works wonderfully for a round, cake-like presentation. You’ll need to break the graham crackers into smaller pieces to fit the round shape, but the layers will look stunning. Just make sure to line the bottom with parchment paper for easy removal.
Pin This Recipe!
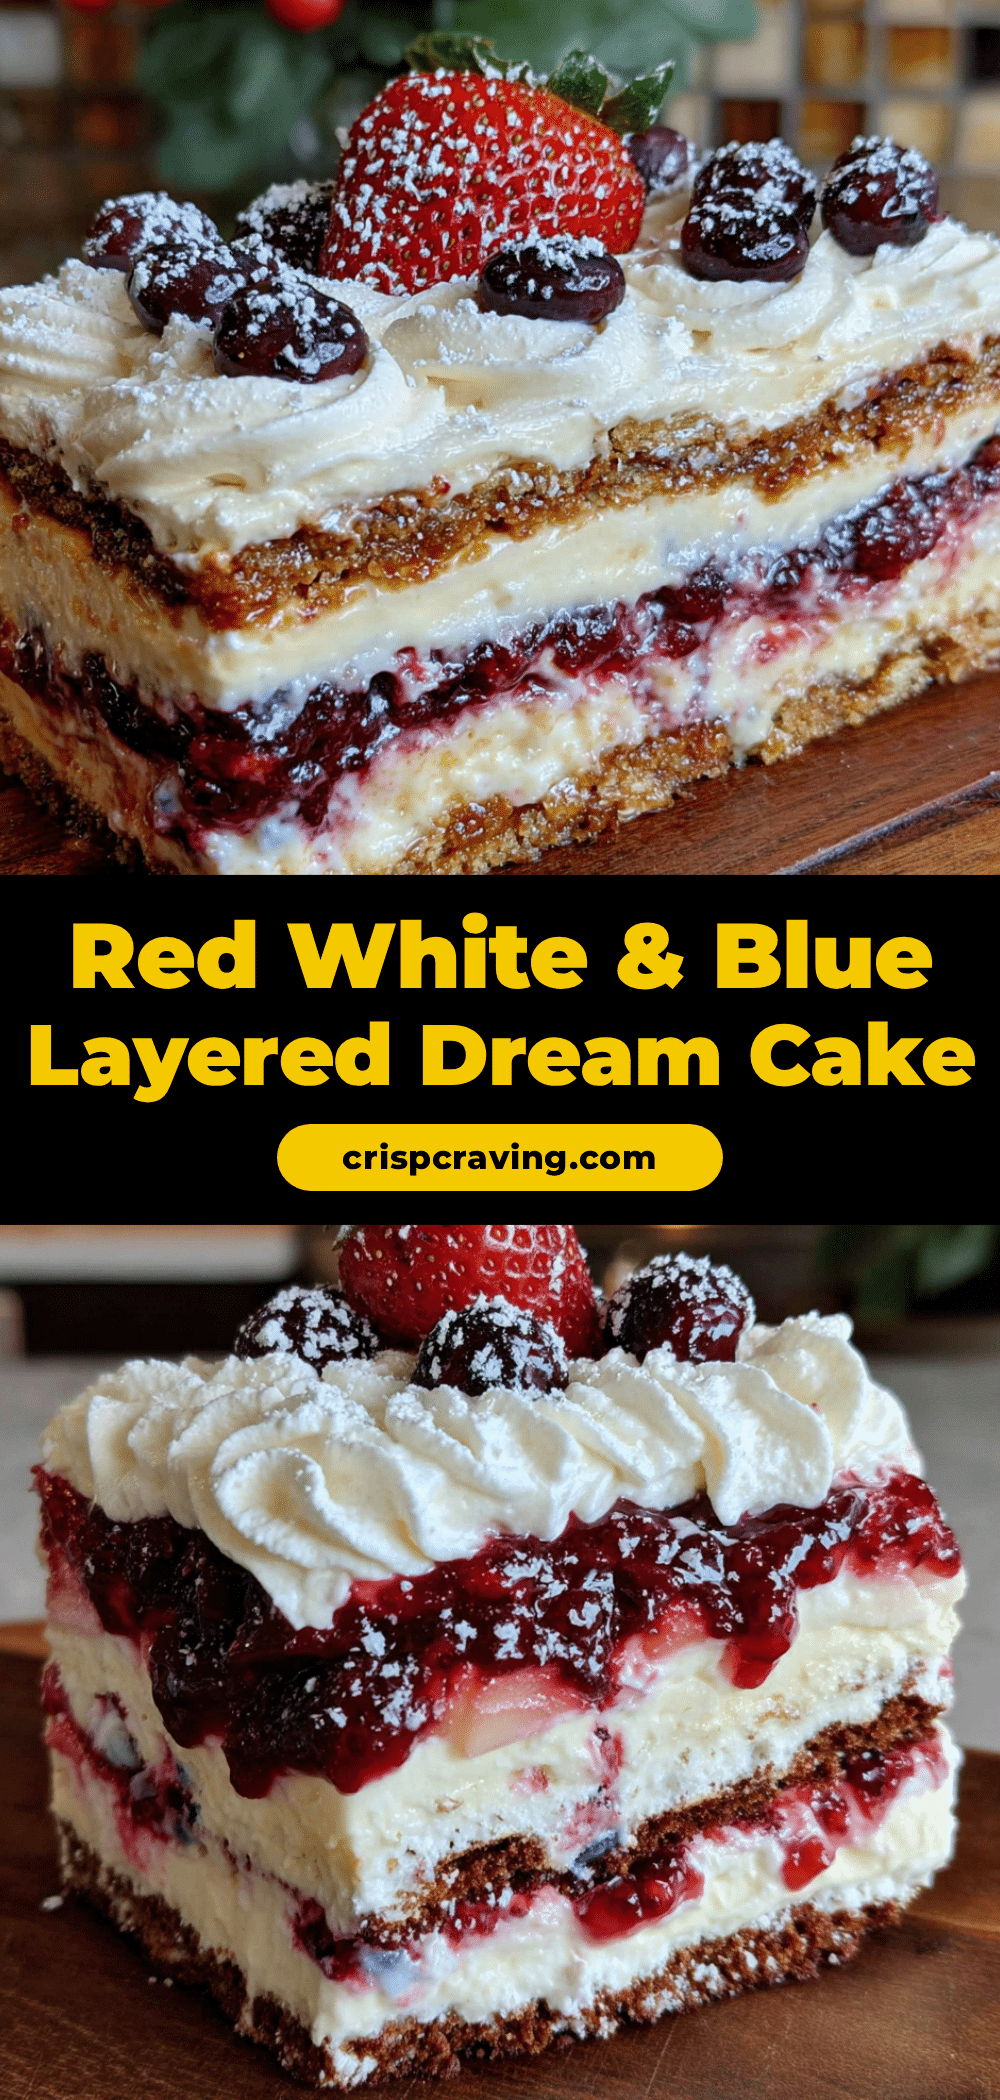
Perfect Red White and Blue Layered Icebox Cake: Easy 4th Dessert
A no-bake, make-ahead dessert featuring layers of graham crackers, cream cheese whipped cream, and fresh strawberries and blueberries. Perfect for Fourth of July or any summer celebration, this cake is simple to assemble and always impresses.
- Prep Time: 20 minutes
- Cook Time: 0 minutes
- Total Time: 6 hours 20 minutes (includes chilling time)
- Yield: 12 servings 1x
- Category: Dessert
- Cuisine: American
Ingredients
- 8 ounces cream cheese, softened to room temperature
- 2 cups heavy whipping cream, cold
- 3/4 cup powdered sugar, sifted
- 1 teaspoon vanilla extract
- Pinch of salt
- 2 cups fresh strawberries, hulled and thinly sliced (about 1/8-inch thick)
- 1 1/2 cups fresh blueberries
- 1 tablespoon granulated sugar (optional, for macerating berries)
- 1 box (about 14 ounces) graham crackers (about 3 sleeves)
- 1/2 cup fresh raspberries (optional, for garnish)
- Fresh mint leaves (optional, for garnish)
Instructions
- Prepare your berries first. Wash and dry the strawberries and blueberries thoroughly. Hull the strawberries and slice them into even 1/8-inch thick pieces. Set the blueberries aside. If your berries seem tart, toss them with 1 tablespoon of sugar and let them sit for 10 minutes, then drain off any released liquid.
- Make the cream cheese base. In a large mixing bowl, beat the softened cream cheese with an electric mixer on medium speed until completely smooth and fluffy—about 2 minutes. Scrape down the sides of the bowl with a spatula halfway through.
- Add the powdered sugar and vanilla. With the mixer on low speed, gradually add the sifted powdered sugar, vanilla extract, and pinch of salt. Mix until combined, then increase the speed to medium and beat for another minute until light and fluffy. Scrape the bowl again.
- Whip the cream separately. In a separate clean, cold bowl, pour the heavy whipping cream. Using clean beaters, whip the cream on medium-high speed until soft peaks form—about 3-4 minutes with a hand mixer.
- Fold the two mixtures together. Add about one-third of the whipped cream to the cream cheese mixture and fold gently with a spatula until combined. Add the remaining whipped cream and fold gently until no white streaks remain. The final mixture should be smooth, airy, and hold its shape.
- Start layering. Spread a thin layer (about 1/4 cup) of the cream mixture on the bottom of your 9×13 dish. Arrange a single layer of graham crackers on top, breaking pieces as needed to fill gaps.
- Add the first cream and berry layer. Spread about one-third of the remaining cream mixture evenly over the graham crackers. Arrange a layer of sliced strawberries on top of the cream, followed by a layer of blueberries. Press the berries gently into the cream.
- Repeat the layers. Add another layer of graham crackers on top of the berries. Press down gently. Spread another third of the cream mixture, then add another layer of berries. Repeat one more time: graham crackers, remaining cream, and the last of the berries on top. You should have three layers of graham crackers and three layers of cream and berries, ending with a top layer of cream and berries.
- Finish with a decorative top. For the final layer, spread the remaining cream smoothly over the top. Arrange the remaining strawberries, blueberries, and optional raspberries in a decorative pattern. Add fresh mint leaves if desired.
- Cover and chill. Cover the dish tightly with plastic wrap and refrigerate for at least 6 hours, but preferably overnight.
- Slice and serve. When ready to serve, use a sharp knife to cut clean slices. Wipe the knife between cuts for the prettiest presentation. Serve cold straight from the fridge.
Notes
Make sure cream cheese is at room temperature for smooth blending. Heavy cream must be ice cold for best whipping. Do not use frozen berries as they release too much liquid. The cake needs at least 6 hours of chilling, but overnight is ideal for the graham crackers to soften fully. Leftovers can be stored in the refrigerator for up to 3 days. For a dairy-free version, use plant-based cream cheese and coconut cream.
Nutrition
- Serving Size: 1 slice (1/12 of cak
- Calories: 320
- Sugar: 16
- Sodium: 220
- Fat: 22
- Saturated Fat: 13
- Carbohydrates: 28
- Fiber: 2
- Protein: 4
Keywords: icebox cake, no-bake dessert, Fourth of July, red white and blue, summer dessert, berry dessert, graham cracker cake



