Love this? Save it for later!
Share the inspiration with your friends
This was supposed to be a proper sit-down dinner. I had this whole vision—a beautifully plated main course, candles flickering, everyone gathered around the table like a scene from a magazine. But the power flickered during the third quarter of the big game, the oven decided it was done for the day, and I was already running late because I forgot to thaw the chicken. What came out was nothing like the plan—and better. I grabbed every leftover bean, cheese shred, and jar of salsa I could find, lined up a bunch of baking sheets, and just started layering. By the time the game came back on, we were all standing around the kitchen island, chips in hand, making the most glorious mess. Honestly, that night changed how I host forever. That chaotic, delicious pile of nachos became the Ultimate Game Day Loaded Nacho Bar, and I haven’t looked back since. Maybe you’ve been there—staring at a half-empty fridge with hungry guests and a ticking clock. Let me tell you, this recipe is the save you didn’t know you needed. It’s flexible, it’s fast, and it turns any ordinary game day into a party. I keep coming back to it because it never fails to make everyone happy, even when everything else goes wrong.
Why You’ll Love This Recipe
This isn’t just another nacho recipe. This is the one you’ll pull out for every Super Bowl, every playoff game, and every casual get-together where you want to impress without the stress. I’ve tested this setup more times than I can count, and it always delivers. Here is why it works so well.
- Quick & Easy: From fridge to table in under 20 minutes. No complicated steps, no fancy techniques. Just layer, bake, and serve.
- Simple Ingredients: You probably have most of this stuff in your pantry right now. Canned beans, tortilla chips, cheese, salsa. No special grocery trips required.
- Perfect for Game Day: This bar setup lets guests build their own plates, which means less work for you and more fun for everyone. It’s the ultimate crowd-pleaser.
- Crowd-Pleaser: I’ve served this to picky kids, hungry teenagers, and adults who claim they don’t like nachos. The platter always comes back empty. Always.
- Unbelievably Delicious: The combination of crispy chips, melty cheese, spicy beans, and cool toppings is pure comfort food magic. It’s the kind of dish that makes you close your eyes after the first bite.
What makes this version different from the rest? It’s the balance. I layer the chips and cheese twice so every single chip gets coated. I use a mix of cheddar and Monterey Jack for that perfect stretchy melt. And I add a quick pickled jalapeño brine drizzle that cuts through all the richness. Trust me, it’s a game changer. This isn’t just nachos—it’s your new secret weapon for hosting.
What Ingredients You Will Need
This recipe uses simple, pantry-friendly ingredients that come together to create something truly special. The magic is in how they layer and balance each other. Here is everything you need to build the ultimate nacho bar.
For the Base Nachos
- 1 large bag (13-16 oz) restaurant-style tortilla chips (I prefer Tostitos or Xochitl for their sturdy texture)
- 2 cups shredded sharp cheddar cheese
- 2 cups shredded Monterey Jack cheese
- 1 can (15 oz) black beans, drained and rinsed
- 1 can (15 oz) pinto beans, drained and rinsed
- 1 cup canned or jarred pickled jalapeños, sliced (reserve 2 tablespoons of the brine)
- 1 teaspoon chili powder
- 1 teaspoon ground cumin
- 1/2 teaspoon garlic powder
- Salt and black pepper to taste
For the Toppings Bar
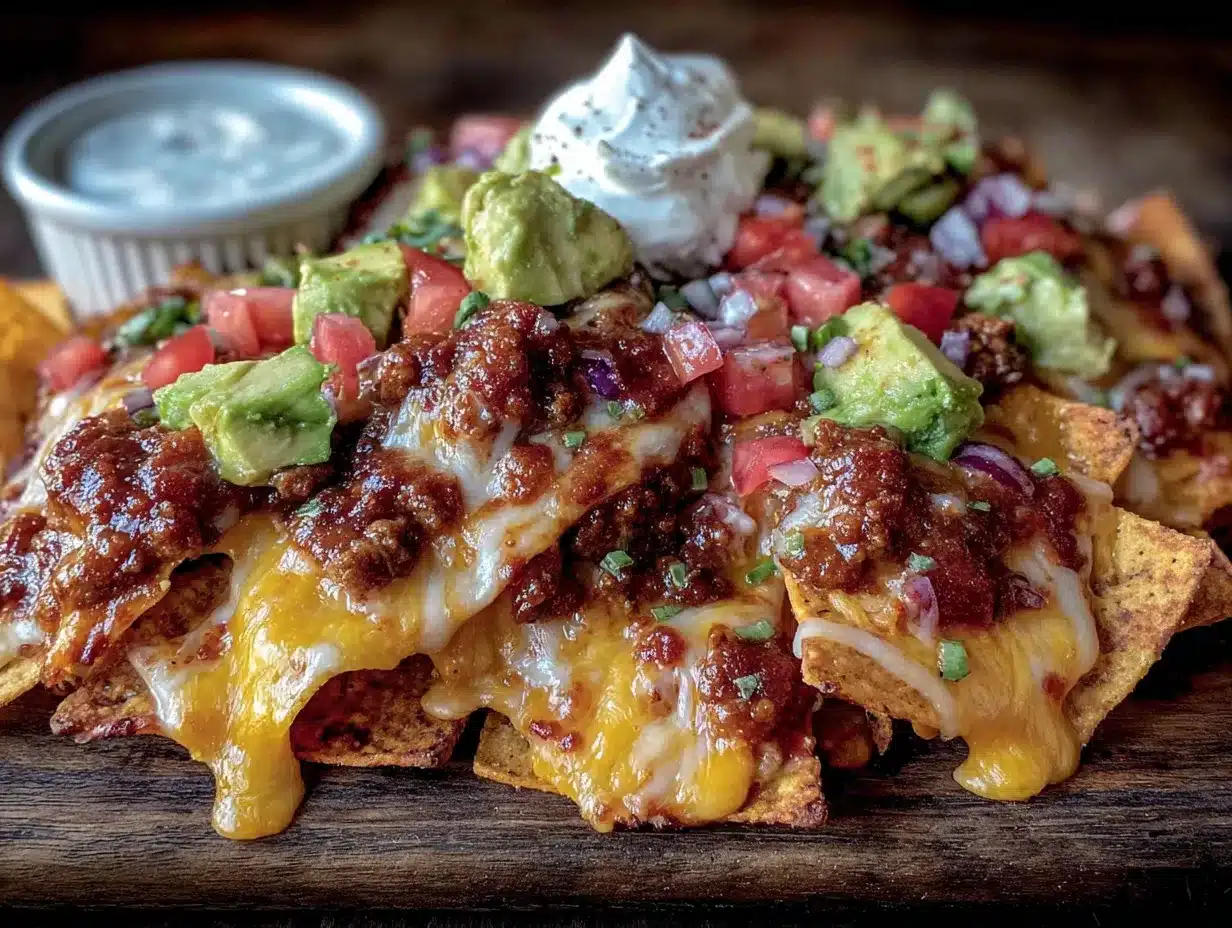
- 1 cup sour cream
- 1 cup fresh salsa or pico de gallo
- 1 large avocado, diced and tossed with lime juice
- 1/2 cup fresh cilantro, roughly chopped
- 1/2 cup pickled red onions (optional, but highly recommended)
- 1/4 cup sliced black olives
- 1 jalapeño, thinly sliced (for fresh heat)
- 1 lime, cut into wedges
Ingredient Selection Tips
Look for a block of cheese and shred it yourself. Pre-shredded cheese has anti-caking agents that prevent it from melting smoothly. I learned this the hard way after a few clumpy, greasy batches. For the beans, I recommend Goya or Bush’s—they hold their shape well and don’t turn mushy. If you want to swap the black beans for refried beans, go ahead, but spread them in a thin layer so they don’t weigh down the chips. For a vegetarian version, use vegetarian refried beans. For a spicier kick, add a diced serrano pepper to the bean mixture.
Equipment Needed
You don’t need anything fancy for this recipe, but having the right tools makes the process smoother. Here is what I use every time.
- Large rimmed baking sheet (13×18 inches or similar)—a rimmed sheet keeps the chips and toppings from sliding off. If you don’t have one, use a large oven-safe skillet or two smaller pans.
- Mixing bowls—one for the beans and spices, and several small bowls for the toppings bar.
- Cheese grater—if you’re shredding your own cheese (which you should). A box grater works great.
- Spatula or spoon—for spreading the bean mixture evenly.
- Aluminum foil—for easy cleanup. Line the baking sheet for zero mess.
I’ve made this recipe on a flimsy cookie sheet before, and the chips slid right off when I tried to move it. A sturdy, rimmed sheet is worth the investment. If you’re on a budget, dollar stores often carry decent rimmed baking pans that work perfectly.
Preparation Method
Follow these steps carefully, and you’ll have a nacho bar that rivals any sports bar. The key is layering and timing—don’t rush it.
- Preheat your oven to 400°F (200°C). Line a large rimmed baking sheet with aluminum foil for easy cleanup. This step saves you from scrubbing later—trust me on this.
- Prepare the bean mixture. In a medium bowl, combine the drained black beans, pinto beans, chili powder, cumin, garlic powder, and a pinch of salt and pepper. Mash about half the beans with a fork until slightly chunky but not smooth. This helps the mixture stick to the chips better. Stir in 1 tablespoon of the reserved pickled jalapeño brine. Set aside.
- Layer the first round of chips and cheese. Spread half the tortilla chips in an even layer on the prepared baking sheet. Sprinkle half the shredded cheddar and half the Monterey Jack evenly over the chips. Dot spoonfuls of the bean mixture all over the cheese layer. Scatter half the pickled jalapeños on top.
- Add the second layer. Arrange the remaining chips on top, trying to cover any bare spots. Sprinkle the remaining cheeses over the chips. Add the rest of the bean mixture and the remaining pickled jalapeños. This double-layering ensures every chip gets some love.
- Bake the nachos. Place the baking sheet in the preheated oven and bake for 8-10 minutes, or until the cheese is fully melted and bubbly. Keep an eye on it—chips can burn quickly. The edges should be golden, and the cheese should be stretchy when you lift a chip.
- Drizzle with the reserved brine. Remove the nachos from the oven and immediately drizzle the remaining 1 tablespoon of pickled jalapeño brine over the top. This adds a bright, tangy kick that balances the richness. Let the nachos rest for 2 minutes—this helps the cheese set slightly so it doesn’t slide off the chips.
- Set up the toppings bar. While the nachos rest, arrange your toppings in small bowls: sour cream, salsa, diced avocado, cilantro, pickled red onions, black olives, fresh jalapeño slices, and lime wedges. Let guests add their own toppings so everyone gets exactly what they want.
- Serve immediately. Place the baking sheet in the center of the table with the toppings arranged around it. Encourage everyone to dig in while the cheese is still warm and stretchy. The nachos are best eaten within 15 minutes of coming out of the oven.
Sensory cues: At step 5, you should smell the cumin and chili powder warming up, and the cheese should look glossy and bubbly. When you lift a chip, the cheese should stretch without breaking. If it looks greasy or the chips are soggy, you may have overbaked or used too much bean mixture. Adjust next time.
Cooking Tips & Techniques
I’ve made a lot of nachos in my day, and I’ve learned a few things the hard way. Here are my best tips for perfect results every time.
- Don’t overload the chips. It’s tempting to pile everything on, but too many toppings make the chips soggy. Stick to two layers of chips and a moderate amount of beans and cheese. You can always add more toppings after baking.
- Shred your own cheese. I know it’s extra work, but pre-shredded cheese contains cellulose and starches that prevent smooth melting. Freshly shredded cheddar and Monterey Jack melt into a creamy, stretchy blanket that coats every chip perfectly.
- Use sturdy chips. Thin, delicate chips will break under the weight of the toppings. Look for restaurant-style or thick-cut tortilla chips. I’ve found that Tostitos scoop-shaped chips hold up really well because they have a slight curve that traps the cheese.
- Watch the oven closely. Nachos go from perfect to burnt in about 30 seconds. Set a timer for 8 minutes and check them. If the cheese isn’t fully melted, give it another minute, but don’t walk away.
- Let them rest. That 2-minute rest after baking is crucial. It allows the cheese to set slightly, so it doesn’t slide off the chips when you lift them. I learned this after serving a plate of naked chips with all the cheese stuck to the foil.
One time I forgot to drain the beans properly, and the nachos turned into a soupy mess. The chips got soggy within minutes, and everyone was eating with spoons. It was still tasty, but not the crispy, crunchy experience I was going for. Now I always rinse and drain my beans thoroughly, and I mash them just enough to hold together without releasing too much liquid.
Variations & Adaptations
This nacho bar is incredibly flexible. Here are some of my favorite ways to change it up.
- Protein-Packed Version: Add 1 cup of cooked, shredded chicken or seasoned ground beef to the bean mixture. I like to toss the meat with a little taco seasoning before adding it. For a vegetarian protein boost, add 1 cup of crumbled tofu or tempeh seasoned with cumin and paprika.
- Spicy Lover’s Nachos: Double the pickled jalapeños and add a diced habanero or serrano pepper to the bean mixture. Drizzle with hot sauce before serving. My brother-in-law swears by this version, and he adds a spoonful of sriracha to his sour cream.
- Breakfast Nachos: Swap the black beans for refried beans, add scrambled eggs and crumbled bacon, and top with a drizzle of crema. This is my go-to for lazy Sunday mornings after a big game. It’s ridiculous and wonderful.
- Vegan Nachos: Use vegan shredded cheese (I like Daiya or Violife) and replace the sour cream with a cashew-based crema. The rest of the recipe stays the same. My vegan friend devours this every time.
- Seasonal Twist: In summer, add fresh corn kernels and diced zucchini to the bean mixture. In fall, swap the pico de gallo for a roasted pumpkin seed salsa. The possibilities are endless.
Serving & Storage Suggestions
Nachos are best served fresh, but I have a few tricks for making them work ahead of time.
Serving: Arrange the baked nachos on a large platter or directly on the baking sheet. Place the toppings in separate bowls so guests can customize their plates. Serve immediately while the cheese is warm and stretchy. If you’re hosting a party, I recommend baking the nachos in batches—one sheet at a time—so they stay hot and crispy throughout the event.
Storage: Leftover nachos don’t reheat well, but they’re still edible. Store any leftover chips and toppings separately in airtight containers in the refrigerator. The baked nachos can be stored for up to 2 days, but the chips will soften. To reheat, spread them on a baking sheet and warm them in a 350°F oven for 5-7 minutes. They won’t be as crispy as fresh, but they’ll still taste good.
Make-Ahead Tips: You can prep the bean mixture and shred the cheese up to 2 days in advance. Store them in separate containers in the fridge. On game day, just assemble and bake. The toppings can also be prepped a few hours ahead—just keep the avocado tossed in lime juice to prevent browning.
Flavors develop nicely over time, especially if you let the bean mixture sit overnight. The spices meld together, and the brine infuses the beans with a subtle tang. I sometimes make the bean mixture the night before just for that extra depth of flavor.
Nutritional Information & Benefits
This recipe is indulgent, but it also has some surprising nutritional perks. Here is an approximate breakdown per serving (based on 8 servings).
| Nutrient | Amount per Serving |
|---|---|
| Calories | 420 |
| Total Fat | 24g |
| Saturated Fat | 12g |
| Cholesterol | 55mg |
| Sodium | 680mg |
| Total Carbohydrates | 38g |
| Dietary Fiber | 8g |
| Sugars | 4g |
| Protein | 16g |
The black beans and pinto beans are excellent sources of fiber and plant-based protein, which help keep you full and satisfied. Avocado provides healthy monounsaturated fats and potassium. The cheese offers calcium, but it’s also high in saturated fat, so enjoy in moderation. This recipe is naturally gluten-free if you use certified gluten-free tortilla chips. For a lower-sodium version, use low-sodium canned beans and reduce the added salt.
I personally love that this dish feels like a treat but still has some nutritional value. It’s not health food, but it’s not empty calories either. It’s the kind of meal that fuels a good time with good people.
Conclusion
This Ultimate Game Day Loaded Nacho Bar has become my go-to for every gathering, and I think it deserves a spot in your recipe rotation too. It’s forgiving, flexible, and always delivers a crowd-pleasing result. Whether you’re hosting a Super Bowl party, a casual dinner with friends, or just a Tuesday night that needs a little excitement, this recipe has your back. I love how it brings people together—everyone huddled around the table, building their perfect bite, laughing over spilled salsa. That’s what cooking is all about, isn’t it? Go ahead and make it your own. Swap in your favorite toppings, adjust the spice level, or double the batch for a bigger crowd. And when you do, I’d love to hear about it. Drop a comment below and tell me how your nacho bar turned out. What toppings did you add? Did anyone fight over the last cheesy chip? Share your stories and photos—I can’t wait to see your creations. Now go make some nachos and enjoy the game!
Frequently Asked Questions
Can I make these nachos ahead of time?
You can prep the bean mixture and shred the cheese up to 2 days in advance. However, I recommend baking the nachos just before serving for the best texture. Reheated nachos won’t be as crispy.
What if I don’t have pickled jalapeños?
You can skip them or use fresh jalapeño slices instead. The brine adds a nice tang, but it’s not essential. You can also substitute with a splash of lime juice for acidity.
How do I keep the chips from getting soggy?
Drain and rinse your beans thoroughly, and don’t overload the chips with wet toppings. Bake the nachos just until the cheese melts, and serve immediately. Letting them rest for 2 minutes also helps the cheese set.
Can I use a different type of cheese?
Absolutely. A mix of cheddar and Monterey Jack is classic, but you can use pepper jack for heat, mozzarella for stretch, or a Mexican blend. Avoid using only pre-shredded cheese for the best melt.
Is this recipe gluten-free?
Yes, as long as you use certified gluten-free tortilla chips. All other ingredients are naturally gluten-free. Check the labels on your beans and spices to be sure.
Pin This Recipe!
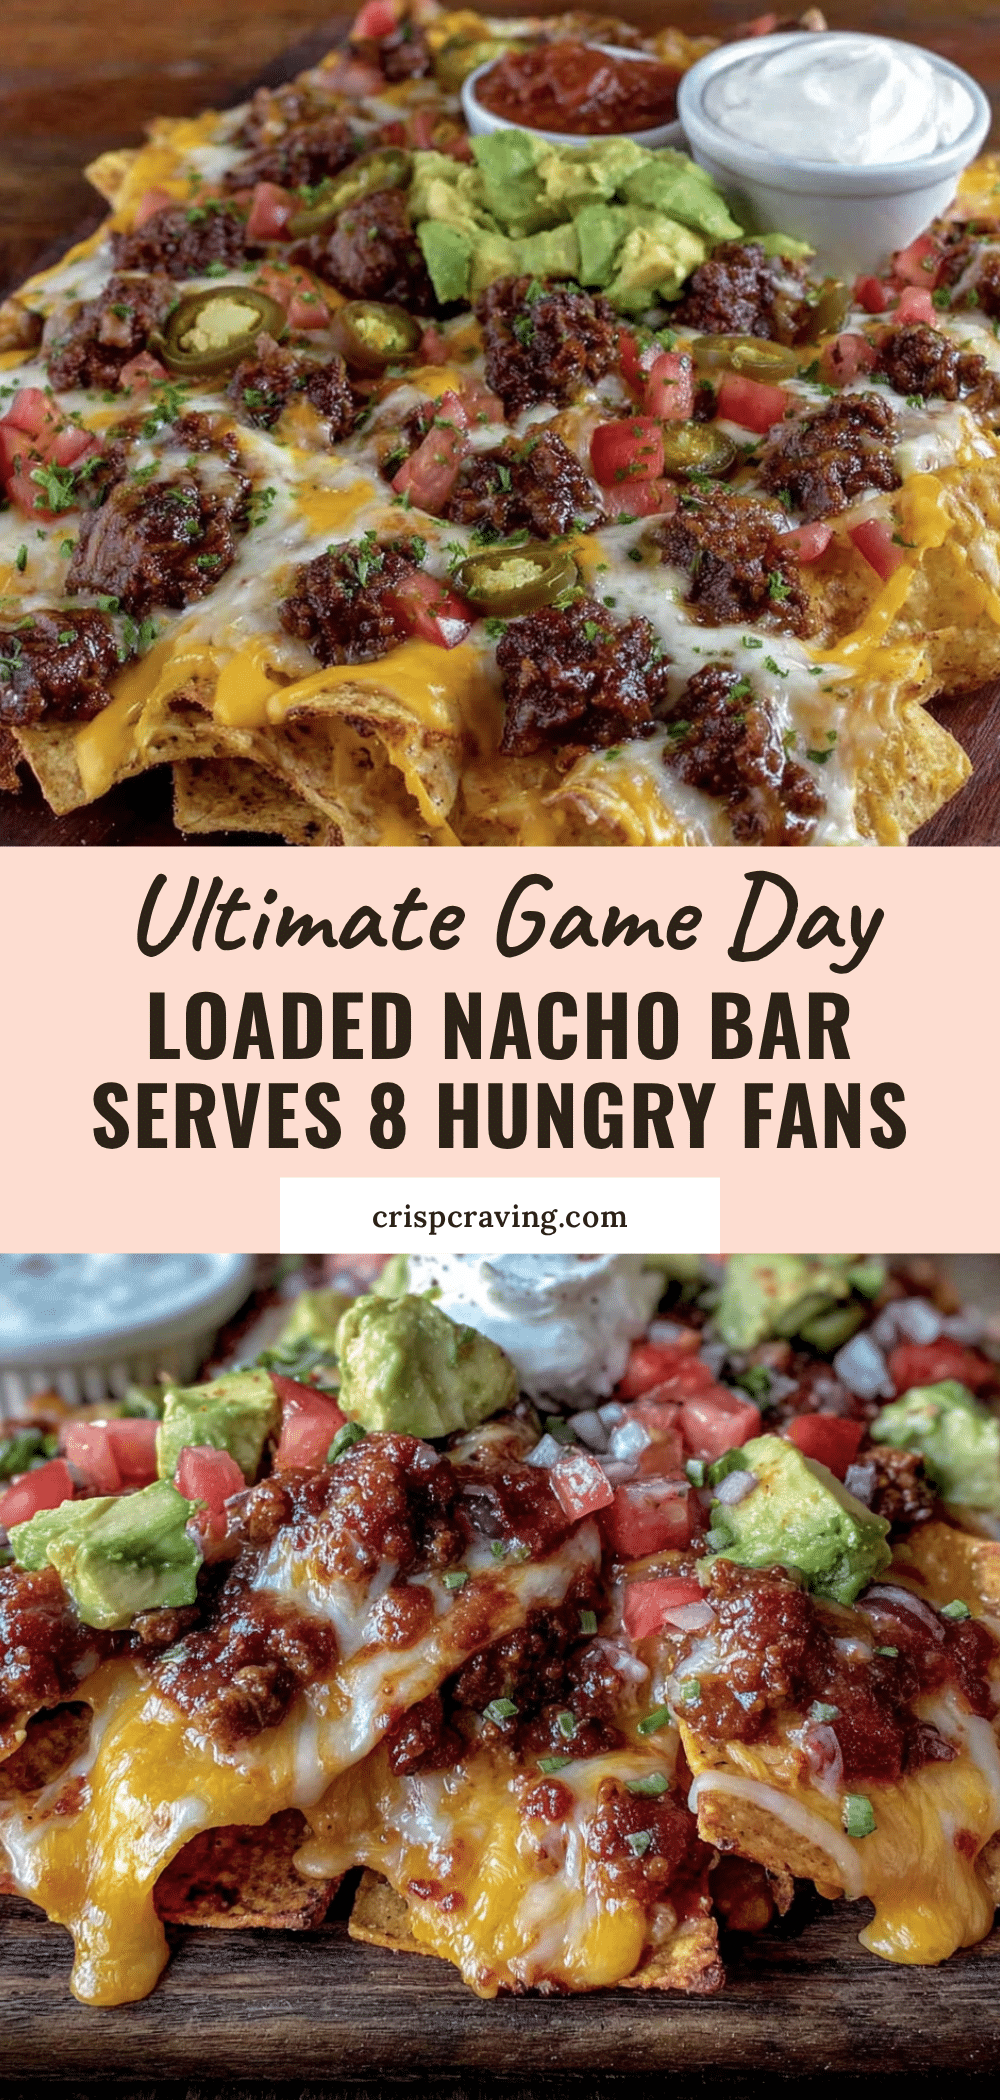
Ultimate Game Day Loaded Nacho Bar: Easy Party Recipe
This Ultimate Game Day Loaded Nacho Bar is a quick, flexible, and crowd-pleasing recipe perfect for any gathering. With double-layered chips, melty cheese, and a build-your-own toppings bar, it turns any ordinary game day into a party.
- Prep Time: 10 minutes
- Cook Time: 10 minutes
- Total Time: 20 minutes
- Yield: 8 servings 1x
- Category: Appetizer
- Cuisine: Mexican-American
Ingredients
- 1 large bag (13–16 oz) restaurant-style tortilla chips (e.g., Tostitos or Xochitl)
- 2 cups shredded sharp cheddar cheese
- 2 cups shredded Monterey Jack cheese
- 1 can (15 oz) black beans, drained and rinsed
- 1 can (15 oz) pinto beans, drained and rinsed
- 1 cup canned or jarred pickled jalapeños, sliced (reserve 2 tablespoons of the brine)
- 1 teaspoon chili powder
- 1 teaspoon ground cumin
- 1/2 teaspoon garlic powder
- Salt and black pepper to taste
- 1 cup sour cream
- 1 cup fresh salsa or pico de gallo
- 1 large avocado, diced and tossed with lime juice
- 1/2 cup fresh cilantro, roughly chopped
- 1/2 cup pickled red onions (optional)
- 1/4 cup sliced black olives
- 1 jalapeño, thinly sliced (for fresh heat)
- 1 lime, cut into wedges
Instructions
- Preheat your oven to 400°F (200°C). Line a large rimmed baking sheet with aluminum foil for easy cleanup.
- Prepare the bean mixture: In a medium bowl, combine the drained black beans, pinto beans, chili powder, cumin, garlic powder, and a pinch of salt and pepper. Mash about half the beans with a fork until slightly chunky but not smooth. Stir in 1 tablespoon of the reserved pickled jalapeño brine. Set aside.
- Layer the first round of chips and cheese: Spread half the tortilla chips in an even layer on the prepared baking sheet. Sprinkle half the shredded cheddar and half the Monterey Jack evenly over the chips. Dot spoonfuls of the bean mixture all over the cheese layer. Scatter half the pickled jalapeños on top.
- Add the second layer: Arrange the remaining chips on top, trying to cover any bare spots. Sprinkle the remaining cheeses over the chips. Add the rest of the bean mixture and the remaining pickled jalapeños.
- Bake the nachos: Place the baking sheet in the preheated oven and bake for 8-10 minutes, or until the cheese is fully melted and bubbly. Keep an eye on it—chips can burn quickly.
- Drizzle with the reserved brine: Remove the nachos from the oven and immediately drizzle the remaining 1 tablespoon of pickled jalapeño brine over the top. Let the nachos rest for 2 minutes.
- Set up the toppings bar: While the nachos rest, arrange your toppings in small bowls: sour cream, salsa, diced avocado, cilantro, pickled red onions, black olives, fresh jalapeño slices, and lime wedges.
- Serve immediately: Place the baking sheet in the center of the table with the toppings arranged around it. Encourage everyone to dig in while the cheese is still warm and stretchy.
Notes
Shred your own cheese for the best melt. Don’t overload the chips with toppings to prevent sogginess. Let the nachos rest for 2 minutes after baking so the cheese sets. For a protein-packed version, add cooked shredded chicken or seasoned ground beef. For vegan nachos, use vegan cheese and cashew crema.
Nutrition
- Serving Size: 1 serving (about 1/8
- Calories: 420
- Sugar: 4
- Sodium: 680
- Fat: 24
- Saturated Fat: 12
- Carbohydrates: 38
- Fiber: 8
- Protein: 16
Keywords: nachos, game day, party recipe, loaded nachos, easy appetizer, Super Bowl, crowd-pleaser, vegetarian



