Love this? Save it for later!
Share the inspiration with your friends
I wasn’t trying to make a Halloween recipe. Honestly, I’d stopped by my neighbor’s house on a random Tuesday in October to return a casserole dish she’d lent me weeks ago. She was just making brownies—nothing spooky about it. But the smell hit me before I even got through the screen door. That deep, dark chocolate smell that makes you stop mid-sentence and just breathe in. I walked into her kitchen and there she was, pouring batter into a pan like it was no big deal, while a bag of candy eyes sat on the counter. “Oh, those are for the kids’ class party,” she said, shrugging. She wasn’t trying to impress anyone. She wasn’t even sure the eyes would stay on. And honestly? That casual, no-pressure energy is exactly what made these brownies so perfect. She handed me a warm, slightly lopsided piece with one wonky eye sliding down the side, and I knew right then—I had to make these myself. Maybe you’ve been there, standing in someone’s kitchen, watching them make something that looks like pure fun and thinking, “I need that in my life.” These Fudgy One-Bowl Halloween Brownies with Candy Eyes are that recipe. They’re the kind of thing you make when you want to bring joy to a room without spending hours in the kitchen. And they’ve become my go-to for every October gathering since that Tuesday afternoon.
Why You’ll Love This Recipe
Let me tell you, I’ve tested a lot of brownie recipes over the years. Some are too cakey, some are too dry, and some just don’t have that rich, fudgy texture that makes you close your eyes after the first bite. But these Fudgy One-Bowl Halloween Brownies with Candy Eyes? They hit every single mark. Here’s why this recipe stands out from the crowd:
- Quick & Easy: From start to finish, you’re looking at about 35 minutes. That’s mixing, baking, and decorating—all in one bowl. Perfect for those last-minute Halloween parties or when the kids suddenly announce they need treats for school tomorrow.
- Simple Ingredients: No fancy grocery trips required. You probably have most of these ingredients in your pantry right now. Butter, sugar, eggs, cocoa powder, flour—that’s it. The only special addition is the candy eyes, and those are easy to find at any grocery store or online.
- Perfect for Halloween: These brownies are made for spooky season. The candy eyes give them that fun, creepy factor that kids and adults both love. They’re great for class parties, Halloween dinners, or just a cozy night in watching scary movies.
- Crowd-Pleaser: I’ve brought these to three different Halloween parties now, and they disappear every single time. People can’t resist the combination of rich, fudgy chocolate and those adorable little eyes staring up at them.
- Unbelievably Delicious: The texture is exactly what you want from a brownie—dense, moist, and almost gooey in the center. The edges have that slight chewiness, while the middle stays soft and fudgy. It’s next-level comfort food, I promise you.
What makes this recipe different from all the other Halloween brownie recipes out there? It’s the one-bowl method. Most recipes have you melting chocolate separately, sifting dry ingredients, and dirtying multiple bowls. Not this one. Everything comes together in a single bowl, which means less cleanup and more time for the fun part—decorating. Plus, the candy eyes aren’t just slapped on top. I’ve found the perfect way to press them in so they stay put and look genuinely spooky. Trust me, I learned the hard way after my first batch lost half their eyes in the oven.
This recipe isn’t just good—it’s the kind that makes you feel like a kitchen superstar without any of the stress. It’s Halloween fun, simplified.
What Ingredients You Will Need
This recipe uses simple, everyday ingredients to create something truly special. The magic is in the ratios and the technique, not in hard-to-find items. Here’s everything you’ll need for these Fudgy One-Bowl Halloween Brownies with Candy Eyes:
For the Brownies
- 1/2 cup (113g) unsalted butter, melted – I use salted butter in a pinch and just reduce the added salt slightly. But unsalted gives you more control over the final flavor.
- 1 cup (200g) granulated sugar – Regular white sugar works perfectly. You can substitute with coconut sugar for a slightly deeper flavor, but the texture might be a tiny bit less fudgy.
- 2 large eggs, room temperature – Room temperature eggs mix in more evenly and create a smoother batter. If you’re in a hurry, place the eggs in a bowl of warm water for 5 minutes.
- 1 teaspoon vanilla extract – Pure vanilla extract adds a warmth that complements the chocolate. Imitation vanilla works fine too, but use a little less since it’s stronger.
- 1/3 cup (40g) unsweetened cocoa powder – I prefer Dutch-process cocoa for its richer, smoother flavor, but natural cocoa works beautifully too. My go-to brand is Ghirardelli for everyday baking.
- 1/2 cup (65g) all-purpose flour – Spoon and level the flour—don’t scoop directly from the bag or you’ll end up with too much and dry brownies.
- 1/4 teaspoon salt – Salt enhances the chocolate flavor. Don’t skip it, even if you’re using salted butter.
- 1/4 teaspoon baking powder – This gives just a tiny lift without making the brownies cakey.
For the Decoration
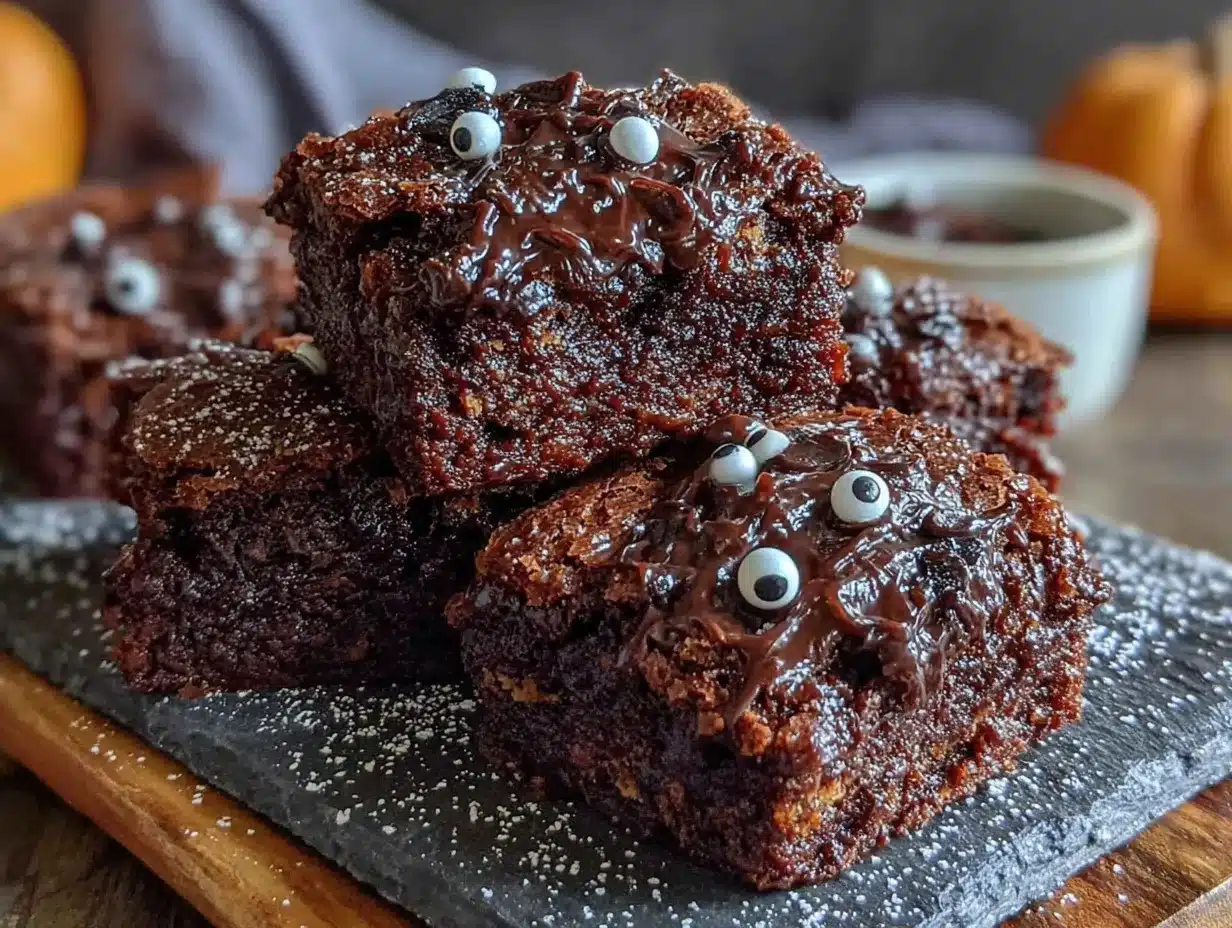
- 1 bag (about 50 pieces) candy eyes – These are widely available in the baking aisle during Halloween season. I’ve found the ones by Wilton hold up well. You can also find them on Amazon year-round.
- Optional: 1/4 cup white chocolate chips or melting wafers – For making the eyes stick better or adding spider web designs. Not strictly necessary, but fun for extra detail.
- Optional: Black gel food coloring – For drawing spooky mouths or spider legs under the eyes.
That’s it. Eight ingredients for the brownies themselves, plus a few optional extras for decorating. The beauty of this recipe is its simplicity. You don’t need special Halloween-themed sprinkles or colored sugar. The candy eyes do all the heavy lifting for the spooky factor.
One note on the candy eyes: make sure you get the edible kind that are made for baking. Some craft eyes are not food-safe. The baking aisle eyes are usually made from sugar and cornstarch, and they hold up well in the oven. I learned this the hard way when I accidentally bought non-edible ones one year. Let’s just say my brownies looked cute but were not safe to eat.
Equipment Needed
You don’t need a fancy kitchen to make these brownies. Here’s what you’ll need:
- One large mixing bowl – Any bowl will do, but a medium to large size gives you room to mix without splattering. I use a glass Pyrex bowl because it’s easy to see when everything is combined.
- 8×8 inch baking pan – This is the perfect size for these brownies. A 9×9 pan will work too, but the brownies will be slightly thinner and may bake a few minutes faster. You can also use a 9-inch round cake pan for a different shape.
- Parchment paper – This is non-negotiable for easy removal. Cut a strip to fit across the bottom and up two sides of the pan, creating a sling. You can also use aluminum foil, but parchment gives cleaner edges.
- Whisk or wooden spoon – A whisk works great for incorporating the eggs smoothly. A wooden spoon is fine too, just make sure you mix thoroughly.
- Rubber spatula – For scraping every last bit of batter into the pan. Nobody wants to waste fudgy brownie batter.
- Measuring cups and spoons – Accurate measurements matter in baking. Use dry measuring cups for dry ingredients and liquid measuring cups for the melted butter.
- Cooling rack – For letting the brownies cool completely before decorating. If you don’t have one, you can use a trivet or just let them cool in the pan on the counter.
If you don’t have an 8×8 pan, don’t worry. I’ve made these in a 9-inch cast iron skillet before, and they turned out amazing—just with a slightly longer bake time. The key is to watch for the edges pulling away from the sides and a toothpick coming out with a few moist crumbs.
Preparation Method
Alright, let’s get to the fun part. This method is so simple, you’ll wonder why you ever used multiple bowls. Follow these steps carefully, and you’ll have the most fudgy, spooky brownies on the block.
- Preheat your oven to 350°F (175°C). While it’s heating, line your 8×8 pan with parchment paper, leaving an overhang on two opposite sides. This creates a sling for lifting the brownies out later. Lightly spray the parchment with non-stick spray for extra insurance.
- Melt the butter in your large mixing bowl. Pop it in the microwave for 30-second intervals, stirring between each, until fully melted. Let it cool for a minute—you don’t want it hot enough to cook the eggs when you add them.
- Add the sugar to the melted butter. Stir until combined. The mixture will look a little grainy, and that’s perfectly fine. You’re not trying to dissolve the sugar here, just incorporate it.
- Crack in the eggs one at a time, whisking well after each addition. The batter should look smooth and glossy. Add the vanilla extract and whisk again. This is where the magic starts—the batter will become thick and shiny.
- Sift the cocoa powder, flour, salt, and baking powder directly into the bowl. Sifting prevents lumps and ensures even distribution. If you don’t have a sifter, use a fine-mesh strainer or just whisk the dry ingredients together in a separate bowl before adding. But remember, we’re trying to keep it to one bowl, so sifting directly works great.
- Fold the dry ingredients into the wet ingredients using a rubber spatula. Stir gently until just combined. Do not overmix! Overmixing develops the gluten in the flour and makes the brownies tough instead of fudgy. A few streaks of flour are okay—they’ll disappear as you fold.
- Pour the batter into the prepared pan and spread it evenly with the spatula. The batter will be thick—don’t worry, that’s exactly what you want. It should spread to the corners without much resistance.
- Bake for 20-25 minutes. Start checking at 20 minutes. The edges should be set and pulling away from the pan slightly. The center will still look a little soft and might jiggle slightly when you shake the pan. A toothpick inserted into the center should come out with a few moist crumbs, not wet batter. If it comes out clean, you’ve overbaked them.
- Let the brownies cool in the pan for 10 minutes. Then, using the parchment sling, lift them out and transfer to a cooling rack. Let them cool completely before decorating—about 1 hour. I know it’s tempting to add the eyes while they’re warm, but trust me, the eyes will slide off or sink in if the brownies are too hot.
- Now for the spooky part. Once the brownies are completely cool, press the candy eyes gently into the surface. Space them out randomly for a chaotic, creepy look. For extra hold, you can dab a tiny bit of melted white chocolate on the back of each eye before pressing it in. If you’re feeling creative, use black gel food coloring to draw little mouths or spider legs under some of the eyes.
- Cut into squares. For clean cuts, use a sharp knife and wipe it clean between each slice. You can also use a plastic knife, which surprisingly gives cleaner cuts on brownies.
One thing I learned the hard way: don’t press the eyes in too deep. They should sit on the surface, not disappear into the brownie. A gentle press is all it takes. And if you’re making these with kids, let them go wild with the decorating. The wonkier the eyes, the spookier the result!
Cooking Tips & Techniques
After making these Fudgy One-Bowl Halloween Brownies with Candy Eyes about a dozen times, I’ve picked up a few tricks that make a real difference. Here are my best tips for perfect results every time.
Don’t overbake. This is the number one mistake people make with brownies. They see the center looking soft and think it needs more time. But brownies continue to cook from residual heat after they come out of the oven. If you wait until the center is fully set, you’ll end up with cakey, dry brownies. Pull them out when the edges are set and the center still looks slightly underdone. That’s the secret to fudgy texture.
Room temperature eggs matter. I know, it’s annoying to wait for eggs to come to room temperature. But cold eggs can cause the butter to seize up, creating a lumpy batter. If you forget to take them out ahead of time, place the eggs in a bowl of warm water for 5 minutes. Problem solved.
Line your pan properly. The parchment sling method is a game-changer. Cut the parchment wide enough to cover the bottom and come up two opposite sides. This lets you lift the entire block of brownies out cleanly for easy cutting. I once forgot the parchment and spent 20 minutes chiseling brownies out of the pan. Never again.
Let them cool completely. I cannot stress this enough. Warm brownies are delicious, but they’re also fragile. The candy eyes will slide right off if the surface is still warm. Give them a full hour on the cooling rack. If you’re in a rush, pop them in the fridge for 20 minutes to speed things up.
Use a light hand with the candy eyes. Press them in gently. If you push too hard, they’ll sink into the brownie and look like creepy sunken eyeballs. Unless that’s the look you’re going for, in which case, go for it!
Test your cocoa powder freshness. Cocoa powder loses its potency over time. If your brownies aren’t as chocolatey as you’d like, check the expiration date on your cocoa. Fresh cocoa makes a world of difference.
One of my biggest failures happened when I tried to double the batch and bake it in a 9×13 pan. The bake time was totally different, and I ended up with overdone edges and a raw center. Lesson learned: stick to the single batch in the 8×8 pan for best results.
Variations & Adaptations
These brownies are wonderfully adaptable. Here are some ways to switch things up depending on your mood, dietary needs, or what you have on hand.
Gluten-Free Version: Substitute the all-purpose flour with a 1:1 gluten-free baking flour blend. I’ve used Bob’s Red Mill 1-to-1 Baking Flour with great results. The texture is slightly more delicate, so be gentle when pressing in the candy eyes. No other adjustments needed.
Dairy-Free Version: Use vegan butter or coconut oil in place of the unsalted butter. I’ve tried both, and coconut oil gives a slightly different flavor that pairs surprisingly well with chocolate. Just make sure your candy eyes are dairy-free as well—some brands use milk powder.
Extra Spooky Spider Web Design: After the brownies cool, melt 1/4 cup of white chocolate chips. Drizzle the white chocolate in a spiral pattern over the brownies, then use a toothpick to drag lines from the center outward, creating a web effect. Place a candy eye in the center of each web. It looks incredible and takes only an extra 5 minutes.
Peanut Butter Swirl: Before baking, drop spoonfuls of peanut butter on top of the batter and swirl it in with a knife. The peanut butter adds a salty contrast to the sweet chocolate. This is my personal favorite variation—I make it for Halloween parties and watch people fight over the pieces with the most swirl.
Mint Chocolate Version: Add 1/2 teaspoon of peppermint extract along with the vanilla. The mint and chocolate combination is classic and feels especially festive for Halloween. Top with crushed candy canes or green sprinkles for extra color.
Less Sweet Option: Reduce the sugar to 3/4 cup instead of 1 cup. The brownies will be slightly less sweet and more intensely chocolatey. This works well if you’re adding a lot of sweet decorations on top.
I once tried making these with black cocoa powder for an extra-dark, spooky look. The flavor was intense—almost like Oreo cookies—but the color was genuinely eerie. If you can find black cocoa powder, give it a try for a truly ghoulish appearance.
Serving & Storage Suggestions
These brownies are best served at room temperature, but they’re also delicious straight from the fridge for a denser, fudgier texture. Here’s how to serve and store them for maximum enjoyment.
Serving: Cut the brownies into 9 or 16 squares, depending on how generous you want to be. Arrange them on a platter with the candy eyes facing up so everyone can see the spooky faces. For a Halloween party, serve them alongside a bowl of popcorn and some apple cider for a complete treat spread. They also pair wonderfully with a glass of cold milk or a scoop of vanilla ice cream.
Presentation Tip: Place the brownies on a black or orange platter to make the candy eyes pop. You can also dust them lightly with powdered sugar for a “ghostly” effect. Just sift the sugar through a fine-mesh strainer right before serving.
Room Temperature Storage: Store the brownies in an airtight container at room temperature for up to 4 days. Place a sheet of parchment paper between layers to prevent sticking and to protect the candy eyes from getting smudged. They actually taste better on day two—the flavors meld together and the texture becomes even more fudgy.
Refrigerator Storage: If you prefer a denser texture, store them in the refrigerator. They’ll keep for up to a week. Let them sit at room temperature for 10 minutes before serving to take the chill off. The candy eyes can become a bit hard in the fridge, so don’t be alarmed if they feel firm.
Freezer Storage: These brownies freeze beautifully. Wrap individual squares tightly in plastic wrap, then place them in a freezer-safe bag or container. They’ll keep for up to 3 months. To thaw, let them sit at room temperature for about 30 minutes. The candy eyes might lose a bit of their shine after freezing, but the flavor remains perfect.
Reheating: For that just-baked experience, warm a brownie in the microwave for 10-15 seconds. The chocolate becomes soft and gooey again. Just be careful not to overheat, or the candy eyes might melt into a creepy puddle. Honestly, that could be a fun Halloween effect too!
One thing I love about these brownies is how the flavors develop. The first day, they’re rich and chocolatey. By day three, they’re almost caramel-like in their depth. If you can resist eating them all at once, you’re in for a treat.
Nutritional Information & Benefits
Let’s be real—these are brownies, not health food. But that doesn’t mean they can’t have some redeeming qualities. Here’s a rough breakdown of what you’re getting in each serving (based on 16 servings per batch):
| Nutrient | Amount Per Serving |
|---|---|
| Calories | 185 |
| Total Fat | 9g |
| Saturated Fat | 5g |
| Cholesterol | 45mg |
| Sodium | 85mg |
| Total Carbohydrates | 26g |
| Dietary Fiber | 1g |
| Sugars | 19g |
| Protein | 3g |
Now for the positives. Cocoa powder is actually rich in antioxidants called flavonoids, which can help reduce inflammation and improve heart health. The eggs provide high-quality protein and essential vitamins like B12 and D. And the butter, while high in fat, contains butyrate, a fatty acid that supports gut health. So while these aren’t a health food, they’re not empty calories either.
If you’re watching your sugar intake, you can reduce the sugar to 3/4 cup without affecting the texture too much. For a lower-fat option, substitute half the butter with unsweetened applesauce. The brownies will be slightly less fudgy but still delicious.
These brownies are not gluten-free or dairy-free in their standard form, but as I mentioned in the variations section, easy substitutions are available. They do contain eggs and dairy, so keep that in mind if you’re baking for someone with allergies.
From a wellness perspective, I believe in balance. These brownies are a treat—something to enjoy on special occasions without guilt. They’re made with real ingredients, not preservatives or artificial flavors. And honestly, the joy they bring to a Halloween party is worth every calorie.
Conclusion
These Fudgy One-Bowl Halloween Brownies with Candy Eyes are everything I want in a Halloween treat—fun, easy, and absolutely delicious. They come together in one bowl, use simple ingredients, and deliver that perfect fudgy texture that makes brownies so irresistible. The candy eyes add a playful spooky touch that kids and adults both love, and the decorating process is genuinely fun. I’ve made these for class parties, Halloween dinners, and casual get-togethers, and they’ve never failed to bring smiles.
What I love most about this recipe is how approachable it is. You don’t need to be a professional baker to pull these off. You don’t need special equipment or hard-to-find ingredients. You just need a bowl, a pan, and a little bit of Halloween spirit. The one-bowl method means less cleanup, which means more time to enjoy the fun part—watching people’s faces light up when they see those spooky little eyes staring back at them.
I encourage you to make these your own. Add peanut butter swirls, go wild with the decorating, or keep them simple with just the eyes. However you make them, they’re going to be a hit. And if your candy eyes end up a little crooked or sliding down the side? That’s part of the charm. The best Halloween treats have a little bit of wonkiness to them.
So go ahead, preheat that oven, grab your one bowl, and make some spooky memories. And when you do, come back and tell me about it. Leave a comment below, share a photo of your creations, or let me know what variations you tried. I genuinely love hearing from you. Happy Halloween, and happy baking!
Frequently Asked Questions
Can I use a different size pan? Yes, but the bake time will change. A 9×9 pan will give thinner brownies that bake in about 18-22 minutes. A 9×13 pan will make very thin brownies that bake in 15-18 minutes. Keep a close eye on them and test with a toothpick.
Why did my brownies turn out cakey instead of fudgy? The most common reason is overbaking. Pull them out when the center still looks slightly underdone. Also, make sure you’re using the right amount of flour—too much flour will make them cakey. Spoon and level your flour rather than scooping directly from the bag.
Can I make these brownies ahead of time? Absolutely. They actually taste better the next day. Bake them up to 2 days in advance, store them in an airtight container at room temperature, and add the candy eyes just before serving for the freshest look.
Where can I find candy eyes for baking? Most grocery stores carry them in the baking aisle during Halloween season. You can also find them year-round on Amazon or at craft stores like Michaels or JoAnn. Just make sure they’re labeled as edible.
Can I freeze these brownies with the candy eyes on? Yes, but the eyes might lose some of their shine and become slightly hard. For best results, freeze the brownies without the eyes, then add them after thawing. If you freeze them with the eyes on, let them thaw in the refrigerator to minimize condensation.
Pin This Recipe!
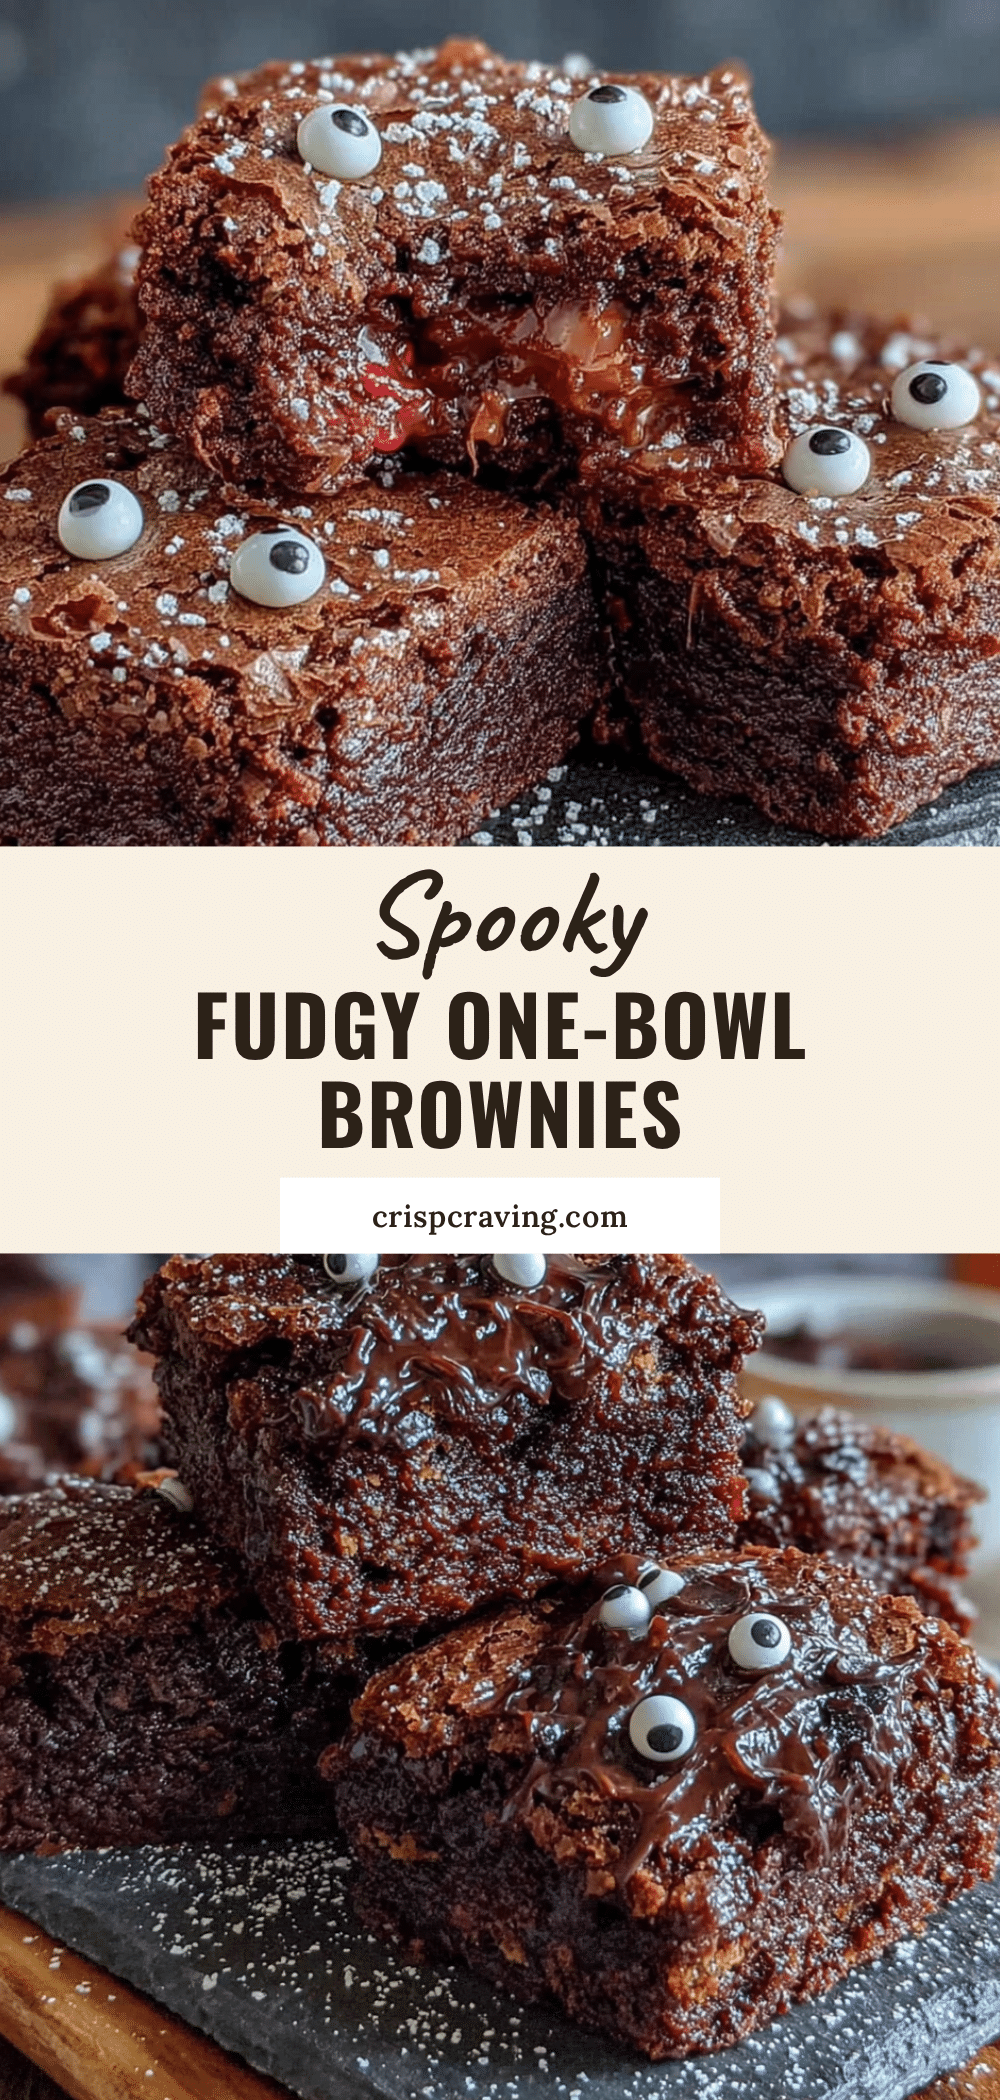
Fudgy One-Bowl Halloween Brownies with Spooky Candy Eyes
These fudgy, one-bowl brownies are topped with spooky candy eyes for a fun and easy Halloween treat. Perfect for parties, they come together quickly with simple ingredients and deliver a rich, chocolatey texture that everyone will love.
- Prep Time: 10 minutes
- Cook Time: 25 minutes
- Total Time: 35 minutes
- Yield: 16 servings 1x
- Category: Dessert
- Cuisine: American
Ingredients
- 1/2 cup (113g) unsalted butter, melted
- 1 cup (200g) granulated sugar
- 2 large eggs, room temperature
- 1 teaspoon vanilla extract
- 1/3 cup (40g) unsweetened cocoa powder
- 1/2 cup (65g) all-purpose flour
- 1/4 teaspoon salt
- 1/4 teaspoon baking powder
- 1 bag (about 50 pieces) candy eyes
- Optional: 1/4 cup white chocolate chips or melting wafers
- Optional: Black gel food coloring
Instructions
- Preheat your oven to 350°F (175°C). Line an 8×8 inch baking pan with parchment paper, leaving an overhang on two opposite sides. Lightly spray the parchment with non-stick spray.
- Melt the butter in a large mixing bowl in the microwave in 30-second intervals. Let it cool for a minute.
- Add the sugar to the melted butter and stir until combined.
- Add the eggs one at a time, whisking well after each addition. Add the vanilla extract and whisk again until the batter is smooth and glossy.
- Sift the cocoa powder, flour, salt, and baking powder directly into the bowl. Fold gently with a rubber spatula until just combined. Do not overmix.
- Pour the batter into the prepared pan and spread it evenly.
- Bake for 20-25 minutes, until the edges are set and a toothpick inserted into the center comes out with a few moist crumbs.
- Let the brownies cool in the pan for 10 minutes, then lift them out using the parchment sling and transfer to a cooling rack. Cool completely (about 1 hour).
- Once cool, press the candy eyes gently into the surface. For extra hold, dab a tiny bit of melted white chocolate on the back of each eye before pressing. Optionally, use black gel food coloring to draw mouths or spider legs.
- Cut into squares using a sharp knife, wiping clean between cuts.
Notes
Don’t overbake; pull brownies out when center still looks slightly underdone. Room temperature eggs help create a smooth batter. Let brownies cool completely before adding candy eyes to prevent them from sliding off. For clean cuts, use a sharp knife and wipe it clean between slices.
Nutrition
- Serving Size: 1 brownie (1/16 of r
- Calories: 185
- Sugar: 19
- Sodium: 85
- Fat: 9
- Saturated Fat: 5
- Carbohydrates: 26
- Fiber: 1
- Protein: 3
Keywords: Halloween brownies, fudgy brownies, one-bowl brownies, candy eyes, spooky brownies, easy Halloween dessert



