Love this? Save it for later!
Share the inspiration with your friends
My nephew, Leo, had claimed to hate pumpkin for seven years. Seven. He would wrinkle his nose at the sight of an orange muffin, push pie crusts around his plate, and declare any hint of cinnamon or nutmeg “too spicy” for his refined six-year-old palate. Then, last Halloween, I made these little cones “just for the other kids” while he was busy sorting his candy stash. I caught him, mid-sort, eyeing the tiny waffle cone I had stuffed with yogurt dip and a few candy pumpkins. “What’s that?” he asked, trying to sound disinterested. “Nothing,” I said, not looking up. “Just a snack for the big kids.” By the time I turned around, he was licking yogurt off his thumb, a mini cone in his hand, looking like he had just gotten away with something. Honestly, that moment was better than any perfectly executed recipe. It was the quiet victory of proving that sometimes, you just have to serve the magic in a cone.
I mean, let’s be real—getting kids to eat a balanced snack during the chaos of fall activities is like trying to wrangle a squirrel on a sugar high. You need something that feels like a treat but secretly packs in the good stuff. These Cozy Mini Pumpkin Charcuterie Cones are my secret weapon. They look like a party, they taste like autumn, and they come together in the time it takes to find matching socks. I’ve made them for school harvest parties, after-pumpkin-patching fuel, and even a surprisingly calm rainy Saturday afternoon. They are the snack that finally made Leo a believer, and honestly, that’s the kind of testimonial you can’t fake.
Why You’ll Love This Recipe
Let me tell you why this recipe is different. It’s not just about throwing some crackers in a cone. I have tested this concept on multiple groups of picky eaters, and these cones win every single time. They hit that sweet spot between fun and functional.
- Quick & Easy: You can assemble a whole batch in under 15 minutes. Seriously. It’s faster than arguing about what to have for a snack.
- Simple Ingredients: No fancy grocery trips needed. You probably have most of this stuff in your pantry right now, minus the mini waffle cones.
- Perfect for Fall Occasions: These are ideal for Halloween parties, Thanksgiving kid tables, pumpkin carving nights, or just a Tuesday that needs a little coziness.
- Crowd-Pleaser: Even the kids who “don’t like pumpkin” (we see you, Leo) will go for these because of the fun presentation.
- Unbelievably Adorable: Let’s be honest, the visual is half the win. They look like tiny edible bouquets, and that makes everyone happy.
What makes this my best version is the balance. I use a simple pumpkin yogurt dip that tastes like dessert but is actually just yogurt and pumpkin puree. It’s not a sugar bomb. It’s creamy, slightly sweet, and perfectly spiced. The cones are sturdy enough to hold a variety of fillings, from cheese cubes to berries to those little chocolate pumpkins that everyone fights over. This isn’t just another snack board—it’s a portable, mess-minimized, kid-approved experience. It’s the kind of thing that makes you close your eyes after the first bite, not because it’s fancy, but because it’s just that perfectly cozy.
What Ingredients You Will Need
This recipe uses simple, wholesome ingredients to deliver a snack that feels special without the stress. The ingredients are mostly pantry staples, making it easy to throw together whenever the fall mood strikes.
- Mini Waffle Cones: These are the stars of the show. Look for the small, flat-bottomed ones. They stand up perfectly on a platter. (I prefer the brand “Joy” for their sturdiness—they don’t get soggy as fast.)
- Plain Greek Yogurt: This forms the base of our “pumpkin dip.” Full-fat works best for creaminess, but 2% is fine. (Use a dairy-free coconut yogurt if needed.)
- Pumpkin Puree: Make sure it’s 100% pure pumpkin, not pumpkin pie filling. It adds the color, flavor, and a little fiber. (Canned is perfect—I always keep a few on hand.)
- Maple Syrup or Honey: Just a touch for sweetness. It balances the earthiness of the pumpkin. (Agave nectar works too.)
- Pumpkin Pie Spice: This is the flavor shortcut. You can make your own with cinnamon, nutmeg, ginger, and cloves, but the store-bought blend is fine.
- Vanilla Extract: A tiny splash rounds out the flavors and makes the dip taste like a treat.
- Assorted Snack Fillings: This is where you get creative. Think about colors, textures, and flavors:
- Fruit: Red grapes (halved for safety), fresh raspberries, blueberries, sliced bananas.
- Cheese: Small cubes of cheddar, mozzarella pearls, or tiny cheese crackers.
- Crunch: Mini pretzel sticks, graham cracker squares, or pumpkin seeds (pepitas).
- Sweets: Candy corn, candy pumpkins, mini chocolate chips, or a few M&Ms.
- Optional Garnishes: A sprinkle of cinnamon on top, a tiny pretzel stick “stem” sticking out of the dip, or a drizzle of melted white chocolate.
Ingredient Selection Tip: For the best texture, make sure your yogurt is thick. If it’s watery, strain it through a cheesecloth for 10 minutes. For the fruit, use what’s in season. In the fall, apples and pears are fantastic, but make sure to cut them into very small, manageable pieces.
Equipment Needed
You don’t need a lot of fancy gear for this, which is part of the charm. I have made these in a friend’s kitchen with only a butter knife, and they still turned out adorable.
- Mixing Bowl: A small or medium bowl for making the pumpkin dip.
- Spatula or Spoon: For mixing the dip until smooth.
- Piping Bag or Zip-Top Bag: This makes filling the cones much cleaner. You can also just use a small spoon, but the bag is faster. (A zip-top bag with a tiny corner snipped off works perfectly.)
- Serving Platter or Board: Something to arrange the cones on. A wooden board or a simple white platter looks great.
- Small Bowls: For holding the different fillings if you are setting up a “build-your-own” station.
- Paring Knife: For cutting fruit and cheese into small pieces.
- Cutting Board: A small one is fine.
Budget-Friendly Tip: Don’t have a piping bag? No problem. Just use a sturdy zip-top bag and snip a small hole. I’ve done it a hundred times. Also, you can often find mini waffle cones at dollar stores or in bulk at warehouse clubs, which saves a lot.
Preparation Method

Alright, let’s get to the fun part. This is so simple, you’ll probably memorize it after the first time.
- Make the Pumpkin Dip (5 minutes): In your small mixing bowl, combine 1 cup (240g) of plain Greek yogurt, 1/3 cup (80g) of pumpkin puree, 2 tablespoons (30ml) of maple syrup, 1/2 teaspoon of pumpkin pie spice, and 1/4 teaspoon of vanilla extract. Stir it all together until it is smooth and uniform. It should be a beautiful, soft orange color. Taste it and adjust the sweetness or spice to your liking. (I sometimes add a pinch of salt to balance the flavors.)
- Prepare Your Fillings (5 minutes): While the dip rests, get your snack fillings ready. Wash and dry your fruit. Cut grapes in half lengthwise. Cube the cheddar cheese into small, bite-sized squares. Measure out your pretzels and candy. Having everything prepped makes assembly a breeze.
- Fill the Cones (5 minutes): This is the most satisfying part. Spoon the pumpkin dip into your piping bag or zip-top bag. If you are using a spoon, just be careful not to overfill. Snip a small hole in the corner of the bag. Gently squeeze the dip into the bottom of each mini waffle cone, filling it about one-third to halfway full. You want enough to anchor the other ingredients but not so much that it overflows.
- Stuff the Cones (5 minutes): Now, start adding your fillings. Think of it like a tiny edible flower arrangement. Start with the larger items, like cheese cubes or whole strawberries, and push them gently into the dip to hold them upright. Then, fill in the gaps with smaller items like blueberries, raspberries, and pretzel sticks. The goal is to have a colorful, textured mix spilling out the top of the cone.
- Garnish and Serve: Once all the cones are stuffed, arrange them on your serving platter. They should stand up on their own because of the flat bottom. If you want, you can add a tiny pretzel stick to the top of the dip to look like a pumpkin stem, or sprinkle a little extra cinnamon over the whole platter. Serve immediately.
Sensory Cue: The dip should be thick enough to hold a piece of fruit upright. If it’s too runny, add a little more yogurt. If it’s too thick, a splash of milk will loosen it. The cones should feel sturdy, not soggy. If you are prepping ahead, keep the dip and the cones separate until you are ready to serve to keep the cones crisp.
Cooking Tips & Techniques
I have learned a few things the hard way so you don’t have to. Here are my best tips for cone success.
- Don’t Overfill the Dip: I know it’s tempting to pack it in, but too much dip will make the cone soggy and heavy. A third full is the sweet spot. It’s enough to hold everything but not so much that it leaks out the bottom.
- Stagger Your Textures: The best cones have a little bit of everything. A soft berry, a crunchy pretzel, a creamy cheese cube. If you just put in all soft stuff, it gets mushy. If you just put in all crunchy stuff, it’s dry. Mix it up.
- Use a “Glue” Ingredient: The pumpkin dip acts as the glue. Without it, everything just falls out. Make sure you push the first few items into the dip so they stay put.
- Prep for a Crowd: If you are making these for a party, set up a “charcuterie cone bar.” Put the dip in a bowl with a spoon, lay out all the fillings in small bowls, and let the kids (or adults!) build their own. It’s less work for you and more fun for them.
- My Biggest Failure: The first time I made these, I used chocolate-hazelnut spread instead of yogurt dip. It was a disaster. The cones got impossibly sticky, the fruit slid right out, and the kids looked like they had been in a chocolate fight. Stick with the yogurt dip—it’s the perfect consistency and much less messy.
Variations & Adaptations
One of the best things about this recipe is how easy it is to change up. Don’t be afraid to make it your own.
- Savory Pumpkin Cones: Swap the sweet dip for a savory one. Mix the pumpkin puree with cream cheese, a pinch of garlic powder, and some salt. Fill the cones with cucumber sticks, cherry tomatoes, and turkey cubes. It’s a fun twist for a fall lunchbox.
- Halloween Monster Cones: Use the same sweet dip, but add “monster” details. Use candy eyes on the top of the cone, and use black licorice strings for “spider legs” sticking out of the sides. The kids will lose their minds.
- Thanksgiving Leftover Cones: This is a genius way to use up leftovers. Fill the cones with small spoonfuls of mashed potatoes, turkey, and cranberry sauce. It’s a tiny, handheld Thanksgiving dinner that kids actually enjoy.
- Vegan & Dairy-Free Version: Use a thick coconut or almond-based yogurt for the dip. Make sure your chocolate and candies are dairy-free. The rest of the recipe stays the same, and it’s just as delicious.
- My Personal Favorite Variation: I once made a “Breakfast Cone” version for a lazy Sunday. I used the pumpkin yogurt dip, added granola, fresh apple slices, and a drizzle of peanut butter. It was like eating a parfait but way more fun. I ate three.
Serving & Storage Suggestions
These cones are best enjoyed right away, but I have some tips for making them work for different schedules.
- Serving Temperature: Serve these at room temperature or slightly chilled. If you make the dip ahead of time, let it sit out for 5 minutes before filling the cones so it’s not too stiff.
- Presentation: Arrange the cones standing up on a large platter. You can also nestle them into a bowl filled with popcorn or crumpled parchment paper to keep them upright. A sprinkle of cinnamon or a few whole star anise on the board makes it look extra festive.
- Storage: These do not store well once assembled. The cones will get soggy from the dip and the fruit. If you have leftovers, it’s best to disassemble them. Store the dip in an airtight container in the fridge for up to 3 days. The cones can be kept in a dry, sealed bag at room temperature for a week. The fruit and cheese should be stored separately.
- Reheating: You don’t reheat these. They are a cold or room-temperature snack. The only thing you might want to “reheat” is the dip if it was in the fridge—just let it sit out for 10 minutes to soften.
- Flavor Development: The dip actually tastes better after it sits in the fridge for an hour or two. The flavors meld together. So feel free to make the dip a day ahead. Just don’t fill the cones until you are ready to serve.
Nutritional Information & Benefits
I am not a dietitian, but I can tell you that these cones are a much better option than a bag of chips or a sugary granola bar. They have some real benefits.
- Estimated Values (per cone, depends on fillings): Approximately 120-180 calories, 4-6g protein, 20-25g carbohydrates, 3-5g fat.
- Key Ingredient Benefits: The pumpkin puree is packed with Vitamin A and fiber. The Greek yogurt adds protein and probiotics for gut health. The fruit provides natural sweetness and vitamins.
- Dietary Considerations: This recipe is naturally vegetarian. It can easily be made gluten-free (use gluten-free cones) and dairy-free (use dairy-free yogurt). It is also nut-free if you avoid nut-based fillings.
- Potential Allergens: Dairy (from yogurt), Gluten (from waffle cones), and possibly tree nuts depending on your fillings. Always check labels if you are serving someone with allergies.
- My Wellness Perspective: I love that this snack feels like a treat but has actual nutritional value. It’s a great way to get kids to eat fruit and yogurt without a fight. It’s not about being “healthy”—it’s about being smart about what you serve.
Conclusion
So, there you have it. The Cozy Mini Pumpkin Charcuterie Cones that turned a pumpkin-hater into a fan. This recipe is worth trying because it is genuinely fun, incredibly easy, and surprisingly versatile. It is the kind of snack that makes a regular afternoon feel like a special occasion without a ton of effort.
I encourage you to take this basic idea and run with it. Use whatever fillings your family loves. Make it savory, make it sweet, make it spooky. The beauty is in the flexibility. I love this recipe because it reminds me of Leo’s surprised little face and the quiet joy of proving that good food can change minds. It is a little bit of autumn magic in a cone.
Now, I want to hear from you! Have you tried making these? What fillings did you use? Drop a comment below and tell me about your cone creations. And if you loved this recipe, please share it with a friend who needs a fun snack idea. Happy fall cooking!
Frequently Asked Questions
Can I make these cones ahead of time for a party?
It is best to assemble them no more than 30 minutes before serving to keep the cones crisp. You can, however, make the pumpkin dip up to 3 days ahead and prep all your fillings the night before. Just store everything separately in the fridge and put the cones together right before your guests arrive.
What if I can’t find mini waffle cones?
No problem! You can use small ice cream cups or even sturdy paper cups as a substitute. You can also use flat-bottomed ice cream cones (the kind that look like little cups). The presentation will be slightly different, but the concept works just as well.
Are these cones healthy enough for a school snack?
Absolutely. The base is yogurt and pumpkin, which provides protein and vitamins. You control the fillings, so you can skip the candy and load up on fruit, cheese, and seeds. They are a fantastic, balanced option for a school harvest party or a classroom snack.
My dip came out too runny. What did I do wrong?
This usually happens if the yogurt is too thin. I recommend using a thick Greek yogurt. If your yogurt is watery, strain it through a coffee filter or cheesecloth for 15 minutes before mixing. Also, make sure you are using pure pumpkin puree and not pumpkin pie filling, which has added liquid.
Can I use a different dip instead of pumpkin?
Of course! The beauty of this recipe is the format. You can fill the cones with hummus for a savory option, chocolate-hazelnut spread for a dessert version, or even a flavored cream cheese. Just make sure the dip is thick enough to hold the other ingredients upright.
Pin This Recipe!

Easy Mini Pumpkin Charcuterie Cones for Kids
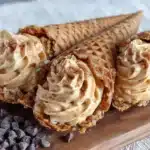
These adorable mini pumpkin charcuterie cones are a fun, kid-friendly snack that combines a creamy pumpkin yogurt dip with a variety of fruits, cheeses, and crunchy treats. Perfect for fall parties, Halloween, or a cozy afternoon snack.
- Prep Time: 15 minutes
- Cook Time: 0 minutes
- Total Time: 15 minutes
- Yield: 12 servings 1x
- Category: Snack
- Cuisine: American
Ingredients
- 12 mini waffle cones
- 1 cup (240g) plain Greek yogurt
- 1/3 cup (80g) pumpkin puree (100% pure, not pie filling)
- 2 tablespoons (30ml) maple syrup or honey
- 1/2 teaspoon pumpkin pie spice
- 1/4 teaspoon vanilla extract
- Assorted fillings: red grapes (halved), fresh raspberries, blueberries, sliced bananas, small cubes of cheddar cheese, mozzarella pearls, mini pretzel sticks, graham cracker squares, pumpkin seeds (pe…
- Optional garnishes: cinnamon, pretzel sticks (for stems), melted white chocolate
Instructions
- Make the Pumpkin Dip: In a small mixing bowl, combine 1 cup Greek yogurt, 1/3 cup pumpkin puree, 2 tablespoons maple syrup, 1/2 teaspoon pumpkin pie spice, and 1/4 teaspoon vanilla extract. Stir until smooth and uniform. Taste and adjust sweetness or spice as desired.
- Prepare Your Fillings: Wash and dry fruit. Halve grapes lengthwise. Cube cheddar cheese into small bite-sized squares. Measure out pretzels, crackers, and candies.
- Fill the Cones: Spoon the pumpkin dip into a piping bag or a zip-top bag with a small corner snipped off. Gently squeeze the dip into the bottom of each mini waffle cone, filling about one-third to halfway full.
- Stuff the Cones: Start with larger items like cheese cubes or whole strawberries, pushing them gently into the dip to hold them upright. Fill in gaps with smaller items like blueberries, raspberries, and pretzel sticks. Aim for a colorful, textured mix spilling out the top.
- Garnish and Serve: Arrange cones on a serving platter. Optionally, add a tiny pretzel stick to the top of the dip to look like a pumpkin stem, or sprinkle extra cinnamon over the platter. Serve immediately.
Notes
For best results, use thick Greek yogurt; if it’s watery, strain it through cheesecloth for 10 minutes. Assemble cones no more than 30 minutes before serving to keep cones crisp. The dip can be made up to 3 days ahead and stored in the fridge. For a dairy-free version, use coconut or almond-based yogurt and dairy-free candies.
Nutrition
- Serving Size: 1 cone
- Calories: 150
- Sugar: 12
- Sodium: 80
- Fat: 4
- Saturated Fat: 2
- Carbohydrates: 22
- Fiber: 2
- Protein: 5
Keywords: mini pumpkin charcuterie cones, kid-friendly snack, fall snack, Halloween snack, pumpkin yogurt dip, easy snack, party snack



