Love this? Save it for later!
Share the inspiration with your friends
My youngest had refused anything spicy for what felt like forever. Years. I’d watch him push away tacos, ignore my chili, and pick every single speck of black pepper off his scrambled eggs. It was a quiet, stubborn war. Then, last Super Bowl Sunday, I made these mummy jalapeno poppers “just for the adults” and found him standing on a stool at the counter, stealing them straight off the baking sheet, cream cheese smeared from his nose to his chin. Caught him red-handed. Or, well, white-handed.
I didn’t say a word. I just handed him a napkin and watched him devour two more. That’s the thing about this recipe—it’s got all the fun of a game-day snack without the heat that scares off the little ones. The cream cheese and cheddar mellow out the jalapeno until it’s just warm, not fiery. And wrapping them up like little mummies? Honestly, that was a last-minute idea born from a half-empty tube of crescent rolls and a desperate need to make something that looked fun. Maybe you’ve been there, staring into your fridge on game day, wondering how to feed a crowd without spending a fortune.
These poppers cost pennies to make, use ingredients you probably already have, and they disappear faster than I can explain what a mummy is supposed to look like. The power went out halfway through the second quarter that night, but nobody cared because we had a plate of these warm, cheesy little guys. That’s when I knew this recipe was staying in rotation. It’s not fancy. It’s not complicated. But it’s the kind of snack that makes everyone—even the spice-haters—come back for more.
Why You’ll Love This Recipe
I have tested this recipe six times in the last three months, and I can tell you without hesitation—this is the version you want. It’s been taste-tested by my own picky eaters, approved by my budget-obsessed spouse, and shared with three neighbors who all asked for the recipe. Here is why it works:
- Quick & Easy: From start to finish, these come together in about 30 minutes. That’s less time than it takes to argue about what to watch before kickoff.
- Simple Ingredients: You likely have cream cheese, cheddar, and crescent rolls in your fridge right now. Jalapenos are cheap and easy to find. No fancy grocery trips needed.
- Perfect for Game Day: These are made for the big screen. They’re handheld, dippable, and fun to look at. Kids and adults fight over them equally.
- Crowd-Pleaser: I have served these at three parties now, and every single time, the plate comes back empty. The mummy design is a conversation starter, and the flavor keeps people reaching.
- Unbelievably Delicious: The cream cheese gets all melty and rich, the cheddar adds a sharp bite, and the crescent dough bakes up golden and flaky. It’s comfort food in a tiny, adorable package.
What makes this recipe different from all the other jalapeno popper recipes out there? It’s the balance. Most poppers are either too spicy for kids or too bland for adults. This version hits the sweet spot—warm, creamy, and just a little bit smoky from the roasted jalapeno. And the mummy wrapping? That’s not just for looks. The dough traps the steam inside, keeping the filling extra soft and gooey. It’s not just another version. It’s the best version for a family on a budget who still wants to impress.
This recipe isn’t just good—it’s the kind that makes you close your eyes after the first bite. It’s comfort food reimagined: faster, cheaper, but with the same soul-soothing satisfaction. Perfect for impressing guests without stress, or turning a simple game-day snack into something memorable.
What Ingredients You Will Need
This recipe uses simple, budget-friendly ingredients that come together to deliver big flavor without the fuss. Most of these are pantry staples or things you might already have in your fridge from a previous taco night or baking project. Let me walk you through each one so you know exactly what to look for.
- Fresh jalapenos (8–10 medium): Look for firm, smooth-skinned peppers with no soft spots. The size matters here—you want them wide enough to hold a good amount of filling but not so huge that they’re tough. I usually pick up a few extra because sometimes one or two are too skinny to stuff properly. (Pro tip: if you want even less heat, look for jalapenos with thin, straight lines—those are usually milder.)
- Cream cheese (8 oz, softened): Full-fat cream cheese gives the best creamy texture. I have tried the reduced-fat version, and it works okay, but it’s not as rich. Let it sit on the counter for 20 minutes before mixing so it blends smoothly. I recommend Philadelphia brand for consistent results—it melts beautifully and doesn’t get grainy.
- Shredded cheddar cheese (1 cup): Sharp cheddar adds the most flavor without needing to use a lot. Pre-shredded is fine in a pinch, but shredding your own from a block melts creamier because it doesn’t have anti-caking agents. (I usually do this while the cream cheese softens—it takes two minutes.)
- Refrigerated crescent roll dough (1 can, 8 oz): This is the shortcut that makes the mummy wrappers possible. Pillsbury is my go-to because the dough is consistent and bakes up flaky every time. You’ll use the whole can, and honestly, it’s cheaper than making dough from scratch. Look for the big can, not the thin one—it gives you more dough to work with.
- Garlic powder (1/2 teaspoon): Just a little adds a savory depth that balances the cream cheese. Don’t skip it—it makes the filling taste like it’s been simmering for hours.
- Onion powder (1/4 teaspoon): This is optional, but I love the subtle sweetness it adds. If you don’t have it, just use a pinch more garlic powder.
- Salt (1/4 teaspoon): A little salt wakes up all the flavors. I use fine sea salt, but table salt works just fine.
- Black pepper (a pinch): Go easy here since we’re keeping it kid-friendly. A tiny pinch is enough to add a little warmth without any heat.
- Egg wash (1 egg + 1 tablespoon water): This gives the dough that gorgeous golden-brown color. You can skip it if you’re in a hurry, but your mummies will look pale and sad. (I learned this the hard way on my first batch.)
- Candy eyes (optional, for decoration): These are purely for fun. You can find them at any grocery store in the baking aisle, or you can use tiny dots of black olive or even black sesame seeds. My kids love the candy eyes, so I always keep a bag in the pantry.
For substitutions: If you want a dairy-free version, use vegan cream cheese and shredded vegan cheddar. They won’t melt exactly the same way, but the flavor is still good. For a gluten-free option, use gluten-free crescent roll dough—it’s available at most larger grocery stores now, and it works surprisingly well. If you can’t find jalapenos, you can use mini sweet peppers instead, but you’ll lose a little bit of that warm, smoky flavor.
Equipment Needed
You don’t need a fancy kitchen to make these mummy poppers. I made my first batch in a tiny apartment kitchen with a mismatched set of bowls and a baking sheet that was older than I was. Here’s what you’ll actually need:
- Baking sheet (half-sheet size, about 13×18 inches): Line it with parchment paper or a silicone baking mat. I prefer parchment because cleanup is faster—just toss it out when you’re done.
- Small mixing bowl: For the cream cheese filling. Any bowl will do, but a medium-sized one gives you room to mix without spilling.
- Sharp paring knife: For cutting the jalapenos in half and scraping out the seeds. A small spoon works too, but a knife gives you more control.
- Cutting board: Something sturdy that won’t slide around. I use a wooden one, but plastic is fine.
- Pastry brush (or a small spoon): For applying the egg wash. If you don’t have a pastry brush, just use the back of a spoon to spread it—works perfectly.
- Kitchen scissors or a pizza cutter: For cutting the crescent roll dough into strips. Scissors are actually easier for this because you can snip right over the baking sheet without making a mess.
- Measuring spoons: For the garlic powder, onion powder, and salt. Eyeballing is fine, but measuring keeps the flavor consistent.
- Rubber spatula: For mixing the filling. A fork works in a pinch, but a spatula gets every last bit of cream cheese out of the bowl.
If you don’t have a pastry brush, don’t stress. I’ve used a paper towel dipped in egg wash before, and it worked fine. The goal is just to get a thin layer on the dough. For the baking sheet, any rimmed sheet will do—just make sure it’s not too small or the poppers will crowd each other and steam instead of getting crispy.
Preparation Method
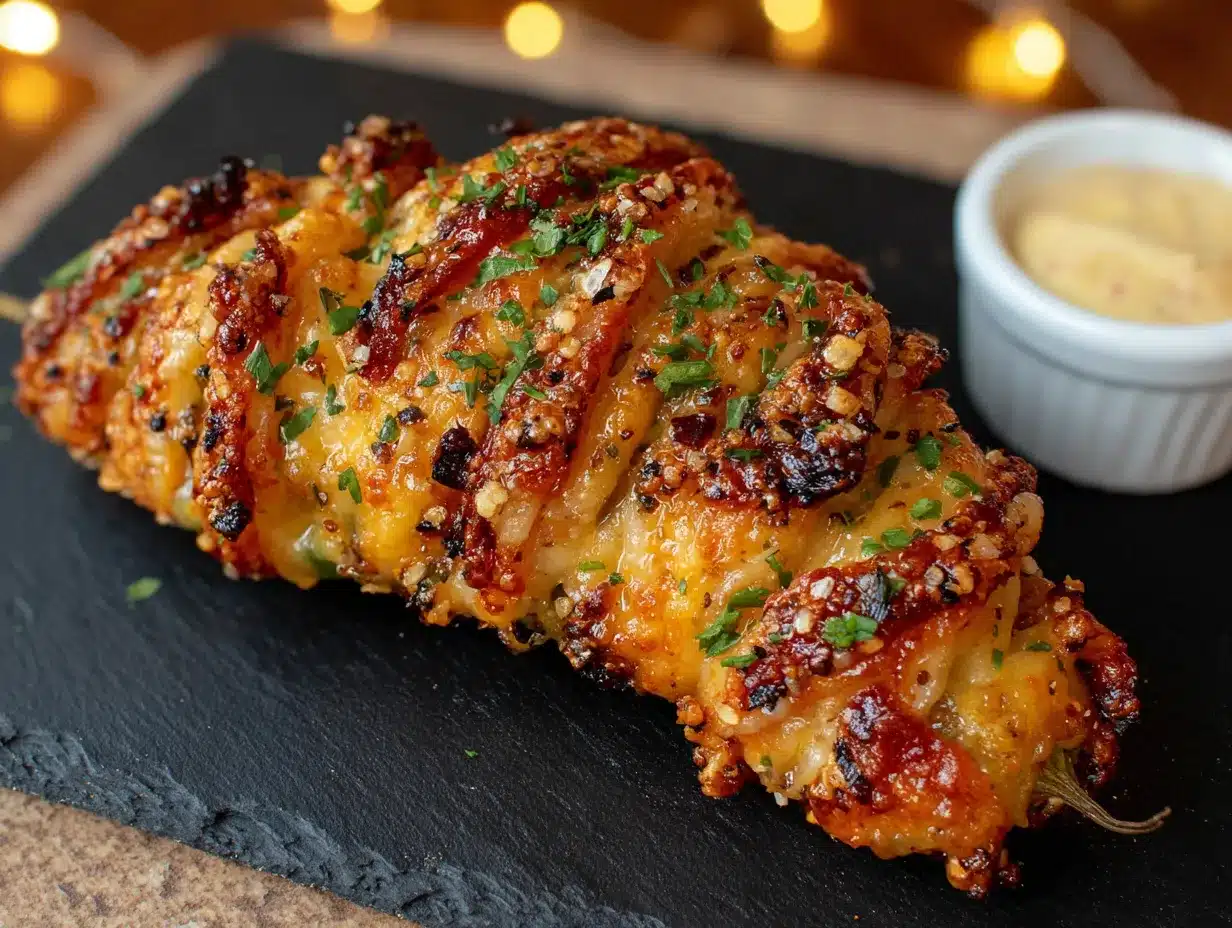
Let me walk you through this step by step. I’ve made these so many times now that I could do it in my sleep, but I remember how confusing the first batch was—especially the wrapping part. Take your time, and don’t worry if your mummies look a little messy. Mine still do sometimes, and they taste just as good.
- Preheat your oven to 375°F (190°C). Line your baking sheet with parchment paper. While the oven heats, take the cream cheese out of the fridge so it can soften. If you forget (I do this all the time), you can microwave it for 10–15 seconds—just watch it so it doesn’t melt.
- Prepare the jalapenos. Wash them well and pat them dry. Cut each jalapeno in half lengthwise, from the stem down to the tip. Use your paring knife to carefully scrape out the white membranes and seeds. This is where most of the heat lives, so be thorough. I like to use a small spoon for this—it’s gentler on the pepper walls. If you have sensitive skin, wear gloves or wash your hands immediately after. (I learned that one the hard way when I rubbed my eye an hour later.)
- Make the filling. In your small mixing bowl, combine the softened cream cheese, shredded cheddar, garlic powder, onion powder, salt, and a tiny pinch of black pepper. Mix with your rubber spatula until everything is smooth and evenly combined. Taste a tiny bit—it should be creamy and savory, not spicy. If it tastes flat, add another pinch of salt.
- Stuff the jalapenos. Using a small spoon or your fingers, fill each jalapeno half with the cream cheese mixture. Don’t overstuff—you want it level with the edge of the pepper, not mounded on top. A rounded teaspoon per half is usually perfect. Place them on the prepared baking sheet, cut side up, with a little space between each one.
- Prepare the mummy wrappers. Open the can of crescent roll dough. Unroll it carefully—it usually separates into eight triangles along the perforated lines. Use your kitchen scissors or pizza cutter to cut each triangle lengthwise into thin strips. I aim for about 4–5 strips per triangle, about half an inch wide. They don’t have to be perfect; mummies are supposed to look a little ragged.
- Wrap the poppers. Take one strip of dough and wrap it around a stuffed jalapeno half, starting at one end and working your way to the other. Leave a small gap near the top so you can see the “face” of the mummy. The dough should overlap slightly but not be too tight—you want it to puff up as it bakes. Press the end of the strip gently to seal it. Repeat with the remaining poppers. This part takes a little practice, but after three or four, you’ll get into a rhythm.
- Apply the egg wash. In a small bowl, whisk the egg with one tablespoon of water until it’s frothy. Use your pastry brush (or the back of a spoon) to brush a thin layer over all the dough strips. This is what gives them that beautiful golden-brown color. Don’t skip this step—I did once, and my mummies looked like sad, pale ghosts.
- Bake. Place the baking sheet in the preheated oven and bake for 15–18 minutes, or until the dough is golden brown and the filling is bubbly. The edges of the dough should be crispy and flaky. If you want them extra golden, you can switch the oven to broil for the last 1–2 minutes, but watch them closely—they burn fast.
- Cool and decorate. Let the poppers cool on the baking sheet for 5 minutes. They are extremely hot inside—the cream cheese holds heat like a little lava pocket. After they’ve cooled slightly, press two candy eyes onto the exposed cream cheese at the top of each mummy. If the eyes won’t stick, dab a tiny bit of cream cheese on the back as “glue.”
- Serve warm. Arrange them on a platter and watch them disappear. I like to serve them with a small bowl of ranch dressing or sour cream for dipping, but they’re fantastic on their own.
Sensory cues to watch for: When you mix the filling, it should be smooth and easy to spread, not crumbly. When you wrap the dough, it should feel pliable and slightly stretchy—if it tears, just press it back together. When you pull the baking sheet out of the oven, the kitchen will smell like buttery, cheesy goodness, and the dough should be a deep golden brown with slightly darker edges.
Common issue: If your dough strips are too thick, they won’t cook through in the center. Keep them thin—about the width of your pinky finger. If the filling leaks out during baking, you probably overstuffed the peppers. No big deal—just scrape it off and eat it as a chef’s snack.
Cooking Tips & Techniques
I have burned, undercooked, and generally mangled my fair share of these poppers. Here are the lessons I learned so you don’t have to repeat them.
Don’t skip the seed removal. The first time I made these, I got lazy and left a few seeds in. My kids took one bite and immediately reached for their water cups. The seeds are where the heat lives. If you want to be absolutely sure your poppers are kid-friendly, scrape those jalapeno cavities clean. A melon baller works great for this if you have one.
Keep the dough cold. Crescent roll dough gets sticky and hard to work with if it warms up too much. If your kitchen is hot, or if you’re a slow wrapper (no judgment—I am too), pop the dough back in the fridge for 5 minutes when it starts feeling tacky. It makes a huge difference.
Space them out. I once tried to cram 20 poppers onto one baking sheet. The ones in the middle came out pale and soggy because they were steaming instead of baking. Give each popper at least an inch of space on all sides. If you need to, use two baking sheets and rotate them halfway through.
Multitask wisely. While the cream cheese is softening, wash and cut your jalapenos. While the poppers are baking, clean up your workspace and set out the candy eyes. This recipe moves fast, and having everything ready before you start wrapping makes the process so much smoother.
For extra crispiness: Bake the poppers on the middle rack of the oven. If you put them too low, the bottoms will burn before the tops are golden. If you put them too high, the tops will brown but the dough underneath will stay doughy.
My biggest failure: I once forgot to add the egg wash entirely. The poppers came out looking like pale, sad little blobs. They still tasted fine, but nobody was excited to eat them. Presentation matters, especially when you’re trying to get kids on board. That golden crust is what makes them look like actual food instead of science experiments.
Timing strategy: If you’re making these for a party, you can prep the stuffed jalapenos (without the dough) up to a day ahead. Keep them in an airtight container in the fridge. Then, on game day, just wrap, egg wash, and bake. It saves a ton of time and stress.
Variations & Adaptations
One of the best things about this recipe is how easy it is to change up. I have tried several variations over the past few months, and here are the ones that actually worked.
Bacon-wrapped version: Before wrapping the poppers in dough, wrap each one with half a slice of cooked, crumbled bacon. The smoky, salty flavor pairs beautifully with the cream cheese. Just make sure the bacon is fully cooked first—otherwise, it will stay chewy inside the dough. My husband calls these the “adult version,” and they disappear even faster than the originals.
Spicy version (for the grown-ups): If you want to keep some heat for yourself, mix a teaspoon of chopped pickled jalapenos or a pinch of cayenne pepper into the cream cheese filling. You can also add a small piece of fresh jalapeno seed (just one!) to a few poppers and mark them with a toothpick so you know which ones are hot.
Vegetarian-friendly: These are already vegetarian, but if you want to add some extra veggies, finely dice some red bell pepper or green onion and mix it into the filling. It adds color and a little crunch without changing the flavor too much.
Dairy-free adaptation: Use vegan cream cheese and vegan shredded cheddar. I tested this with a friend who is lactose intolerant, and it worked surprisingly well. The texture was slightly less creamy, but the flavor was still great. Just make sure to let the vegan cream cheese soften fully—it can be a little stiff straight out of the fridge.
Air fryer method: If you have an air fryer, these cook beautifully in it. Preheat the air fryer to 350°F (175°C). Place the wrapped poppers in the basket in a single layer (you may need to work in batches). Cook for 8–10 minutes, flipping halfway through, until the dough is golden and crispy. The air fryer gives them an extra-crunchy exterior that my kids love.
My personal favorite twist: I once made a batch with a tiny cube of pepper jack cheese hidden inside the cream cheese filling. It created a little pocket of melted, spicy cheese in the center. I called them “surprise mummies,” and my kids thought it was the best thing ever. Just be careful—the cheese gets extremely hot, so let them cool for an extra minute before serving.
Serving & Storage Suggestions
These poppers are best served warm, straight from the oven, when the dough is still flaky and the filling is gooey. I like to arrange them on a large platter with the mummy faces facing outward so everyone can see the cute little eyes. They’re perfect for game-day spreads alongside wings, chips and dip, or a big bowl of chili.
Dipping sauces: Ranch dressing is the classic choice, but sour cream works beautifully too. For a little extra kick, mix some hot sauce into the sour cream. My kids actually prefer ketchup (don’t judge—it works), and I’ve seen adults dip them in barbecue sauce. Honestly, they’re good with almost anything.
What to serve with them: These poppers are rich and cheesy, so I like to balance them with something fresh. A simple side salad with a tangy vinaigrette or a bowl of crunchy carrot and celery sticks works perfectly. If you’re making a full meal out of them, pair them with slow cooker chicken tacos for a fun, hands-on dinner that everyone will love.
Storage instructions: If you have leftovers (which is rare in my house), let them cool completely, then store them in an airtight container in the refrigerator for up to 3 days. The dough will soften a little, but they’ll still taste great.
Reheating methods: The best way to reheat these is in the oven at 350°F (175°C) for about 5–7 minutes. This crisps the dough back up. You can also use an air fryer at 350°F for 3–4 minutes. The microwave works in a pinch, but the dough will be soft and a little chewy—still tasty, just not as crispy.
Freezer instructions: You can freeze these either before or after baking. To freeze before baking, assemble the poppers completely (including the egg wash) and place them on a parchment-lined baking sheet. Freeze until solid, then transfer them to a freezer bag. When you’re ready to bake, pop them straight from the freezer into a 375°F oven—just add 5–7 minutes to the baking time. To freeze after baking, let them cool completely, then freeze in a single layer on a baking sheet before transferring to a bag. Reheat from frozen in the oven or air fryer.
How flavors develop over time: These poppers are actually best the day they’re made. The dough is at its flakiest, and the filling is at its creamiest. After a day in the fridge, the dough softens and absorbs a little moisture from the filling. They’re still good—especially if you reheat them in the oven—but they won’t have that same fresh-from-the-oven magic.
Nutritional Information & Benefits
I’m not a nutritionist, but I do pay attention to what goes into my family’s food. Here’s a rough breakdown for one popper (based on the recipe as written, without any variations):
| Nutrient | Amount per popper |
|---|---|
| Calories | 120–140 |
| Total Fat | 9–10g |
| Saturated Fat | 5–6g |
| Cholesterol | 25–30mg |
| Sodium | 200–250mg |
| Total Carbohydrates | 7–8g |
| Dietary Fiber | 0.5g |
| Sugars | 1–2g |
| Protein | 4–5g |
Health benefits of key ingredients: Jalapenos are surprisingly good for you. They’re packed with vitamin C (more than an orange, gram for gram) and vitamin A, which supports eye health. The capsaicin in jalapenos can also help boost metabolism, though the amount in these poppers is minimal since we remove the seeds. Cream cheese provides calcium and a little protein, and cheddar adds even more calcium. The crescent roll dough isn’t exactly a health food, but it’s a small amount per serving—about the same as a slice of bread.
Dietary considerations: This recipe is vegetarian as written. For a gluten-free version, use gluten-free crescent roll dough. For a dairy-free version, use vegan cream cheese and vegan cheddar. These poppers are not low-carb (about 7–8g per serving), but they’re not terrible either—especially if you’re only having two or three as part of a larger spread.
Potential allergens: This recipe contains dairy (cream cheese, cheddar) and gluten (crescent roll dough). It also contains eggs (in the egg wash). If you have allergies, be sure to check the labels on your crescent roll dough—some brands may contain soy or other additives.
My personal perspective: I don’t think every snack needs to be a superfood. These poppers are a treat, and they’re meant to be enjoyed. But I feel good about serving them because they use real ingredients, they’re not fried, and they’re portion-controlled. Plus, my kids are eating vegetables (jalapenos count, right?) without complaining. That’s a win in my book.
Conclusion
These mummy jalapeno poppers are proof that you don’t need a big budget or fancy skills to make something that feels special. They’re fun, they’re cheap, and they’re the kind of snack that brings people together—even the ones who swore they hated spicy food. I love that I can make a whole batch for under ten dollars and still get the same reaction I’d get from a platter of expensive appetizers.
I hope you give these a try, whether it’s for game day, a Halloween party, or just a random Tuesday when you need something playful on the table. Don’t be afraid to make them your own—add bacon, swap the cheese, or skip the candy eyes if you’re feeling lazy. They’ll still be delicious. And if your kids end up standing on a stool, stealing them off the baking sheet like mine did? Well, that’s just part of the fun.
I’d love to hear how yours turn out! Drop a comment below and let me know what variations you tried, or tag me in your photos if you share them online. And if you’re looking for more budget-friendly game-day snacks, check out my easy homemade nachos or three-ingredient meatballs—they’re just as simple and just as crowd-pleasing. Happy cooking, and enjoy every last bite!
Frequently Asked Questions
Can I make these ahead of time for a party?
Absolutely! You can prepare the stuffed jalapenos (without the dough) up to 24 hours in advance. Store them in an airtight container in the fridge. When you’re ready to serve, just wrap them in the dough, apply the egg wash, and bake. It saves a ton of time on game day.
How do I make these less spicy for my kids?
The key is removing all the white membranes and seeds from the jalapenos. That’s where the heat lives. If you want to be extra safe, you can also blanch the jalapeno halves in boiling water for 30 seconds before stuffing them—this leaches out even more capsaicin. Or, use mini sweet peppers instead of jalapenos for a completely mild version.
Can I use a different type of cheese?
Yes! Monterey Jack, pepper jack, or even mozzarella work well. Sharp cheddar is my favorite because it has a strong flavor that stands up to the creamy base. If you use a milder cheese, you might want to add a little extra salt or garlic powder to keep the filling from tasting flat.
What if I don’t have crescent roll dough?
You can use puff pastry instead—just cut it into thin strips the same way. Puff pastry will give you a flakier, more buttery wrapper, but it’s a little more expensive. You can also use refrigerated pizza dough, but it will be thicker and chewier. Crescent rolls are the easiest and most budget-friendly option.
Can I freeze these after baking?
Yes! Let them cool completely, then freeze them in a single layer on a baking sheet. Once they’re frozen solid, transfer them to a freezer bag. To reheat, pop them in a 350°F oven for 5–7 minutes, or in an air fryer for 3–4 minutes. They won’t be quite as crispy as fresh, but they’ll still be delicious.
Pin This Recipe!
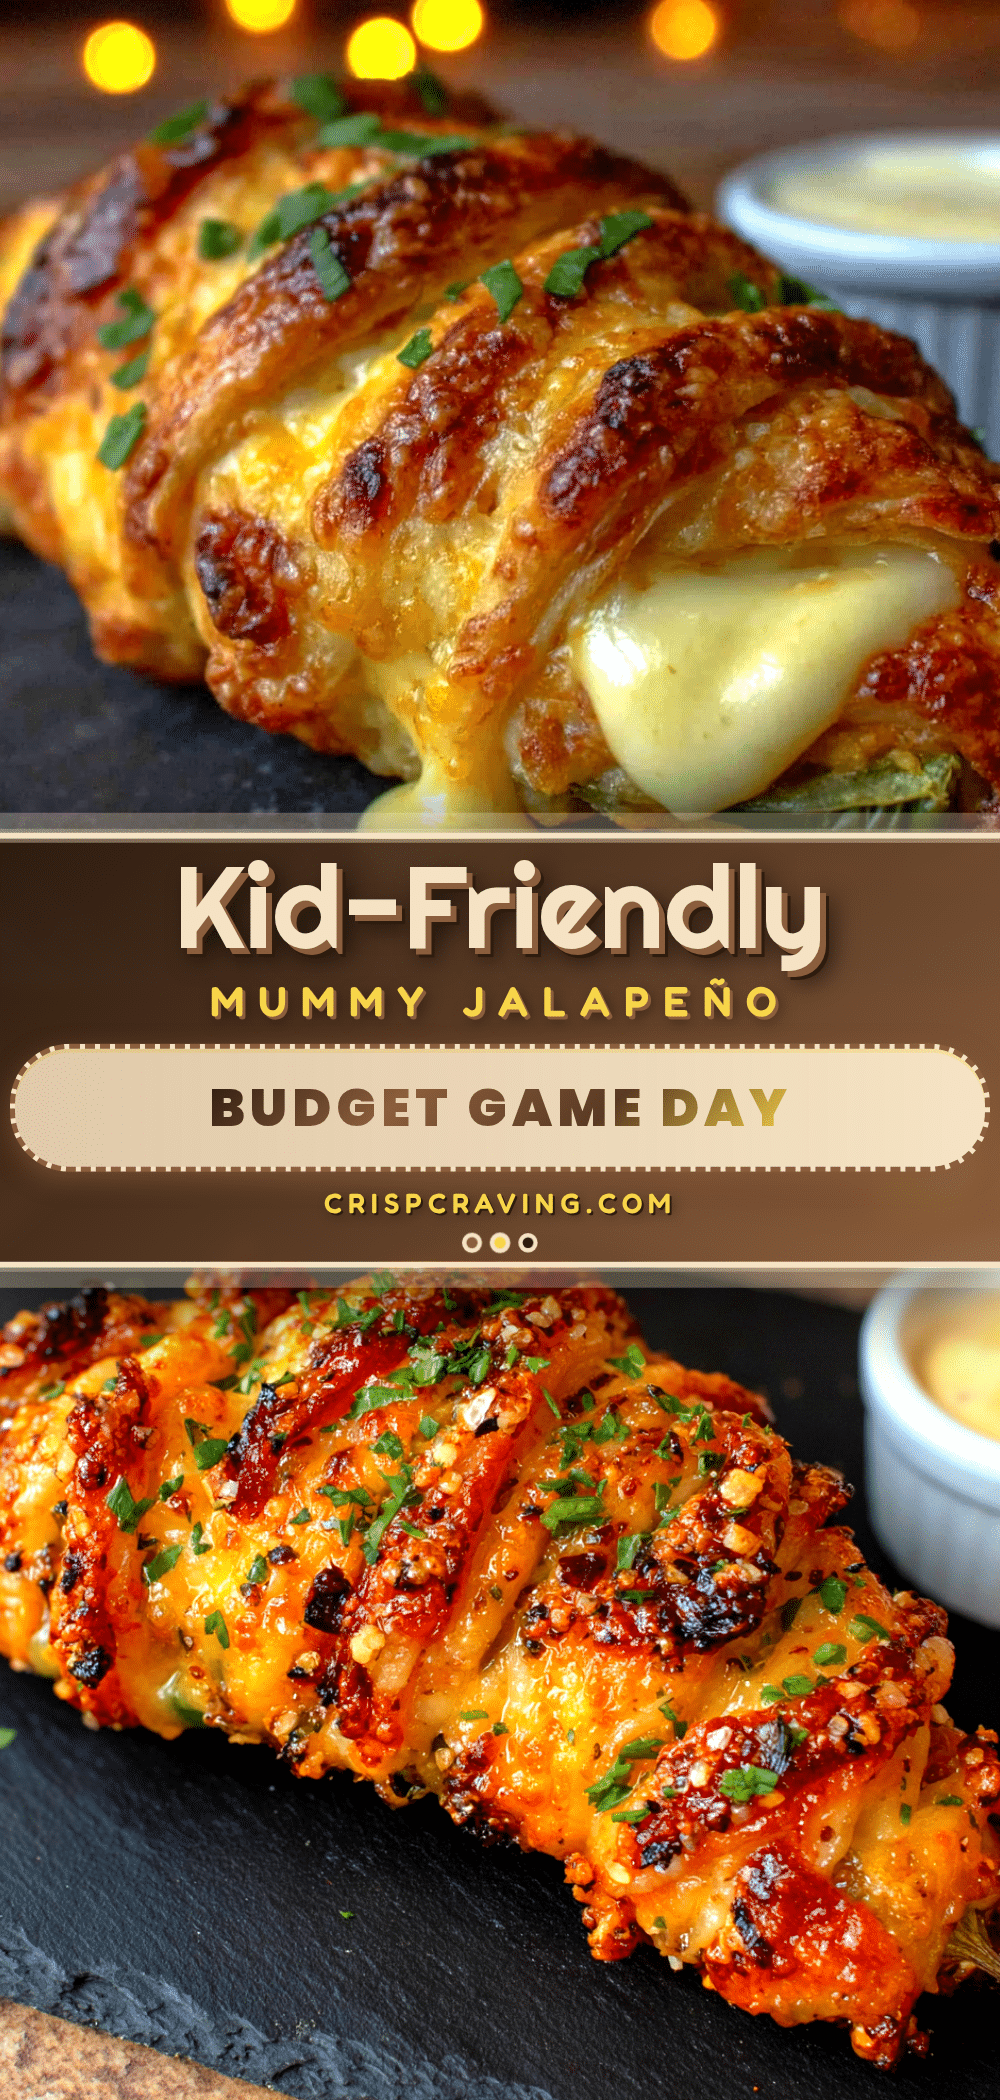
Kid-Friendly Mummy Jalapeno Poppers: Easy Budget Game Day Snack

These mummy jalapeno poppers are a fun, budget-friendly game day snack that even spice-haters will love. Cream cheese and cheddar mellow the heat, while crescent roll dough wraps them up like little mummies.
- Prep Time: 15 minutes
- Cook Time: 18 minutes
- Total Time: 33 minutes
- Yield: 16–20 poppers 1x
- Category: Appetizer
- Cuisine: American
Ingredients
- 8–10 medium fresh jalapenos
- 8 oz cream cheese, softened
- 1 cup shredded cheddar cheese
- 1 can (8 oz) refrigerated crescent roll dough
- 1/2 teaspoon garlic powder
- 1/4 teaspoon onion powder
- 1/4 teaspoon salt
- 1 pinch black pepper
- 1 egg + 1 tablespoon water (for egg wash)
- Candy eyes (optional, for decoration)
Instructions
- Preheat oven to 375°F (190°C). Line a baking sheet with parchment paper. Let cream cheese soften.
- Wash and dry jalapenos. Cut each in half lengthwise. Scrape out white membranes and seeds thoroughly.
- In a small bowl, combine softened cream cheese, shredded cheddar, garlic powder, onion powder, salt, and a pinch of black pepper. Mix until smooth.
- Fill each jalapeno half with about a rounded teaspoon of the cream cheese mixture. Place on prepared baking sheet, cut side up.
- Unroll crescent roll dough and separate into 8 triangles. Cut each triangle lengthwise into 4–5 thin strips (about 1/2 inch wide).
- Wrap each stuffed jalapeno with dough strips, starting at one end and leaving a small gap near the top for the ‘face.’ Press ends to seal.
- Whisk egg with 1 tablespoon water. Brush a thin layer of egg wash over all dough strips.
- Bake for 15–18 minutes, until dough is golden brown and filling is bubbly. Optionally, broil for 1–2 minutes for extra color.
- Let cool on baking sheet for 5 minutes. Press candy eyes onto exposed cream cheese at the top of each mummy.
- Serve warm, optionally with ranch dressing or sour cream for dipping.
Notes
For less heat, remove all white membranes and seeds. Keep dough cold for easier handling. Space poppers at least 1 inch apart on baking sheet. For extra crispiness, bake on middle rack. Can prep stuffed jalapenos (without dough) up to 24 hours ahead.
Nutrition
- Serving Size: 1 popper
- Calories: 130
- Sugar: 1.5
- Sodium: 225
- Fat: 9.5
- Saturated Fat: 5.5
- Carbohydrates: 7.5
- Fiber: 0.5
- Protein: 4.5
Keywords: mummy jalapeno poppers, game day snack, budget-friendly, kid-friendly, easy appetizer, Halloween snack



