Love this? Save it for later!
Share the inspiration with your friends
There used to be a little bakery tucked between a hardware store and a laundromat in my hometown—the kind of place with a cracked bell over the door and a handwritten menu that changed with the seasons. They made these incredible Rice Krispie Treats that weren’t like any I’d ever tasted. They were cut into perfect triangles, striped with orange and yellow, and topped with a tiny candy corn on top. When they closed their doors three years ago—the landlord raised the rent, and they just couldn’t swing it—I honestly felt a little lost. That sounds dramatic, I know, but those treats were the highlight of my kids’ Halloween season every single year.
After about six attempts—some too sticky, some too hard, one that my husband politely described as “a science experiment”—I finally cracked the code. The secret, let me tell you, is in the timing and the way you layer the colors. You can’t just dump everything in one pot and hope for the best. No, you have to be a little patient, but the payoff is so worth it. I remember the Tuesday afternoon it finally worked; my youngest walked into the kitchen, saw the pan on the counter, and just stopped. “Mom,” she said, “they look like the bakery ones.” That was the moment I knew I had to share this with you.
Maybe you’ve been there—chasing a recipe that feels just out of reach, or maybe you’re just looking for a fun, easy Halloween treat that won’t have you pulling your hair out. Either way, these Kid-Approved Candy Corn Rice Krispie Treats are exactly what you need. They’re simple enough to make on a school night, but they look like you spent hours on them. And honestly, the best part? They taste just like that bakery version I’ve been missing all these years. The marshmallow is perfectly gooey, the cereal stays crunchy, and that candy corn on top gives it just the right amount of sweetness. I keep making them because they make my kids happy, and honestly, they make me happy too.
Why You’ll Love This Recipe
I’ve tested this recipe more times than I care to admit, and I can tell you with confidence—this is the version you’ll come back to year after year. It’s not just another Rice Krispie Treat recipe; it’s the one that nails the texture, the flavor, and the fun factor without any fuss. Here’s why it works so well for busy families like ours.
- Quick & Easy: From start to finish, you’re looking at about 20 minutes of active time. The hardest part is waiting for them to set, and honestly, that’s just a good excuse to sip your coffee while the kids peek at the pan every five minutes.
- Simple Ingredients: You probably have everything in your pantry right now—marshmallows, butter, cereal, and candy corn. No special trips to the fancy grocery store required. I mean it, I’ve made these with whatever brand of cereal was on sale, and they turn out great every time.
- Perfect for Halloween: Whether it’s a classroom party, a spooky movie night, or just a fun after-school treat, these fit right in. They’re festive without being too complicated, and kids absolutely love the candy corn on top.
- Crowd-Pleaser: I’ve brought these to potlucks, neighborhood gatherings, and even my book club (don’t judge), and they disappear faster than anything else on the table. Kids and adults alike can’t resist that combination of marshmallow and candy corn.
- Unbelievably Delicious: The texture is what sets these apart. The marshmallow coating is soft and chewy, the cereal stays perfectly crisp, and the candy corn adds a little pop of sweetness. It’s comfort food at its finest.
What makes this recipe different from all the others I tried? It’s all about the layering technique. Instead of mixing everything together and hoping for the best, you create distinct stripes of orange and yellow that look like actual candy corn. It’s a small detail, but it makes a huge difference in both presentation and taste. Plus, I’ve tested this with both salted and unsalted butter, and honestly, the salted butter gives it that little extra something that makes you close your eyes after the first bite. It’s comfort food reimagined—faster, easier, but with the same soul-soothing satisfaction. Perfect for impressing your kids without stressing yourself out.
What Ingredients You Will Need
This recipe uses simple, pantry-friendly ingredients to create something that looks and tastes like it came from a bakery. The key is using good-quality marshmallows and fresh cereal—stale cereal will give you a sad, chewy result. Trust me on that one.
- Unsalted butter, 6 tablespoons (85g) — I prefer using unsalted so I can control the salt level, but salted butter works fine if that’s what you have. Just skip the extra pinch of salt later. (adds richness and helps prevent sticking)
- Mini marshmallows, 10 cups (about 340g) — I’ve tested this with both Jet-Puffed and store-brand, and honestly, the name brand melts a little smoother. If you use store-brand, just be patient and stir a bit longer. (the base of the gooey texture)
- Rice Krispies cereal, 8 cups (about 240g) — Make sure it’s fresh! If your box has been open for months, the cereal will be stale and your treats will be chewy instead of crispy. I like to buy a fresh box for this recipe. (provides the signature crunch)
- Orange food coloring, 15-20 drops — I use gel food coloring because it gives a vibrant color without thinning the marshmallow mixture. Liquid food coloring works too, but you’ll need more drops. (creates the orange stripe)
- Yellow food coloring, 15-20 drops — Same deal here—gel is best for a bright, sunny yellow. (creates the yellow stripe)
- Candy corn, 1 cup (about 150g) — I love using the classic Brach’s candy corn for this, but any brand works. You’ll need about 40-50 pieces for decorating. (adds the festive finishing touch)
- Vanilla extract, 1 teaspoon — Pure vanilla extract gives the best flavor, but imitation works in a pinch. (enhances the sweetness)
- Salt, ¼ teaspoon — Just a pinch to balance all that sweetness. It sounds weird, but it makes a difference. (balances flavors)
For the best results, I recommend using a fresh bag of mini marshmallows—they melt more evenly than ones that have been sitting in your pantry for months. And if you’re making these for a school event, check if there are any allergy concerns. The cereal is gluten-free, but candy corn sometimes contains traces of wheat, so double-check the label if that’s a concern.
One more thing—if you want to make these dairy-free, you can swap the butter for a vegan butter stick (I like Earth Balance). The texture will be slightly different, but they’ll still be delicious. And for a fun twist, try using the autumn mix candy corn that has the little pumpkins mixed in. My kids go crazy for that version.
Equipment Needed
You don’t need fancy equipment for these treats, which is part of why I love them. Here’s what you’ll need:
- Large pot (at least 5-quart) — You need room to stir everything without making a mess. I use my trusty Dutch oven, but any large pot works.
- 9×13-inch baking pan — This gives you the perfect thickness for layering. If you only have a 9×9 pan, the treats will be thicker, and you’ll need to adjust your layering slightly.
- Parchment paper — This is non-negotiable. Without it, your treats will stick to the pan, and you’ll be scraping marshmallow off for days. I like to leave overhang on two sides for easy lifting.
- Silicone spatula — A good spatula makes stirring the marshmallow mixture so much easier. Metal spoons get too sticky, and wooden spoons can leave splinters.
- Small bowls (2-3) — You’ll need these for dividing the marshmallow mixture and mixing in the food coloring.
- Measuring cups and spoons — Standard set for accurate measurements.
- Sharp knife — A chef’s knife works best for clean cuts. A serrated knife can work, but it tends to squish the treats.
If you don’t have a silicone spatula, a wooden spoon coated in a little cooking spray works fine. And if you’re on a budget, dollar store parchment paper works just as well as the expensive stuff. I’ve been there, and honestly, it’s all the same once it’s in the pan.
Preparation Method
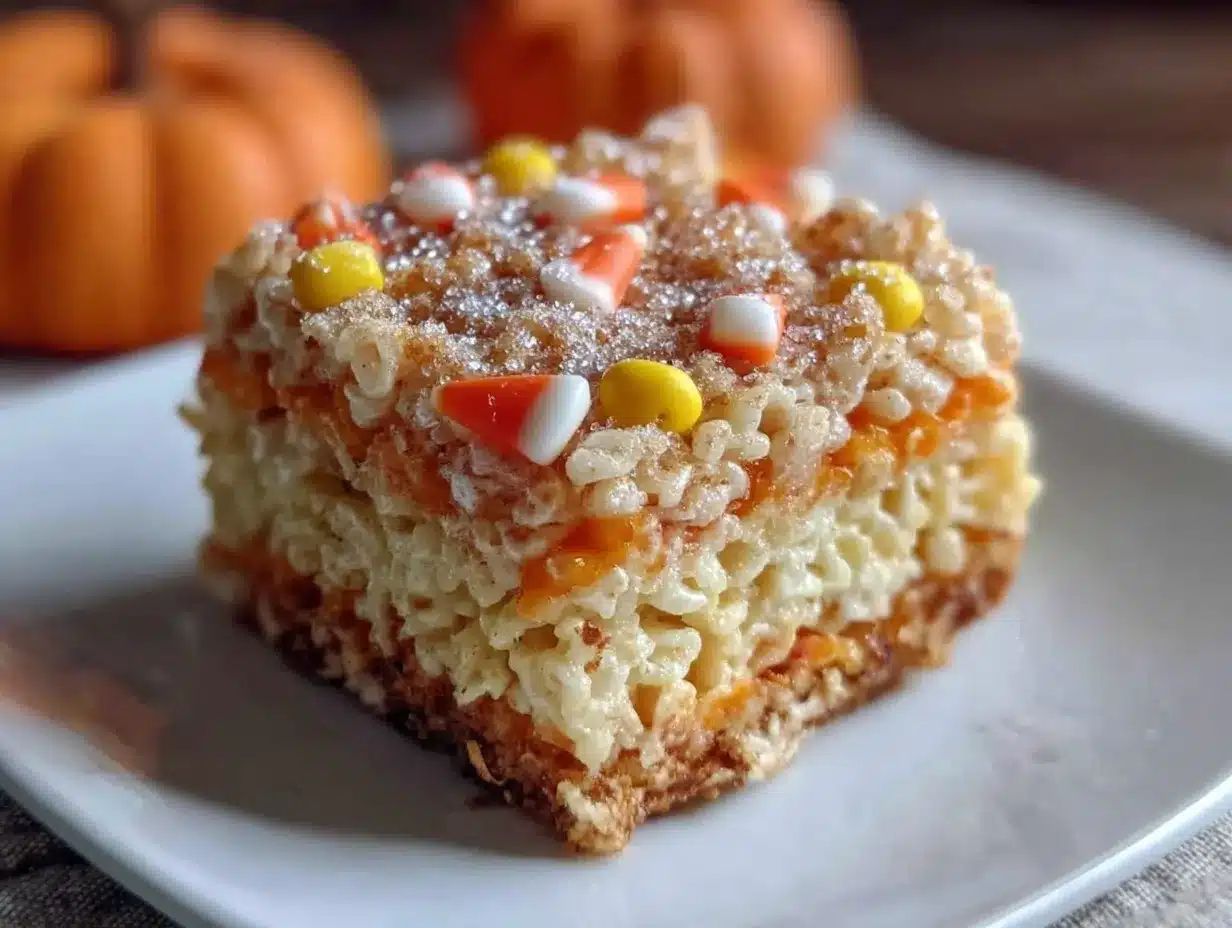
Alright, let’s get to the fun part. I’m going to walk you through this step by step, so even if you’ve never made Rice Krispie Treats before, you’ll nail it. Trust me, if I can do this after six failed attempts, you can do it on your first try.
- Prep your pan. Line your 9×13-inch baking pan with parchment paper, leaving about 2 inches of overhang on the long sides. This will make lifting the treats out so much easier later. Lightly spray the parchment with non-stick cooking spray. Set it aside.
- Melt the butter. In your large pot, melt the 6 tablespoons of unsalted butter over medium-low heat. Don’t rush this—if the butter burns, your treats will have a weird, bitter taste. I learned that the hard way. Once it’s fully melted, add the ¼ teaspoon of salt and stir.
- Add the marshmallows. Pour in all 10 cups of mini marshmallows and stir constantly with your silicone spatula. Keep the heat on medium-low. The marshmallows will start to puff up and then melt down. This takes about 5-7 minutes. Don’t walk away! Burnt marshmallow smells awful and ruins the whole batch.
- Add the vanilla. Once the marshmallows are completely melted and smooth, remove the pot from the heat. Stir in the 1 teaspoon of vanilla extract. The mixture will be glossy and stretchy. This is where you need to work quickly—the marshmallow sets fast.
- Divide the mixture. Working quickly, divide the marshmallow mixture evenly into three bowls. You’ll have about 1 cup of mixture in each bowl. One bowl will stay plain (for the white layer), one will get the yellow food coloring, and one will get the orange food coloring.
- Color the mixtures. Add 15-20 drops of yellow food coloring to one bowl and stir until the color is even. Do the same with the orange food coloring in another bowl. Leave the third bowl plain. If the mixture starts to thicken, pop the bowls in the microwave for 10 seconds to loosen them up.
- Layer the cereal. Here’s the important part. You need to work in thirds. First, add about 2 ½ cups of Rice Krispies to the plain (white) bowl and stir until the cereal is evenly coated. Spread this mixture in an even layer in your prepared pan. Press it down gently with a spatula or your hands (lightly sprayed with cooking spray).
- Add the yellow layer. Add another 2 ½ cups of cereal to the yellow marshmallow mixture and stir. Spread this over the white layer, pressing gently to even it out. Don’t press too hard—you want distinct layers, not a muddy mess.
- Finish with the orange layer. Add the remaining cereal to the orange marshmallow mixture and stir. Spread this over the yellow layer, pressing gently. You should now have three distinct stripes: white on the bottom, yellow in the middle, orange on top.
- Add the candy corn. While the top layer is still warm, gently press the candy corn into the surface in a pattern. I like to do rows of three, but you can get creative. Just make sure they’re slightly embedded so they stay put when you cut the treats.
- Let them set. Allow the treats to cool at room temperature for at least 30 minutes. Don’t rush this—if you cut them while they’re warm, they’ll be a gooey mess. I know it’s tempting, but patience pays off here.
- Cut and serve. Once set, use the parchment overhang to lift the treats out of the pan. Place them on a cutting board and use a sharp knife to cut them into squares or rectangles. I like to cut them into 12 large squares, but you can do smaller ones for a party.
One thing I want to mention—if your hands get sticky while pressing the layers, just spray them lightly with cooking spray. It makes a world of difference. And if you’re making these with kids, let them help with the layering and candy corn placement. It’s a fun, messy activity that they’ll love.
Cooking Tips & Techniques
After all those failed attempts, I’ve learned a few things that make this recipe foolproof. Let me share them so you don’t have to make the same mistakes I did.
Don’t overheat the marshmallows. This is the number one mistake people make. If you cook the marshmallows over high heat or for too long, they’ll become hard and rubbery once they cool. Keep the heat on medium-low and stir constantly. The moment they’re smooth and glossy, take them off the heat. I once left them on for an extra minute “just to be sure,” and I ended up with treats that could have doubled as hockey pucks.
Work in stages. The biggest challenge with layered treats is that the marshmallow mixture sets quickly. That’s why I recommend dividing the mixture into bowls before adding the cereal. This way, you’re not rushing to color and mix everything at once. If the mixture starts to stiffen, just microwave each bowl for 10-15 seconds to soften it up again.
Use a light touch when pressing. I know it’s tempting to really pack the mixture down, but that’s what makes dense, hard treats. Gently press the mixture into an even layer. You want the cereal to stay intact so you get that satisfying crunch with every bite. My husband used to press them down like he was making a sandcastle, and they always turned out too dense. Now he knows better.
Time your candy corn placement. Press the candy corn into the top layer while the mixture is still warm but not hot. If you wait too long, the marshmallow will set and the candy corn won’t stick. If you do it too soon, the candy corn might sink in too deep. Aim for about 2-3 minutes after you’ve spread the top layer. You’ll know it’s right when the candy corn stays put without disappearing into the treat.
Multitask smartly. While the marshmallow is melting, have your cereal measured and your bowls ready. I like to set everything out before I even turn on the stove. It makes the whole process so much smoother, especially if you’re doing this with kids underfoot. Trust me, there’s nothing worse than frantically measuring cereal while marshmallow burns on the stove.
Variations & Adaptations
One of the best things about this recipe is how easy it is to adapt. I’ve tried several variations over the years, and here are my favorites.
Chocolate Drizzle Version: After the treats have set, melt ½ cup of semi-sweet chocolate chips with 1 tablespoon of coconut oil and drizzle it over the top. Let the chocolate set before cutting. My kids go absolutely nuts for this version. It adds a nice contrast to the sweetness of the candy corn.
Peanut Butter Twist: Add ¼ cup of creamy peanut butter to the butter before adding the marshmallows. Stir until it’s fully incorporated. The peanut butter adds a savory note that balances the sweetness beautifully. If you have peanut allergies in the house, sunflower seed butter works great too.
Ghostly White Version: Skip the food coloring altogether and use white chocolate chips instead. Melt ½ cup of white chocolate chips with the marshmallows for an extra creamy, ghostly white treat. Top with candy eyes instead of candy corn for a spooky twist. I made these for a Halloween party last year, and they were a huge hit.
Gluten-Free Option: Good news—Rice Krispies are naturally gluten-free, but always check the label to be sure. Some generic brands may contain malt flavoring, which has gluten. If you need a certified gluten-free option, look for the specific gluten-free Rice Krispies or use a similar crispy rice cereal.
Vegan Adaptation: Use vegan butter and vegan marshmallows (Dandies brand works great). The texture will be slightly different—a bit softer—but they’re still delicious. I’ve made these for a vegan friend’s Halloween party, and no one could tell the difference.
My personal favorite variation is the chocolate drizzle version. I made it for a neighborhood potluck last fall, and someone asked me if I’d bought them from a bakery. I just smiled and said, “Nope, made ’em myself.” It felt pretty good, I won’t lie.
Serving & Storage Suggestions
These treats are best served at room temperature, but honestly, they’re delicious straight out of the fridge too. Here’s how I like to serve and store them.
Serving Temperature: Let the treats come to room temperature for about 10 minutes after cutting. This softens them just enough to make them perfectly chewy. If you serve them straight from the fridge, they’ll be a bit firmer, which some people prefer.
Presentation Ideas: Arrange the treats on a Halloween-themed platter or a simple white cake stand. The orange, yellow, and white stripes really pop against a dark background. For a party, I like to place them on a bed of orange and black sprinkles. It looks festive and keeps them from sticking to the plate.
Complementary Dishes: These treats pair wonderfully with a glass of cold milk or a warm mug of apple cider. If you’re serving them at a Halloween party, try them alongside a bowl of popcorn balls or caramel apples. The combination of sweet and salty is always a hit.
Storage Instructions: Store the treats in an airtight container at room temperature for up to 3 days. If you stack them, place a piece of parchment paper between the layers to prevent sticking. Do not refrigerate them—the cold air will make them hard and dry. Trust me, I learned this the hard way when I tried to make them ahead of time for a school party.
Freezing Instructions: You can freeze these treats for up to 2 months. Wrap each treat individually in plastic wrap, then place them in a freezer-safe bag. To thaw, let them sit at room temperature for about 30 minutes. The texture will be slightly softer, but they’ll still be delicious.
Flavor Development: These treats are actually best the day you make them, but they’re still good for a few days after. The marshmallow will soften the cereal slightly over time, so if you want that perfect crunch, make them the same day you plan to serve them. I usually make them in the morning for an afternoon party, and they’re perfect.
Nutritional Information & Benefits
Let’s be real—these are treats, not health food. But that doesn’t mean they can’t fit into a balanced diet. Here’s what you need to know.
Estimated Nutritional Values (per serving, based on 12 servings):
- Calories: 285
- Total Fat: 8g
- Saturated Fat: 5g
- Carbohydrates: 52g
- Sugar: 32g
- Protein: 2g
- Sodium: 180mg
Health Benefits: While these aren’t exactly a superfood, they do have a few redeeming qualities. The Rice Krispies are made from rice, which is a gluten-free grain (check the label). The butter provides a small amount of vitamin A, and the marshmallows are mostly air and sugar—so at least they’re not dense with calories. Plus, making them at home means you control the ingredients and portion sizes.
Dietary Considerations: This recipe is naturally nut-free (as long as your candy corn doesn’t contain traces of nuts) and can be made gluten-free with the right cereal. For a lower-sugar option, you can reduce the candy corn on top or skip it altogether. The treats will still be sweet from the marshmallows.
Potential Allergens: This recipe contains dairy (butter). If you use vegan butter and vegan marshmallows, it becomes dairy-free. Always check your candy corn label for potential cross-contamination with wheat or nuts if you’re serving people with allergies.
I personally love that these treats are a once-in-a-while indulgence. They’re perfect for Halloween, birthday parties, or just a fun weekend project with the kids. And honestly, a little sweetness never hurt anyone. Life’s too short to skip dessert.
Conclusion
So there you have it—my version of those bakery treats I’ve been chasing for years. These Kid-Approved Candy Corn Rice Krispie Treats are everything I wanted them to be: easy, fun, and absolutely delicious. They bring back that nostalgic feeling of walking into that little bakery, and I hope they bring a little joy to your kitchen too.
I really encourage you to make these your own. Add a chocolate drizzle, swap the candy corn for candy eyes, or let your kids go wild with the decorations. The beauty of this recipe is that it’s forgiving and adaptable. You really can’t mess it up (trust me, I’ve tried).
I’d love to hear how yours turn out! Drop a comment below and let me know if your kids approved, or share a photo of your creations. And if you have a variation that worked really well, please share it—I’m always looking for new ideas. Until next time, happy cooking, and remember: the best treats are the ones made with love (and a little bit of butter).
Frequently Asked Questions
Can I use regular-sized marshmallows instead of mini marshmallows?
Yes, you can! Use about 40 regular marshmallows (a 10-ounce bag) instead of the 10 cups of mini marshmallows. Just be aware that regular marshmallows take a little longer to melt, so be patient and keep stirring. The texture will be the same once they’re fully melted.
Why did my treats turn out hard and chewy?
This usually happens when the marshmallows are overheated or cooked too long. Keep the heat on medium-low and remove the pot from the stove as soon as the marshmallows are smooth and glossy. Also, make sure you’re using fresh cereal—stale cereal can make the treats chewy instead of crispy.
Can I make these treats ahead of time for a party?
Absolutely! You can make them up to 2 days in advance. Store them in an airtight container at room temperature. If you’re making them more than a day ahead, I recommend adding the candy corn just before serving so they stay fresh and pretty. The marshmallow can soften the candy corn over time.
How do I get clean, sharp cuts without squishing the treats?
Use a sharp chef’s knife and spray it lightly with cooking spray before cutting. Wipe the blade clean between cuts and re-spray as needed. This prevents the marshmallow from sticking to the knife and gives you clean edges. Also, make sure the treats are fully set before cutting—at least 30 minutes at room temperature.
Can I use a different type of cereal for this recipe?
Yes, but the texture will be different. Cocoa Pebbles or Fruity Pebbles work great for a flavor twist, but they’re smaller and more delicate, so handle them gently. You can also use a generic crispy rice cereal, but make sure it’s fresh. Avoid using anything with large pieces, like granola, as it won’t hold together as well.
Pin This Recipe!
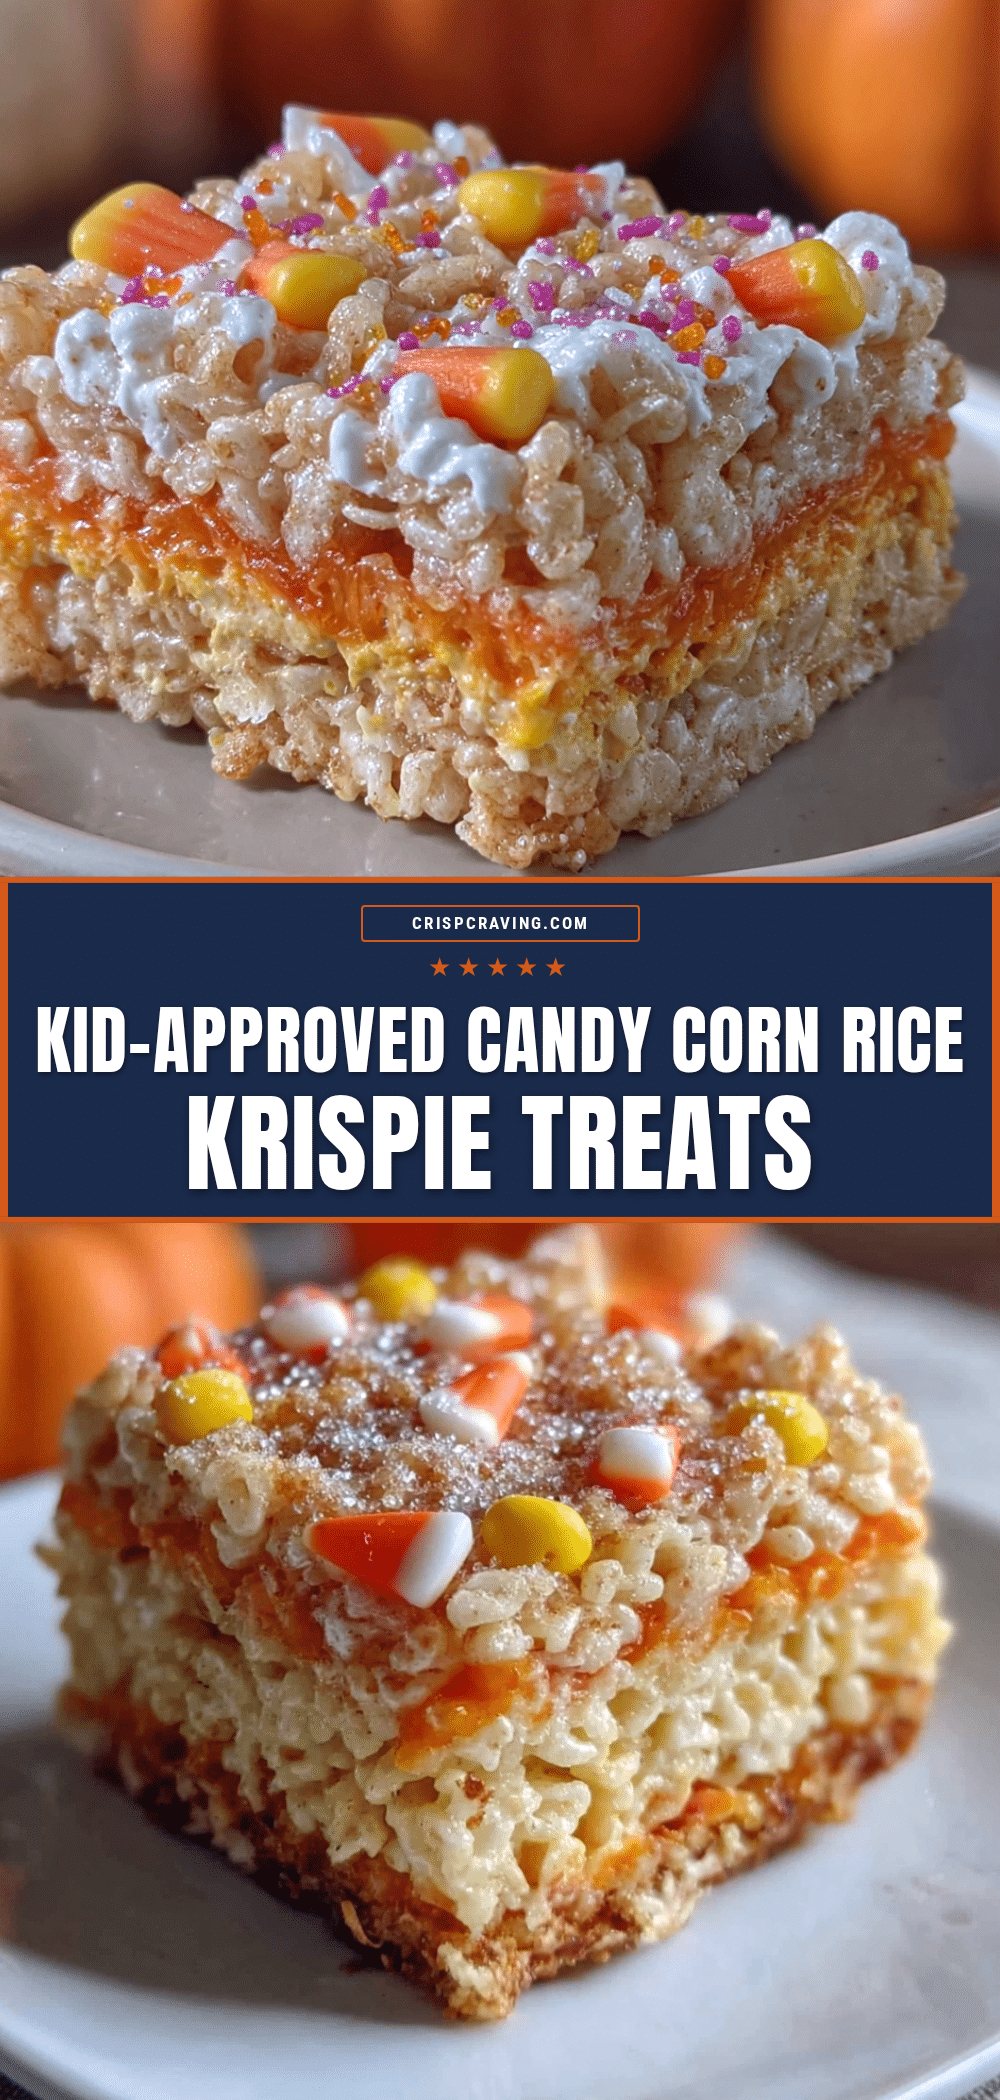
Kid-Approved Candy Corn Rice Krispie Treats: Easy Halloween Dessert
These layered Rice Krispie Treats are striped with orange and yellow, topped with candy corn, and taste just like the bakery version. They’re simple enough to make on a school night but look like you spent hours on them.
- Prep Time: 20 minutes
- Cook Time: 10 minutes
- Total Time: 1 hour (including 30 minutes setting time)
- Yield: 12 servings 1x
- Category: Dessert
- Cuisine: American
Ingredients
- 6 tablespoons (85g) unsalted butter
- 10 cups (about 340g) mini marshmallows
- 8 cups (about 240g) Rice Krispies cereal
- 15–20 drops orange food coloring (gel preferred)
- 15–20 drops yellow food coloring (gel preferred)
- 1 cup (about 150g) candy corn (about 40–50 pieces)
- 1 teaspoon vanilla extract
- ¼ teaspoon salt
Instructions
- Prep your pan. Line a 9×13-inch baking pan with parchment paper, leaving about 2 inches of overhang on the long sides. Lightly spray the parchment with non-stick cooking spray. Set aside.
- Melt the butter. In a large pot (at least 5-quart), melt the 6 tablespoons of unsalted butter over medium-low heat. Once fully melted, add the ¼ teaspoon of salt and stir.
- Add the marshmallows. Pour in all 10 cups of mini marshmallows and stir constantly with a silicone spatula over medium-low heat until completely melted and smooth, about 5-7 minutes. Remove from heat.
- Add the vanilla. Stir in the 1 teaspoon of vanilla extract until glossy and stretchy.
- Divide the mixture. Working quickly, divide the marshmallow mixture evenly into three bowls (about 1 cup each). Leave one bowl plain, add yellow food coloring to the second, and orange food coloring to the third.
- Color the mixtures. Add 15-20 drops of yellow food coloring to one bowl and stir until even. Do the same with orange food coloring in another bowl. If the mixture thickens, microwave each bowl for 10 seconds to loosen.
- Layer the cereal. Add about 2 ½ cups of Rice Krispies to the plain (white) bowl and stir until evenly coated. Spread in an even layer in the prepared pan. Press down gently.
- Add the yellow layer. Add another 2 ½ cups of cereal to the yellow marshmallow mixture and stir. Spread over the white layer, pressing gently.
- Finish with the orange layer. Add the remaining cereal to the orange marshmallow mixture and stir. Spread over the yellow layer, pressing gently. You should have three distinct stripes: white, yellow, orange.
- Add the candy corn. While the top layer is still warm, gently press the candy corn into the surface in a pattern (e.g., rows of three). Ensure they are slightly embedded.
- Let them set. Allow the treats to cool at room temperature for at least 30 minutes.
- Cut and serve. Once set, use the parchment overhang to lift the treats out of the pan. Place on a cutting board and cut into squares or rectangles with a sharp knife. Makes 12 large squares.
Notes
Don’t overheat the marshmallows or they’ll become hard and rubbery. Work in stages to prevent the marshmallow mixture from setting too quickly. Use a light touch when pressing the layers to keep the cereal crunchy. Press candy corn into the top layer while still warm but not hot. If hands get sticky, spray lightly with cooking spray.
Nutrition
- Serving Size: 1 large square
- Calories: 285
- Sugar: 32
- Sodium: 180
- Fat: 8
- Saturated Fat: 5
- Carbohydrates: 52
- Protein: 2
Keywords: candy corn, Rice Krispie treats, Halloween dessert, easy Halloween treat, kid-friendly, no-bake dessert, layered Rice Krispie treats



