Love this? Save it for later!
Share the inspiration with your friends
It was 11:47 PM on a random Wednesday in mid-October, and I had a very specific craving for something that didn’t exist. I wanted the cozy feeling of a sugar cookie — that soft, buttery, melt-in-your-mouth thing — but I also wanted it to scream Halloween. Not in a scary, gory way. More like a “curl up on the couch with a blanket and a mug of tea” kind of Halloween. The problem? I didn’t have the energy for rolling out dough and cutting out little ghosts and pumpkins. But I had a half-stick of butter, a bag of powdered sugar, and one very stubborn idea that wouldn’t let me sleep. That night, these cozy Halloween sugar cookie bars with orange frosting were born. Honestly, I made a mess. I got orange food coloring on my favorite sweatshirt. I forgot to line the pan with parchment at first and had to scrape the whole thing out and start over. But when I took that first bite of the soft, thick bar with that silky, citrusy frosting on top? I knew I’d never go back to cut-out cookies again. Maybe you’ve been there — wanting the seasonal fun without the fuss. That’s what this recipe is for.
Why You’ll Love This Recipe
Let me tell you, I’ve tested this recipe about seven times to get it just right. Not because it was complicated, but because I wanted that perfect balance of soft, chewy bar and creamy, not-too-sweet frosting. Here’s why these bars are about to become your new fall favorite:
- Quick & Easy : From start to finish, these are ready in under an hour. No chilling dough, no rolling pins, no messing with cookie cutters. Just press, bake, and frost.
- Simple Ingredients : You likely have everything in your pantry right now. Butter, sugar, flour, eggs — the usual suspects. The only special thing is a little orange extract, which is totally worth keeping around.
- Perfect for Halloween Night : These are the ultimate cozy Halloween treat. They’re great for a party, sure, but they’re even better for a quiet night in with a scary movie and a cup of something warm.
- Crowd-Pleaser : I brought a batch to my neighbor’s pumpkin carving party, and they disappeared faster than the candy bowl. Kids and adults went back for seconds (and thirds).
- Unbelievably Delicious : The texture is what gets me every time. It’s denser than a cake, softer than a traditional sugar cookie, and the orange frosting adds this bright, zesty pop that cuts through the sweetness perfectly.
This isn’t just another sugar cookie bar recipe. The trick here is using cream cheese in the dough, which gives it that signature softness and a slight tang that plays beautifully with the sweet orange frosting. It’s the kind of recipe that makes you close your eyes after the first bite — comfort food reimagined for the spookiest, coziest time of year.
What Ingredients You Will Need
This recipe uses simple, wholesome ingredients to create something that tastes way more complicated than it is. Most of these are pantry staples, which is exactly what you want when a late-night craving hits.
For the Sugar Cookie Bars
- Unsalted butter, softened — 1 cup (2 sticks). I always use unsalted so I can control the salt level. Let it sit out for about 30 minutes before you start.
- Granulated sugar — 1 ½ cups. This gives the bars that classic sweet sugar cookie flavor.
- Cream cheese, softened — 4 oz (half a block). This is my secret ingredient. It makes the bars incredibly soft and adds a subtle tang.
- Large eggs — 2, at room temperature. If you forget to take them out, just put them in a bowl of warm water for 5 minutes.
- Vanilla extract — 2 teaspoons. Use the real stuff if you have it, it makes a difference.
- All-purpose flour — 3 cups. Spoon and level it into your measuring cup; don’t scoop directly from the bag or you’ll get too much.
- Baking powder — 1 teaspoon. For a little lift.
- Salt — ½ teaspoon. Balances the sweetness.
For the Orange Frosting
- Unsalted butter, softened — ½ cup (1 stick). Again, softened is key for a smooth frosting.
- Powdered sugar — 3 cups, sifted if you have the patience (I usually skip it, honestly).
- Orange extract — 1 teaspoon. This is the star! It gives that pure, bright orange flavor without any bitterness. I love the McCormick brand.
- Fresh orange zest — from 1 medium orange. Adds little flecks of color and a fresh, natural citrus note.
- Heavy cream or milk — 2-3 tablespoons. To get the right spreading consistency. Start with 2 and add more if needed.
- Orange food coloring — a few drops (optional, but fun for Halloween). Use gel coloring for the best color without thinning the frosting.
- Halloween sprinkles — for topping! The more the merrier.
Equipment Needed
- 9×13-inch baking pan — This is the perfect size for thick, generous bars. A metal pan works best for even baking.
- Parchment paper — Absolutely non-negotiable. It creates a sling that lets you lift the whole block of bars out cleanly. Trust me on this one.
- Electric hand mixer or stand mixer — You can do this by hand with a wooden spoon, but a mixer makes creaming the butter and sugar so much easier.
- Mixing bowls — One large for the dough, one medium for the frosting.
- Rubber spatula — For scraping down the bowl and spreading the dough in the pan.
- Offset spatula — This is my favorite tool for frosting. It gives you that smooth, bakery-style finish. A butter knife works too, though.
- Cooling rack — Essential for letting the bars cool completely before frosting.
Preparation Method
- Preheat and Prep: Preheat your oven to 375°F (190°C). Line your 9×13-inch baking pan with parchment paper, leaving a 2-inch overhang on the long sides. This is your “sling” for lifting the bars out later. Lightly grease the parchment with butter or non-stick spray.
- Cream the Butter and Sugar: In a large mixing bowl, beat the softened butter, granulated sugar, and cream cheese together on medium speed until light, fluffy, and pale in color — about 3-4 minutes. You want it to look like a thick, creamy cloud. Scrape down the sides of the bowl with your spatula halfway through.
- Add the Wet Ingredients: Beat in the eggs one at a time, making sure each is fully incorporated before adding the next. Then mix in the vanilla extract. The mixture might look a little curdled at this point — don’t panic, that’s totally normal. It will come together once you add the flour.
- Mix the Dry Ingredients: In a separate, smaller bowl, whisk together the all-purpose flour, baking powder, and salt. This step is important to evenly distribute the leavening agent so you don’t get weird puffy spots in your bars.
- Combine Wet and Dry: Gradually add the dry ingredients to the wet mixture, mixing on low speed. Stop as soon as the flour disappears. Overmixing will make your bars tough, and nobody wants a tough sugar cookie. The dough will be thick and slightly sticky — that’s exactly what you’re looking for.
- Press into the Pan: Transfer the dough to your prepared pan. Using your hands or a spatula (I spray my hands with a little cooking spray to prevent sticking), press the dough into an even layer. Take your time here — an even layer means even baking. The dough should be about ½-inch thick.
- Bake: Bake for 18-22 minutes, or until the edges are lightly golden brown and the center is set. The top should look puffed and dry, and a toothpick inserted in the center should come out with a few moist crumbs (not wet batter). My oven runs hot, so I always check at the 18-minute mark.
- Cool Completely: Place the pan on a cooling rack and let the bars cool completely in the pan. This is the hardest part — the waiting. But if you frost them while they’re warm, the frosting will melt into a puddle. Patience, my friend. It takes about 1-2 hours.
- Make the Frosting: While the bars are cooling, make the frosting. In a medium bowl, beat the softened butter on medium speed until smooth and creamy. Gradually add the powdered sugar, about 1 cup at a time, beating on low to start so it doesn’t fly everywhere. Add the orange extract, orange zest, and 2 tablespoons of heavy cream. Beat on medium-high for 2-3 minutes until light and fluffy. If it’s too thick, add the remaining tablespoon of cream. If it’s too thin, add a little more powdered sugar. Stir in the orange food coloring until you reach your desired Halloween shade.
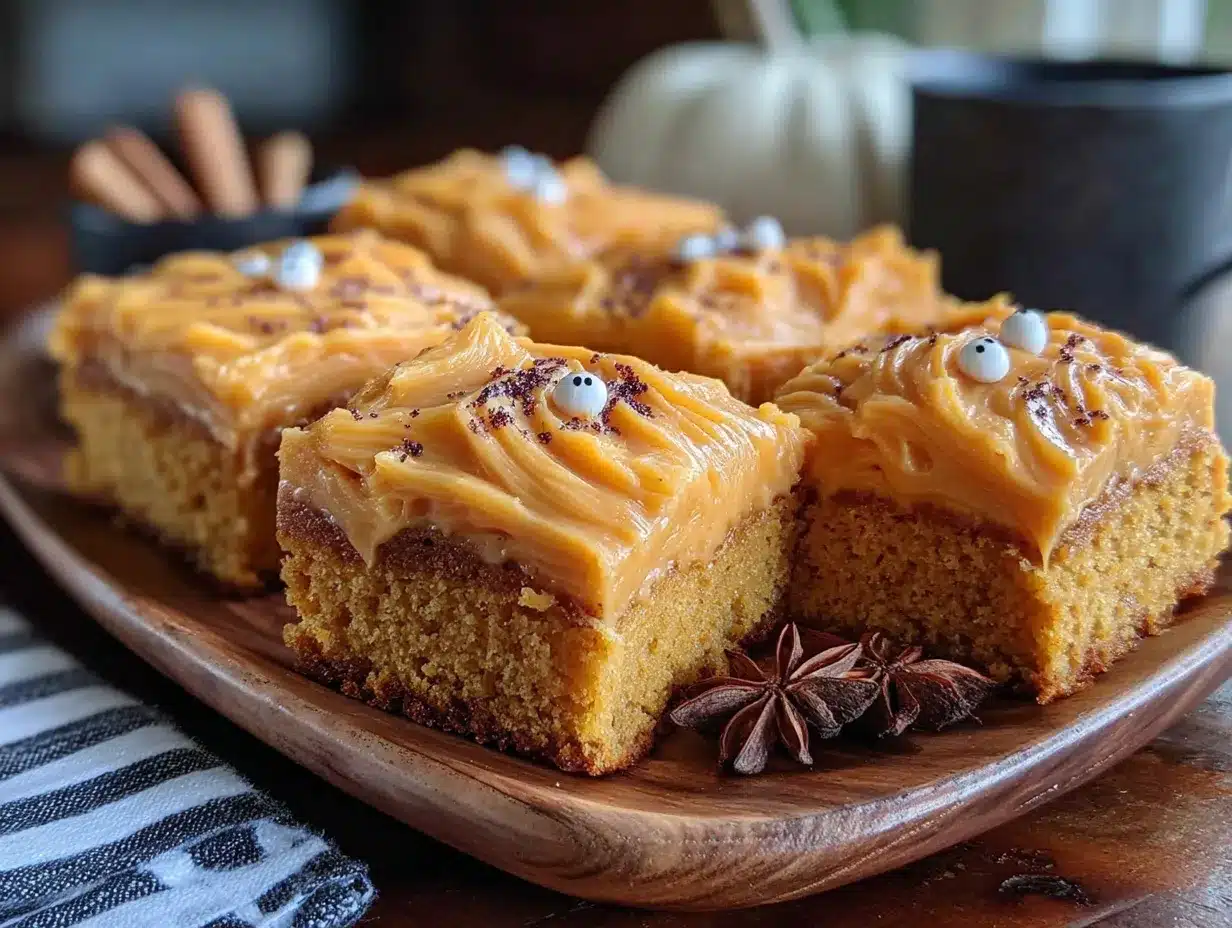
- Frost and Decorate: Once the bars are completely cool, lift them out of the pan using the parchment sling. Spread the orange frosting evenly over the top using your offset spatula. Go wild with the Halloween sprinkles — the more color and crunch, the better.
- Slice and Serve: Let the frosting set for about 15-20 minutes before slicing. This gives you cleaner cuts. Slice into 24 squares or 12 larger rectangles. For the cleanest cuts, wipe your knife clean between each slice.
Cooking Tips & Techniques
I learned a few things the hard way so you don’t have to. First, the cream cheese needs to be truly softened. If it’s cold, you’ll end up with little white lumps in your dough that never quite bake out. Leave it on the counter for a good 30-40 minutes.
Don’t overbake these bars. I know it’s tempting to leave them in until they’re deeply golden, but you want them to stay soft and tender. The edges should just barely be turning golden, and the center will look slightly underdone — that’s perfect. They continue to set as they cool.
Here’s a mistake I made the first time: I used orange juice instead of orange extract in the frosting. Big mistake. The juice made the frosting too thin and it had a weird, slightly sour note. Orange extract is concentrated and gives you that pure, candy-like orange flavor without messing with the consistency. Don’t skip it.
For the smoothest frosting, sift your powdered sugar. I know, I know, it’s an extra step. But it gets rid of those little clumps that can make your frosting look bumpy. If you’re in a rush (like I usually am), just beat it for an extra minute or two — it usually works itself out.
If you’re making these ahead, hold off on the sprinkles until right before serving. They can bleed their color into the frosting after a day or two, especially if the bars are stored in the fridge.
Variations & Adaptations
One of the best things about this recipe is how flexible it is. Here are a few ways I’ve played around with it:
- Gluten-Free Version: I swapped the all-purpose flour with a 1:1 gluten-free baking flour (I like the King Arthur brand) and it worked beautifully. The texture was slightly more crumbly, but still delicious. Add an extra tablespoon of butter to help with moisture.
- Chocolate Halloween Bars: For a richer twist, fold ½ cup of mini chocolate chips into the dough before pressing it into the pan. The chocolate pairs amazingly with the orange frosting — it’s like a chocolate orange in bar form.
- Spiced Fall Version: Add 1 teaspoon of cinnamon and ½ teaspoon of nutmeg to the dry ingredients. It gives the bars a warm, cozy autumn flavor that’s perfect for a November afternoon. I did this for a Friendsgiving and got so many compliments.
- Dairy-Free Adaptation: Use vegan butter and a dairy-free cream cheese alternative (like Kite Hill). For the frosting, use canned coconut cream instead of heavy cream. The flavor will be slightly different, but still incredibly good.
- Lemon Frosting Swap: If orange isn’t your thing, replace the orange extract and zest with lemon extract and lemon zest. It’s bright, tangy, and perfect for a spring or summer version. You could even add a drop of yellow and red food coloring to make it look like a sunset.
Serving & Storage Suggestions
These bars are best served at room temperature. The texture is softest and the frosting is perfectly creamy. If you’ve refrigerated them, let them sit out for about 20 minutes before serving.
For a truly cozy Halloween presentation, I like to arrange the bars on a rustic wooden board with a few mini pumpkins and a handful of candy corn scattered around. It makes for a great photo and sets the mood.
These pair beautifully with a hot cup of apple cider, a pumpkin spice latte, or even a tall glass of cold milk. For an adult twist, try them with a cup of chai tea or a warm mug of mulled wine.
Storage: Store leftover bars in an airtight container at room temperature for up to 3 days. If your kitchen is warm, you can store them in the fridge — just know the bars will firm up a bit. They’ll still taste amazing.
Freezer Instructions: These freeze beautifully. Freeze the unfrosted bars (wrapped tightly in plastic wrap and then foil) for up to 3 months. When you’re ready to serve, thaw them in the fridge overnight, then bring to room temperature and frost. You can also freeze the frosted bars, but I find the texture of the frosting is better if you do it fresh.
The flavors actually get better after a day. The orange zest seems to meld with the buttery cookie base, and everything becomes more cohesive. So don’t be afraid to make them a day ahead.
Nutritional Information & Benefits
Here’s the thing — these are a treat, plain and simple. They’re not health food, and they shouldn’t be. But here’s what I can tell you:
Per bar (based on 24 servings): Approximately 280 calories, 14g fat, 38g carbohydrates, 3g protein, and 22g sugar. These are estimates and will vary based on your exact ingredients and portion sizes.
On the plus side, the cream cheese adds a small amount of calcium and protein. The orange zest provides a little vitamin C and adds bright, fresh flavor without any extra sugar. And honestly? There’s a mental health benefit to taking a moment to enjoy something homemade and festive. I stand by that.
If you’re watching your sugar intake, you can reduce the sugar in the dough to 1 cup without affecting the texture too much. You can also use a sugar-free powdered sugar substitute in the frosting, though I haven’t tested that myself.
These are not gluten-free, dairy-free, or vegan as written, but the variations section above has options for all of those dietary needs.
Conclusion
These cozy Halloween sugar cookie bars with orange frosting are everything I want in a fall treat — they’re soft, they’re festive, and they come together without any of the stress of traditional decorated cookies. The orange frosting is bright and cheerful, the bars are buttery and tender, and the whole thing feels like a warm hug on a chilly October evening.
I really hope you give these a try. Don’t be afraid to make them your own — add extra sprinkles, swap the flavor, or double the batch because trust me, one pan won’t be enough. If you make them, I’d love to hear about it. Leave a comment below and tell me how they turned out, or tag me in your photos. There’s something so special about seeing these bars come to life in your kitchen.
Now go preheat that oven. Halloween is waiting, and these bars aren’t going to bake themselves.
Frequently Asked Questions
Can I use a different size pan?
Yes, but it will change the baking time and thickness. A 9×9-inch pan will give you thicker bars that need about 25-30 minutes of baking time. A half-sheet pan (13×18-inch) will give you thinner bars that bake in about 12-15 minutes. Keep a close eye on them.
Can I make these without cream cheese?
You can, but the texture won’t be the same. The cream cheese is what makes these bars so soft and tender. If you don’t have it, you can substitute with 4 oz of plain Greek yogurt or sour cream. The flavor will be slightly tangier, but it will still work.
How do I get clean, neat slices?
Use a long, sharp knife and wipe it clean with a damp paper towel between each cut. For the absolute cleanest slices, chill the frosted bars in the fridge for about 30 minutes before cutting. This firms up the frosting so it doesn’t drag or smear.
Can I use store-bought frosting instead?
You absolutely can, and I won’t judge you. If you’re short on time, pick up a can of cream cheese frosting and stir in some orange extract and zest. It won’t be quite as good as homemade, but it’ll still be delicious and festive.
Why did my bars turn out dry?
The most common reason is overbaking. Remember, you want to take them out when the edges are just barely golden and the center looks slightly underdone. Another culprit is overmeasuring the flour. Always spoon the flour into your measuring cup and level it off with a knife. Scooping directly from the bag can pack in way too much flour.
Pin This Recipe!
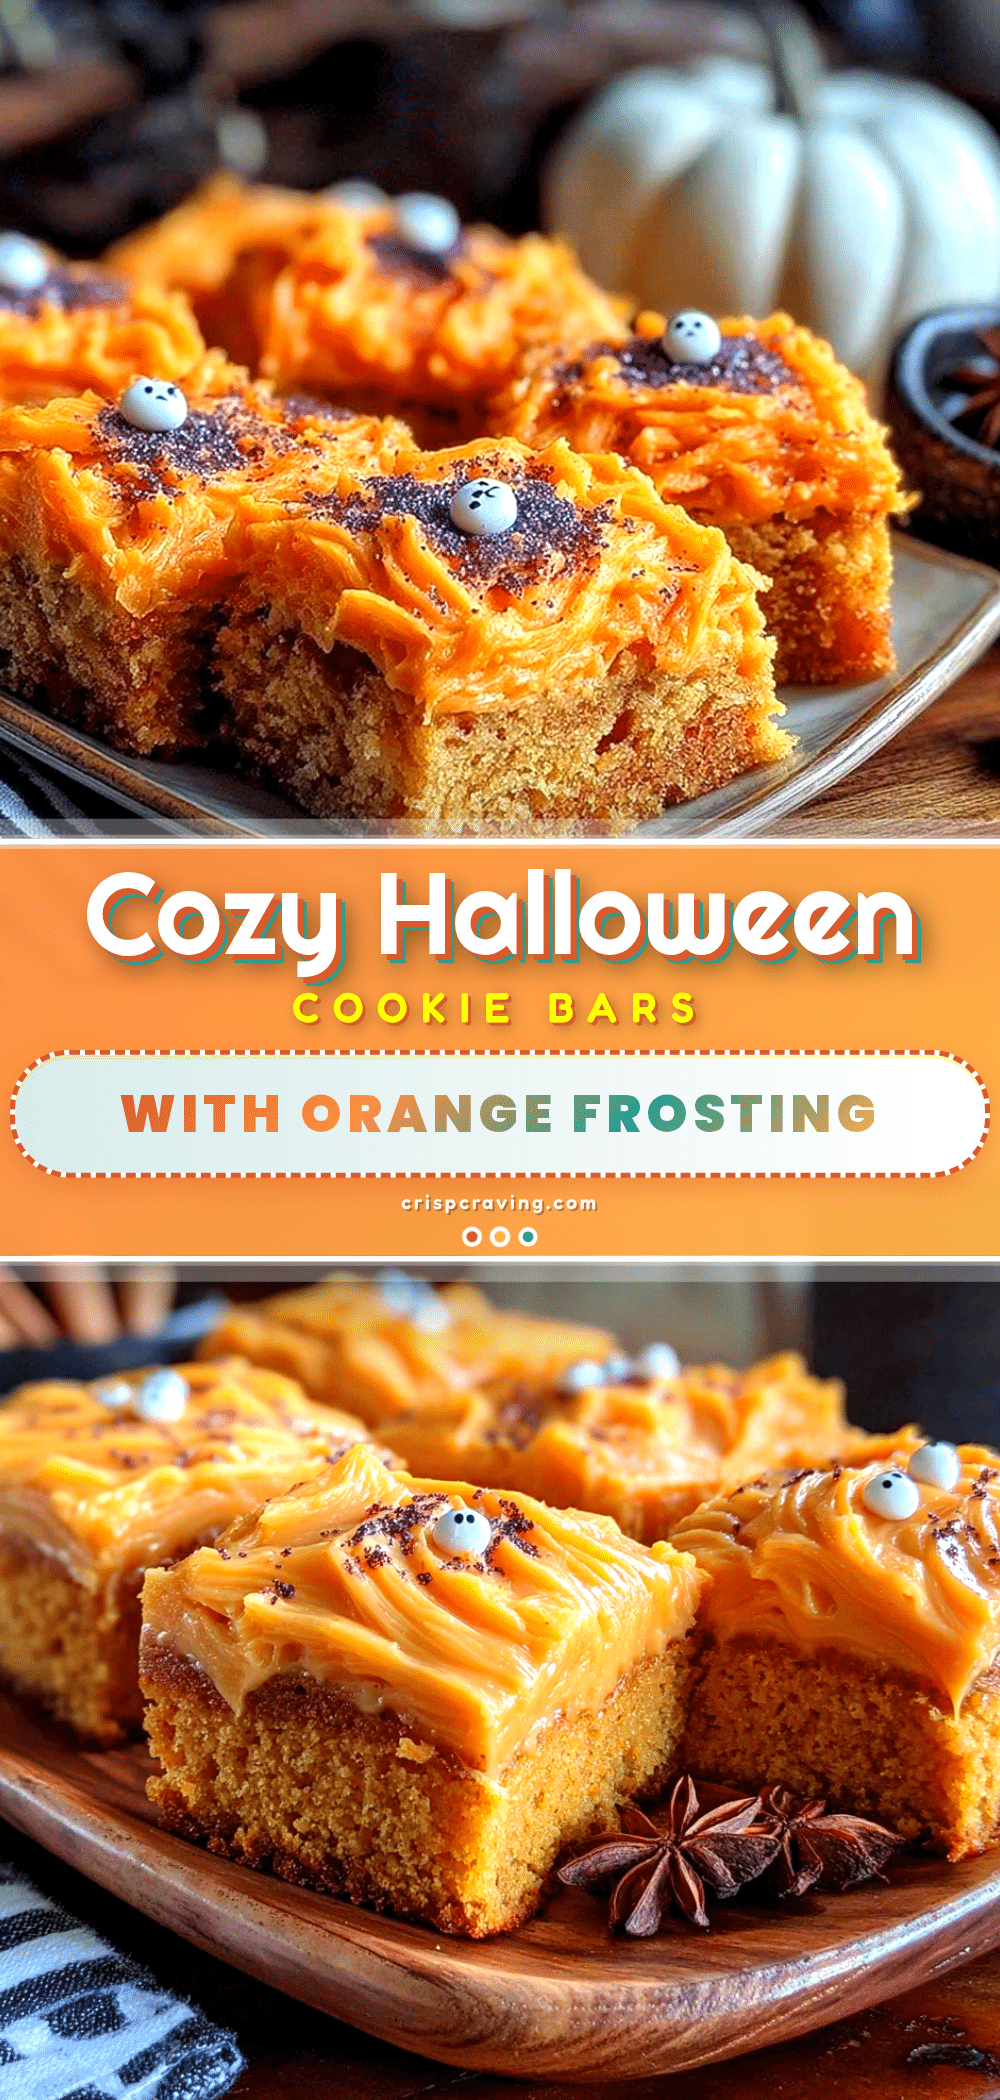
Cozy Halloween Sugar Cookie Bars with Orange Frosting
Soft, buttery sugar cookie bars topped with a creamy, citrusy orange frosting. The perfect fuss-free Halloween treat for cozy nights in.
- Prep Time: 20 minutes
- Cook Time: 20 minutes
- Total Time: 40 minutes (plus cooling time)
- Yield: 24 servings 1x
- Category: Dessert
- Cuisine: American
Ingredients
- 1 cup (2 sticks) unsalted butter, softened
- 1 ½ cups granulated sugar
- 4 oz cream cheese, softened
- 2 large eggs, at room temperature
- 2 teaspoons vanilla extract
- 3 cups all-purpose flour
- 1 teaspoon baking powder
- ½ teaspoon salt
- ½ cup (1 stick) unsalted butter, softened
- 3 cups powdered sugar, sifted if desired
- 1 teaspoon orange extract
- Fresh orange zest from 1 medium orange
- 2–3 tablespoons heavy cream or milk
- A few drops orange food coloring (optional)
- Halloween sprinkles for topping
Instructions
- Preheat oven to 375°F (190°C). Line a 9×13-inch baking pan with parchment paper, leaving a 2-inch overhang on the long sides. Lightly grease the parchment.
- In a large mixing bowl, beat the softened butter, granulated sugar, and cream cheese together on medium speed until light, fluffy, and pale, about 3-4 minutes. Scrape down the sides halfway through.
- Beat in the eggs one at a time, fully incorporating each before adding the next. Mix in the vanilla extract.
- In a separate bowl, whisk together the flour, baking powder, and salt.
- Gradually add the dry ingredients to the wet mixture, mixing on low speed just until the flour disappears. Do not overmix. The dough will be thick and slightly sticky.
- Transfer the dough to the prepared pan. Using your hands or a spatula (lightly greased if needed), press the dough into an even layer, about ½-inch thick.
- Bake for 18-22 minutes, until the edges are lightly golden and the center is set. A toothpick inserted in the center should come out with a few moist crumbs. Cool completely in the pan on a cooling rack (about 1-2 hours).
- For the frosting: In a medium bowl, beat the softened butter on medium speed until smooth and creamy. Gradually add the powdered sugar, 1 cup at a time, beating on low to start. Add the orange extract, orange zest, and 2 tablespoons of heavy cream. Beat on medium-high for 2-3 minutes until light and fluffy. Add more cream if needed, or more powdered sugar if too thin. Stir in orange food coloring if desired.
- Once bars are completely cool, lift them out using the parchment sling. Spread the frosting evenly over the top. Decorate with Halloween sprinkles.
- Let the frosting set for 15-20 minutes before slicing. Slice into 24 squares or 12 rectangles. Wipe the knife clean between cuts for neat slices.
Notes
Cream cheese must be truly softened to avoid lumps. Do not overbake; edges should be just golden and center slightly underdone. Use orange extract, not orange juice, for the frosting. For clean slices, chill frosted bars for 30 minutes before cutting. Store in an airtight container at room temperature for up to 3 days, or freeze unfrosted bars for up to 3 months.
Nutrition
- Serving Size: 1 bar
- Calories: 280
- Sugar: 22
- Sodium: 120
- Fat: 14
- Saturated Fat: 8
- Carbohydrates: 38
- Protein: 3
Keywords: Halloween, sugar cookie bars, orange frosting, fall dessert, easy Halloween treat, cream cheese sugar cookies



