Love this? Save it for later!
Share the inspiration with your friends
My neighbor wasn’t trying to impress me. I’d stopped by on a chilly Tuesday afternoon to borrow a cup of brown sugar—a last-minute baking whim that had me rummaging through her pantry with her permission. The smell hit me before I even got past her front door. It was warm and spicy, like autumn had decided to move in permanently and bake cookies for a living. She was pulling a tray out of the oven, these little golden puffs with cracks on top, and she just shrugged when I asked what they were. “Oh, just some pumpkin snickerdoodles,” she said, like it was nothing. Like she hadn’t just created the exact thing my soul needed on that gray, drizzly afternoon.
Honestly, I almost forgot about the brown sugar. I stood there, watching her slide a spatula under one of those cookies, and the casualness of it all got me. She wasn’t running a food blog or testing a recipe for a magazine. She was just making cookies on a Tuesday because she felt like it. That’s the kind of energy this recipe carries. It’s not fussy or demanding. It’s just good—the kind of good that makes you close your eyes after the first bite. I mean, maybe you’ve been there. You take a bite of something, and it’s not just a cookie; it’s a warm hug in edible form.
The best part? She made a small batch. Just enough for her and her kids to enjoy that night, not a mountain of cookies that would go stale by the weekend. I scribbled down the basics on a scrap of paper she lent me, and I’ve been tweaking it ever since. This is my version—cozy, small batch, and packed with all the pumpkin spice goodness you could want. It’s the kind of recipe that makes you want to put on a sweater, light a candle, and pretend the world outside can wait.
Why You’ll Love This Recipe
Let me tell you why these little cookies have become my go-to for fall baking. It’s not just because they taste amazing—though they absolutely do. It’s the whole experience. From the moment you mix the dough to that first bite straight off the cooling rack, everything about this recipe feels right.
- Quick & Easy: You can have these cookies from mixing bowl to plate in under 30 minutes. No chilling required, which is a game-changer for those spontaneous baking urges.
- Simple Ingredients: You probably have most of this stuff in your pantry already. Pumpkin puree, butter, sugar, flour, and the classic snickerdoodle cinnamon-sugar coating. No fancy trips to specialty stores.
- Perfect for Cozy Evenings: This is the recipe for a slow night at home, a rainy afternoon, or a day when you just need something warm and comforting. It’s also fantastic for a small gathering or a quiet dessert for two.
- Crowd-Pleaser: I’ve tested these on neighbors, family, and my skeptical husband who “doesn’t like pumpkin desserts.” Every single person has asked for the recipe. It’s the texture that gets them—soft, chewy centers with that slightly crisp, cinnamon-sugar edge.
- Unbelievably Delicious: The combination of pumpkin and warm spices with that classic snickerdoodle tang is next-level. It’s like your favorite fall latte turned into a cookie. Honestly, it’s comfort food at its finest.
What makes this different from every other pumpkin cookie out there? It’s the small batch approach. Most pumpkin recipes make a ton of dough, which can be a pain if you’re just cooking for yourself or a small family. This recipe gives you exactly six perfect cookies. No waste, no temptation to eat a dozen, just the right amount of cozy. Plus, the texture is spot-on—soft, pillowy, with that signature snickerdoodle crackle on top. It’s not just another version; it’s my best version, tested and perfected over several batches.
What Ingredients You Will Need
This recipe uses simple, wholesome ingredients to deliver that bold pumpkin spice flavor and satisfyingly soft texture. Most of these are pantry staples, especially if you do a bit of fall baking. The key is using the right form of each ingredient to get that perfect chewy cookie.
- All-Purpose Flour (1 cup / 120g): The backbone of the cookie. I use standard all-purpose flour for the best structure. Spoon and level it into your measuring cup for accuracy—don’t scoop directly from the bag or you might end up with dry cookies.
- Pumpkin Puree (¼ cup / 60g): Make sure you’re using pure pumpkin puree, not pumpkin pie filling. The pie filling has added sugar and spices that will throw off the balance. I usually go with Libby’s brand for consistent results. If you have leftover puree, you can freeze it in small portions for later.
- Unsalted Butter (3 tablespoons / 42g), softened: Softened butter is crucial here. It needs to be at room temperature so it creams properly with the sugar. If you forget to take it out, you can microwave it in 5-second bursts, but be careful not to melt it.
- Granulated Sugar (¼ cup / 50g): For sweetness and that classic snickerdoodle texture. The sugar also helps create the slight crackle on top.
- Light Brown Sugar (2 tablespoons / 25g), packed: Adds moisture and a deeper, almost caramel-like sweetness that pairs beautifully with pumpkin. Pack it firmly into your measuring spoon.
- Large Egg Yolk (1): Just the yolk. This adds richness and tenderness without making the dough too wet. Save the egg white for your breakfast scramble tomorrow.
- Vanilla Extract (½ teaspoon): Pure vanilla extract is best. It rounds out the flavors and makes everything taste more, well, baked.
- Pumpkin Pie Spice (1 teaspoon): You can use store-bought or make your own with a mix of cinnamon, nutmeg, ginger, and cloves. This is where the cozy flavor comes from.
- Ground Cinnamon (½ teaspoon): For an extra layer of warmth in the dough itself.
- Baking Powder (½ teaspoon): Helps the cookies puff up and get that soft, tender crumb.
- Baking Soda (¼ teaspoon): Works with the pumpkin to give the cookies a little lift.
- Salt (¼ teaspoon): Don’t skip it. Salt balances the sweetness and makes all the flavors pop.
For the Cinnamon-Sugar Coating:
- Granulated Sugar (2 tablespoons / 25g): For the coating.
- Ground Cinnamon (1 teaspoon): The star of the coating. Fresh cinnamon makes a big difference here.
Equipment Needed
You don’t need a fancy kitchen to pull these off. I’ve made them in my tiny apartment with the bare minimum, and they came out perfectly. Here’s what you’ll need:
- Mixing Bowls: One medium bowl for the dry ingredients and one large bowl for the wet ingredients. I use a set of nested glass bowls, but any will do.
- Electric Mixer (Hand or Stand): A hand mixer is perfect for creaming the butter and sugar. You can do it by hand with a wooden spoon, but it takes some elbow grease. A stand mixer works too, just keep the speed low.
- Baking Sheet: A standard half-sheet pan is ideal. Line it with parchment paper or a silicone baking mat for easy cleanup. I’ve used a non-stick pan without lining, and they still worked, but the parchment makes life easier.
- Cookie Scoop (1.5-tablespoon size): This is my secret weapon for uniform cookies. It ensures they all bake evenly. If you don’t have one, just use a tablespoon measure and shape the dough into balls with your hands.
- Cooling Rack: Essential for getting those perfectly set cookies. Letting them cool on the pan can lead to over-baking from the residual heat.
- Small Bowl for Coating: A shallow bowl or plate for mixing the cinnamon and sugar.
- Measuring Cups and Spoons: Accurate measurements are key in baking, especially with a small batch. A kitchen scale is even better for precision, but cup measures work fine.
That’s it. No stand mixer required, no food processor, no fancy gadgets. Just the basics and a little bit of love.
Preparation Method
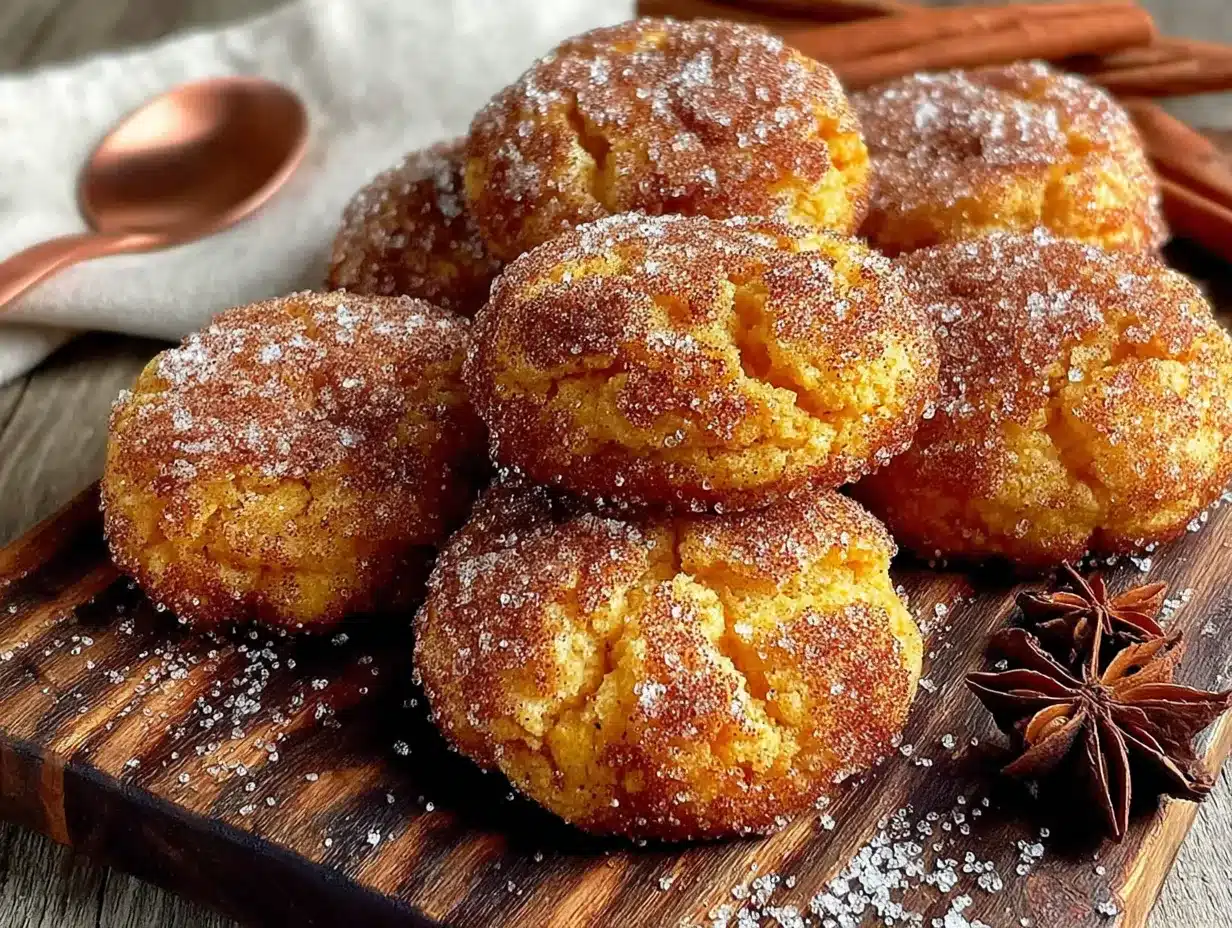
Alright, let’s get to the fun part. This process is straightforward, and I’ll walk you through every step with the little tricks I’ve picked up along the way.
- Preheat and Prep: First things first, preheat your oven to 350°F (175°C). Line your baking sheet with parchment paper. This gives the cookies a non-stick surface and helps them spread evenly. While the oven is heating, get your ingredients ready. Make sure your butter is softened—it should give slightly when you press it with your finger.
- Mix the Dry Ingredients: In a medium bowl, whisk together 1 cup of all-purpose flour, 1 teaspoon of pumpkin pie spice, ½ teaspoon of ground cinnamon, ½ teaspoon of baking powder, ¼ teaspoon of baking soda, and ¼ teaspoon of salt. Whisking aerates the flour and ensures the leavening agents are evenly distributed. Set this bowl aside.
- Cream the Butter and Sugars: In a large bowl, beat the 3 tablespoons of softened unsalted butter with ¼ cup of granulated sugar and 2 tablespoons of packed light brown sugar. Use your electric mixer on medium speed for about 2 minutes, until the mixture is light and fluffy. Scrape down the sides of the bowl once. This step is important—it incorporates air into the dough, which helps the cookies get that soft, tender texture.
- Add the Wet Ingredients: Beat in the egg yolk, ½ teaspoon of vanilla extract, and ¼ cup of pumpkin puree. Mix on low speed until just combined. The dough will look a little wet and might seem a bit loose—that’s totally normal. Don’t overmix at this stage, or you’ll develop the gluten too much and end up with tough cookies.
- Combine Wet and Dry: Gradually add the dry ingredient mixture to the wet ingredients. Mix on low speed or fold in with a spatula until just incorporated. You want to see no more streaks of flour. The dough will be soft and slightly sticky, which is exactly what you’re aiming for. If it feels too sticky to handle, you can chill it for 10 minutes, but I usually find it works fine as is.
- Make the Coating: In a small shallow bowl, stir together 2 tablespoons of granulated sugar and 1 teaspoon of ground cinnamon. This is your coating mixture.
- Shape and Coat the Dough: Using a 1.5-tablespoon cookie scoop or a regular tablespoon, scoop out portions of dough. Roll each portion into a smooth ball between your palms. Drop each ball into the cinnamon-sugar mixture and roll it around until it’s completely coated. Place the coated dough balls on the prepared baking sheet, spacing them about 2 inches apart. You should get exactly 6 cookies.
- Bake: Bake in your preheated oven for 10 to 12 minutes. The cookies will look puffy and slightly cracked on top. The edges should be set, but the centers will still look a little soft and underdone. That’s what you want! They’ll continue to set as they cool. For a softer cookie, aim for 10 minutes. For a slightly crisper edge, go for 11 or 12.
- Cool: Let the cookies cool on the baking sheet for 5 minutes. This is crucial—they’re very fragile right out of the oven. After 5 minutes, transfer them to a wire cooling rack to cool completely. If you try to move them too soon, they’ll fall apart. Trust me, I learned that the hard way.
One last thing—the smell in your kitchen right now is going to be incredible. Take a moment to enjoy it before you dive in.
Cooking Tips & Techniques
I’ve made these cookies more times than I can count, and I’ve definitely had my share of flops. Here are the lessons I’ve learned so you don’t have to repeat my mistakes.
Don’t Overmix the Dough: This is the number one mistake I see. Once you add the flour, mix just until it’s combined. Overmixing develops gluten, which makes cookies tough and dense instead of soft and tender. You want to see a few streaks of flour, then stop. Fold them in gently with a spatula if you’re worried.
Measure Your Flour Correctly: I cannot stress this enough. Scooping flour directly from the bag can pack it down, giving you way more than you need. Use the spoon-and-level method: fluff the flour in the bag, spoon it into your measuring cup, and level it off with a straight edge. A digital scale is even better—120 grams is your target.
The Pumpkin Factor: Pumpkin puree adds moisture, which is great for a soft cookie, but it can also make the dough sticky. If your dough feels too wet to roll into balls, pop it in the fridge for 10 to 15 minutes. That short chill firms it up just enough without changing the baking time.
Watch Your Oven: Every oven runs a little differently. My old oven used to run hot, so I’d check the cookies at the 8-minute mark. Start checking at 10 minutes, and look for the edges to be set and the tops to have that signature crackle. The centers should still look a bit soft. If you bake them until the centers look fully done, they’ll be overbaked and dry.
Let Them Cool Properly: That 5-minute rest on the baking sheet is non-negotiable. The cookies are still cooking from the residual heat, and they need that time to firm up. Moving them too early is a recipe for crumbled cookies. I’ve had to eat my mistakes with a spoon before, and while it was still delicious, it wasn’t pretty.
Room Temperature Ingredients: For the best texture, make sure your butter is softened and your egg yolk is at room temperature. Cold ingredients don’t cream together as well, which can affect the final texture. If you’re in a rush, you can place the egg in a bowl of warm water for a few minutes.
Variations & Adaptations
One of the best things about this recipe is how adaptable it is. I’ve played around with it quite a bit, and here are some of my favorite variations.
Gluten-Free Version: Swap the all-purpose flour for a 1:1 gluten-free baking flour blend. I’ve used Bob’s Red Mill with great results. The texture will be slightly more delicate, but they’re still delicious. Add an extra tablespoon of flour if the dough seems too wet.
Dairy-Free Option: Use a plant-based butter stick (like Earth Balance) in place of the regular butter. Make sure it’s softened. The cookies will taste just as buttery and rich. Coconut oil can work too, but use the solid form, not melted.
Spice It Up: If you want a bolder pumpkin flavor, add an extra ¼ teaspoon of pumpkin pie spice to the dough. You can also add a pinch of ground cloves or nutmeg for a more complex spice profile. I sometimes add a tiny pinch of black pepper—it sounds weird, but it really makes the other spices pop.
Add Mix-Ins: Fold in ¼ cup of white chocolate chips, chopped pecans, or dried cranberries after you’ve combined the wet and dry ingredients. The white chocolate version is my personal favorite—it adds a creamy sweetness that pairs beautifully with the pumpkin spice.
Make Them Bigger: If you want jumbo cookies, use a 3-tablespoon scoop and bake for 14 to 16 minutes. You’ll get 3 large cookies instead of 6. Just adjust your baking time and keep an eye on them.
Pumpkin Spice Latte Twist: Add ½ teaspoon of instant espresso powder to the dry ingredients. It doesn’t make the cookies taste like coffee; it just deepens the pumpkin spice flavor and adds a subtle richness. Trust me on this one.
Serving & Storage Suggestions
These cookies are best enjoyed warm, straight from the oven, with a tall glass of cold milk or a hot cup of coffee. The combination of the soft, tender cookie and that crisp cinnamon-sugar coating is pure magic. I also love serving them with a scoop of vanilla ice cream for a simple but impressive dessert.
For a cozy presentation, arrange the cookies on a rustic wooden board or a pretty plate. Sprinkle a little extra cinnamon on top for a finishing touch. They’re perfect for a fall movie night, a Thanksgiving dessert table, or just a quiet afternoon treat.
Storage: Store any leftover cookies (if you have any!) in an airtight container at room temperature for up to 3 days. To keep them soft, add a slice of bread to the container—it absorbs excess moisture and keeps the cookies from drying out. The bread will get stale, but your cookies will stay perfect.
Freezing: You can freeze the baked cookies for up to 3 months. Place them in a single layer in a freezer-safe bag or container. To thaw, just leave them at room temperature for about 30 minutes. You can also freeze the unbaked dough balls. Roll them, coat them in cinnamon sugar, and place them on a baking sheet in the freezer until solid. Then transfer them to a freezer bag. When you’re ready to bake, just add a couple of minutes to the baking time—no need to thaw.
Reheating: To bring back that fresh-from-the-oven feel, pop a cookie in the microwave for 10 seconds. Or, reheat them in a 300°F oven for 5 minutes. The texture will be just like new. Honestly, I think the flavors are even better on the second day—the spices have a chance to meld together.
Nutritional Information & Benefits
Here’s the thing about these cookies—they’re a treat, and I’m not going to pretend they’re health food. But they do have some redeeming qualities, especially compared to store-bought versions.
Estimated Nutritional Values (per cookie, based on 6 cookies):
- Calories: ~180
- Fat: 7g
- Carbohydrates: 28g
- Fiber: 1g
- Sugar: 16g
- Protein: 2g
Health Benefits of Key Ingredients: Pumpkin puree is packed with vitamin A and fiber, which is great for your immune system and digestion. The cinnamon in the coating has anti-inflammatory properties and can help regulate blood sugar. Plus, since this is a small batch recipe, you’re less likely to overindulge—portion control built right in!
Dietary Considerations: This recipe can easily be made gluten-free or dairy-free with the substitutions mentioned above. It is not vegan due to the egg yolk, but you could try a flax egg (1 tablespoon ground flaxseed mixed with 3 tablespoons water) as a substitute—though the texture will be slightly different.
Potential Allergens: Contains wheat (gluten), dairy (butter), and eggs. If you’re serving these to a crowd, it’s always good to ask about allergies first.
My personal take? Baking should be joyful, not guilt-ridden. These cookies are made with real ingredients, they’re portion-controlled, and they bring a lot of happiness. That’s a win in my book.
Conclusion
So there you have it—my recipe for cozy small batch pumpkin snickerdoodles. These little cookies have become a staple in my fall baking rotation, and I have a feeling they’ll become one in yours too. They’re simple, they’re quick, and they deliver that warm, spiced comfort we all crave when the weather turns cool.
I love this recipe because it’s forgiving. It doesn’t demand perfection. You can make it on a whim, with ingredients you already have, and it will still turn out amazing. It’s the kind of recipe that makes you feel like a good baker, even on days when you’re not sure you have the energy for it. And honestly, that’s the best kind of recipe to have in your back pocket.
Now it’s your turn. I’d love to hear how these turn out for you. Did you try any of the variations? Did you add your own twist? Leave a comment below and let me know. And if you share a photo on Pinterest or Instagram, tag me—I want to see your cozy creations! Happy baking, friends. May your kitchen smell like autumn and your cookies be perfectly soft.
Frequently Asked Questions
Can I make these cookies vegan?
You can try! Replace the butter with a vegan butter stick and use a flax egg (1 tablespoon ground flaxseed mixed with 3 tablespoons water, let sit for 5 minutes) in place of the egg yolk. The texture might be slightly less tender, but the flavor will still be delicious. I haven’t tested this exact version, so let me know how it goes if you try it.
Why did my cookies turn out flat?
Flat cookies usually mean your butter was too soft or melted, or your baking powder is old. Make sure your butter is softened but not melted, and check the expiration date on your leavening agents. Also, if your dough was too warm, chilling it for 10 minutes before baking can help prevent spreading.
Can I use pumpkin pie filling instead of pumpkin puree?
I wouldn’t recommend it. Pumpkin pie filling has added sugar and spices, which will throw off the balance of the recipe. Your cookies might end up too sweet and overly spiced. Stick with 100% pure pumpkin puree for the best results.
How do I make sure my cookies are soft and chewy?
The key is not overbaking them. Pull them out of the oven when the edges are set but the centers still look a little soft. They’ll continue to cook on the hot baking sheet during the 5-minute rest. Also, using brown sugar adds moisture, which helps keep them soft.
Can I double this recipe?
Absolutely! This recipe scales up beautifully. Just double all the ingredients and bake in batches. You might need to adjust the baking time slightly if you’re baking more trays at once—rotate the pans halfway through for even baking. You’ll get 12 perfect cookies.
Pin This Recipe!
Cozy Small Batch Pumpkin Snickerdoodles: Easy Fall Recipe

These soft, chewy pumpkin snickerdoodles are made in a small batch of six cookies, perfect for a cozy fall evening. They’re quick, easy, and packed with warm pumpkin spice flavor.
- Prep Time: 15 minutes
- Cook Time: 12 minutes
- Total Time: 27 minutes
- Yield: 6 cookies 1x
- Category: Dessert
- Cuisine: American
Ingredients
- 1 cup (120g) all-purpose flour
- ¼ cup (60g) pumpkin puree
- 3 tablespoons (42g) unsalted butter, softened
- ¼ cup (50g) granulated sugar
- 2 tablespoons (25g) light brown sugar, packed
- 1 large egg yolk
- ½ teaspoon vanilla extract
- 1 teaspoon pumpkin pie spice
- ½ teaspoon ground cinnamon
- ½ teaspoon baking powder
- ¼ teaspoon baking soda
- ¼ teaspoon salt
- 2 tablespoons (25g) granulated sugar (for coating)
- 1 teaspoon ground cinnamon (for coating)
Instructions
- Preheat oven to 350°F (175°C). Line a baking sheet with parchment paper.
- In a medium bowl, whisk together flour, pumpkin pie spice, cinnamon, baking powder, baking soda, and salt.
- In a large bowl, beat softened butter, granulated sugar, and brown sugar with an electric mixer on medium speed until light and fluffy, about 2 minutes.
- Beat in egg yolk, vanilla extract, and pumpkin puree until just combined.
- Gradually add dry ingredients to wet ingredients, mixing on low speed or folding with a spatula until just incorporated. Dough will be soft and slightly sticky.
- In a small shallow bowl, stir together 2 tablespoons granulated sugar and 1 teaspoon cinnamon for the coating.
- Using a 1.5-tablespoon cookie scoop, portion dough into 6 balls. Roll each ball in the cinnamon-sugar mixture until coated. Place on prepared baking sheet, spacing 2 inches apart.
- Bake for 10 to 12 minutes, until edges are set and tops are cracked but centers still look soft.
- Let cookies cool on baking sheet for 5 minutes, then transfer to a wire rack to cool completely.
Notes
For best results, use pure pumpkin puree (not pumpkin pie filling). Butter should be softened but not melted. Do not overmix the dough. Let cookies cool on the baking sheet for 5 minutes before transferring to a rack. Store in an airtight container at room temperature for up to 3 days.
Nutrition
- Serving Size: 1 cookie
- Calories: 180
- Sugar: 16
- Sodium: 150
- Fat: 7
- Saturated Fat: 4
- Carbohydrates: 28
- Fiber: 1
- Protein: 2
Keywords: pumpkin snickerdoodles, small batch cookies, fall cookies, pumpkin spice, easy cookie recipe



