Love this? Save it for later!
Share the inspiration with your friends
The woman at the spice shop watched me eyeing a package of Biscoff cookies for the third time that month. She didn’t say anything at first. Then she just smiled, reached under the counter, and pulled out a handwritten card with a recipe for something she called “emergency comfort bars.” No measurements, just a list of ingredients and the words “no oven, no stress, no sharing required.” I laughed, bought the cookies anyway, and went home to figure out the rest. That was two winters ago, and honestly, that scribbled note has saved me more times than I can count. These Cozy No-Bake Biscoff Cheesecake Bars are the result of my many attempts to turn her simple idea into something that feels like a real dessert—not just a quick fix, but a proper, soul-warming treat. The kind you make when the weather turns cold, or when you’ve had a week that just needs a little sweetness at the end of it. Maybe you’ve been there, standing in your kitchen, wanting something that feels special but not wanting to turn on the oven or dirty every bowl you own. That’s exactly where this recipe lives. It’s rich, creamy, and has that unmistakable spiced cookie crunch that makes Biscoff so addictive. I’ve tweaked the ratios, tested the chilling times, and even made a version that accidentally set too firm (still delicious, just required more arm strength to cut). This version is the one I keep coming back to. It’s the one that feels like a hug in bar form.
Why You’ll Love These Cozy No-Bake Biscoff Cheesecake Bars
Let me tell you, I’ve tested a lot of no-bake cheesecake recipes over the years. Some are too soft, some never set properly, and some just don’t have enough of that cookie butter magic. These bars are different. They hit that perfect sweet spot between creamy and firm, with a crust that actually stays together when you cut it. No crumbling disasters here, I promise.
- Ready in 10 Minutes: The active prep time is genuinely that short. You mix the crust, whip the filling, and let the fridge do the rest. Perfect for when you need dessert but don’t have the energy for a project.
- Simple Ingredients: You only need about seven ingredients, and most of them are pantry staples. No fancy cream cheese from a specialty store, no hard-to-find extracts.
- Perfect for Cozy Nights: These bars are made for cold weather, rainy afternoons, or any time you want something that feels indulgent without being heavy. They’re also fantastic for holiday gatherings or potlucks.
- Crowd-Pleaser: I’ve brought these to family dinners, office parties, and casual get-togethers. They disappear fast. Kids love them, adults sneak seconds, and someone always asks for the recipe.
- Unbelievably Delicious: The combination of the spiced cookie crust, the silky cream cheese filling, and that glossy Biscoff spread on top is pure comfort. It’s the kind of dessert that makes you close your eyes after the first bite.
What really sets these bars apart is the texture. The crust isn’t just crushed cookies and butter—it’s pressed firmly so it holds its shape, but it still has that satisfying crunch. The filling uses a trick I learned from making too many soft cheesecakes: a little bit of heavy cream whipped into the cream cheese mixture gives it structure without needing gelatin. It’s a small thing, but it makes a big difference. This isn’t just another no-bake cheesecake recipe. It’s the one that finally worked for me, and I think it will work for you too.
What Ingredients You Will Need
This recipe uses simple, wholesome ingredients to deliver that rich, comforting flavor without any fuss. Most of these are things you might already have in your kitchen, which is exactly how I like my desserts to start.
- Biscoff Cookies (250g / about 2 cups crushed): These are the heart of the crust. I use the original caramelized biscuits. You can find them in most grocery stores near the coffee or international foods aisle. The spiced flavor is what makes this crust so special.
- Unsalted Butter (113g / 1/2 cup, melted): This binds the crust together. I prefer unsalted so I can control the salt level, but salted butter works in a pinch—just skip adding any extra salt.
- Full-Fat Cream Cheese (450g / 2 blocks, softened): Let this sit on the counter for about 30 minutes before you start. Cold cream cheese makes lumpy filling, and nobody wants that. I like Philadelphia brand for consistency, but any good-quality block cream cheese works.
- Powdered Sugar (100g / 1 cup): This sweetens the filling without making it grainy. Sift it if you have the patience, but honestly, I’ve skipped that step plenty of times and it still turned out fine.
- Heavy Cream (120ml / 1/2 cup, cold): This is the secret to a light, mousse-like texture. Don’t use half-and-half or milk—you need the fat content for structure.
- Vanilla Extract (1 tsp): A good vanilla rounds out the flavors. Use pure extract if you have it, but imitation works too.
- Biscoff Spread (120g / 1/2 cup, warmed slightly): This is for the top layer. You can find it next to the peanut butter or in the baking aisle. Lotus brand is the classic, but store brands work fine. Warm it in the microwave for about 15 seconds so it’s pourable but not hot.
Optional: a pinch of flaky sea salt to sprinkle on top. It sounds fancy, but it just cuts through the sweetness and makes the flavors pop. I do it almost every time now.
Substitution note: If you can’t find Biscoff cookies, speculoos cookies or even graham crackers with a pinch of cinnamon and nutmeg work. It won’t be exactly the same, but it’ll still be delicious. For a dairy-free version, use a plant-based cream cheese and coconut cream instead of heavy cream. The texture will be slightly different, but I’ve tested it and it’s still very good.
Equipment Needed
You don’t need a lot of fancy tools for this recipe, which is part of the charm. Here’s what you’ll need:
- 8×8-inch Square Baking Pan: This is the perfect size for thick bars. If you only have a 9×9, the bars will be slightly thinner and you might need to reduce the chilling time a bit.
- Parchment Paper: Line the pan with two overlapping strips, leaving some overhang on the sides. This makes lifting the bars out so much easier. I learned this the hard way after wrestling a stuck cheesecake out of a pan.
- Food Processor or Zip-Top Bag: For crushing the cookies. A food processor gives you a fine, even crumb. A rolling pin and a sturdy bag work too, and it’s a great way to release some frustration.
- Mixing Bowls: One medium bowl for the crust, one large bowl for the filling. Glass or stainless steel works best.
- Electric Hand Mixer or Stand Mixer: You can whisk the filling by hand, but your arm will get tired. A hand mixer makes it quick and easy.
- Spatula: For scraping the bowl and smoothing the top of the bars.
- Measuring Cups and Spoons: Standard set for accuracy.
I bought my first hand mixer for fifteen dollars at a discount store, and it’s still going strong after five years. You don’t need expensive equipment here. Just make sure your cream cheese is properly softened and you’re good to go.
Preparation Method
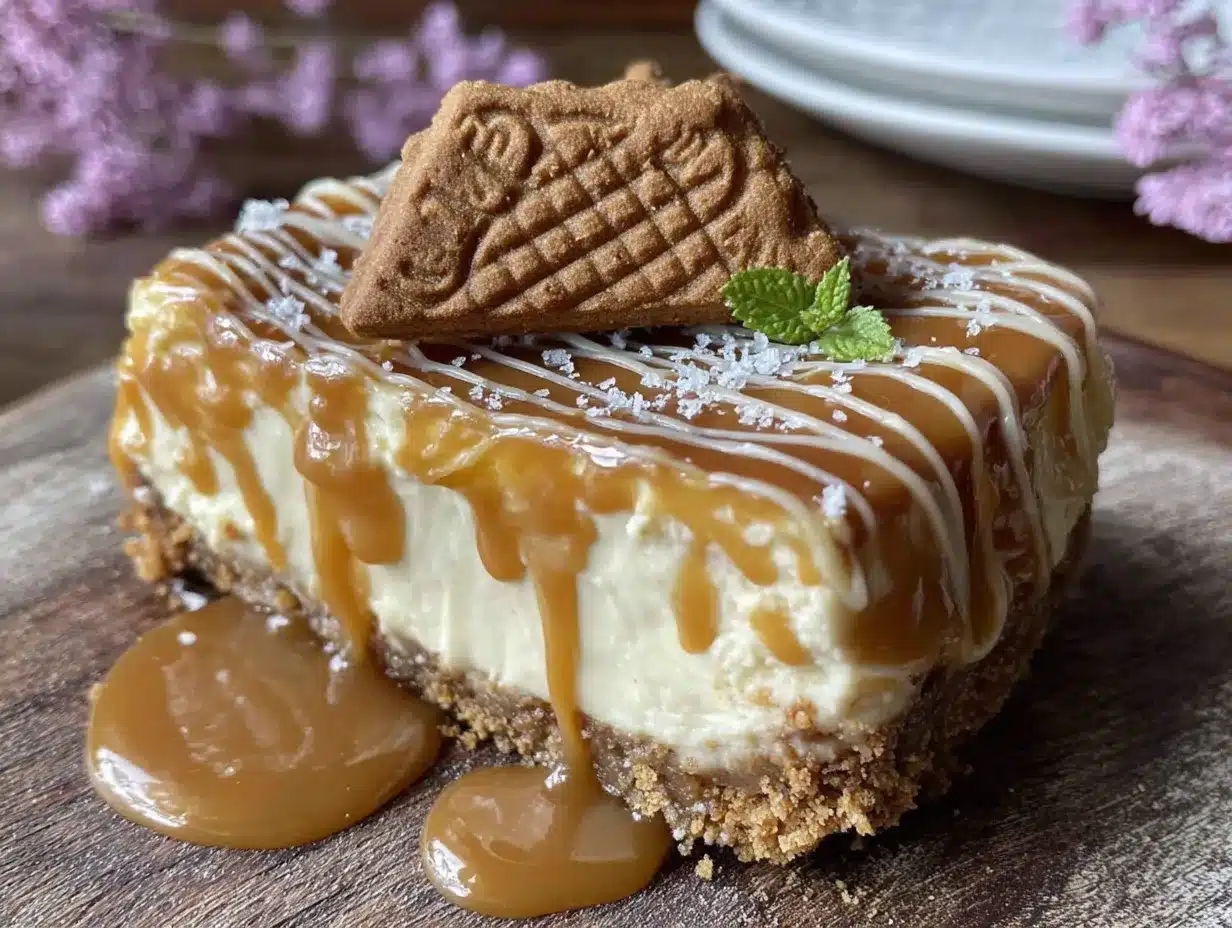
This is the part where it all comes together. Take your time, read through the steps once before starting, and you’ll have a gorgeous pan of bars ready for the fridge in no time.
- Prepare the pan. Line your 8×8-inch pan with parchment paper, leaving about 2 inches of overhang on two opposite sides. This creates handles for lifting the bars out later. Set it aside.
- Make the crust. Place the Biscoff cookies in a food processor and pulse until they become fine crumbs. You should have about 2 cups. If you’re using a bag and rolling pin, crush them until no large pieces remain. Pour the crumbs into a medium bowl. Add the melted butter and stir with a fork until every crumb is coated. The mixture should look like wet sand and hold together when you press it in your fist.
- Press the crust. Transfer the crumb mixture to your prepared pan. Press it down firmly and evenly. I use the bottom of a flat measuring cup for this—it gives you a nice, even surface. Make sure you press into the corners well. Place the pan in the refrigerator while you make the filling. This helps the crust set.
- Whip the cream. In a separate bowl, pour the cold heavy cream. Using your hand mixer, whip it on medium-high speed until soft peaks form. This takes about 2-3 minutes. You’re looking for the cream to hold its shape when you lift the beaters, but it should still be soft and pillowy. Don’t over-whip it into butter. Set this aside.
- Make the filling. In a large bowl, beat the softened cream cheese with the hand mixer on medium speed until it’s smooth and creamy, about 1 minute. Scrape down the sides and the bottom of the bowl with your spatula. Add the powdered sugar and vanilla extract. Beat again until combined, about 30 seconds. It should be smooth with no lumps.
- Fold in the whipped cream. Add the whipped cream to the cream cheese mixture. Fold it in gently with your spatula. Don’t stir vigorously—you want to keep the air you whipped into the cream. Fold just until no white streaks remain. The filling should be light, fluffy, and uniform in color.
- Assemble the bars. Take the pan with the crust out of the fridge. Spoon the filling over the crust and spread it evenly with your spatula. Smooth the top as best you can. It doesn’t have to be perfect, but try to get it fairly level.
- Add the top layer. Warm the Biscoff spread in the microwave for about 15 seconds until it’s pourable. Drizzle it over the filling. You can spread it gently with a knife or spatula, or leave it in swirls for a more rustic look. I like to leave some thicker patches—they’re a nice surprise when you bite into a bar.
- Chill. Cover the pan with plastic wrap or foil and place it in the refrigerator. This is the hardest part: you need to let it chill for at least 6 hours, but overnight is better. The bars need time to set properly. If you cut them too early, they’ll be a gooey mess. Trust me, I’ve done it. It’s still tasty, but it’s not pretty.
- Slice and serve. Once fully set, lift the bars out of the pan using the parchment paper handles. Place them on a cutting board. Use a sharp knife to cut them into 9 or 16 squares, depending on how big you want them. Wipe the knife clean between cuts for neat edges. Serve cold.
Cooking Tips & Techniques
I’ve made these bars more times than I can count, and I’ve picked up a few tricks along the way. Here are the things I wish someone had told me the first time.
Softening cream cheese properly. This is the most common mistake. If your cream cheese is too cold, your filling will be lumpy. Leave it on the counter for at least 30 minutes. If you’re in a hurry, cut it into cubes and microwave it for 10 seconds at a time, but be careful—you don’t want it to melt. It should be room temperature, not warm.
Don’t skip the parchment paper. I know it seems like an extra step, but I promise you’ll thank me when you lift the entire block of cheesecake out of the pan in one piece. Trying to scoop these bars out with a spatula is a recipe for frustration.
Press the crust firmly. A loose crust will crumble when you cut the bars. Take the time to press it down evenly and with some force. I use the bottom of a glass or a measuring cup. The crust should feel solid, not sandy.
Watch your whipping time. Over-whipped cream turns into butter. You want soft peaks that hold their shape but still look silky. If you see the cream starting to look grainy or separate, stop immediately. You’ve gone too far.
Chill time is non-negotiable. I know you’re going to want to eat these right away. I get it. But if you cut them after only 2-3 hours, they’ll be more like cheesecake pudding than bars. The filling needs time to firm up. Overnight is truly best. The texture is so much better the next day.
Cut with a clean knife. Run your knife under hot water, wipe it dry, then cut. Wipe the blade between each cut. This gives you those beautiful, clean edges that look professional. It takes an extra minute, but it makes a big difference.
Variations & Adaptations
One of the best things about this recipe is how easy it is to change up. Here are some variations I’ve tried and loved.
Chocolate Biscoff Bars: Add 2 tablespoons of cocoa powder to the crust mixture before pressing it in. You can also melt some dark chocolate and drizzle it over the top along with the Biscoff spread. The chocolate and spiced cookie flavors are a match made in heaven.
Peanut Butter Swirl: Warm up 1/4 cup of peanut butter and swirl it into the filling before adding the Biscoff top layer. Use a knife to create swirls. It adds a nice salty contrast to the sweetness. I made this version for a friend who doesn’t like Biscoff spread (I know, I was shocked too) and she ate three bars.
Vegan Version: Use a high-quality vegan cream cheese (I like Violife or Kite Hill), coconut cream instead of heavy cream, and a plant-based butter for the crust. The texture will be slightly softer, but it sets well and tastes delicious. Chill it for the full overnight time for best results.
Mini Version: Instead of an 8×8 pan, use a muffin tin lined with paper liners. Press the crust into the bottom of each liner, add the filling, and chill. These are perfect for parties or portion control. You’ll get about 12 mini cheesecakes.
Spiced Up Version: Add 1/2 teaspoon of cinnamon and a pinch of nutmeg to the crust mixture. You can also add a tiny pinch of cardamom to the filling. It gives the bars a warm, holiday feel that’s perfect for winter gatherings.
Serving & Storage Suggestions
These bars are best served cold, straight from the refrigerator. The filling is firm but still creamy, and the crust has that satisfying snap. I like to let them sit at room temperature for about 5 minutes before serving—it takes the edge off the chill without making them soft.
For presentation, I arrange the bars on a simple white plate or a wooden board. A light dusting of powdered sugar or a tiny pinch of flaky sea salt on top looks beautiful and adds flavor. You can also add a small dollop of whipped cream and a whole Biscoff cookie on the side for a more decadent look.
These bars pair wonderfully with a hot cup of coffee or a glass of cold milk. The spiced cookie flavor is a natural match for coffee, and the creamy filling balances the bitterness. For a dessert spread, serve them alongside fresh berries or a simple chocolate mousse.
Storage: Keep the bars in an airtight container in the refrigerator. They will stay fresh for up to 5 days, though they rarely last that long in my house. The flavors actually develop more over the first 24-48 hours, so day-old bars are even better than fresh ones.
Freezing: These bars freeze beautifully. Wrap individual bars in plastic wrap, then place them in a freezer-safe bag or container. They’ll keep for up to 3 months. To serve, let them thaw in the refrigerator for a few hours or at room temperature for about 30 minutes. I often make a double batch and freeze half for emergency dessert cravings.
Reheating: These are meant to be eaten cold, so no reheating needed. If you want a slightly softer texture, let them sit at room temperature for 10-15 minutes before serving.
Nutritional Information & Benefits
Let’s be honest—these are a treat, not a health food. But knowing what’s in them can help you enjoy them mindfully.
Per bar (based on 9 servings): approximately 380-420 calories, 28g fat, 32g carbohydrates, 5g protein, 18g sugar. These are estimates and will vary based on the specific brands you use.
The cream cheese provides a good amount of calcium and protein, while the Biscoff cookies offer a small dose of iron. The heavy cream adds richness, but also some vitamin A. It’s not a nutritional powerhouse, but it’s a dessert that makes you feel good, and that counts for something.
For those with dietary concerns: this recipe contains gluten (from the cookies), dairy (from the cream cheese and cream), and soy (often in the cookies). For a gluten-free version, use gluten-free speculoos cookies or a gluten-free graham cracker crust. For a dairy-free version, use the substitutions mentioned in the variations section.
I personally love that this dessert feels indulgent without being overly heavy. The portion size is satisfying, and the richness means a little goes a long way. One bar is usually enough to hit that sweet spot.
Conclusion
These Cozy No-Bake Biscoff Cheesecake Bars have become my go-to dessert for so many occasions. They’re quick enough for a Tuesday night craving but special enough for a holiday party. The recipe is forgiving, the ingredients are simple, and the result is genuinely delicious. Every time I make them, I think of that woman at the spice shop and her handwritten note. She was right—no oven, no stress, and honestly, no sharing required if you don’t want to.
I hope you give these bars a try. Make them your own. Add a swirl, change the topping, or keep them exactly as written. They’re meant to be flexible and forgiving, just like a good comfort recipe should be. When you make them, I’d love to hear how they turn out. Drop a comment below and let me know if you added your own twist, or if they became a new favorite in your kitchen. And if you’re looking for another cozy dessert, you might enjoy these crispy garlic chicken for a savory option, or these creamy tuscan chicken for a comforting dinner. Happy baking—or in this case, happy no-baking!
Frequently Asked Questions
Can I use low-fat cream cheese?
You can, but the filling won’t be as creamy or set as firmly. Full-fat cream cheese gives the best texture and flavor. If you do use low-fat, expect a slightly softer bar that may need extra chilling time.
How long do these bars need to chill?
At least 6 hours, but overnight is ideal. The filling needs time to firm up so you can cut clean slices. If you’re in a rush, 4 hours might work, but the bars will be softer and harder to handle.
Can I use a different cookie for the crust?
Absolutely. Graham crackers, vanilla wafers, or shortbread cookies all work. If you use a less flavorful cookie, consider adding a pinch of cinnamon and nutmeg to mimic the Biscoff spice profile.
Why did my filling turn out lumpy?
Most likely your cream cheese was too cold. Make sure it’s softened to room temperature before you start. If you do get lumps, try beating the mixture for an extra minute or two. Sometimes they’ll smooth out with more mixing.
Can I make these bars ahead of time?
Yes, they’re perfect for making ahead. They actually taste better after a day or two in the fridge. You can make them up to 3 days in advance. Just keep them covered in the refrigerator until you’re ready to serve.
Pin This Recipe!
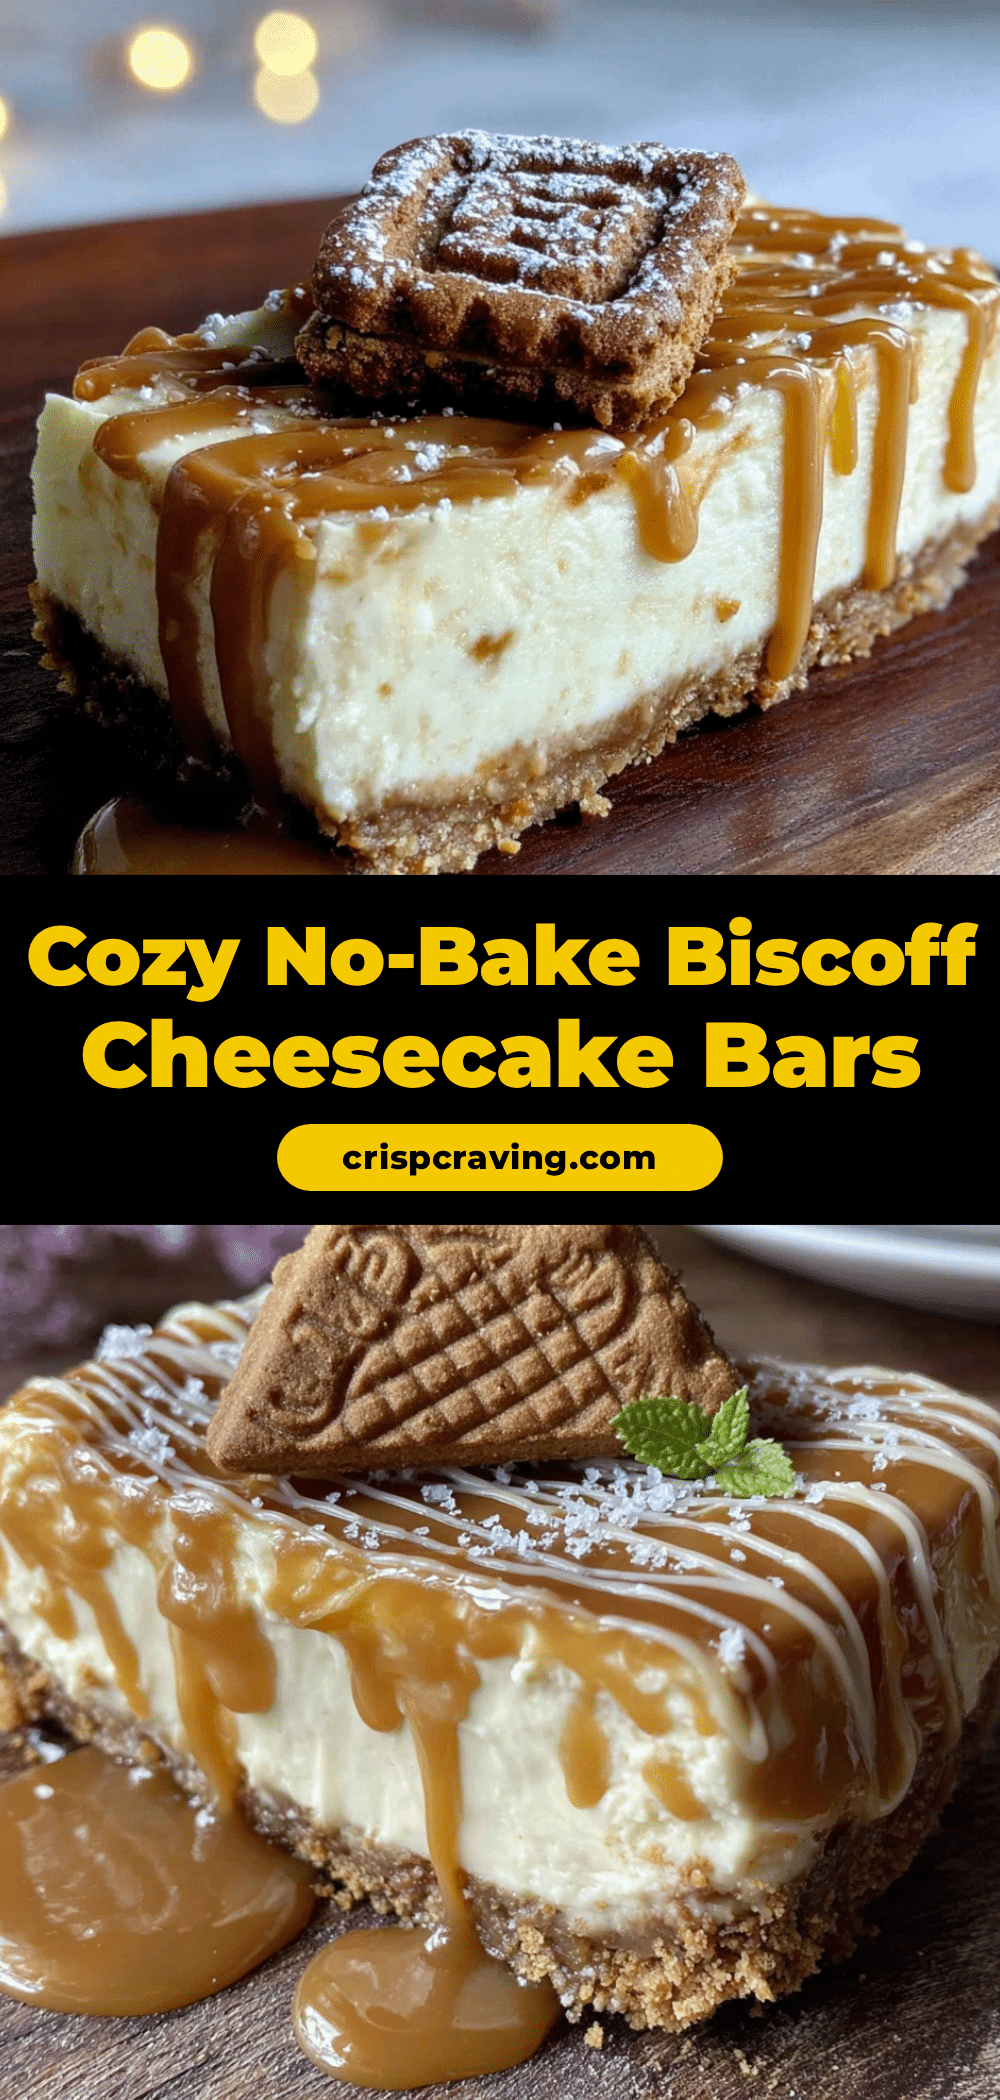
Cozy No-Bake Biscoff Cheesecake Bars: Easy 10-Min Recipe
Rich, creamy no-bake cheesecake bars with a spiced Biscoff cookie crust and a silky cream cheese filling, topped with a glossy Biscoff spread. Ready in just 10 minutes of active prep, these bars are the perfect cozy dessert for any occasion.
- Prep Time: 10 minutes
- Cook Time: 0 minutes
- Total Time: 6 hours 10 minutes (includes chilling)
- Yield: 9 servings 1x
- Category: Dessert
- Cuisine: American
Ingredients
- 250g Biscoff cookies (about 2 cups crushed)
- 113g unsalted butter (1/2 cup, melted)
- 450g full-fat cream cheese (2 blocks, softened)
- 100g powdered sugar (1 cup)
- 120ml heavy cream (1/2 cup, cold)
- 1 tsp vanilla extract
- 120g Biscoff spread (1/2 cup, warmed slightly)
- Optional: pinch of flaky sea salt
Instructions
- Line an 8×8-inch baking pan with parchment paper, leaving about 2 inches of overhang on two opposite sides.
- Pulse Biscoff cookies in a food processor until fine crumbs form (about 2 cups). Transfer to a medium bowl, add melted butter, and stir until every crumb is coated. The mixture should look like wet sand.
- Press the crumb mixture firmly and evenly into the prepared pan using the bottom of a flat measuring cup. Refrigerate while making the filling.
- In a separate bowl, whip cold heavy cream with a hand mixer on medium-high speed until soft peaks form (about 2-3 minutes). Set aside.
- In a large bowl, beat softened cream cheese on medium speed until smooth and creamy (about 1 minute). Scrape down the sides. Add powdered sugar and vanilla extract, beat until combined (about 30 seconds).
- Gently fold the whipped cream into the cream cheese mixture with a spatula until no white streaks remain. The filling should be light and fluffy.
- Remove the crust from the fridge. Spoon the filling over the crust and spread evenly with a spatula.
- Warm the Biscoff spread in the microwave for about 15 seconds until pourable. Drizzle over the filling and spread gently or leave in swirls.
- Cover the pan with plastic wrap or foil and refrigerate for at least 6 hours, preferably overnight.
- Once fully set, lift the bars out using the parchment handles. Place on a cutting board and cut into 9 or 16 squares with a sharp knife, wiping the blade clean between cuts.
Notes
Cream cheese must be softened to room temperature for a smooth filling. Chilling time is non-negotiable—at least 6 hours, but overnight is best. For clean cuts, run the knife under hot water and wipe dry between cuts. Bars can be stored in an airtight container in the refrigerator for up to 5 days or frozen for up to 3 months.
Nutrition
- Serving Size: 1 bar (based on 9 se
- Calories: 400
- Sugar: 18
- Sodium: 280
- Fat: 28
- Saturated Fat: 16
- Carbohydrates: 32
- Fiber: 1
- Protein: 5
Keywords: no-bake cheesecake, Biscoff cheesecake bars, easy dessert, no-bake dessert, cookie butter cheesecake, 10-minute recipe



