Love this? Save it for later!
Share the inspiration with your friends
There used to be a tiny bakery on the corner of Elm and 4th in my hometown called “The Flour Pot.” It was the kind of place with mismatched chairs and a chalkboard menu that changed daily. And they made these dirt cups that were, honestly, legendary. When they closed three summers ago—turned into a vape shop, of all things—I felt a real pang of loss. It sounds silly to mourn a dessert, but those dirt cups were a staple at every birthday party, every school pick-up treat, and every “I just need a win today” moment.
After about a dozen tries—some were too soupy, others were basically just pudding with a sad cookie crumble—I finally got it. This recipe is that exact replica. The creamy, dreamy chocolate pudding, the crunchy, “dirty” Oreo topping, and of course, those sneaky gummy worms peeking out. It’s the kind of dessert that makes you feel like a kid again, even when you’re a full-grown adult paying bills. I mean, maybe you’ve been there—craving a specific taste from a specific place that just doesn’t exist anymore. This is my solution, and I’m so excited to share it with you.
Why You’ll Love This Recipe
Let me tell you, this isn’t just another dessert recipe. I’ve tested it, tweaked it, and served it to everyone from my picky 5-year-old nephew to my mother-in-law who “doesn’t do sweets.” The verdict? Universal love. Here’s why this dirt cup recipe is a keeper.
- Quick & Easy: No oven required. No complicated techniques. Just a few simple steps and you’re done. Perfect for those last-minute cravings or when you need a fun activity with the kids.
- Simple Ingredients: You probably have most of these in your pantry right now. Pudding mix, milk, Oreos, and gummy worms. No fancy grocery trips needed.
- Perfect for Any Occasion: Birthday parties, Halloween celebrations, a cozy movie night, or just a Tuesday that needs a little pick-me-up. They’re always a hit.
- Crowd-Pleaser: Kids adore them, and adults secretly do too. There’s something about digging into a cup of “dirt” that brings out the kid in everyone.
- Unbelievably Delicious: The combination of the silky, rich pudding and the crunchy, chocolatey Oreo “dirt” is pure comfort. It’s the kind of dessert that makes you close your eyes after the first bite.
What makes this recipe different from the rest is the texture. I use a specific ratio of pudding to milk that gives you a perfectly thick, almost mousse-like consistency. It’s not runny, and it’s not too stiff. And the trick of using cold heavy cream in the pudding mix? That was a happy accident from one of my failed attempts, and it makes all the difference. This is comfort food reimagined—simple enough for a weeknight, but impressive enough to make you feel like a rockstar.
What Ingredients You Will Need
This recipe uses simple, wholesome ingredients to deliver a dessert that’s pure nostalgia. You’ll find everything you need in your local grocery store, and most of it is probably already in your kitchen. Here’s what you’ll need:
- For the Pudding Base:
- 1 (3.9-ounce) package instant chocolate pudding mix (I recommend Jell-O brand for the smoothest texture)
- 2 cups (480ml) cold whole milk (adds richness)
- 1/2 cup (120ml) cold heavy cream (this is my secret for an ultra-creamy texture)
- For the “Dirt” Topping:
- 1 (14.3-ounce) package Oreo cookies (about 36 cookies)
- Optional: 2 tablespoons unsalted butter, melted (helps the “dirt” clump slightly for a more realistic look)
- For the “Worms” and Decorations:
- 1 (5-ounce) bag gummy worms (I like the sour ones for a little tangy contrast)
- Optional: 1/4 cup chocolate shavings or sprinkles for extra “dirt” texture
- Optional: Fresh mint leaves for a “garden” look
Ingredient Selection Tips: For the best results, use full-fat milk and cream. The fat content is crucial for that rich, decadent texture. If you’re dairy-free, you can use full-fat oat milk and coconut cream, but the texture will be slightly different. I’ve tried it with almond milk, and it was a bit watery. For the Oreos, the classic ones work best, but double-stuffed are fine too—just know your “dirt” will be a little creamier. And for the gummy worms, pick your favorite! The sour ones add a nice pop of flavor against the sweet pudding.
Equipment Needed
You don’t need a lot of fancy gear for this recipe, which is part of its charm. Here’s what you’ll need:
- Mixing Bowls: One large bowl for the pudding, one medium bowl for crushing the Oreos.
- Whisk or Electric Hand Mixer: A whisk works fine, but an electric mixer makes the pudding come together in a flash. I’ve used both, and honestly, my hand mixer saves me a few minutes of arm work.
- Measuring Cups and Spoons: For accurate measurements.
- 6 to 8 Small Cups or Jars: Clear plastic cups are classic for showing off the layers, but small mason jars or even teacups work beautifully. I found a set of 8-ounce plastic cups at the dollar store that are perfect.
- Food Processor or Ziploc Bag and Rolling Pin: For crushing the Oreos. A food processor gives you a fine, even crumb. A Ziploc bag and rolling pin is a great arm workout and a fun job for kids. I’ve definitely used the bag method when my food processor was in the dishwasher.
- Spatula: For scraping every last bit of pudding.
Budget-Friendly Tip: If you don’t have a food processor, just put the Oreos in a sturdy Ziploc bag, seal it, and go to town with a rolling pin. It’s a great way to get out some frustration!
Preparation Method
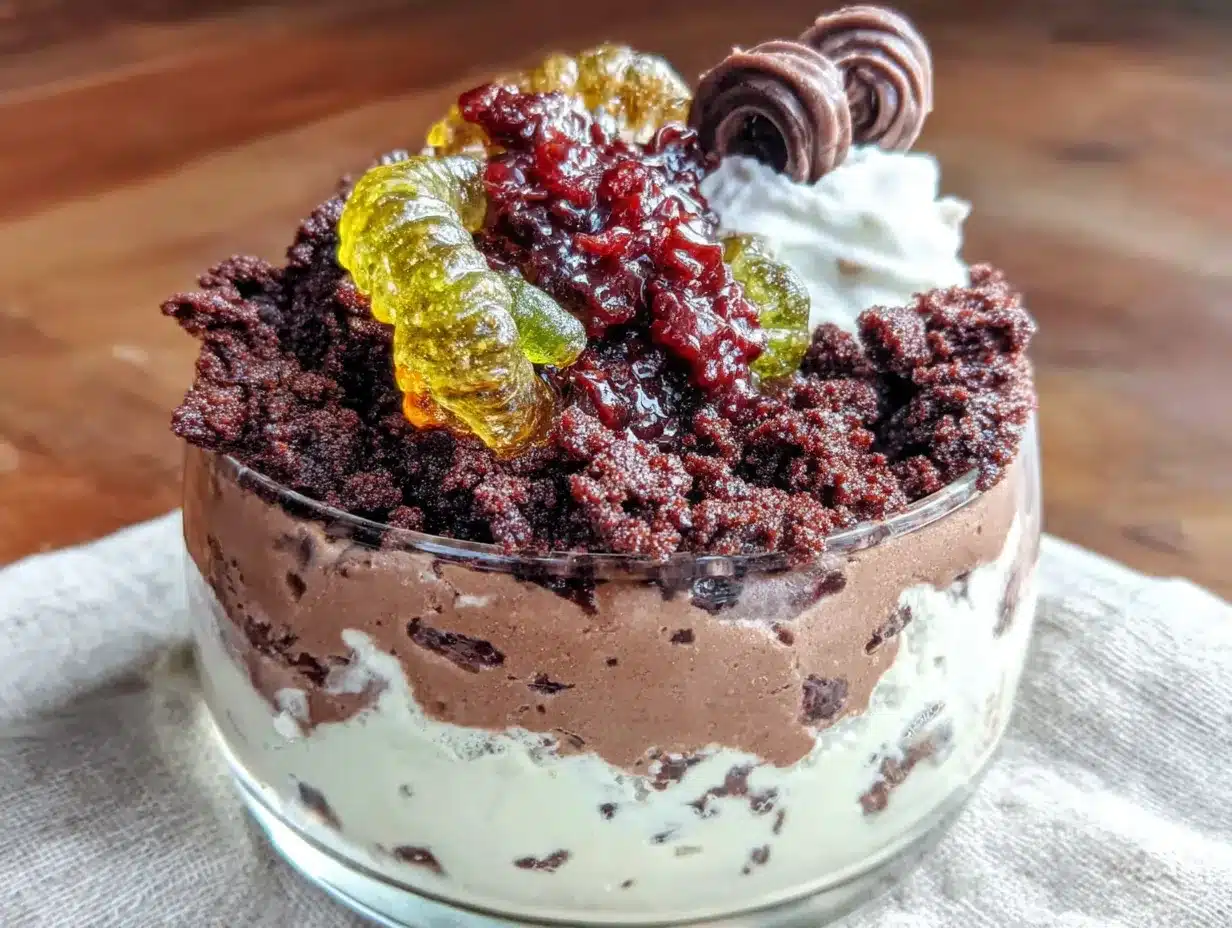
Okay, let’s get to the fun part. Making these dirt cups is a process, but a simple and rewarding one. Follow these steps, and you’ll have a batch of cozy, nostalgic desserts in no time.
- Crush the Oreos: Place the entire package of Oreos (cream filling included) into your food processor. Pulse until you have fine crumbs that resemble dirt. If you’re using the Ziploc bag method, place the cookies in the bag, seal it, and crush them with a rolling pin. You want a mix of fine crumbs and some slightly larger pieces for texture. Set the crumbs aside in a medium bowl.
- Make the Pudding Base: In a large mixing bowl, combine the instant chocolate pudding mix, cold whole milk, and cold heavy cream. Whisk vigorously or use an electric hand mixer on low speed for about 2 minutes, until the mixture is smooth and begins to thicken. It will be quite thin at first, but don’t worry—it will set up beautifully. Let it sit for 5 minutes to thicken slightly.
- Assemble the First Layer: Grab your cups or jars. Spoon about 2 tablespoons of the Oreo “dirt” into the bottom of each cup. This creates a nice foundation and ensures every bite has that crunchy texture. Gently press it down with the back of a spoon.
- Add the Pudding Layer: Spoon or pipe the chocolate pudding over the Oreo layer, filling each cup about halfway. You can use a piping bag for a cleaner look, but a spoon works perfectly fine. Tap the cups gently on the counter to settle the pudding and remove any air bubbles.
- Add the Worms: This is the best part. Take a few gummy worms and gently press them into the pudding layer, letting some stick out over the edge of the cup. You want them to look like they’re crawling out of the “dirt.” I usually add 3-4 worms per cup.
- Top with More Pudding: Carefully spoon the remaining pudding over the worms, filling the cups almost to the top. Leave a little room for the final dirt layer. Smooth the top with a spatula.
- Finish with the “Dirt”: Generously sprinkle the remaining Oreo crumbs over the top of each cup, completely covering the pudding. This is the “dirt” layer. You can add a little extra here—don’t be shy.
- Garnish and Chill: For the final touch, add a few more gummy worms on top, maybe one completely buried and one peeking out. If you’re using chocolate shavings or mint leaves, add them now. Cover the cups with plastic wrap or lids and refrigerate for at least 2 hours, or overnight. The chilling time is crucial—it allows the pudding to fully set and the flavors to meld together.
Personal Tip: I like to make these the night before I plan to serve them. The next day, the Oreo crumbs have softened just a little, creating a texture that’s almost like a dirt-flavored cake. It’s divine.
Cooking Tips & Techniques
After many, many batches of dirt cups, I’ve learned a few things the hard way. Here are my top tips to ensure your dirt cups are perfect every time.
- Don’t Overmix the Pudding: Overmixing can make the pudding gummy or cause it to break down. Mix just until it’s smooth and starting to thicken. A few lumps are fine—they’ll disappear as it sets.
- Use Cold Ingredients: This is non-negotiable. Cold milk and cream help the pudding set up properly and give it that luscious, creamy texture. If your ingredients are warm, the pudding will be thin and won’t set.
- Crush the Oreos to the Right Consistency: You want a mix of fine crumbs and some slightly larger pieces. If you crush them too fine, you lose that satisfying crunch. If you leave them too chunky, it’s hard to eat. I like to pulse my food processor about 10-12 times.
- Let the Pudding Set: This is the hardest part—waiting! But it’s essential. The pudding needs at least 2 hours to fully set. If you try to serve them too soon, you’ll have a soupy mess. Overnight is always best.
- My Biggest Failure: One time, I was in a rush and used warm milk. The pudding never set, and I ended up with chocolate soup with floating Oreo chunks. It was a sad day. Learn from my mistake!
Variations & Adaptations
This recipe is a fantastic base for all sorts of fun variations. Here are a few of my favorites.
- Halloween Dirt Cups: Use orange and black gummy worms, and add some candy eyeballs or pumpkin-shaped sprinkles on top. It’s the perfect spooky treat.
- Peanut Butter Dirt Cups: Add 1/4 cup of creamy peanut butter to the pudding mixture before whisking. The peanut butter and chocolate combination is incredible. Use peanut butter Oreos for the “dirt” for an extra punch.
- Vegan Dirt Cups: Use a high-quality vegan chocolate pudding mix (like Simply Delish) and full-fat oat milk or coconut milk. For the “dirt,” use vegan chocolate sandwich cookies (like Newman’s Own). It works beautifully.
- Mint Chocolate Dirt Cups: Add 1/2 teaspoon of peppermint extract to the pudding mixture. Use mint-flavored gummy worms or add a few Andes mints on top. It’s refreshing and delicious.
- Gluten-Free Dirt Cups: Use gluten-free chocolate sandwich cookies (like Glutino) and ensure your pudding mix is certified gluten-free. Most instant pudding mixes are, but it’s always good to double-check.
Serving & Storage Suggestions
These dirt cups are best served cold, straight from the fridge. The contrast between the cold, creamy pudding and the crunchy “dirt” is what makes them so special.
For Serving: Serve them in their cups with a small spoon. You can also get creative with presentation. Arrange them on a platter with some extra gummy worms scattered around for a “garden” effect. They’re perfect for a kids’ party, a Halloween gathering, or even a fun dessert for a movie night. I love serving them with a glass of cold milk—it’s the ultimate comfort pairing.
For Storage: Cover each cup tightly with plastic wrap or a lid and store them in the refrigerator. They will keep well for up to 3 days. The Oreo crumbs will soften over time, which some people (like me) actually prefer. If you like your “dirt” crunchy, I recommend adding the final layer of crumbs just before serving.
Freezing: I don’t recommend freezing these. The pudding can become icy and the texture of the Oreos will be off. They’re best enjoyed fresh from the fridge.
Nutritional Information & Benefits
Let’s be honest—this is a treat, not a health food. But that doesn’t mean it can’t be enjoyed as part of a balanced life. Here’s a rough estimate of the nutritional content per serving (assuming 8 servings):
| Nutrient | Amount per Serving |
|---|---|
| Calories | 350-400 |
| Fat | 18g |
| Carbohydrates | 50g |
| Protein | 5g |
| Sugar | 35g |
Health Benefits of Key Ingredients: The milk and cream provide calcium and vitamin D for strong bones. The cocoa in the pudding and Oreos contains antioxidants called flavonoids, which are good for heart health. And the gummy worms? Well, they’re made of sugar, but they do provide a moment of pure, unadulterated joy. And sometimes, that’s exactly what you need.
Dietary Considerations: This recipe contains dairy and gluten. For dairy-free and gluten-free options, see the variations section above. It also contains soy (in the Oreos) and corn (in the gummy worms).
Conclusion
So there you have it—my perfect recreation of those legendary dirt cups from The Flour Pot. This recipe is more than just a dessert; it’s a little piece of nostalgia, a moment of comfort, and a guaranteed smile-maker. Whether you’re making them for a birthday party, a Halloween bash, or just because you need a little joy in your day, I promise you won’t be disappointed.
I love this recipe because it’s simple, fun, and endlessly adaptable. It’s the kind of dessert that brings people together, and honestly, that’s what food is all about. So go ahead, get a little messy, and enjoy every single bite. And when you make them, I’d love to hear about it! Leave a comment below and tell me how they turned out. Did you add any fun variations? What’s your favorite way to eat them? Let me know!
Frequently Asked Questions
Can I make these dirt cups ahead of time?
Absolutely! In fact, I recommend it. They need at least 2 hours to set in the fridge, but they’re even better the next day. The flavors meld together, and the Oreo crumbs soften slightly, creating a perfect texture.
Can I use sugar-free pudding mix?
Yes, you can. The texture will be slightly different—sugar-free pudding can be a bit less creamy—but it works. I recommend using full-fat milk and cream to help compensate for the lack of sugar.
My pudding didn’t set. What went wrong?
This usually happens if your milk or cream wasn’t cold enough, or if you didn’t let it set for long enough. Make sure your ingredients are well-chilled, and be patient! Give it the full 2 hours, or even overnight.
Can I use homemade chocolate pudding instead of instant?
You can, but it will change the texture and the setting time. Homemade pudding is usually thinner and needs more time to set. If you go that route, make sure it’s completely cool and thick before assembling the cups.
How do I keep the gummy worms from sinking to the bottom?
The trick is to add them after the first layer of pudding has had a chance to thicken slightly. Let the pudding sit for 5 minutes after mixing, then add your worms. Also, don’t press them in too hard—just gently nestle them into the pudding.
Pin This Recipe!
Cozy No-Bake Oreo Dirt Cups with Gummy Worms

A nostalgic no-bake dessert featuring creamy chocolate pudding, crunchy Oreo ‘dirt,’ and gummy worms peeking out. Perfect for parties, Halloween, or a fun treat any day.
- Prep Time: 15 minutes
- Cook Time: 0 minutes
- Total Time: 2 hours 15 minutes (includes chilling)
- Yield: 8 servings 1x
- Category: Dessert
- Cuisine: American
Ingredients
- 1 (3.9-ounce) package instant chocolate pudding mix (recommended: Jell-O brand)
- 2 cups (480ml) cold whole milk
- 1/2 cup (120ml) cold heavy cream
- 1 (14.3-ounce) package Oreo cookies (about 36 cookies)
- 2 tablespoons unsalted butter, melted (optional, for clumping)
- 1 (5-ounce) bag gummy worms (sour recommended)
- 1/4 cup chocolate shavings or sprinkles (optional, for extra texture)
- Fresh mint leaves (optional, for garnish)
Instructions
- Crush the Oreos: Place the entire package of Oreos (cream filling included) into a food processor. Pulse until you have fine crumbs that resemble dirt. Alternatively, place cookies in a Ziploc bag and crush with a rolling pin. Set aside in a medium bowl.
- Make the Pudding Base: In a large mixing bowl, combine the instant chocolate pudding mix, cold whole milk, and cold heavy cream. Whisk vigorously or use an electric hand mixer on low speed for about 2 minutes, until smooth and beginning to thicken. Let sit for 5 minutes to thicken slightly.
- Assemble the First Layer: Spoon about 2 tablespoons of the Oreo ‘dirt’ into the bottom of each cup (6-8 small cups or jars). Gently press down with the back of a spoon.
- Add the Pudding Layer: Spoon or pipe the chocolate pudding over the Oreo layer, filling each cup about halfway. Tap cups gently on the counter to settle the pudding and remove air bubbles.
- Add the Worms: Gently press 3-4 gummy worms into the pudding layer, letting some stick out over the edge of the cup.
- Top with More Pudding: Carefully spoon the remaining pudding over the worms, filling cups almost to the top. Smooth the top with a spatula.
- Finish with the ‘Dirt’: Generously sprinkle the remaining Oreo crumbs over the top of each cup, completely covering the pudding.
- Garnish and Chill: Add a few more gummy worms on top, and optional chocolate shavings or mint leaves. Cover cups with plastic wrap or lids and refrigerate for at least 2 hours, or overnight.
Notes
For best results, use full-fat milk and cream. Chill ingredients well. Let pudding set for at least 2 hours, preferably overnight. For a dairy-free version, use full-fat oat milk and coconut cream. For gluten-free, use gluten-free chocolate sandwich cookies and certified gluten-free pudding mix.
Nutrition
- Serving Size: 1 cup
- Calories: 375
- Sugar: 35
- Sodium: 380
- Fat: 18
- Saturated Fat: 10
- Carbohydrates: 50
- Fiber: 2
- Protein: 5
Keywords: dirt cups, Oreo dirt cups, no-bake dessert, chocolate pudding, gummy worms, Halloween dessert, kids dessert, easy dessert



