Love this? Save it for later!
Share the inspiration with your friends
The neighborhood Halloween block party was in four hours and I’d completely forgotten. Everyone else would be bringing elaborate themed dishes—I saw Lisa from three doors down lugging a massive cauldron of bubbling green punch, and Mark was already setting up a graveyard cake that must have taken him two days. I had a dozen hard-boiled eggs in my fridge and a vague sense of panic. My kids were looking at me with those eyes, you know the ones, like mom, please don’t embarrass us.
I’d planned to make regular deviled eggs for the potluck, but that felt so boring next to all the spooky spreads. Then it hit me—what if I just made them look creepy? I mean, deviled eggs are already the fastest thing in my recipe rotation. A little food coloring, some black olives, and maybe a squiggle of hot sauce for blood effect? Fifteen minutes later, I had a platter of the most ridiculous-looking Halloween deviled eggs you’ve ever seen. Honestly, I almost didn’t bring them out. They looked too silly.
Well, let me tell you—those eggs disappeared first. The kids went nuts, the adults kept sneaking back for “just one more,” and someone actually asked me if I’d spent all day on them. I laughed out loud. These quick spooky Halloween deviled eggs took me maybe ten minutes, start to finish. That’s the thing about this recipe—it makes you look like a Halloween hero without actually working for it. And honestly? That’s my favorite kind of recipe. Maybe you’ve been there too, scrambling at the last minute, wondering how everyone else makes it look so easy. This one’s for you.
Why You’ll Love This Recipe
Let me be straight with you—I’ve tested this recipe more times than I care to admit. I’ve made it for kid’s classroom parties, last-minute Halloween gatherings, and even a spooky movie night where I was the only adult who remembered to bring food. Every single time, people act like I pulled off some kitchen magic trick. The secret? It’s absurdly simple.
- Ready in 10 Minutes: If your eggs are already boiled, you’re looking at maybe ten minutes of active work. Perfect for the parent who forgot about the school party until 7 AM that morning. Not that I’ve done that or anything.
- Pantry Ingredients: You need eggs, mayo, mustard, and whatever creepy decorations you have lying around. Black olives, paprika, hot sauce—it’s all stuff you probably already own.
- Perfect for Halloween Chaos: Whether it’s a potluck, a classroom party, or just a fun dinner before trick-or-treating, these fit right in. They’re portable, kid-friendly, and don’t require a fork.
- Crowd-Pleaser Guaranteed: I’ve watched picky eaters and foodie adults both go back for thirds. Something about the spooky look makes people braver about trying them.
- Unbelievably Delicious: The filling is creamy, tangy, and perfectly seasoned. The spooky decorations are just a bonus—the actual flavor is what keeps people coming back.
What makes this different from every other Halloween deviled egg recipe out there? It’s the speed, honestly. Most recipes want you to pipe spider webs with sour cream or carve little pumpkin faces into the egg whites. Who has time for that? My version uses simple shortcuts—olive slices for spider bodies, a dash of paprika for a bloody look, and a quick squiggle of hot sauce for veins. It looks impressive but takes almost no effort. That’s the kind of Halloween cooking I can get behind.
There’s something about seeing a plate of these on the table that makes people smile. It’s comfort food with a spooky twist—familiar enough to be satisfying, weird enough to be fun. And when you’re running around trying to get everyone out the door for trick-or-treating, that’s exactly what you need.
What Ingredients You Will Need
This recipe uses simple, everyday ingredients to create something that looks way more complicated than it is. Most of these are probably in your kitchen right now, which is exactly the point. Here’s what you’ll need:
- 12 large eggs, hard-boiled and peeled (older eggs peel easier, so buy them a week ahead if you can)
- 1/3 cup mayonnaise (I prefer Hellmann’s for creaminess, but any brand works)
- 1 tablespoon yellow mustard (Dijon works too, but yellow gives that classic deviled egg color)
- 1 teaspoon white vinegar (adds brightness and helps the filling hold together)
- 1/4 teaspoon salt
- 1/8 teaspoon black pepper
- 1/4 teaspoon paprika, plus more for garnish (smoked paprika adds a nice depth)
- Black olives, sliced into rounds (for spider bodies—use canned, pitted ones)
- Hot sauce (optional, for a bloody vein effect—Sriracha works great)
- Red food coloring (optional, for dyeing the egg whites or filling a creepy color)
Ingredient Selection Tips: For the best texture, use eggs that are at least a week old—fresh eggs are a nightmare to peel. I learned this the hard way after losing half an egg white to stubborn shell fragments. If you’re buying eggs specifically for this, grab them a week before Halloween and let them sit in your fridge. Trust me on this.
Substitution Guidance: If you’re dairy-free, use vegan mayonnaise—it works perfectly here. For a healthier twist, swap half the mayo with plain Greek yogurt. The tanginess actually complements the filling nicely. And if you don’t have black olives, you can use capers or even small slices of roasted red pepper for the spider bodies. Get creative with whatever you have on hand.
Brand Recommendations: I’ve tested this with several mayo brands, and Hellmann’s gives the smoothest, creamiest result. For mustard, French’s yellow mustard is my go-to. And for hot sauce, Tabasco’s smoky flavor adds a nice kick without overwhelming the filling. But honestly, use what you have—these Halloween deviled eggs are forgiving.
Equipment Needed
You don’t need fancy tools for this recipe, which is part of why I love it. Here’s what you’ll need:
- Large pot for boiling eggs (any size works, just make sure eggs are submerged)
- Medium mixing bowl for the filling
- Fork or potato masher for mashing the yolks (I prefer a fork—less cleanup)
- Small spoon or piping bag for filling the eggs (a zip-top bag with the corner snipped off works beautifully)
- Cutting board and knife for slicing olives
- Platter or serving dish for presentation
Budget-Friendly Options: Don’t own a piping bag? No problem. A plastic sandwich bag works just as well—scoop the filling in, twist the top, and snip off a tiny corner. I’ve done this dozens of times and it works perfectly. For slicing olives, a butter knife gets the job done if your regular knife is dirty. And if you don’t have a large pot, any pot that fits your eggs will do—just make sure they’re in a single layer.
Personal Experience: I once tried to use a fancy piping tip for these Halloween deviled eggs and it was a disaster. The filling got stuck, I made a mess, and I ended up just using a spoon anyway. Keep it simple. The spooky decorations cover up any imperfections, so don’t stress about making them look perfect.
Preparation Method
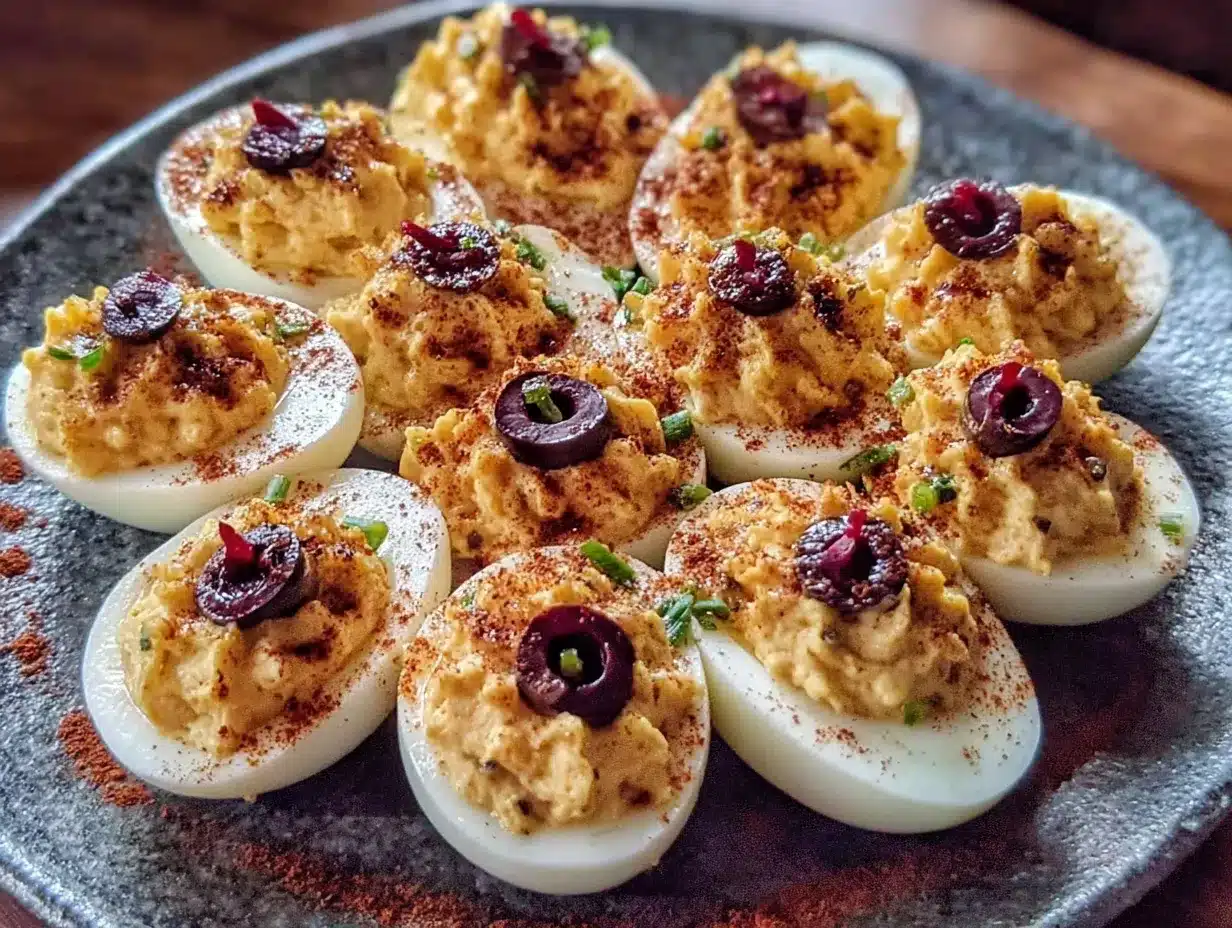
Alright, let’s make these quick spooky Halloween deviled eggs. I’ll walk you through every step, including the little tricks I’ve learned from making these about fifty times.
- Hard-boil the eggs (if not already done): Place 12 eggs in a single layer in a large pot. Cover with cold water by about an inch. Bring to a boil over high heat, then immediately remove from heat, cover, and let sit for 10-12 minutes. Transfer to an ice bath immediately to stop cooking. Pro tip: older eggs peel much easier, so plan ahead if you can.
- Peel and halve the eggs: Once cooled, gently tap each egg on the counter to crack the shell, then roll it between your palms to loosen. Peel under running cold water—this helps remove stubborn shell pieces. Slice each egg in half lengthwise. Carefully pop out the yolks into a medium bowl. Arrange the whites on a platter, cut-side up.
- Make the filling: Add 1/3 cup mayonnaise, 1 tablespoon yellow mustard, 1 teaspoon white vinegar, 1/4 teaspoon salt, 1/8 teaspoon black pepper, and 1/4 teaspoon paprika to the yolks. Mash everything together with a fork until smooth and creamy. Taste it—I always do—and adjust seasoning if needed. It should be tangy, creamy, and just a little bit rich.
- Color the filling (optional but fun): If you want green or purple egg filling for extra spookiness, add a drop of food coloring now. Stir until evenly colored. I’ve done green for a monster vibe and it always gets a reaction. Just don’t overdo it—one drop is plenty.
- Fill the egg whites: Spoon the filling into a piping bag or zip-top bag. If using a zip-top bag, snip off a tiny corner. Pipe the filling into each egg white half, mounding it slightly. Don’t worry about being neat—the decorations will cover any imperfections. If you don’t have a bag, just use a small spoon. It works fine.
- Create the spider decorations: Take your sliced black olives and place 4-6 slices on each filled egg to look like spider bodies. Arrange them slightly off-center so they look more realistic. For legs, you can cut thin strips of olive and arrange them around the body, or just leave the body as-is for a simpler look.
- Add the spooky details: Sprinkle a light dusting of paprika over the eggs for a “bloody” effect. If using hot sauce, drizzle a tiny squiggle across the filling to look like veins. A little goes a long way—you want creepy, not soggy. For extra effect, add a tiny dot of hot sauce near the olive “eyes” to look like blood.
- Chill before serving: Refrigerate the platter for at least 15 minutes before serving. This helps the filling set and makes the flavors meld together. If you’re in a rush (and let’s face it, you probably are), 5 minutes is better than nothing.
Sensory Cues: The filling should be smooth and creamy, not lumpy. When you pipe it, it should hold its shape without spreading too much. The olive slices should sit on top of the filling without sinking in. And when you take a bite, the filling should be cool, creamy, and tangy with a slight kick from the paprika or hot sauce.
Troubleshooting Tips: If your filling is too thick, add a teaspoon of milk or extra mayo. Too thin? Add another yolk or some breadcrumbs to thicken it up. If the egg whites tear while peeling, don’t panic—just use them for the filling and save the pretty ones for serving. Nobody will know.
Cooking Tips & Techniques
I’ve made plenty of mistakes with deviled eggs over the years, so let me save you the trouble. Here’s what I’ve learned:
The Perfect Boiled Egg: The biggest mistake people make is overcooking the eggs. That green ring around the yolk? That’s overcooked. Set a timer for 10 minutes exactly after the water boils, then immediately transfer to an ice bath. The yolks should be bright yellow and creamy, not chalky. I’ve ruined entire batches by getting distracted—set that timer.
Peeling Without Tears: Run the eggs under cold water while peeling. The water gets under the shell and helps it slide off. I also gently crack the entire shell surface before starting to peel—this creates more entry points for the water. And remember, older eggs peel way easier. If you’re buying eggs specifically for this, buy them a week ahead.
Make-Ahead Strategy: You can boil and peel the eggs up to 3 days ahead. Store them in a covered container in the fridge. You can also make the filling a day ahead and keep it in a piping bag in the fridge. Then on Halloween day, all you have to do is pipe and decorate. This is a lifesaver when you’re juggling costumes and candy.
Multitasking Tips: While the eggs are boiling, slice your olives and set up your platter. While the eggs are cooling in the ice bath, make the filling. This way, everything comes together in about 10 minutes of active work. I’ve timed myself—it’s genuinely fast.
Consistency Secrets: For the creamiest filling, make sure your mayo is at room temperature. Cold mayo doesn’t blend as smoothly. Also, mash the yolks thoroughly before adding any liquid ingredients—this prevents lumps. And always taste the filling before piping. Seasoning is personal, so adjust salt and pepper to your preference.
One Big Failure: I once tried to make these Halloween deviled eggs with neon green food coloring and accidentally used way too much. The filling came out looking radioactive—like something from a toxic waste spill. My kids thought it was hilarious, but it was definitely not the vibe I was going for. Lesson learned: start with one drop of food coloring and add more if needed.
Variations & Adaptations
One of the best things about this recipe is how easy it is to customize. Here are some variations I’ve tried and loved:
Spider Web Design: Instead of olive spiders, pipe a thin spiral of sour cream or mayo over the filling, then drag a toothpick from the center outward to create a web pattern. This looks super fancy but takes about 30 seconds per egg. I did this for a Halloween party last year and people thought I’d spent hours on them.
Monster Eye Eggs: Use sliced black olives for pupils and arrange them on the filling with a ring of paprika around each one to look like bloodshot eyes. This is my kids’ favorite version—they think it’s hilarious. You can also use sliced green olives with pimentos for a different look.
Ghostly White Filling: Skip the paprika and use plain filling without any coloring. Arrange the eggs on a dark platter (black or dark purple) so the white filling stands out. Add tiny dots of black sesame seeds for ghost eyes. This version is simpler and looks surprisingly elegant.
Dietary Adaptations: For a dairy-free version, use vegan mayo—it works perfectly. For a lower-fat option, swap half the mayo with plain Greek yogurt. The yogurt adds tanginess and creaminess without the extra calories. I’ve also made these with avocado mayo for a healthier twist, and they turned out great.
Flavor Twists: Add a teaspoon of pickle relish for sweetness and crunch. Mix in some crumbled bacon for a smoky flavor. Or add a pinch of curry powder for an unexpected kick. I once added sriracha directly to the filling and it was amazing—spicy and creamy at the same time.
Seasonal Variations: In the fall, add a pinch of pumpkin pie spice to the filling for a subtle warmth. For Christmas, use red and green food coloring for festive eggs. And for Easter, skip the spooky decorations and use fresh herbs for a spring-themed look.
Serving & Storage Suggestions
These Halloween deviled eggs are best served cold, straight from the fridge. The filling firms up nicely after chilling, making them easier to handle and eat. Here’s how to serve and store them:
Presentation Tips: Arrange the eggs on a dark platter or black serving tray to make the spooky decorations pop. I like to add a few fake spider webs around the edges of the platter for extra effect. You can also sprinkle some black sesame seeds around the eggs for a “dirt” effect. For a party, arrange them in a circular pattern with a small pumpkin in the center.
Complementary Dishes: These pair beautifully with other finger foods—think mini sliders, veggie platters, or cheese boards. For a Halloween party, serve them alongside mummy hot dogs (crescent rolls wrapped around hot dogs with mustard eyes) or pumpkin-shaped cheese balls. They also go great with a crisp white wine or apple cider.
Storage Instructions: Store leftover deviled eggs in an airtight container in the refrigerator for up to 2 days. Place them in a single layer with a paper towel on top to absorb excess moisture. Don’t stack them—the filling will get squished. And don’t leave them out at room temperature for more than 2 hours, especially if you’re serving them at a party.
Reheating: These are meant to be served cold, so no reheating needed. If they’ve been in the fridge for a while, let them sit at room temperature for 5-10 minutes before serving to take the chill off. The flavors actually taste better when they’re not ice-cold.
How Flavors Develop: Honestly, these taste even better the next day. The flavors meld together as they sit, and the filling becomes creamier. I’ve made them a day ahead for parties and they were perfect. Just wait to add the olive spiders until right before serving—they can get soggy if they sit on the filling too long.
Nutritional Information & Benefits
Here’s a rough estimate of the nutritional content per deviled egg half (based on 24 halves from 12 eggs):
| Nutrient | Amount per Half |
|---|---|
| Calories | 65 |
| Total Fat | 5g |
| Saturated Fat | 1g |
| Cholesterol | 95mg |
| Sodium | 120mg |
| Total Carbohydrates | 1g |
| Protein | 4g |
Health Benefits: Eggs are packed with high-quality protein, vitamin D, and choline, which is important for brain health. The yolks contain lutein and zeaxanthin, antioxidants that support eye health. And despite their reputation, eggs have been shown to raise good cholesterol (HDL) while having minimal effect on bad cholesterol for most people.
Dietary Considerations: This recipe is naturally gluten-free, low-carb, and keto-friendly. For a lower-fat option, swap half the mayo with Greek yogurt. For a dairy-free version, use vegan mayo. And if you’re watching sodium, use low-sodium mayo and skip the added salt in the filling.
Allergen Warning: This recipe contains eggs and may contain dairy (if using yogurt) or soy (if using certain mayo brands). Always check labels if serving to guests with allergies. For an egg-free version, you could try using silken tofu as a base, but the texture will be different.
Personal Perspective: I love that these Halloween deviled eggs are a treat that doesn’t feel completely indulgent. They’re satisfying without being heavy, and the protein keeps everyone full during a long night of trick-or-treating. They’re the kind of recipe that feels like a celebration but doesn’t leave you feeling sluggish afterward.
Conclusion
Look, I know Halloween can be stressful. Between the costumes, the candy, the decorations, and the pressure to make everything perfect, it’s easy to feel overwhelmed. That’s exactly why I love this recipe—it’s the one thing you can check off your list in ten minutes flat, and it’ll be the thing everyone remembers.
These quick spooky Halloween deviled eggs have saved me more times than I can count. They’ve been my go-to for classroom parties, last-minute gatherings, and those moments when I realize I forgot to sign up for the potluck. They make me look like I have my act together, when really, I just have a good recipe in my back pocket.
So go ahead and make these your own. Add extra hot sauce if you like things spicy. Use different olive arrangements to create your own creepy creatures. Or keep it simple with just a dusting of paprika. However you make them, they’ll be a hit. And when someone asks you how you made them look so spooky, just smile and say it’s your secret.
I’d love to hear how yours turn out! Drop a comment below and tell me your favorite Halloween recipe hack, or share a photo of your spooky eggs. And if you’re looking for more quick Halloween ideas, check out my spooky Halloween punch recipe and easy mummy pizza bites—they’re both lifesavers for busy Halloween nights.
Happy Halloween, and happy cooking!
Frequently Asked Questions
Can I make these Halloween deviled eggs ahead of time?
Absolutely! You can boil and peel the eggs up to 3 days ahead. Make the filling a day ahead and store it in a piping bag in the fridge. Assemble and decorate the day of for best results—the olive spiders can get soggy if they sit too long.
How do I get my eggs to peel easily?
Use older eggs (at least a week old) and plunge them into an ice bath immediately after boiling. Peel under running cold water—the water helps loosen the shell. I’ve found that gently cracking the entire shell surface before peeling also makes a huge difference.
Can I use a different decoration instead of olives?
Of course! Try capers for tiny spiders, sliced cherry tomatoes for a bloody look, or strips of roasted red pepper for legs. You can also pipe sour cream in spider web patterns or use black sesame seeds for a simpler look. Get creative with whatever you have on hand.
How long do these keep in the fridge?
Store them in an airtight container for up to 2 days. Place a paper towel on top to absorb moisture. Don’t stack them—the filling will get squished. And remember, the decorations work best if added right before serving.
Are these suitable for kids?
Definitely! Kids love the spooky look, and the classic deviled egg flavor is usually a hit. If you’re serving very young children, skip the hot sauce or use just a tiny amount. You can also make a milder version with just paprika for color and no spicy elements.
Pin This Recipe!
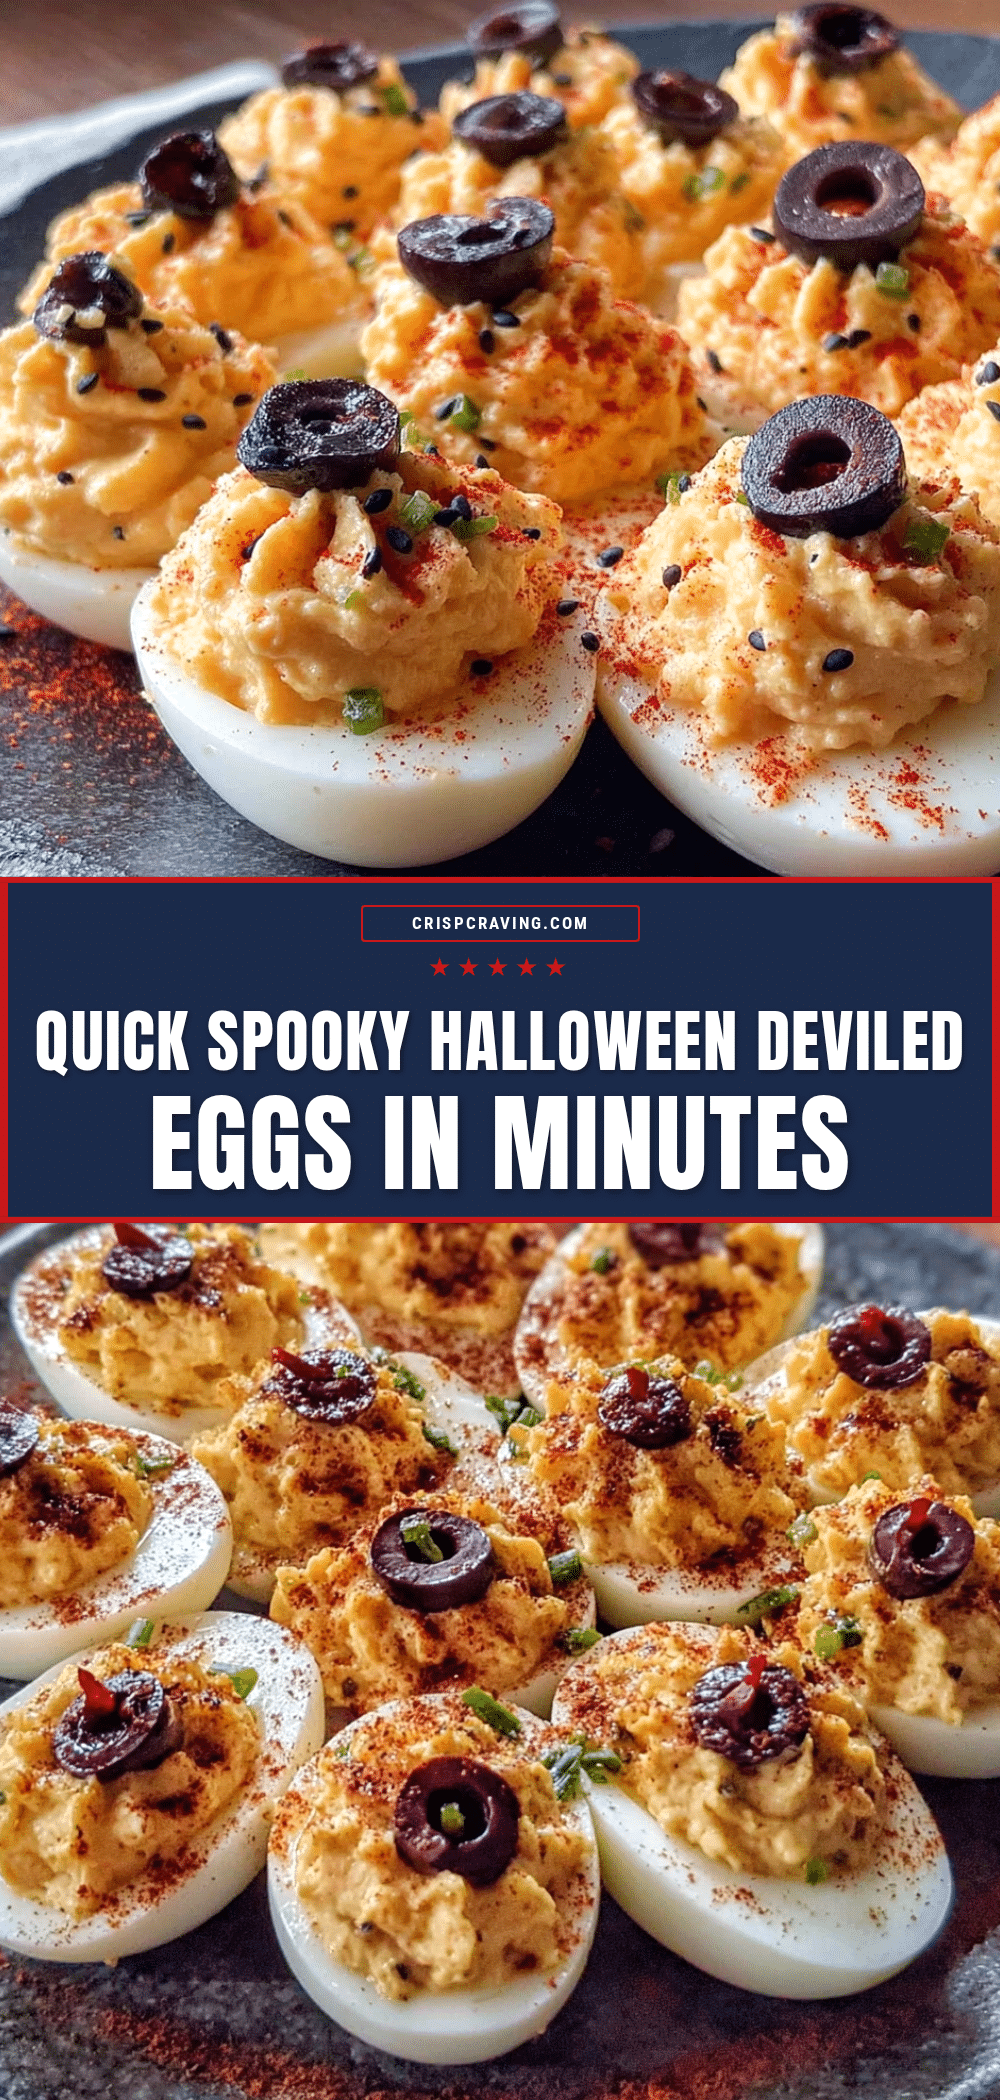
Quick Spooky Halloween Deviled Eggs: Easy 10-Minute Recipe
These quick spooky Halloween deviled eggs are ready in just 10 minutes and use simple pantry ingredients. Perfect for last-minute Halloween parties, potlucks, or a fun dinner before trick-or-treating, they look impressively creepy but require almost no effort.
- Prep Time: 10 minutes
- Cook Time: 12 minutes
- Total Time: 22 minutes
- Yield: 24 deviled egg halves (12 servings) 1x
- Category: Appetizer
- Cuisine: American
Ingredients
- 12 large eggs, hard-boiled and peeled
- 1/3 cup mayonnaise
- 1 tablespoon yellow mustard
- 1 teaspoon white vinegar
- 1/4 teaspoon salt
- 1/8 teaspoon black pepper
- 1/4 teaspoon paprika, plus more for garnish
- Black olives, sliced into rounds (for spider bodies)
- Hot sauce (optional, for a bloody vein effect)
- Red food coloring (optional, for dyeing the egg whites or filling)
Instructions
- Hard-boil the eggs (if not already done): Place 12 eggs in a single layer in a large pot. Cover with cold water by about an inch. Bring to a boil over high heat, then immediately remove from heat, cover, and let sit for 10-12 minutes. Transfer to an ice bath immediately to stop cooking.
- Peel and halve the eggs: Once cooled, gently tap each egg on the counter to crack the shell, then roll it between your palms to loosen. Peel under running cold water. Slice each egg in half lengthwise. Carefully pop out the yolks into a medium bowl. Arrange the whites on a platter, cut-side up.
- Make the filling: Add 1/3 cup mayonnaise, 1 tablespoon yellow mustard, 1 teaspoon white vinegar, 1/4 teaspoon salt, 1/8 teaspoon black pepper, and 1/4 teaspoon paprika to the yolks. Mash everything together with a fork until smooth and creamy. Taste and adjust seasoning if needed.
- Color the filling (optional but fun): If you want green or purple egg filling for extra spookiness, add a drop of food coloring now. Stir until evenly colored.
- Fill the egg whites: Spoon the filling into a piping bag or zip-top bag. If using a zip-top bag, snip off a tiny corner. Pipe the filling into each egg white half, mounding it slightly. If you don’t have a bag, just use a small spoon.
- Create the spider decorations: Take your sliced black olives and place 4-6 slices on each filled egg to look like spider bodies. Arrange them slightly off-center. For legs, cut thin strips of olive and arrange them around the body, or just leave the body as-is for a simpler look.
- Add the spooky details: Sprinkle a light dusting of paprika over the eggs for a ‘bloody’ effect. If using hot sauce, drizzle a tiny squiggle across the filling to look like veins. For extra effect, add a tiny dot of hot sauce near the olive ‘eyes’ to look like blood.
- Chill before serving: Refrigerate the platter for at least 15 minutes before serving. This helps the filling set and makes the flavors meld together.
Notes
Use older eggs (at least a week old) for easier peeling. The filling can be made a day ahead and stored in a piping bag in the fridge. Add olive spiders just before serving to prevent sogginess. For a dairy-free version, use vegan mayonnaise. For a lower-fat option, swap half the mayo with plain Greek yogurt.
Nutrition
- Serving Size: 2 deviled egg halves
- Calories: 130
- Sugar: 1
- Sodium: 240
- Fat: 10
- Saturated Fat: 2
- Carbohydrates: 2
- Protein: 8
Keywords: Halloween deviled eggs, spooky deviled eggs, quick Halloween recipe, easy appetizer, last-minute Halloween, deviled eggs with olives, spider deviled eggs



