Love this? Save it for later!
Share the inspiration with your friends
I was standing in the checkout line at the grocery store last October, staring blankly at a display of candy corn, when the smell hit me. Not candy corn—no, it was the faint, dusty scent of almond extract mixed with something warm and buttery. And suddenly I was seven years old, sitting cross-legged on my Aunt Carol’s linoleum kitchen floor, watching her roll out dough on a floured counter. She wasn’t making cookies. She was making fingers. I remember how the afternoon light caught the little slivered almond she pressed into the tip of each dough roll, and how she wiggled her own fingers at me and cackled. She’s been gone five years now, but every time October rolls around, I find myself chasing that feeling—that mix of creepy and cozy, of being just scared enough to giggle. I’ve tried other Halloween treats over the years, but nothing lands quite like these witch finger pretzel rods. Maybe you’ve been there too, standing in the candy aisle feeling like something’s missing from your Halloween spread. I mean, let’s face it—store-bought candy is fine, but it doesn’t make people do a double-take. These little guys do. And the best part? They take five minutes to throw together. Honestly, I think Aunt Carol would approve of the shortcut.
Why You’ll Love This Recipe
Let me tell you—I have tested a lot of Halloween recipes over the years. Some are adorable but take three hours. Others are quick but look like a toddler assembled them. These witch finger pretzel rods hit that sweet spot where creepy meets ridiculously easy. Here’s what makes them stand out:
- Five Minutes of Work: I’m not joking. You dip, you decorate, you chill. That’s it. Perfect for the night before a Halloween party when you realize you forgot to plan anything.
- Simple Ingredients: Pretzel rods, almond bark or white chocolate, green food coloring, and slivered almonds. You probably already have half of these in your pantry.
- Perfect for Halloween Gatherings: These are made for a crowd. They sit on a platter looking delightfully grotesque, and guests can’t stop picking them up and showing each other. They’re a conversation starter.
- Crowd-Pleaser: Kids love them because they’re spooky. Adults love them because they’re salty-sweet and actually taste good. Not just a gimmick.
- Unbelievably Customizable: You can make them spookier, sweeter, or even add a little spice. I’ve done a batch with a pinch of cayenne in the chocolate, and let me tell you—that was a hit.
What makes this version different from the hundreds of other witch finger recipes out there? It’s the pretzel rod base. Most recipes use a soft cookie dough that takes time to shape and bake. But the pretzel rod gives you that satisfying crunch, that salty contrast, and a sturdy structure that doesn’t crumble in your hand. Plus, you don’t have to wait for dough to chill. I’ve brought these to three different Halloween parties now, and every single time, someone asks for the recipe. It’s the kind of treat that makes you close your eyes after the first bite—salty, sweet, creamy, and just a little bit wicked.
What Ingredients You Will Need
This recipe uses simple, pantry-friendly ingredients to create something that looks far more complicated than it actually is. The key is in the contrast—salty pretzel, sweet coating, and that little almond nail that makes everything read as “finger.” Here’s what you’ll need:
- Pretzel rods (1 standard 12-ounce bag, about 20 rods): Look for thick, sturdy rods that won’t snap easily when you dip them. I prefer the Snyder’s brand for their consistent shape and salt distribution. You want rods that are straight-ish, not too curved, so they actually look like fingers.
- Almond bark or white chocolate melting wafers (12 ounces): This is your “skin” base. I recommend using almond bark or CandiQuik melting wafers because they set up firm and shiny without needing to be tempered. White chocolate chips work in a pinch but can be finicky—add a teaspoon of coconut oil to help them melt smoothly.
- Green gel food coloring: This is what gives your witch fingers that sickly, undead hue. Drop by drop is the way to go—you want a pale, swampy green, not neon. I use Wilton brand gel because it doesn’t thin out the chocolate like liquid food coloring does.
- Slivered almonds (about ¼ cup): These become the fingernails. Look for slivered almonds that are relatively flat and uniform in shape. I’ve tried whole almonds before, and they just look like boulders on the end of a finger. Slivered is the way to go.
- Optional decorations: A little red gel icing or raspberry jam for “blood” around the cuticle area. You can also use a tiny brush to dab a bit of cocoa powder into the knuckle creases for a dirty, aged look.
A quick note on ingredient selection: if you’re serving these at a party where someone has a nut allergy, you can swap the almond bark for white candy melts and use a small red candy or a dot of red frosting instead of the almond “nail.” Not quite as spooky, but still fun. For a dairy-free version, use dairy-free white chocolate chips and coconut oil. And honestly? Don’t overthink the pretzel rods. The standard ones from the grocery store work beautifully.
Equipment Needed
You don’t need a fancy kitchen setup for these. Here’s what I use every time:
- Microwave-safe bowl: For melting the almond bark. A glass measuring cup works great because the spout makes dipping easier.
- Parchment paper or silicone baking mat: For letting the dipped pretzels set. Parchment is non-stick and makes cleanup a breeze.
- Baking sheet: To hold the parchment paper and give you a stable surface for the dipped pretzels.
- Small offset spatula or butter knife: For spreading the melted coating evenly if needed. Honestly, I just use a butter knife.
- Toothpick or small paintbrush: For adding knuckle creases and details. A toothpick works perfectly for dragging lines into the coating before it sets.
- Plates or tray for chilling: You’ll need space in your fridge or freezer to let these set up firm.
If you don’t have a microwave, you can melt the almond bark in a double boiler on the stovetop. Just make sure the bowl doesn’t touch the water. I’ve ruined a batch by getting steam into the chocolate—it seizes up and becomes a grainy mess. Also, a tip from personal experience: don’t use wax paper. It sticks. Parchment paper is your friend here.
Preparation Method
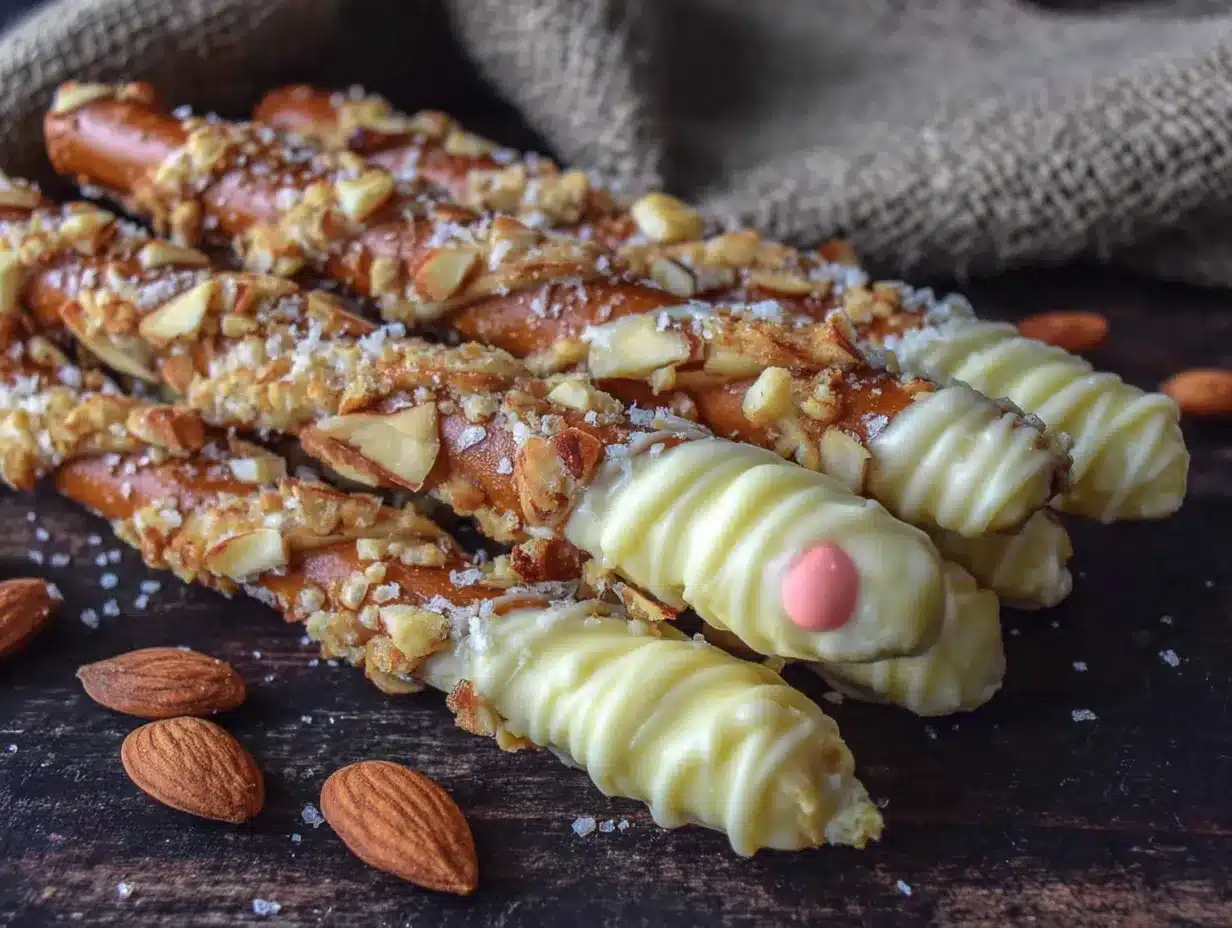
Alright, let’s make some fingers. This whole process takes about five minutes of active work, plus 15 minutes of chilling time. Here’s how it goes:
- Set up your workspace. Line a baking sheet with parchment paper. Have your pretzel rods, slivered almonds, and green food coloring ready. I like to have everything within arm’s reach because once the coating is melted, you want to work quickly before it starts to set.
- Melt the almond bark. Break the almond bark into pieces and place them in a microwave-safe bowl. Microwave in 30-second intervals, stirring after each, until completely smooth. This usually takes about 1.5 to 2 minutes total. Be careful not to overheat—almond bark can burn and turn lumpy if you push it too far.
- Add the green food coloring. Stir in the gel food coloring one drop at a time. I start with two drops, stir well, then assess. You’re going for a pale, sickly green—think zombie skin, not Grinch skin. If you add too much, it’ll look unnatural. Remember, the coating will lighten slightly as it sets.
- Dip the pretzel rods. Hold a pretzel rod by one end and dip it into the melted coating, leaving about an inch undipped at the top (that’s the “wrist” area, which looks more realistic if it’s bare). Gently lift the pretzel and let the excess drip back into the bowl. Use your finger or a butter knife to wipe off any drips from the bottom edge.
- Place on parchment and add the nail. Set the dipped pretzel on the parchment. Immediately press a slivered almond into the tip of the coated end, angled slightly upward so it looks like a fingernail growing out. Press gently—it should stick into the coating. Repeat with the remaining pretzels.
- Create knuckle creases. While the coating is still wet, use a toothpick to drag three or four horizontal lines across the “finger” section. These are the knuckles. Don’t press too hard—you just want to part the coating, not scrape down to the pretzel. I like to make the lines slightly uneven, because real fingers aren’t perfectly straight.
- Add details (optional). If you want extra creep factor, use a tiny dab of red gel icing or raspberry jam at the base of the almond “nail” to look like blood. You can also use a toothpick to add a few tiny dots or wrinkles near the knuckles. This is where the fun really starts.
- Chill to set. Place the baking sheet in the refrigerator for about 15 minutes, or until the coating is completely firm. If you’re in a hurry, 5 minutes in the freezer works too—just don’t leave them in there too long or the pretzels can get stale.
- Serve and spook. Arrange the witch finger pretzel rods on a platter. I like to fan them out like a hand reaching out of the serving dish. You can also stand them up in a jar or cup for a more dramatic effect. Watch your guests do a double-take before they grab one.
A quick note: if the coating starts to thicken while you’re working, pop the bowl back in the microwave for 10 seconds to loosen it up. Also, don’t worry if some of the pretzels look a little messy—imperfect fingers are actually more realistic. Real fingers aren’t uniform, and neither should these be.
Cooking Tips & Techniques
I’ve made these witch finger pretzel rods more times than I care to count, and I’ve definitely made my share of mistakes. Here’s what I’ve learned so you don’t have to repeat my errors:
Work in small batches. If you’re making a double batch for a big Halloween party, don’t melt all the coating at once. Melt half, use it up, then melt the second half. The coating will start to set after about 10 minutes, and you’ll end up with thick, lumpy fingers if you try to stretch it too far.
Watch your temperature. I once microwaved the almond bark for a full minute without stirring, and the bottom burned while the top looked fine. Stirring between intervals is non-negotiable. Also, if you’re using a double boiler, keep the water at a gentle simmer—not a rolling boil. Steam is the enemy of melted chocolate.
Don’t skip the knuckle lines. I made a batch once without them, and they just looked like green pretzels with almonds stuck on top. The knuckle creases are what sell the illusion. They take two seconds to draw, and they make all the difference.
Chill before serving. These are best served cold or at room temperature. If you’re taking them to a party, keep them in the fridge until you leave, then transport them in a single layer in a container. Stacking them while the coating is soft will ruin the fingernails.
Make them the day before. These actually hold up beautifully overnight. Just store them in an airtight container in the fridge, and they’ll be ready to go when you are. The coating stays firm and shiny, and the pretzels stay crunchy.
One more thing: if you accidentally break a pretzel rod while dipping it, don’t panic. Just eat it and move on. I mean, honestly—it’s still delicious.
Variations & Adaptations
One of the best things about this recipe is how easy it is to tweak. Here are some variations I’ve tried and loved:
- Dark Chocolate Witches: Swap the white coating for dark or milk chocolate. Skip the green food coloring, and you’ve got chocolate-covered pretzel “fingers.” Add the almond nail and knuckle lines the same way. These are less spooky but more decadent.
- Spicy Fingers: Add a pinch of cayenne pepper or a few drops of chili oil to the melted coating. The heat builds slowly and pairs surprisingly well with the saltiness of the pretzel. I brought these to a Halloween potluck, and they were gone in ten minutes.
- Gluten-Free Version: Use gluten-free pretzel rods. Most major brands now offer a gluten-free option, and they work exactly the same way. Just check the label to make sure your almond bark is also gluten-free.
- Vegan Adaptation: Use dairy-free white chocolate chips and coconut oil (about 1 teaspoon per cup of chips). The texture is slightly softer, but they still set up nicely in the fridge. Use a vegan red gel for the “blood” detail.
- Extra Spooky: Add a tiny drop of black food coloring to the green to make it a murky, swampy color. You can also sprinkle a little black sanding sugar over the wet coating for a dirt effect. I did this once for a zombie-themed party, and it was a huge hit.
My personal favorite variation? I add a tiny smear of raspberry jam at the base of the almond nail, then sprinkle a pinch of flaky sea salt over the whole finger. The sweet-salty-spooky combo is absolutely lethal. My neighbor tried one and immediately demanded the recipe.
Serving & Storage Suggestions
These witch finger pretzel rods are best served cold, straight from the fridge. The coating is firm, the pretzel is crunchy, and the whole effect is at its most convincing when they’re chilled. I like to arrange them on a black platter or a dark-colored serving board—the contrast makes the green pop. You can fan them out like a hand, or stand them upright in a jar filled with black beans or crushed Oreo “dirt” for a creepy centerpiece.
For a Halloween party, I usually set these out alongside a bowl of spicy pumpkin dip and some apple slices. The sweet-spicy combo works beautifully with the salty pretzels. If you’re serving them as part of a dessert table, they pair well with chocolate spiderweb cupcakes or a batch of ghostly meringue pops.
As for storage, keep them in an airtight container in the refrigerator for up to five days. The pretzels will soften slightly over time, but they’ll still be good. I don’t recommend freezing them—the coating can develop condensation when thawed, which makes the pretzels soggy. If you’re making them ahead for a party, prepare them the day before and store them in the fridge overnight. They’ll be perfect.
One more thing: these do not travel well in warm weather. If you’re taking them to a party, pack them in a single layer in a rigid container and keep them cool until serving. I learned this the hard way during a particularly warm October afternoon—my fingers turned into a melted mess before I even got to the party.
Nutritional Information & Benefits
Let’s be real—these are a treat, not a health food. But here’s the breakdown if you’re curious. Per serving (one witch finger pretzel rod): approximately 180 calories, 8 grams of fat, 24 grams of carbohydrates, 2 grams of protein, and about 12 grams of sugar. The exact numbers will vary depending on the brand of almond bark and pretzels you use.
On the plus side, pretzels are lower in fat than many other snack options, and almonds provide a small amount of healthy fats and vitamin E. If you use dark chocolate instead of white, you’ll get a dose of antioxidants. But honestly? These are about fun and flavor, not nutrition. I serve them as a once-a-year Halloween indulgence, and I don’t feel bad about it one bit.
If you’re watching your sugar intake, you can use sugar-free white chocolate chips and a sugar-free pretzel rod. The texture will be slightly different, but the spooky effect is the same. For anyone with nut allergies, skip the almond nail and use a small red candy or a dot of red frosting instead.
Conclusion
These witch finger pretzel rods are exactly the kind of Halloween treat I wish I’d discovered years ago. They’re quick, they’re creepy, and they taste genuinely good—not just “good for a Halloween recipe.” Every time I make them, I think of Aunt Carol and her cackling laugh, and I smile. That’s what Halloween should feel like, right? A little spooky, a little silly, and full of moments that make people grin.
I’d love to hear how yours turn out. Did you add any wild variations? Did your guests scream or laugh? Drop a comment below and let me know—I read every single one. And if you’re looking for more Halloween inspiration, check out my easy Halloween appetizers or this creepy crawly jello shots for adults. Happy haunting, and happy snacking!
Frequently Asked Questions
Can I make these witch finger pretzel rods ahead of time?
Absolutely. Make them up to two days in advance and store them in an airtight container in the refrigerator. They actually hold up beautifully and are ready to serve whenever you need them.
Why did my almond bark seize up?
This usually happens if water gets into the melted coating—even a single drop can cause it to seize. Make sure your bowl and utensils are completely dry. If it does seize, you can try adding a teaspoon of vegetable oil or coconut oil and stirring vigorously to bring it back.
Can I use milk chocolate instead of white chocolate?
Yes! Milk or dark chocolate works great. Skip the green food coloring, and you’ll have chocolate-covered pretzel fingers. They’re less spooky but still delicious. Add the almond nail and knuckle lines the same way.
How do I make the green color look more realistic?
Start with just one or two drops of green gel food coloring. You want a pale, sickly green—not bright neon. If you add too much, you can balance it with a tiny drop of yellow or brown food coloring to muddy it up. Real zombie skin isn’t uniform, so don’t stress about perfection.
Can I freeze these for later?
I don’t recommend freezing them. The coating can develop condensation when thawed, which makes the pretzels soft and the almond bark sticky. They’re best made fresh or stored in the fridge for up to five days.
Pin This Recipe!
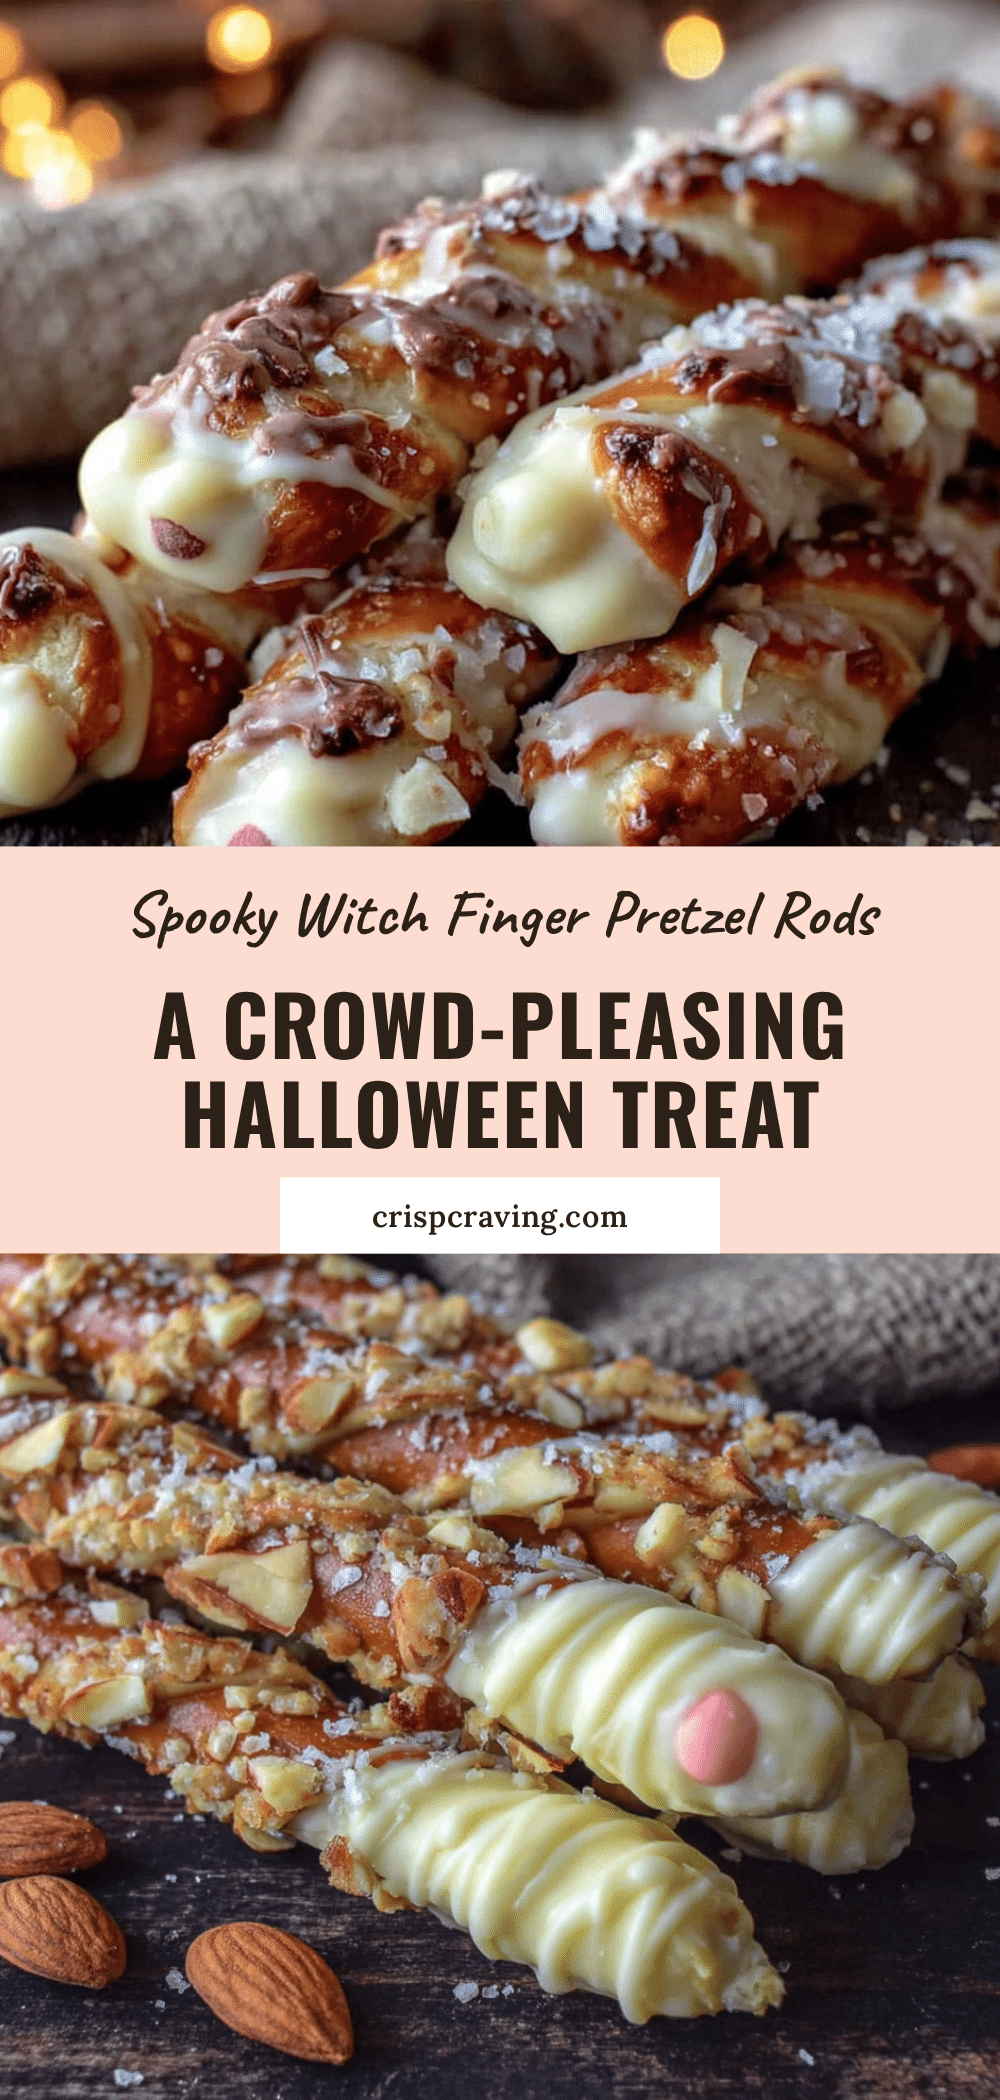
Best Halloween Witch Finger Pretzel Rods: Easy 5-Minute Treat

These witch finger pretzel rods are a quick and easy Halloween treat that combines salty pretzels with a sweet, green-tinted coating and almond fingernails. Ready in just 5 minutes of active time, they’re perfect for parties and guaranteed to get a double-take from guests.
- Prep Time: 5 minutes
- Cook Time: 0 minutes
- Total Time: 20 minutes (including 15 minutes chilling)
- Yield: 20 servings 1x
- Category: Dessert
- Cuisine: American
Ingredients
- 1 standard 12-ounce bag pretzel rods (about 20 rods)
- 12 ounces almond bark or white chocolate melting wafers
- Green gel food coloring
- ¼ cup slivered almonds
- Optional: red gel icing or raspberry jam for ‘blood’
- Optional: cocoa powder for aged look
Instructions
- Set up your workspace. Line a baking sheet with parchment paper. Have your pretzel rods, slivered almonds, and green food coloring ready.
- Melt the almond bark. Break the almond bark into pieces and place them in a microwave-safe bowl. Microwave in 30-second intervals, stirring after each, until completely smooth (about 1.5 to 2 minutes total).
- Add the green food coloring. Stir in the gel food coloring one drop at a time until you achieve a pale, sickly green color.
- Dip the pretzel rods. Hold a pretzel rod by one end and dip it into the melted coating, leaving about an inch undipped at the top (the ‘wrist’ area). Let excess drip back into the bowl.
- Place on parchment and add the nail. Set the dipped pretzel on the parchment. Immediately press a slivered almond into the tip of the coated end, angled slightly upward.
- Create knuckle creases. While the coating is still wet, use a toothpick to drag three or four horizontal lines across the ‘finger’ section to create knuckles.
- Add details (optional). Use a tiny dab of red gel icing or raspberry jam at the base of the almond ‘nail’ for blood effect. Add tiny dots or wrinkles near the knuckles.
- Chill to set. Place the baking sheet in the refrigerator for about 15 minutes, or until the coating is completely firm. (5 minutes in the freezer works too.)
- Serve and spook. Arrange the witch finger pretzel rods on a platter, fanning them out like a hand or standing them upright in a jar.
Notes
Work in small batches to prevent coating from setting. Don’t skip the knuckle lines—they sell the illusion. These are best served cold or at room temperature. Store in an airtight container in the refrigerator for up to 5 days. For a nut-free version, swap almond bark for white candy melts and use a small red candy instead of almond ‘nail.’ For dairy-free, use dairy-free white chocolate chips with coconut oil.
Nutrition
- Serving Size: 1 pretzel rod
- Calories: 180
- Sugar: 12
- Sodium: 200
- Fat: 8
- Saturated Fat: 4
- Carbohydrates: 24
- Fiber: 1
- Protein: 2
Keywords: Halloween treats, witch fingers, pretzel rods, easy Halloween recipe, spooky snacks, 5-minute recipe, party food



