Love this? Save it for later!
Share the inspiration with your friends
I wasn’t expecting cooking advice from the quietest guy at the office potluck, but there I was, standing by the break room sink, rinsing coffee stains off my favorite mug, when Dave – the accountant who never says more than three words in a meeting – started describing his grandmother’s cheese ball. He wasn’t even talking to me, really. He was talking to the leftover veggie platter, mumbling about how “everything tastes better when you don’t overthink it.” I almost laughed, but then he mentioned dried beef and cream cheese, and I froze. That combination? Honestly, it sounded like something my own grandmother would have thrown together on a random Tuesday night when she wanted to feel fancy without actually trying. I mean, let me tell you, I’ve made a lot of cheese balls in my time. Some were too dry. Some were too soft. Some just sat there looking sad and unappetizing. But this one? This one was different. It had this salty, savory depth from the dried beef that you just don’t get from bacon or ham. And the everything seasoning on the outside? That was Dave’s twist. He said his grandmother never used it, but he started adding it one year when he ran out of nuts, and now he can’t make it any other way. I scribbled the recipe on a napkin that had a little coffee ring on it – which, honestly, feels appropriate for this kind of recipe. It’s not a fancy, fussy dish. It’s the kind of thing you make when you want to impress people without actually trying to impress them. It’s the kind of thing you serve with crackers and a glass of wine on a cold Thursday night when you just need something cozy. Maybe you’ve been there. Maybe you’ve stood in your kitchen, staring at a block of cream cheese, wondering how to turn it into something magical. Well, this is it. This is that recipe.
I’ve made this cheese ball for every holiday gathering, every casual get-together, and every time I’ve needed a little comfort food that feels like a hug. It’s stayed with me because it’s simple, it’s forgiving, and it always, always gets devoured. Let me show you how to make it.
Why You’ll Love This Recipe
This isn’t just another cheese ball recipe. I’ve tested this version more times than I can count, tweaking the ratios and the seasoning until it was absolutely perfect. Here’s why I keep coming back to it:
- Quick & Easy: It comes together in about 15 minutes of active prep time. You just mix, shape, and chill. That’s it. Perfect for busy weeknights or last-minute party planning.
- Simple Ingredients: No fancy grocery trips needed. You likely already have everything in your kitchen – cream cheese, dried beef, green onions, and a jar of everything bagel seasoning.
- Perfect for Cozy Nights: This is the ultimate cold-weather appetizer. It’s rich, savory, and pairs beautifully with a warm drink or a glass of red wine. Great for holiday mornings, too.
- Crowd-Pleaser: I’ve brought this to potlucks, family dinners, and casual get-togethers. It always gets rave reviews from kids and adults alike. There’s never a crumb left.
- Unbelievably Delicious: The texture is creamy and smooth, with little bursts of salty, savory dried beef. The everything seasoning on the outside adds that perfect crunch and pop of flavor. It’s next-level comfort food.
What makes this recipe different from the rest? It’s the balance. The dried beef is salty, but not overpowering. The cream cheese is rich, but not heavy. And the everything seasoning – that’s the secret weapon. It adds a toasty, seedy, garlicky finish that makes every bite interesting. This isn’t just another version of a cheese ball. It’s my best version.
This recipe isn’t just good – it is the kind that makes you close your eyes after the first bite. It’s comfort food reimagined: faster, simpler, but with the same soul-soothing satisfaction. Perfect for impressing guests without stress, or turning a simple snack into something memorable.
What Ingredients You Will Need
This recipe uses simple, wholesome ingredients to deliver bold flavor and satisfying texture without the fuss. Most of these are pantry staples, which makes this a great go-to recipe when you need something impressive fast.
- 16 ounces cream cheese, softened (I recommend Philadelphia for the creamiest texture – it really does make a difference. Let it sit on the counter for at least 30 minutes before you start.)
- 1 package (2.5 ounces) dried beef, finely chopped (Look for the jarred or packaged kind in the canned meat aisle. You want the thin, salty slices, not the thick-sliced deli version. I prefer Armour or Hormel.)
- 1/2 cup green onions, thinly sliced (Use both the white and green parts for the best flavor. The green parts add a nice pop of color.)
- 1/4 cup fresh parsley, finely chopped (Optional, but it adds freshness and a little color. Flat-leaf or curly both work.)
- 1 teaspoon Worcestershire sauce (This adds a subtle umami depth. Don’t skip it – it’s a game-changer.)
- 1/2 teaspoon garlic powder (Not garlic salt – we have enough salt from the dried beef and seasoning.)
- 1/4 teaspoon black pepper, freshly ground (Freshly ground really does taste better here.)
- 1/4 cup everything bagel seasoning (For coating. I use Trader Joe’s or make my own with sesame seeds, poppy seeds, dried garlic, dried onion, and salt.)
Ingredient Selection Tips: For the best texture, make sure your cream cheese is truly softened. If you forget to take it out of the fridge, you can microwave it in 10-second bursts, but be careful not to melt it. For the dried beef, I’ve found that chopping it into very fine pieces – almost like a mince – distributes the flavor much better than larger chunks. Some brands of dried beef are saltier than others, so taste your mixture before adding any extra salt.
Substitution Guidance: If you can’t find dried beef, you can substitute with prosciutto or even bacon (cooked and crumbled), but the flavor will be slightly different. For a vegetarian version, try using sun-dried tomatoes (finely chopped) or roasted red peppers. For a dairy-free option, use a plant-based cream cheese alternative – just make sure it’s a block-style, not a spreadable one.
Equipment Needed
You don’t need a lot of fancy equipment for this recipe, which is part of its charm. Here’s what you’ll need:
- Large mixing bowl (Any bowl will work, but a wide, shallow one makes mixing easier.)
- Hand mixer or stand mixer (A hand mixer is perfect for this. You can also mix by hand with a wooden spoon, but it takes a little more elbow grease.)
- Rubber spatula (For scraping down the sides of the bowl and shaping the cheese ball.)
- Plastic wrap (Essential for shaping and chilling. I like the press-and-seal kind – it sticks better.)
- Sharp knife and cutting board (For chopping the dried beef and green onions.)
- Small shallow dish or plate (For rolling the cheese ball in the everything seasoning.)
- Serving platter (Something pretty to serve it on – a wooden board or a simple white plate works beautifully.)
Budget-Friendly Options: If you don’t have a hand mixer, a sturdy fork and some patience will do the job. For shaping, you can use a piece of parchment paper instead of plastic wrap – just be careful not to tear it. And if you don’t have a serving platter, a large dinner plate works just fine.
Maintenance Tip: After you’re done, wash your mixing bowl and mixer attachments right away. Cream cheese can be stubborn if it dries on.
Preparation Method
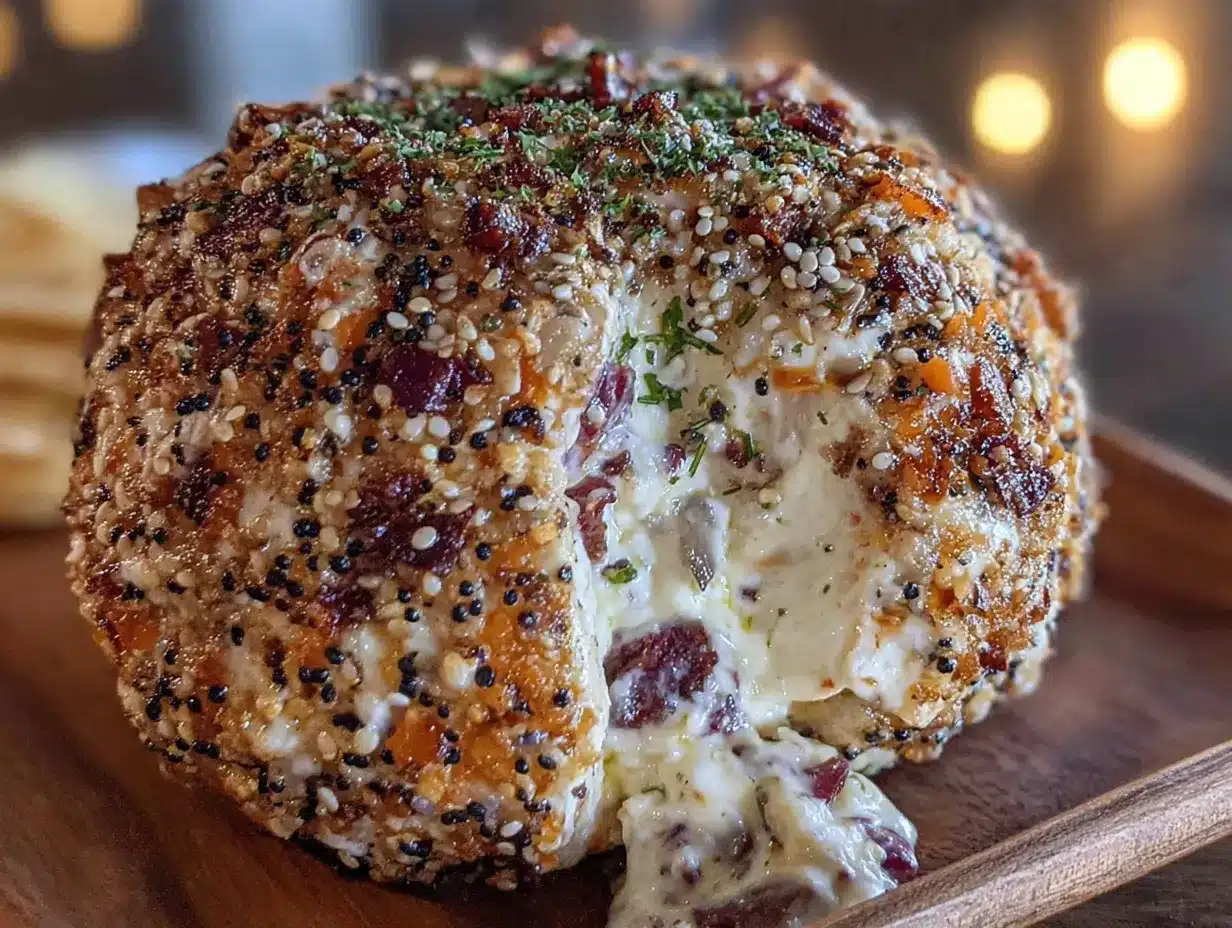
This recipe is incredibly straightforward, but I’ve included some tips and sensory cues to help you get it perfect every time.
- Soften the cream cheese. Take the cream cheese out of the fridge at least 30 minutes before you start. It should be soft enough that you can easily press your finger into it. If you’re in a hurry, unwrap the blocks and microwave them on a plate in 10-second bursts until just softened – about 20-30 seconds total. Be careful not to melt it; you want it soft, not liquid.
- Chop the dried beef. While the cream cheese softens, finely chop the dried beef. I like to stack a few slices on top of each other and cut them into thin strips, then cut the strips crosswise into tiny pieces. You want them about the size of a small pea – maybe smaller. Set aside about 2 tablespoons of the chopped beef for the coating if you want a little extra texture on the outside.
- Mix the base. In a large mixing bowl, combine the softened cream cheese, the chopped dried beef (reserving the 2 tablespoons if you’re using them for coating), the sliced green onions, the chopped parsley, the Worcestershire sauce, the garlic powder, and the black pepper. Using a hand mixer on low speed, beat everything together until well combined. You want the mixture to be uniform, with the dried beef and green onions evenly distributed. Scrape down the sides of the bowl with a rubber spatula as you go.
- Taste and adjust. This is the most important step. Take a tiny taste of the mixture – yes, it’s safe to eat a little raw cream cheese. Does it need more Worcestershire? A pinch more pepper? Remember, the dried beef and the everything seasoning are both salty, so go easy on any additional salt. I usually find it’s perfectly seasoned as is.
- Shape the cheese ball. Lay a large piece of plastic wrap on your counter. Scrape the cream cheese mixture onto the center of the plastic wrap. Gather the edges of the plastic wrap and twist them together at the top, using the plastic to gently shape the mixture into a ball. You can also use your hands through the plastic to smooth it into a perfect sphere. Don’t worry if it’s not perfectly round – a slightly rustic shape looks more inviting.
- Chill the cheese ball. Place the wrapped cheese ball in the refrigerator for at least 2 hours, or up to overnight. This step is crucial – the cheese ball needs time to firm up so it holds its shape when you roll it in the seasoning. If you’re in a rush, you can pop it in the freezer for about 30 minutes, but don’t forget about it!
- Coat with everything seasoning. Once the cheese ball is firm, pour the everything bagel seasoning onto a small, shallow dish or plate. Unwrap the cheese ball and roll it gently in the seasoning, pressing lightly so the seasoning sticks to all sides. If you reserved some chopped dried beef, you can mix it with the seasoning for extra texture. Use your hands to gently pat the seasoning into the cheese ball.
- Serve and enjoy. Place the coated cheese ball on a serving platter. Let it sit at room temperature for about 15-20 minutes before serving – this softens it slightly, making it easier to spread. Serve with your favorite crackers, crusty bread, or fresh vegetables.
Troubleshooting Tip: If your cheese ball feels too soft to shape after mixing, it’s probably because the cream cheese was too warm. Just pop the mixture in the fridge for 15-20 minutes before shaping. If it feels too dry, add a tablespoon of milk or cream and mix again.
Cooking Tips & Techniques
I’ve made this cheese ball more times than I can count, and I’ve learned a few things along the way. Here are my best tips for getting it right every time:
Don’t overmix. Once the ingredients are combined, stop mixing. Overmixing can make the cream cheese too soft and airy, which makes the cheese ball harder to shape. You want it thick and creamy, not fluffy.
Chop the dried beef finely. This is the most common mistake I see. If the dried beef pieces are too big, they’ll make the cheese ball difficult to slice and spread. Take the extra minute to chop it really fine – it’s worth it.
Let it chill properly. I know it’s tempting to skip the chilling step, but trust me on this one. A properly chilled cheese ball holds its shape beautifully when you roll it in the seasoning. If you try to coat it while it’s still soft, the seasoning will just fall off or clump up.
Toast the seasoning (optional). For an extra layer of flavor, you can toast the everything bagel seasoning in a dry skillet over medium heat for 1-2 minutes until it’s fragrant. Let it cool completely before using. This brings out the nuttiness of the sesame seeds and the sweetness of the dried onion.
Make it ahead. This cheese ball actually gets better with time. You can make it up to 3 days in advance – just keep it wrapped tightly in the fridge and coat it with the seasoning right before serving. The flavors meld together beautifully overnight.
Use a cheesecloth trick. If you want a super smooth cheese ball, you can line a small bowl with cheesecloth, fill it with the cream cheese mixture, and then gather the edges to shape it. This gives you a perfectly round, smooth ball with no plastic wrap wrinkles.
Variations & Adaptations
This recipe is incredibly versatile. Here are some of my favorite ways to change it up:
Spicy Southwest Version: Replace the dried beef with finely chopped chorizo (cooked and drained). Add 1/4 cup finely chopped pickled jalapeños and 1 teaspoon cumin to the cream cheese mixture. Coat with a mixture of everything seasoning and chili powder. This version is incredible with tortilla chips.
Smoky Bacon & Cheddar Version: Replace the dried beef with 6 strips of bacon (cooked crisp and crumbled). Add 1/2 cup sharp cheddar cheese (finely shredded) and 1/2 teaspoon smoked paprika to the cream cheese mixture. Coat with everything seasoning mixed with a little extra crumbled bacon. This is a crowd favorite.
Herb & Sun-Dried Tomato Version: For a vegetarian option, replace the dried beef with 1/2 cup sun-dried tomatoes (finely chopped, oil-packed or rehydrated). Add 1 tablespoon fresh basil (chopped) and 1 teaspoon dried oregano to the cream cheese mixture. Coat with everything seasoning mixed with a little extra dried herbs. This version is bright and tangy.
Dairy-Free Adaptation: Use a block-style plant-based cream cheese (like Kite Hill or Violife). Make sure it’s softened. The texture will be slightly different – a little less firm – but the flavor is still delicious. You may need to chill it a bit longer before coating.
Make It a Log: Instead of shaping it into a ball, you can shape the mixture into a log. This is great for slicing and serving on a charcuterie board. Just shape it into a cylinder using the plastic wrap, chill, and then roll in the seasoning.
Serving & Storage Suggestions
Serving: This cheese ball is best served slightly softened. Take it out of the fridge about 20 minutes before you plan to serve it. I like to serve it on a wooden board or a simple white platter, surrounded by an assortment of crackers – buttery rounds, whole wheat crisps, and maybe some seeded flatbreads. Fresh vegetables like cucumber slices, bell pepper strips, and celery sticks are also fantastic for dipping. For a cozy presentation, I sometimes add a small bowl of marinated olives and some sliced salami on the side.
Complementary Dishes: This cheese ball pairs beautifully with a glass of crisp white wine (like Sauvignon Blanc) or a light red (like Pinot Noir). For a non-alcoholic option, try it with sparkling water with a squeeze of lemon. It’s also wonderful alongside a bowl of tomato soup or a simple green salad for a light meal.
Storage: Leftover cheese ball can be stored in the refrigerator, tightly wrapped in plastic wrap, for up to 5 days. The everything seasoning may lose a little of its crunch over time, but the flavor will still be delicious. If you’re storing it for more than a day, I recommend waiting to coat it with the seasoning until right before serving.
Freezing: You can freeze the uncoated cheese ball for up to 2 months. Wrap it tightly in plastic wrap, then in a layer of aluminum foil. To thaw, transfer it to the refrigerator for 24 hours. Once thawed, let it come to room temperature for about 20 minutes, then coat with the everything seasoning. The texture will be slightly softer after freezing, but the flavor is still great.
Reheating: This cheese ball is served cold or at room temperature, so no reheating is needed. If it’s been in the fridge for a while, just let it sit out for 15-20 minutes before serving.
Flavor Development: This is one of those recipes that actually tastes better the next day. The flavors meld together as it sits, creating a more complex, cohesive taste. If you can, make it a day ahead – you’ll be rewarded with a deeper, more savory flavor.
Nutritional Information & Benefits
While this cheese ball is definitely a treat, it does have some nutritional benefits worth noting.
Estimated Nutritional Values (per 2-tablespoon serving):
- Calories: 110
- Fat: 10g
- Saturated Fat: 6g
- Cholesterol: 30mg
- Sodium: 280mg
- Carbohydrates: 2g
- Fiber: 0g
- Sugar: 1g
- Protein: 4g
Health Benefits: Cream cheese provides a good amount of calcium and vitamin A, which are important for bone health and immune function. Dried beef is a good source of protein and iron. The green onions and parsley add a small amount of vitamins K and C. And the everything seasoning – sesame seeds are rich in healthy fats and minerals like copper and manganese.
Dietary Considerations: This recipe is low-carb and keto-friendly (about 2g net carbs per serving). It’s also gluten-free (just make sure your everything seasoning doesn’t contain any wheat-based additives). It’s not suitable for vegetarians or vegans in its traditional form, but the variations I’ve shared above offer great alternatives.
Potential Allergens: This recipe contains dairy (cream cheese) and sesame seeds (in the everything seasoning). It may also contain traces of other allergens depending on the brands you use.
Personal Wellness Perspective: I believe in enjoying food without guilt. This cheese ball is a wonderful treat for special occasions or cozy nights in. Pair it with fresh vegetables for a more balanced snack, and savor every bite. Food is about joy and connection, and this recipe delivers both.
Frequently Asked Questions
Can I make this cheese ball without a mixer?
Absolutely! You can mix everything by hand with a sturdy wooden spoon or a fork. Just make sure your cream cheese is very soft – almost at room temperature – so it’s easy to work. It might take a little more elbow grease, but the result will be just as delicious.
Can I use low-fat cream cheese?
You can, but I don’t recommend it. Low-fat cream cheese has a higher water content, which can make the cheese ball softer and less stable. It also won’t have the same rich, creamy texture. If you’re looking for a lighter option, try using Neufchâtel cheese (which has about a third less fat) – it works better than low-fat cream cheese.
How do I make my own everything bagel seasoning?
It’s easy! Combine 2 tablespoons white sesame seeds, 1 tablespoon black sesame seeds, 1 tablespoon poppy seeds, 1 tablespoon dried minced garlic, 1 tablespoon dried minced onion, and 1 teaspoon flaky sea salt. Mix well and store in an airtight container. This makes about 1/2 cup, which is plenty for several cheese balls.
Can I serve this cheese ball warm?
I wouldn’t recommend it. This cheese ball is meant to be served cold or at room temperature. If you warm it up, the cream cheese will become too soft and runny, and it won’t hold its shape. If you want a warm cheese dip, try this same recipe but bake it in a small oven-safe dish at 350°F for about 15 minutes until bubbly.
How far in advance can I make this cheese ball?
You can make the cheese ball (without the coating) up to 3 days in advance. Keep it tightly wrapped in plastic wrap in the refrigerator. When you’re ready to serve, let it sit at room temperature for about 20 minutes, then roll it in the everything seasoning. The flavor actually improves after a day or two in the fridge.
Conclusion
This cozy dried beef cheese ball with everything seasoning is the kind of recipe that makes you feel like you’ve discovered a secret. It’s simple, it’s forgiving, and it’s absolutely packed with flavor. Whether you’re serving it at a holiday party, a casual get-together, or just treating yourself on a quiet night in, it never disappoints.
I love this recipe because it reminds me that you don’t need fancy ingredients or complicated techniques to create something truly special. Sometimes the best dishes come from the most unexpected places – like a quiet accountant at an office potluck, sharing his grandmother’s recipe over a coffee-stained napkin. That’s the magic of cooking. It connects us. It comforts us. And it reminds us that the simplest things are often the best.
I’d love to hear how yours turns out! Leave a comment below and let me know if you tried any of the variations, or if you came up with your own twist. Don’t forget to share this recipe with someone who needs a little cozy comfort in their life. Happy cooking, friends!
Pin This Recipe!
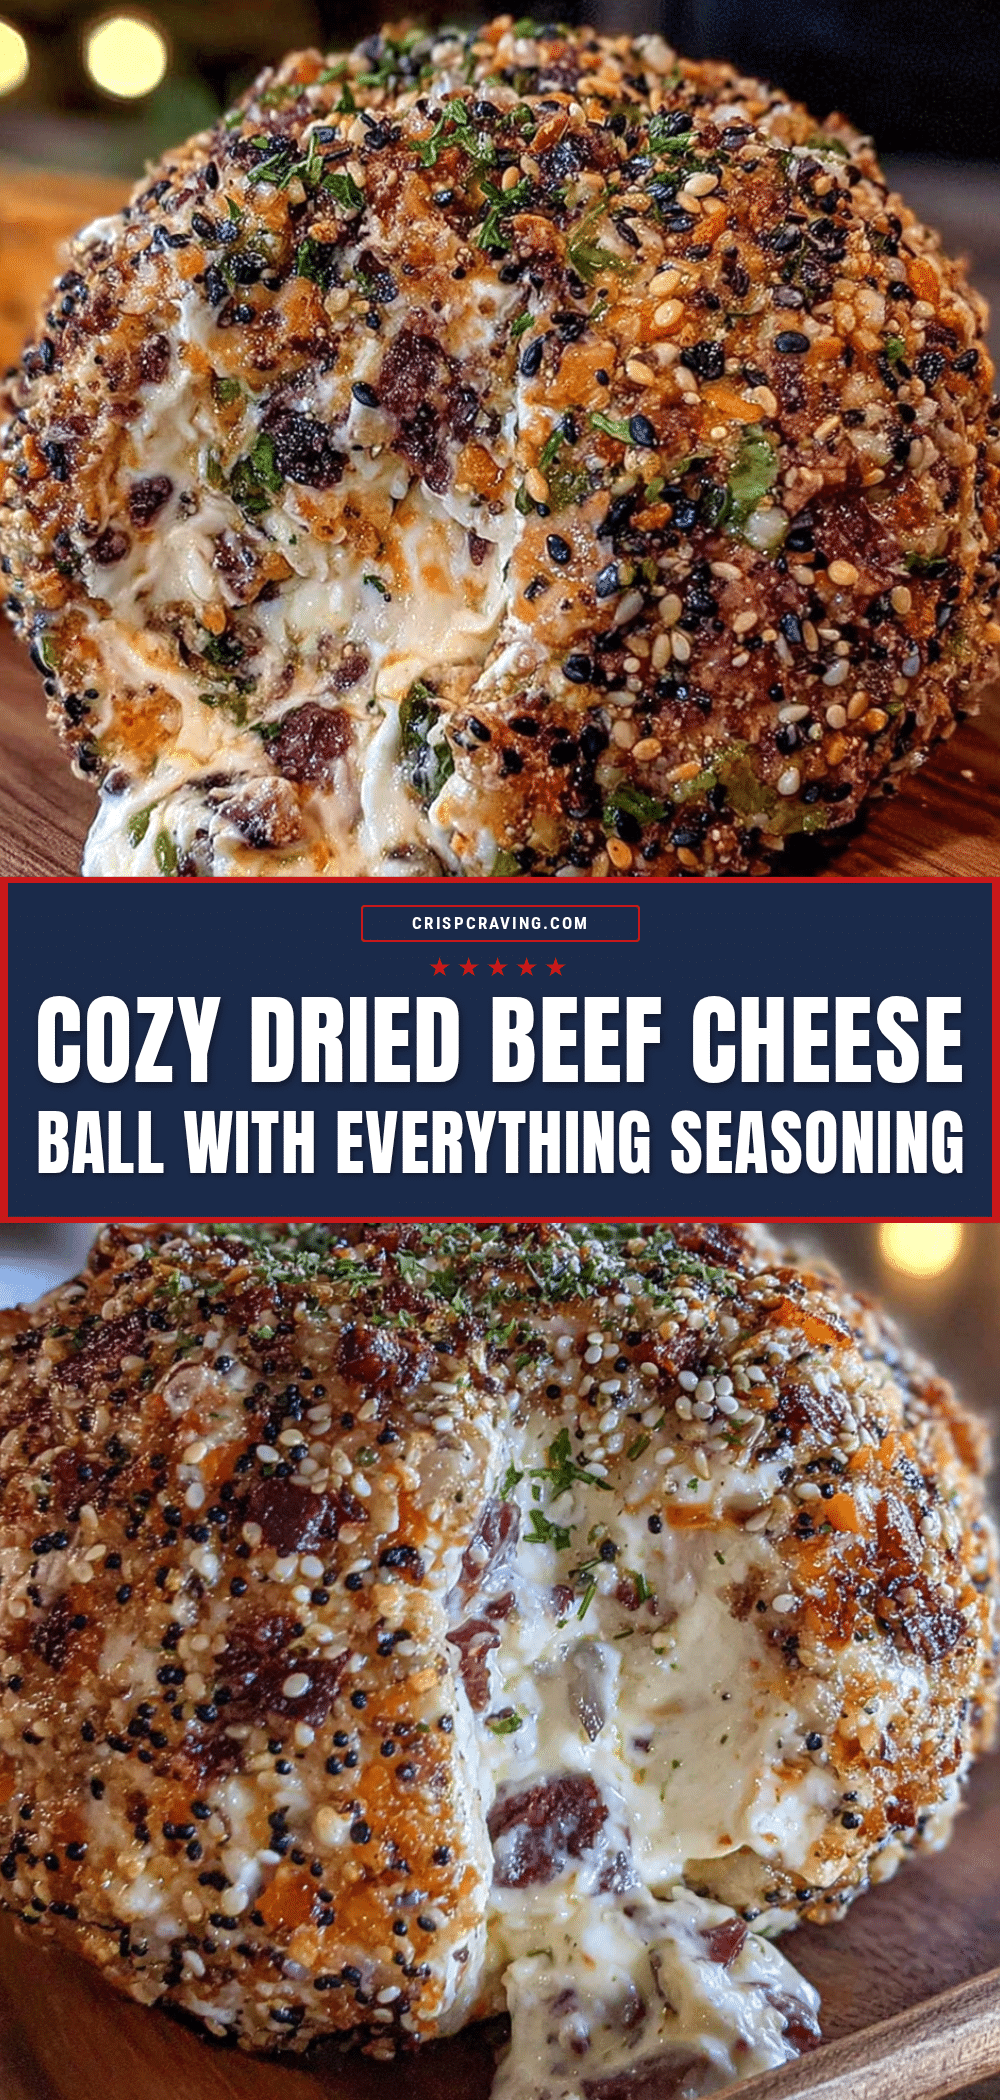
Cozy Dried Beef Cheese Ball with Everything Seasoning

A creamy, savory cheese ball loaded with finely chopped dried beef and green onions, coated in everything bagel seasoning. Perfect for holiday gatherings, potlucks, or a cozy night in.
- Prep Time: 15 minutes
- Cook Time: 0 minutes
- Total Time: 2 hours 15 minutes (includes chilling)
- Yield: 16 servings 1x
- Category: Appetizer
- Cuisine: American
Ingredients
- 16 ounces cream cheese, softened
- 1 package (2.5 ounces) dried beef, finely chopped
- 1/2 cup green onions, thinly sliced
- 1/4 cup fresh parsley, finely chopped (optional)
- 1 teaspoon Worcestershire sauce
- 1/2 teaspoon garlic powder
- 1/4 teaspoon black pepper, freshly ground
- 1/4 cup everything bagel seasoning (for coating)
Instructions
- Soften the cream cheese: Take the cream cheese out of the fridge at least 30 minutes before starting. It should be soft enough to easily press your finger into it. If in a hurry, microwave unwrapped blocks in 10-second bursts until just softened (20-30 seconds total). Do not melt.
- Chop the dried beef: While cream cheese softens, finely chop the dried beef into small pea-sized pieces. Set aside about 2 tablespoons for the coating if desired.
- Mix the base: In a large mixing bowl, combine softened cream cheese, chopped dried beef (reserving 2 tablespoons if using for coating), sliced green onions, chopped parsley, Worcestershire sauce, garlic powder, and black pepper. Beat with a hand mixer on low speed until well combined and uniform. Scrape down sides of bowl as needed.
- Taste and adjust: Taste the mixture and adjust seasoning if needed. Remember the dried beef and everything seasoning are salty, so go easy on additional salt.
- Shape the cheese ball: Lay a large piece of plastic wrap on the counter. Scrape the mixture onto the center. Gather the edges of the plastic wrap and twist together at the top, using the plastic to gently shape into a ball. Smooth into a sphere through the plastic.
- Chill the cheese ball: Place wrapped cheese ball in the refrigerator for at least 2 hours, or up to overnight. For a quicker chill, freeze for about 30 minutes.
- Coat with everything seasoning: Once firm, pour everything bagel seasoning onto a small shallow dish. Unwrap the cheese ball and roll gently in the seasoning, pressing lightly so it sticks. If reserved, mix the 2 tablespoons chopped dried beef with the seasoning for extra texture. Pat seasoning into the cheese ball with your hands.
- Serve and enjoy: Place coated cheese ball on a serving platter. Let sit at room temperature for 15-20 minutes before serving to soften slightly. Serve with crackers, crusty bread, or fresh vegetables.
Notes
For best results, use full-fat cream cheese and let it soften properly. Chop dried beef very finely for even distribution. The cheese ball can be made up to 3 days in advance (coat with seasoning just before serving). For a smoother shape, line a small bowl with cheesecloth, fill with mixture, and gather edges to shape. Toast the everything seasoning in a dry skillet for 1-2 minutes for extra flavor.
Nutrition
- Serving Size: 2 tablespoons
- Calories: 110
- Sugar: 1
- Sodium: 280
- Fat: 10
- Saturated Fat: 6
- Carbohydrates: 2
- Protein: 4
Keywords: cheese ball, dried beef, everything seasoning, appetizer, party food, holiday appetizer, cream cheese



