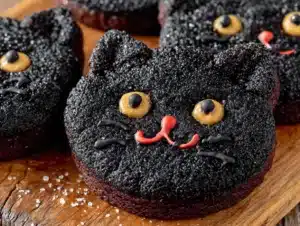
Love this? Save it for later!
Share the inspiration with your friends
The little old lady at the farmers’ market watched me fumbling with a bag of apples, my toddler trying to make a break for it, and my preschooler asking the same question for the fifth time. She didn’t say anything at first. Then she reached into her basket, pulled out a cookie cutter shaped like a cat, and pressed it into my hand. “For later,” she said with a wink. “When you need something that makes everyone smile.” I laughed, thanked her, and honestly forgot about it until I found it months later, buried at the bottom of my baking drawer. That’s how these adorable black cat sugar cookies came to be. They aren’t just a Halloween treat; they’re a little piece of that kind lady’s wisdom, passed along when I needed it most. Maybe you’ve been there, too—when a simple, fun activity is exactly what the afternoon calls for. These cookies are that activity.
I mean, let’s be real. Baking with kids can be a glorious mess. Flour on the floor, sprinkles in hair, and a whole lot of joy. This recipe leans into that beautiful chaos. These black cat sugar cookies are designed for little hands to help with. They’re sturdy enough to decorate without crumbling, and the “black cat” design is forgiving—a slightly wonky ear just adds character. Plus, it uses a simple sugar cookie dough you can whip up in minutes, and the decorating is more about fun than perfection. It’s the kind of recipe that turns a regular Tuesday into a mini celebration.
Why You’ll Love This Recipe
After testing this recipe more times than I care to admit (my family was happy to be the taste testers, trust me), I can tell you why these cookies are a winner. They check every box for a busy parent looking for a fun, budget-friendly activity.
- Quick & Easy: The dough comes together in about 15 minutes. With a 30-minute chill, you’re rolling and cutting before you know it. Total active time is under an hour.
- Simple Ingredients: You probably have butter, sugar, flour, and eggs in your kitchen right now. No fancy extracts or hard-to-find items.
- Perfect for Halloween: These are the star of any classroom party, playdate, or spooky movie night. They’re cute, not scary, so even the littlest goblins love them.
- Crowd-Pleaser: The cookies are buttery and tender with a slight crisp edge. Even adults who claim they’re “too busy for cookies” will grab three.
- Unbelievably Delicious: This isn’t just a sugar cookie; it’s the best sugar cookie. The secret is a touch of almond extract that makes the flavor sing.
What makes these different from every other sugar cookie recipe? It’s the foolproof dough and the decorating approach. The dough doesn’t spread, so your cat shapes stay perfect. And the decorating? We use a simple black royal icing that dries hard, meaning you can stack and store these cookies without a disaster. It’s comfort food reimagined—a fun, creative outlet that ends with a delicious treat. Perfect for impressing your kids without stressing yourself out.
What Ingredients You Will Need
This recipe uses simple, wholesome ingredients to deliver a tender, flavorful cookie that holds its shape perfectly. Everything is a pantry staple, making this an easy last-minute project.
For the Sugar Cookies
- Unsalted Butter, softened – 1 cup (2 sticks or 226g). I prefer using unsalted so I can control the salt level. Let it sit out for 30 minutes to soften properly.
- Granulated Sugar – 1 cup (200g). Standard white sugar gives the cookies a nice crisp edge.
- Large Egg – 1, at room temperature. A room-temp egg blends into the butter mixture more smoothly.
- Vanilla Extract – 1 teaspoon. Pure vanilla is best, but imitation works fine.
- Almond Extract – ½ teaspoon. This is the secret ingredient! It adds a subtle, nutty sweetness that makes these cookies unforgettable.
- All-Purpose Flour – 2 ½ cups (312g). Spoon and level it into your measuring cup for accuracy.
- Baking Powder – 1 teaspoon. This helps the cookies puff up just slightly.
- Salt – ½ teaspoon. Balances the sweetness.
For the Royal Icing
- Powdered Sugar – 2 cups (240g). Sift it if it’s lumpy.
- Meringue Powder – 2 tablespoons. This stabilizes the icing and makes it dry hard. I recommend Wilton brand for consistent results.
- Water – 3-4 tablespoons, plus more for thinning. Start with 3 and add more drop by drop.
- Black Gel Food Coloring – A few drops. Gel is much better than liquid, which can thin the icing too much.
- Yellow or White Gel Food Coloring – For the eyes.
Ingredient Substitutions: You can use salted butter, just reduce the added salt to ¼ teaspoon. For a dairy-free version, use a high-quality vegan butter stick. If you don’t have almond extract, just use 1 ½ teaspoons of vanilla extract total.
Equipment Needed
You don’t need a professional bakery setup for these cookies. Most of these tools are probably already in your kitchen.
- Electric Mixer – A hand mixer or stand mixer with the paddle attachment works perfectly. I’ve made these with both, and the hand mixer is actually easier to clean.
- Mixing Bowls – One large and one medium.
- Measuring Cups and Spoons – For accurate baking.
- Cat-Shaped Cookie Cutter – Any size works! I use a 3-inch cutter. You can find them online or at craft stores for a few dollars.
- Rolling Pin – A standard rolling pin is fine. If you don’t have one, a clean wine bottle works in a pinch.
- Baking Sheets – 2-3 sheets. Lining them with parchment paper prevents sticking and makes cleanup a breeze.
- Piping Bags or Zip-Top Bags – For the royal icing. Snip a tiny corner off a zip-top bag if you don’t have piping bags.
- Cooling Rack – Essential for letting the cookies cool completely before icing.
Budget-Friendly Tip: Don’t buy a fancy set of piping tips. A simple small round tip (or just snipping the corner of a bag) is all you need for these cats.
Preparation Method
Let’s get to the fun part. Follow these steps, and you’ll have a batch of adorable black cat cookies in no time.
- Make the Dough: In your large bowl, beat the softened butter and granulated sugar together until light and fluffy. This takes about 2-3 minutes. Scrape down the sides of the bowl. Add the egg, vanilla extract, and almond extract. Beat until combined. Don’t worry if it looks a little curdled—it will come together.
- Mix the Dry Ingredients: In a separate medium bowl, whisk together the flour, baking powder, and salt. Gradually add this to the wet mixture, mixing on low speed until a soft dough forms. It will be slightly crumbly at first, but it will come together as you mix.
- Chill the Dough: Divide the dough into two discs, wrap each tightly in plastic wrap, and refrigerate for at least 30 minutes. This step is non-negotiable! Chilled dough is much easier to roll and cut, and it prevents the cookies from spreading in the oven. You can chill it for up to 2 days.
- Preheat and Prep: When you’re ready to bake, preheat your oven to 350°F (175°C). Line your baking sheets with parchment paper.
- Roll and Cut: On a lightly floured surface, roll out one disc of dough to about ¼-inch thickness. I like to dust my rolling pin with flour, too. Cut out cat shapes using your cookie cutter. Re-roll the scraps and cut more shapes. Place the cookies about 1 inch apart on the prepared baking sheets.
- Bake: Bake for 8-10 minutes, or until the edges are just barely golden brown. The centers will still look slightly soft. That’s perfect! Let the cookies cool on the baking sheet for 5 minutes, then transfer them to a wire rack to cool completely. They must be 100% cool before you ice them.
- Make the Icing: In a medium bowl, whisk together the powdered sugar and meringue powder. Add 3 tablespoons of water and whisk until smooth. The icing should be thick but flow slowly from a spoon. Add a drop or two more water if it’s too thick. Stir in the black gel food coloring until you reach your desired shade of darkness.
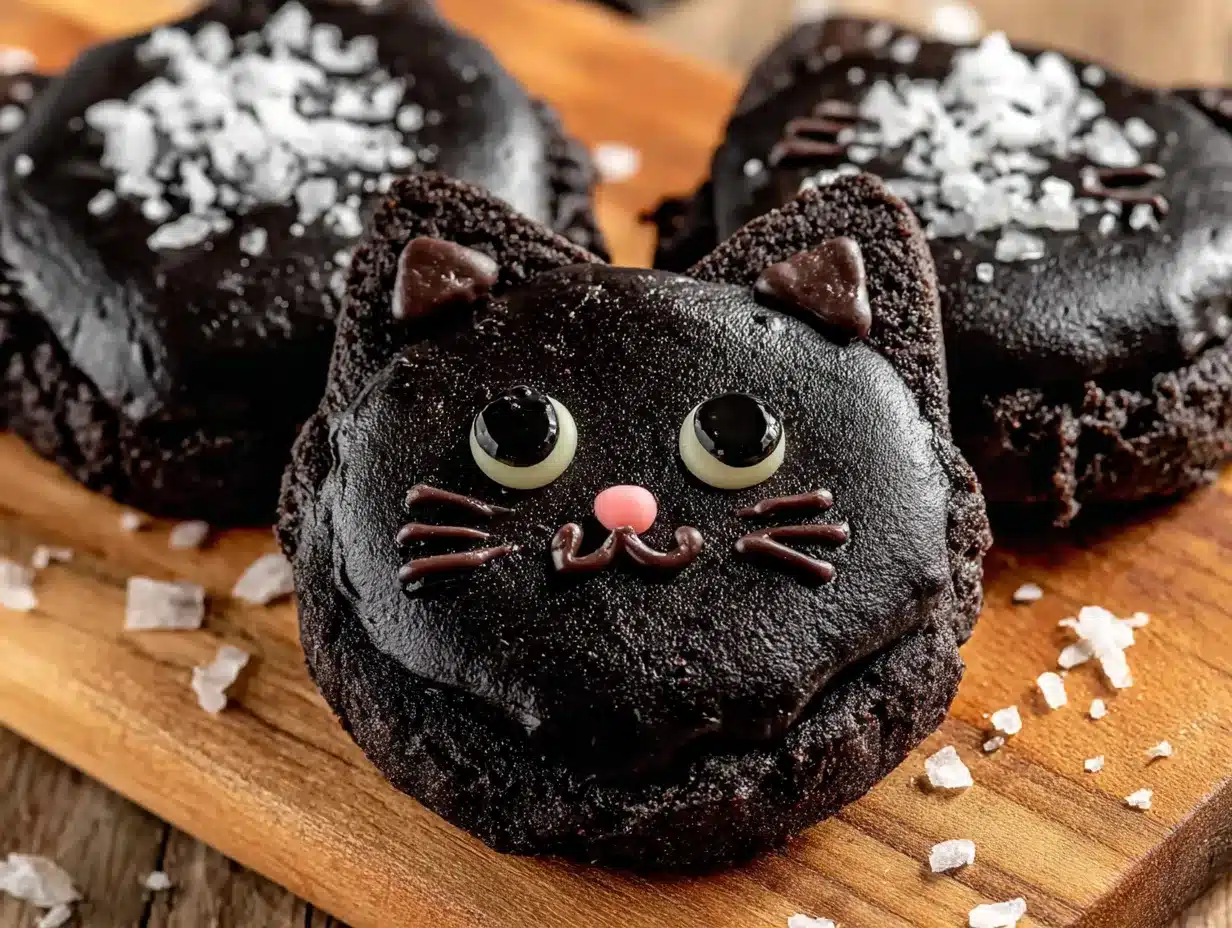
- Decorate the Cats: Transfer the black icing to a piping bag or zip-top bag with a tiny corner snipped off. Outline each cat cookie, then fill in the outline with more icing. Use a toothpick to spread the icing into the corners. Before the icing sets, pipe two small dots of white or yellow icing for the eyes. Let the cookies dry for at least 2 hours, or overnight, for the icing to harden completely.
Sensory Cue: When you pull the cookies from the oven, the kitchen will smell like a warm, buttery hug. The edges should be set, and the bottom should be a light golden brown. A perfectly baked cookie will have a slight give when you press the center.
Cooking Tips & Techniques
I’ve had my share of cookie disasters, so let me save you from them. Here are the lessons I learned the hard way.
- Don’t Overmix the Dough: Once you add the flour, mix just until it’s combined. Overmixing develops gluten, which makes cookies tough. You want them tender.
- Chill, Chill, Chill: I cannot stress this enough. If you skip the chilling step, your cats will turn into blobs. Chilled dough holds its shape perfectly. If your dough gets too soft while rolling, pop it back in the fridge for 10 minutes.
- Flour Your Surface Lightly: Too much flour will dry out the dough. Just a light dusting is all you need. I keep a small bowl of flour next to my rolling area.
- Watch the Bake Time: Ovens vary. Start checking at 8 minutes. The cookies will continue to bake on the hot sheet after you pull them out, so don’t wait for them to look fully golden. Slightly underbaked cookies are softer and more delicious.
- Royal Icing Consistency: The icing should be thick enough to hold its shape when piped, but thin enough to spread a little. If it’s too thick, add water a drop at a time. If it’s too thin, add more powdered sugar. I test it by lifting the spoon—the icing should ribbon back into the bowl and disappear in about 10 seconds.
One time, I forgot the almond extract. The cookies were still good, but they were just… okay. That little half-teaspoon makes all the difference. Don’t skip it!
Variations & Adaptations
Once you master the basic black cat, the possibilities are endless. Here are a few ways to make these cookies your own.
- Gluten-Free Version: Substitute the all-purpose flour with a 1:1 gluten-free baking flour blend that contains xanthan gum. I’ve used Bob’s Red Mill with great results. The dough will be a bit more delicate, so handle it gently.
- Lemon Zest Cats: Add the zest of one lemon to the butter and sugar mixture. It adds a bright, fresh flavor that’s perfect for spring. You can even use yellow food coloring instead of black for a sunshine cat!
- Spooky Spider Web: Instead of a solid black cat, pipe a white spider web on top of the black icing. Use a toothpick to drag the white lines through the black for a cool marbled effect. My kids went crazy for this version.
- Colorful Kitties: Divide the royal icing into a few bowls and color them different shades—orange for a pumpkin cat, purple for a magical cat, or green for a monster cat. Let the kids go wild.
I once tried making these with whole wheat flour. Let’s just say the texture was… rustic. Stick with all-purpose for the best results.
Serving & Storage Suggestions
These cookies are perfect for so many occasions. Here’s how to serve and store them.
- Serving Temperature: They are best at room temperature. The icing will be perfectly hard, and the cookie will be tender.
- Presentation: Arrange them on a platter with some orange and black sprinkles scattered around. For a Halloween party, place them on a cake stand for a fun, spooky centerpiece.
- Complementary Dishes: These pair wonderfully with a glass of cold milk, a warm cup of apple cider, or a mug of hot chocolate. They’re also great alongside a fruit platter for a balanced treat.
- Storage: Store the decorated cookies in an airtight container at room temperature. Place a piece of parchment paper between layers to prevent the icing from sticking. They will stay fresh for up to 1 week.
- Freezing: You can freeze the undecorated, baked cookies for up to 3 months. Wrap them tightly in plastic wrap and then foil. Thaw at room temperature, then decorate. The icing itself does not freeze well.
Flavor Development: Honestly, these cookies taste even better the next day. The flavors meld together, and the texture softens just slightly. So don’t be afraid to make them a day ahead!
Nutritional Information & Benefits
Let’s be honest—these are a treat, not a health food. But here’s the breakdown for one cookie (based on a 3-inch cutter and using the full amount of icing).
- Calories: Approximately 150-180 calories per cookie.
- Fat: 8g
- Carbohydrates: 22g
- Sugar: 14g
- Protein: 2g
Health Highlights: The butter provides a small amount of vitamin A, and the egg adds a bit of protein. The almond extract is a nice touch, but it doesn’t add any nutritional value. The real benefit? The joy of baking with your family. The connection, the laughter, the shared creativity—that’s the good stuff.
Dietary Considerations: This recipe contains gluten, dairy, and eggs. It can be made gluten-free and dairy-free with the substitutions mentioned above. It is not suitable for a low-carb or keto diet.
Conclusion
These adorable black cat sugar cookies are more than just a Halloween treat. They’re a chance to slow down, get a little messy, and make something cute together. The recipe is forgiving, the ingredients are simple, and the result is always a hit. I love making these with my kids because there’s no pressure for perfection. A cat with one eye bigger than the other? That’s character. A tail that broke off? Just eat it first. It’s about the fun, not the flawlessness.
I hope you give these cookies a try and make them your own. Add your favorite sprinkles, change the colors, or just stick with the classic black cat. Whatever you do, I’d love to hear about it. Leave a comment below and tell me how your cookie adventure went. Did your kids love them? Did you try a fun variation? Share a photo on Pinterest and tag me—I can’t wait to see your adorable creations. Happy baking, friends!
Frequently Asked Questions
Can I use a different cookie cutter shape?
Absolutely! While this recipe is designed for a cat cutter, you can use any shape you like. Just adjust the baking time slightly for smaller or larger cookies. The dough is very versatile.
My dough is too sticky. What do I do?
If your dough is sticky, it likely needs more chilling. Pop it back in the fridge for 15-20 minutes. You can also dust your rolling surface and rolling pin with a little more flour.
Can I make the dough ahead of time?
Yes! The dough can be refrigerated for up to 2 days. You can also freeze the dough discs, wrapped tightly, for up to 3 months. Thaw in the refrigerator overnight before rolling and cutting.
How do I get the black icing to be really black?
Use a high-quality black gel food coloring. Start with a few drops, mix, and add more until you reach the desired darkness. The color will deepen slightly as it dries. If it’s still gray, you need more coloring.
Why did my cookies spread in the oven?
This usually happens for one of three reasons: the dough wasn’t chilled long enough, the butter was too soft, or you added too much liquid to the dough. Next time, make sure your dough is well-chilled and your butter is just softened, not melted.
Pin This Recipe!

Adorable Black Cat Sugar Cookies: Easy Halloween Treat

These adorable black cat sugar cookies are a fun and easy Halloween treat. Made with a simple sugar cookie dough and decorated with black royal icing, they are perfect for baking with kids and guaranteed to bring smiles.
- Prep Time: 15 minutes
- Cook Time: 10 minutes
- Total Time: 55 minutes (including 30 minutes chilling)
- Yield: 24 servings 1x
- Category: Dessert
- Cuisine: American
Ingredients
- 1 cup (2 sticks or 226g) unsalted butter, softened
- 1 cup (200g) granulated sugar
- 1 large egg, at room temperature
- 1 teaspoon vanilla extract
- ½ teaspoon almond extract
- 2 ½ cups (312g) all-purpose flour
- 1 teaspoon baking powder
- ½ teaspoon salt
- 2 cups (240g) powdered sugar
- 2 tablespoons meringue powder
- 3–4 tablespoons water
- Black gel food coloring
- Yellow or white gel food coloring (for eyes)
Instructions
- Make the Dough: In a large bowl, beat the softened butter and granulated sugar together until light and fluffy, about 2-3 minutes. Scrape down the sides. Add the egg, vanilla extract, and almond extract. Beat until combined.
- Mix the Dry Ingredients: In a separate medium bowl, whisk together the flour, baking powder, and salt. Gradually add to the wet mixture, mixing on low speed until a soft dough forms.
- Chill the Dough: Divide the dough into two discs, wrap each tightly in plastic wrap, and refrigerate for at least 30 minutes (up to 2 days).
- Preheat and Prep: Preheat oven to 350°F (175°C). Line baking sheets with parchment paper.
- Roll and Cut: On a lightly floured surface, roll out one disc of dough to about ¼-inch thickness. Cut out cat shapes using a cat-shaped cookie cutter. Re-roll scraps and cut more shapes. Place cookies about 1 inch apart on prepared baking sheets.
- Bake: Bake for 8-10 minutes, until edges are just barely golden brown. Let cool on baking sheet for 5 minutes, then transfer to a wire rack to cool completely.
- Make the Icing: In a medium bowl, whisk together powdered sugar and meringue powder. Add 3 tablespoons water and whisk until smooth. Add more water drop by drop if needed. Stir in black gel food coloring until desired shade.
- Decorate the Cats: Transfer black icing to a piping bag or zip-top bag with a tiny corner snipped off. Outline each cat cookie, then fill in with more icing. Use a toothpick to spread into corners. Before icing sets, pipe two small dots of white or yellow icing for eyes. Let dry for at least 2 hours or overnight.
Notes
The dough must be chilled for at least 30 minutes to prevent spreading. For best flavor, do not skip the almond extract. Cookies taste even better the next day. Store in an airtight container at room temperature for up to 1 week.
Nutrition
- Serving Size: 1 cookie
- Calories: 165
- Sugar: 14
- Sodium: 95
- Fat: 8
- Saturated Fat: 5
- Carbohydrates: 22
- Protein: 2
Keywords: black cat sugar cookies, Halloween cookies, easy sugar cookies, cat cookies, royal icing cookies, kid-friendly baking