Love this? Save it for later!
Share the inspiration with your friends
It was 10:47 PM on a rainy Tuesday in October, and I had a sudden, desperate need to make something grotesque. I didn’t have any fancy Halloween cookie cutters or specialty food coloring, but I had a dozen hard-boiled eggs from earlier that week and a bizarre idea that arrived fully formed in my head. The rain was hammering against the kitchen window, my favorite horror movie was playing in the background on low volume, and I just started pulling things out of the fridge. I mean, honestly, sometimes the best recipes come from that weird, unobserved creative space where you’re not trying to impress anyone and you’re just letting your slightly twisted imagination run wild.
I cracked open the first egg and thought, “These need to look like they’re staring back at me.” Maybe you’ve been there—you want to make something for a Halloween party that actually makes people pause before they eat it. Something that’s equal parts delicious and disturbing. The first batch was a total mess, let me tell you. I used too much food coloring on the whites and they turned this sad, murky gray color. But that failure taught me exactly what not to do, and by the time the clock struck midnight, I had a platter of the most gloriously creepy monster eyeballs staring up at me from my counter. They were perfect—creepy, delicious, and surprisingly easy to make.
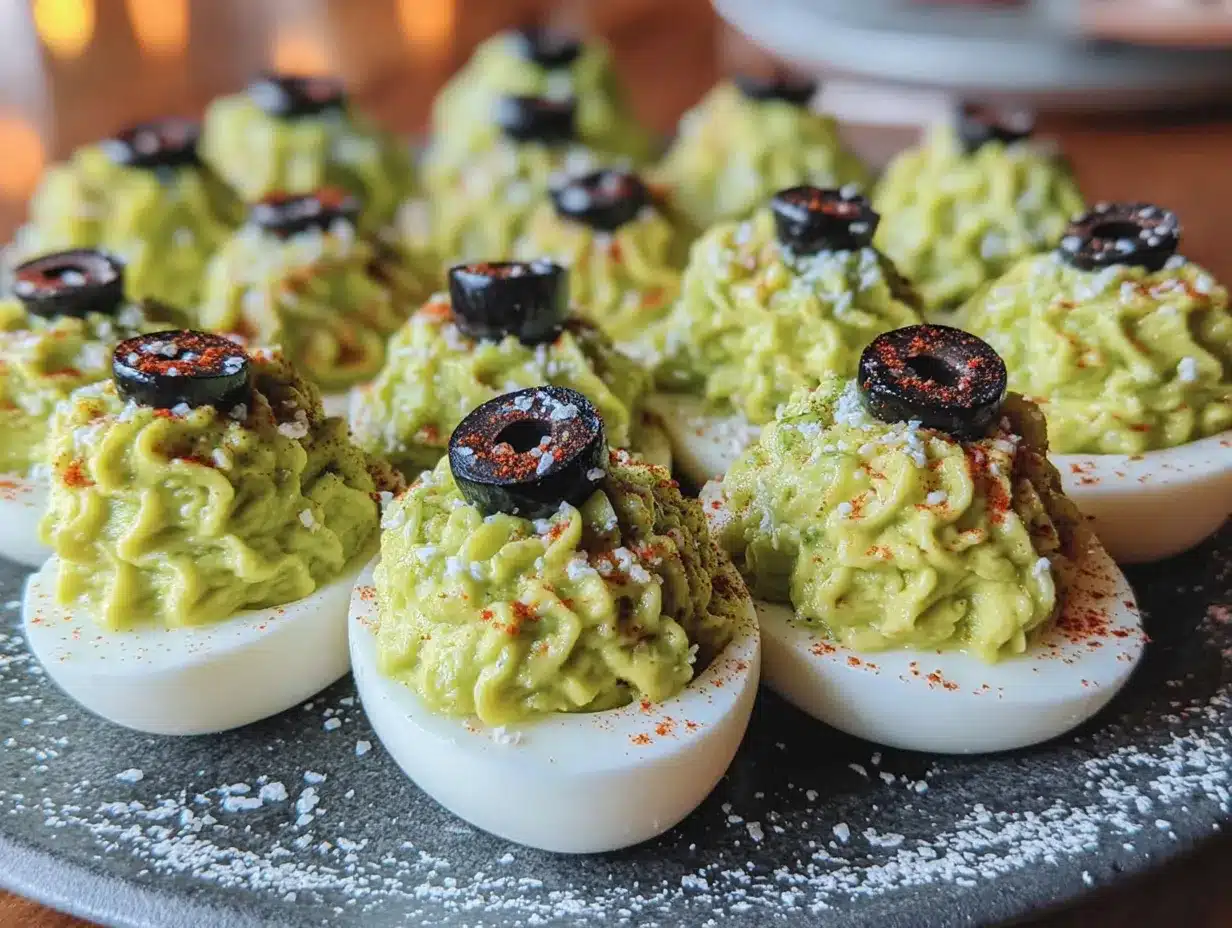
These Best Creepy Monster Eyeball Deviled Eggs for Halloween have become my go-to party trick. They’re the kind of appetizer that gets people talking, taking photos, and then reaching for seconds. And honestly, they taste just like classic deviled eggs—because at their core, that’s exactly what they are. Just with a seriously spooky makeover.
Why You’ll Love This Recipe
I’ve tested this recipe through three different Halloween parties and two neighborhood potlucks, and let me tell you—each time I learned something new. The first time, the “bloodshot veins” looked more like pink spaghetti. The second time, I figured out the perfect consistency for the yolk filling. By the third try, I had it dialed in perfectly. Here’s why these eggs are worth your time:
- Quick & Easy: These come together in about 30 minutes of active prep time. The eggs do most of the work while they chill in the fridge.
- Simple Ingredients: You probably already have everything you need. Eggs, mayo, mustard, paprika—plus a few specialty items like black olives and red food coloring that are easy to find.
- Perfect for Halloween: Whether you’re hosting a costume party, bringing a dish to a school event, or just want to freak out your family on October 31st, these fit the bill perfectly.
- Crowd-Pleaser: I’ve served these to kids and adults alike. The kids love the gross-out factor, and the adults appreciate that they actually taste amazing.
- Unbelievably Delicious: Despite their creepy appearance, these are classic deviled eggs through and through. Creamy, tangy, with that perfect paprika finish.
What makes this recipe different from the dozens of other deviled egg recipes out there? It’s the attention to detail in the “eyeball” effect. The way the olive slice sits perfectly in the center of the yolk, the subtle red veining that makes them look genuinely unsettling, and the fact that they taste exactly like the deviled eggs your grandma used to make. This isn’t just another Halloween recipe—it’s the one that will have people asking, “Wait, how did you DO that?”
There’s something deeply satisfying about watching someone’s face go from “ew, gross” to “oh wait, these are actually incredible” in about three seconds flat. That’s the magic of these eggs. They deliver on the Halloween creep factor without sacrificing any of the flavor. And honestly, isn’t that the whole point of Halloween food?
What Ingredients You Will Need
This recipe uses simple, everyday ingredients to create something that looks complicated but isn’t. The real magic happens in the assembly, not in hunting down obscure ingredients. Here’s what you’ll need to gather:
For the Hard-Boiled Eggs
- 12 large eggs (look for eggs that are at least a week old—they peel easier)
- Ice water bath (for shocking the eggs after boiling)
For the Deviled Egg Filling
- 1/3 cup mayonnaise (I prefer Hellmann’s or Duke’s for the creamiest texture)
- 1 tablespoon yellow mustard (adds that classic tang and yellow color)
- 1 teaspoon white vinegar (brightens the flavor without being overpowering)
- 1/2 teaspoon salt
- 1/4 teaspoon black pepper
- 1/2 teaspoon paprika (plus extra for garnish)
- 1/4 teaspoon garlic powder (optional, but I love the depth it adds)
For the Monster Eyeball Decoration
- 1 can (6 oz) large black olives, drained
- 1 jar pimento peppers or roasted red peppers (for the “bloodshot” veins)
- Red food coloring gel (not liquid—it’s more concentrated and won’t water down the filling)
- 1 tablespoon cream cheese, softened (helps the olive “pupils” stick to the yolk)
The eggs are the star here, so don’t skimp on quality. I’ve found that organic, free-range eggs tend to have brighter yolks and a richer flavor, which makes the final product taste noticeably better. If you’re using eggs straight from the fridge, let them sit at room temperature for about 15 minutes before boiling—this helps prevent the shells from cracking during cooking.
For the olives, look for the largest ones you can find. The bigger the olive slice, the more dramatic and eyeball-like the final effect will be. I’ve tried this with both black and green olives, and black olives give a much more convincing “pupil” look. Green olives just look like… well, green olives on top of deviled eggs.
The pimento peppers are what create those creepy red veins that make the eggs look genuinely unsettling. You can find them in the pickle aisle at most grocery stores, usually near the olives. If you can’t find pimentos, roasted red peppers work just as well—just cut them into thin strips.
Equipment Needed
You don’t need any fancy equipment for these eggs, which is part of what makes them so great. Here’s what you’ll need:
- Large pot: Big enough to hold all 12 eggs in a single layer. I use my 5-quart Dutch oven, but any large pot works fine.
- Slotted spoon: For gently lowering the eggs into the water and fishing them out. A regular spoon works too, but a slotted one makes it easier.
- Mixing bowls: One medium bowl for the filling, one small bowl for the garnish.
- Piping bag or zip-top bag: For filling the egg whites neatly. A zip-top bag with the corner snipped off works perfectly if you don’t have a piping bag.
- Sharp knife: For cutting the olives into thin slices. A dull knife will just smash them.
- Cutting board: Preferably one that won’t stain from the red food coloring. I learned this the hard way.
- Small spoon or melon baller: For scooping out the yolks cleanly. A melon baller gives you perfectly round scoops, but a small spoon works fine too.
- Toothpicks: For arranging the pimento “veins” and olive “pupils” without getting your fingers sticky.
If you don’t have a piping bag, don’t worry. I’ve made these dozens of times using just a sandwich bag with the corner snipped off. It’s not as fancy, but it works perfectly. Just make sure the bag doesn’t have any holes in it before you start—I learned that one the messy way.
Preparation Method
Alright, let’s get into the nitty-gritty of making these creepy little monsters. I’ve broken this down into clear steps so you can follow along without any confusion. Trust me, if I can do this at 11 PM on a rainy Tuesday, you can absolutely do this.
Step 1: Perfect Hard-Boiled Eggs (15 minutes)
Place your eggs in a single layer in a large pot. Add enough cold water to cover them by about an inch. Bring the water to a rolling boil over high heat—you’ll see big bubbles breaking the surface. Once it’s boiling, cover the pot, remove it from the heat, and let it sit for exactly 12 minutes. This gives you fully cooked yolks without that gray-green ring around them. While the eggs are cooking, prepare an ice water bath in a large bowl. When the timer goes off, use your slotted spoon to transfer the eggs to the ice water. Let them chill for at least 10 minutes. This shock step is crucial—it stops the cooking immediately and makes the eggs much easier to peel.
Step 2: Peel and Prep the Eggs (10 minutes)
Gently tap each egg on the counter to crack the shell all over. Start peeling from the wider end—there’s usually an air pocket there that makes it easier to get under the shell. Run the eggs under cold water while you peel to help remove any stubborn shell fragments. You should have perfectly smooth, white egg whites. Pat them dry with a paper towel. Using a sharp knife, slice each egg in half lengthwise. Carefully pop out the yolks into a medium bowl. Arrange the egg white halves on a serving platter, cut side up. If any of the whites tear, don’t panic—just set them aside and use them for the filling later. I’ve had plenty of egg white casualties over the years.
Step 3: Make the Filling (10 minutes)
To the bowl with the yolks, add the mayonnaise, yellow mustard, white vinegar, salt, pepper, paprika, and garlic powder if you’re using it. Mash everything together with a fork until it’s smooth and creamy. You want a texture that’s thick enough to hold its shape but soft enough to pipe easily. If it seems too stiff, add another teaspoon of mayonnaise. If it’s too loose, add another yolk (you can boil an extra egg just in case). Taste it and adjust the seasoning—this is your chance to make it perfect. I always add a tiny bit more paprika than I think I need because it adds such a nice color and flavor.
Step 4: Create the Eyeball Effect (15 minutes)
This is where the magic happens. Take about 2 tablespoons of the filling and mix it with a small drop of red food coloring gel until it’s a pale pink color. Set this aside—you’ll use it for the “bloodshot” veins. Transfer the remaining filling to a piping bag or zip-top bag with the corner snipped off. Pipe a generous mound of filling into each egg white half, making it slightly rounded on top like an eyeball. Don’t worry about being perfect—you’re going to cover the top anyway.
Step 5: Add the Veins and Pupils (10 minutes)
Take your pink-tinted filling and put it in a small piping bag or a sandwich bag with a tiny hole cut in the corner. Pipe thin, squiggly lines over the yellow filling to create “bloodshot” veins. Don’t overthink this—real veins are messy and irregular. Now, take your black olives and slice them into thin rounds. You want slices that are about 1/4 inch thick. Pat them dry with a paper towel. Dab a tiny amount of cream cheese on the back of each olive slice—this helps it stick to the filling. Press one olive slice gently into the center of each filled egg white, creating the “pupil.” Take your pimento peppers or roasted red pepper strips and cut them into small, thin pieces. Arrange a few pieces around the olive to look like burst blood vessels. The more irregular and messy, the better.
Step 6: Chill and Serve (30 minutes minimum)
Once all the eggs are assembled, cover the platter loosely with plastic wrap and refrigerate for at least 30 minutes. This helps the filling firm up and the flavors meld together. When you’re ready to serve, sprinkle a tiny bit of paprika over the top for extra color. Arrange them on a platter with some fake spider webs or plastic spiders for maximum Halloween effect. Watch your guests’ faces as they realize what they’re about to eat.
Cooking Tips & Techniques
I’ve made plenty of mistakes with these eggs so you don’t have to. Here are the things I wish someone had told me before I started:
Don’t overcook the eggs. I know I said 12 minutes, but if you’re at high altitude or using extra-large eggs, you might need to adjust. The yolks should be fully set but still bright yellow, not gray and crumbly. If you see that gray ring around the yolk, you’ve gone too long. Back it off by a minute next time.
Use gel food coloring, not liquid. Liquid food coloring will thin out your filling and make it watery. Gel coloring is concentrated and won’t affect the texture. I use Wilton brand red gel coloring, and it works perfectly. A tiny dab goes a long way.
Make the filling ahead of time. You can prepare the filling up to two days in advance and store it in the fridge in a piping bag. When you’re ready to assemble, just let it sit at room temperature for 10 minutes so it softens enough to pipe smoothly.
Keep the olives dry. Wet olives won’t stick to the filling. Pat them dry thoroughly before adding the cream cheese dab. And don’t use too much cream cheese—just a tiny smear is enough to hold them in place.
Embrace the imperfection. The first time I made these, I tried to make every eyeball look identical. It was a disaster. Real eyeballs aren’t perfect, and neither should these be. Some can have more veins, some can have smaller pupils, some can look slightly squished. The variety actually makes them more convincing and creepier.
Use a toothpick for detail work. When you’re arranging the pimento veins, a toothpick gives you much more control than your fingers. You can nudge the tiny pepper strips into exactly the right position without smashing the filling.
Variations & Adaptations
One of the best things about this recipe is how easy it is to customize. Here are some variations I’ve tried and loved:
Spicy Monster Eyes
Add 1/2 teaspoon of sriracha or hot sauce to the filling for a spicy kick. The heat pairs surprisingly well with the creamy texture. I made these for a Halloween party and they were gone before the regular ones.
Avocado Monster Eyes
Replace half the mayonnaise with mashed avocado for a greener, healthier version. The avocado adds a beautiful green tint that makes the eyes look even more alien. Just be aware that these won’t keep as long—avocado browns quickly.
Bacon Monster Eyes
Because everything is better with bacon. Crumble crispy bacon over the top of the finished eggs before serving. The salty, smoky crunch contrasts beautifully with the creamy filling. I’ve also tried adding bacon bits directly into the filling, which works great too.
Vegan Monster Eyes
Use silken tofu instead of egg yolks and vegan mayonnaise to make these completely plant-based. The texture won’t be identical, but it’s surprisingly close. I served these to a group of vegans and omnivores, and no one complained.
Gluten-Free Monster Eyes
These are naturally gluten-free as written, but double-check your mayonnaise and mustard labels. Some brands use gluten-containing ingredients. I use Hellmann’s and French’s, both of which are gluten-free.
Serving & Storage Suggestions
These eggs are best served cold, straight from the fridge. The filling firms up nicely when chilled, and the flavors are more pronounced. I like to arrange them on a black platter or a dark-colored serving board to make the white egg whites pop. Add some fake spider webs, plastic spiders, or even a few fake eyeballs from the party store around the edges for extra creep factor.
For a Halloween party, I recommend making these the day before. The flavors actually improve overnight as the filling melds together. Just wait to add the paprika garnish until right before serving, or it will get soggy.
Storage: Store leftover deviled eggs in an airtight container in the refrigerator for up to 3 days. I don’t recommend freezing them—the texture of the filling changes and becomes watery when thawed.
Reheating: These are meant to be served cold, so no reheating is necessary. If you’ve stored them in the fridge, just take them out about 10 minutes before serving to take the chill off slightly.
Transporting: If you’re bringing these to a party, I highly recommend using a deviled egg carrier. They’re inexpensive and keep the eggs from sliding around. If you don’t have one, place a damp paper towel on the bottom of a container to keep the eggs from shifting. I learned this the hard way after arriving at a party with a platter of scrambled deviled eggs.
Nutritional Information & Benefits
Here’s the approximate nutritional breakdown per deviled egg half (based on 24 halves total):
- Calories: 85
- Protein: 6g
- Fat: 6g
- Carbohydrates: 1g
- Fiber: 0g
- Sugar: 0g
- Sodium: 150mg
Eggs are a fantastic source of high-quality protein, containing all nine essential amino acids. They’re also rich in choline, which is important for brain health, and lutein and zeaxanthin, which support eye health. The olive slices add healthy monounsaturated fats, and the paprika provides a small amount of vitamin A.
These deviled eggs are naturally low-carb and keto-friendly, making them a great option for guests with dietary restrictions. They’re also gluten-free and can easily be made dairy-free by skipping the cream cheese on the olive slices (they’ll still stick, just not as firmly).
If you’re watching your cholesterol, keep in mind that egg yolks are high in dietary cholesterol. However, current research suggests that dietary cholesterol has less impact on blood cholesterol levels than previously thought. As with all things, moderation is key.
Conclusion
These Best Creepy Monster Eyeball Deviled Eggs for Halloween have become a staple in my October recipe rotation, and I honestly can’t imagine a Halloween party without them now. They’re the perfect combination of creepy and delicious—the kind of appetizer that gets people talking, taking photos, and then coming back for more. Every time I make them, I’m reminded of that rainy Tuesday night when I just let my imagination run wild in the kitchen. Sometimes the best recipes come from those unplanned, slightly unhinged moments of creativity.
I’d love to hear how yours turn out! Did you add any creative twists? Did your guests scream or laugh? Drop a comment below and let me know. And if you’re looking for more spooky recipes to round out your Halloween menu, you might want to try my spider web dip or these mummy meatballs that are always a hit. Happy Halloween, and happy cooking!
Frequently Asked Questions
Can I make these deviled eggs ahead of time?
Absolutely! You can prepare the filling and boil the eggs up to two days in advance. Store the filling in a piping bag in the fridge and the peeled egg whites in an airtight container. Assemble everything the day of your party for the freshest look. The assembled eggs will keep for up to 3 days in the fridge.
How do I get the eggs to peel easily?
The key is using older eggs (at least a week old) and shocking them in an ice water bath immediately after boiling. The cold water creates a temperature shock that helps separate the shell from the egg white. Peeling under running water also helps remove stubborn shell fragments.
Can I use green olives instead of black olives?
You can, but they won’t look as much like eyeballs. Green olives have a different color and texture that doesn’t read as a “pupil” as convincingly. If you do use green olives, consider stuffing them with a small piece of pimento to create a more dramatic effect.
How do I keep the olive slices from falling off?
A tiny dab of cream cheese on the back of the olive slice acts as an edible glue. Make sure the olive slice is dry before applying the cream cheese, and press it gently into the filling. The cream cheese will firm up in the fridge and hold everything in place.
Can I make these without food coloring?
Yes! The red veining is optional. You can skip it entirely and just have white eggs with black olive pupils for a simpler (but still creepy) look. Alternatively, you can use finely chopped sun-dried tomatoes or roasted red peppers for a natural red color without artificial dyes.
Pin This Recipe!
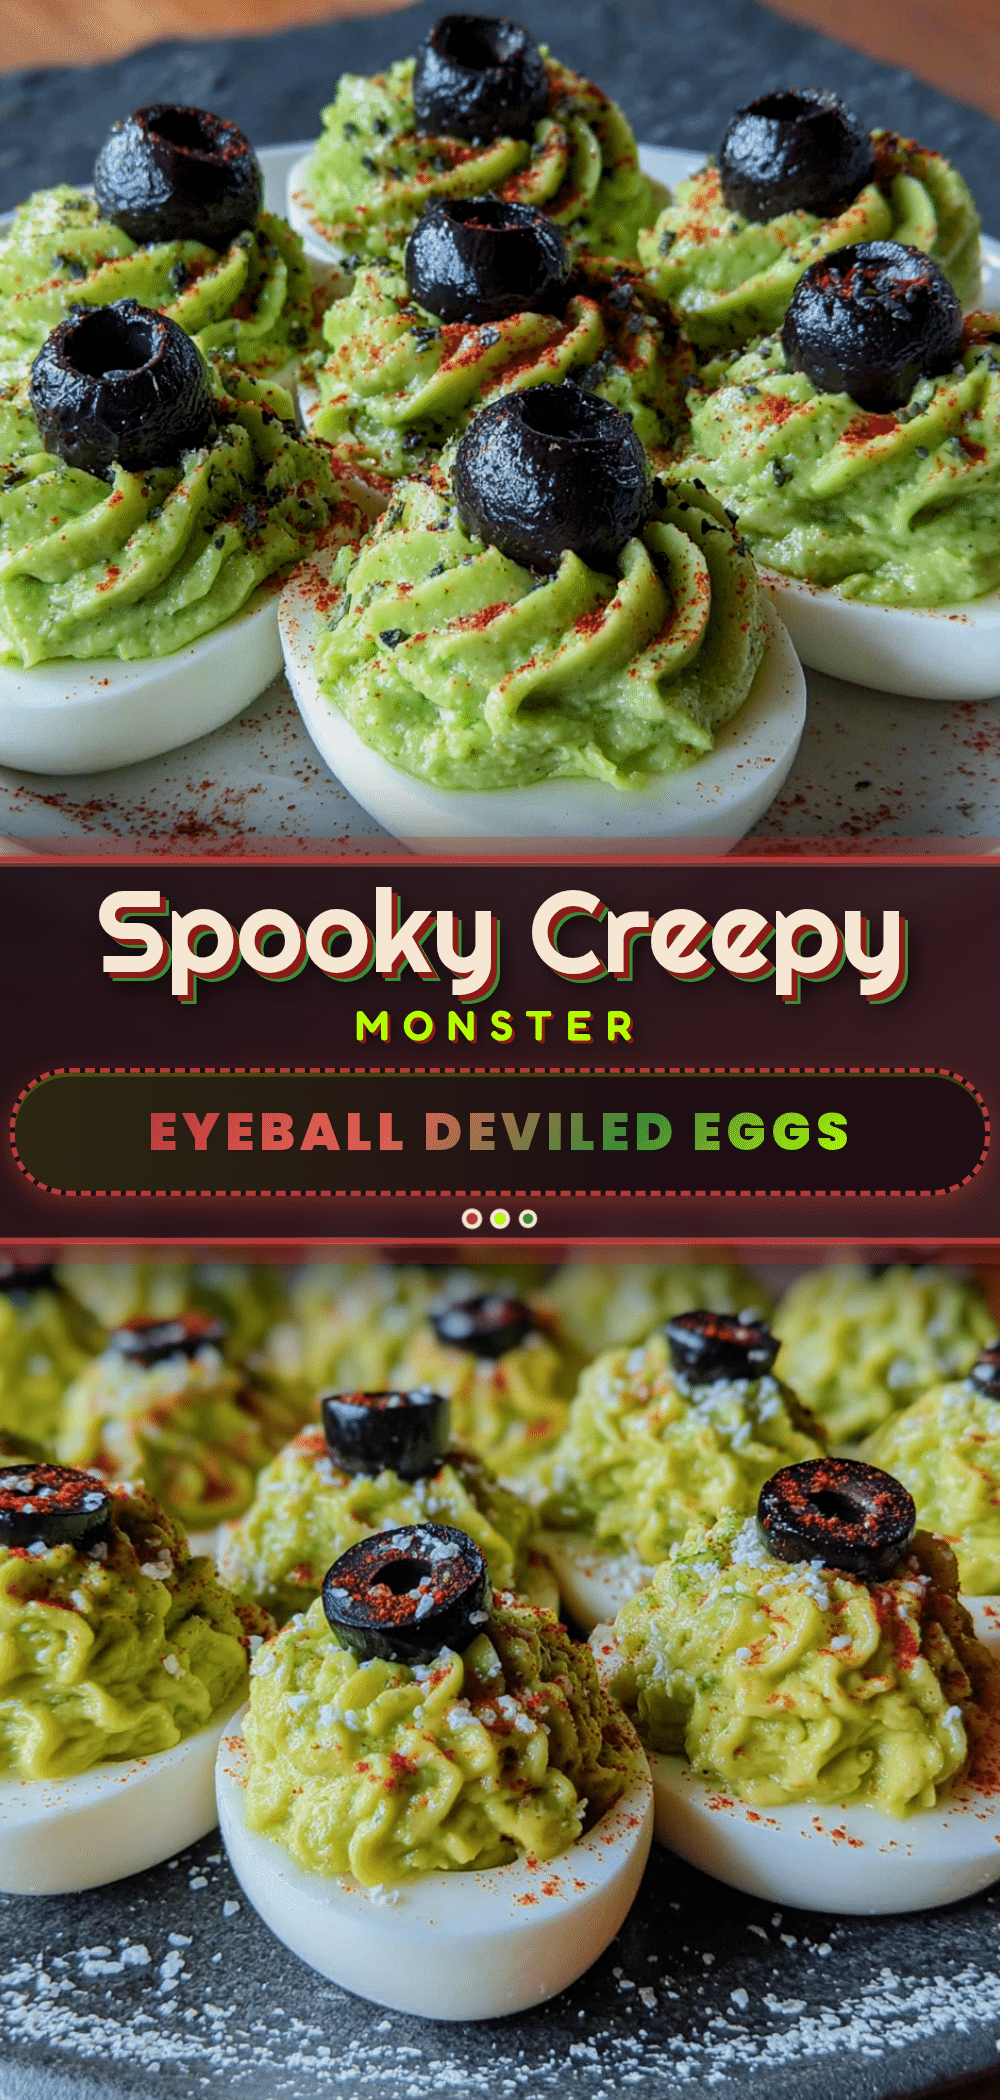
Best Creepy Monster Eyeball Deviled Eggs for Halloween
These Best Creepy Monster Eyeball Deviled Eggs for Halloween are the perfect party trick—creepy, delicious, and surprisingly easy to make. They taste just like classic deviled eggs but with a seriously spooky makeover that will have guests talking, taking photos, and reaching for seconds.
- Prep Time: 30 minutes
- Cook Time: 12 minutes
- Total Time: 42 minutes
- Yield: 24 deviled egg halves 1x
- Category: Appetizer
- Cuisine: American
Ingredients
- 12 large eggs (at least a week old for easier peeling)
- Ice water bath (for shocking the eggs after boiling)
- 1/3 cup mayonnaise (Hellmann’s or Duke’s recommended)
- 1 tablespoon yellow mustard
- 1 teaspoon white vinegar
- 1/2 teaspoon salt
- 1/4 teaspoon black pepper
- 1/2 teaspoon paprika (plus extra for garnish)
- 1/4 teaspoon garlic powder (optional)
- 1 can (6 oz) large black olives, drained
- 1 jar pimento peppers or roasted red peppers (for the ‘bloodshot’ veins)
- Red food coloring gel (not liquid)
- 1 tablespoon cream cheese, softened
Instructions
- Place eggs in a single layer in a large pot. Add enough cold water to cover by about an inch. Bring to a rolling boil over high heat. Once boiling, cover the pot, remove from heat, and let sit for exactly 12 minutes.
- While eggs cook, prepare an ice water bath in a large bowl. Transfer eggs to the ice water using a slotted spoon and let chill for at least 10 minutes.
- Gently tap each egg on the counter to crack the shell all over. Peel starting from the wider end, running under cold water to remove stubborn shell fragments. Pat dry.
- Slice each egg in half lengthwise with a sharp knife. Pop out yolks into a medium bowl. Arrange egg white halves on a serving platter, cut side up.
- To the yolks, add mayonnaise, yellow mustard, white vinegar, salt, pepper, paprika, and garlic powder (if using). Mash together with a fork until smooth and creamy. Adjust seasoning to taste.
- Take about 2 tablespoons of the filling and mix with a small drop of red food coloring gel until pale pink. Set aside for the ‘bloodshot’ veins.
- Transfer remaining filling to a piping bag or zip-top bag with the corner snipped off. Pipe a generous mound into each egg white half, making it slightly rounded on top like an eyeball.
- Put the pink-tinted filling in a small piping bag or sandwich bag with a tiny hole cut in the corner. Pipe thin, squiggly lines over the yellow filling to create ‘bloodshot’ veins.
- Slice black olives into thin rounds (about 1/4 inch thick). Pat dry with a paper towel. Dab a tiny amount of cream cheese on the back of each olive slice and press one gently into the center of each filled egg white to create the ‘pupil’.
- Cut pimento peppers or roasted red pepper strips into small, thin pieces. Arrange a few pieces around the olive to look like burst blood vessels.
- Cover the platter loosely with plastic wrap and refrigerate for at least 30 minutes. Before serving, sprinkle a tiny bit of paprika over the top for extra color.
Notes
Use gel food coloring, not liquid, to avoid thinning the filling. Keep olives dry so they stick better. Embrace imperfection—real eyeballs aren’t identical. Make filling up to 2 days ahead and store in a piping bag in the fridge. For easier peeling, use eggs that are at least a week old and shock them in an ice water bath immediately after boiling.
Nutrition
- Serving Size: 1 deviled egg half
- Calories: 85
- Sodium: 150
- Fat: 6
- Saturated Fat: 1.5
- Carbohydrates: 1
- Protein: 6
Keywords: Halloween deviled eggs, monster eyeball deviled eggs, creepy deviled eggs, spooky appetizer, Halloween party food



