Love this? Save it for later!
Share the inspiration with your friends
I was at the accountant’s office last October, waiting to go over some boring quarterly numbers, when Mr. Henderson—a man who wears suspenders and talks about lawn fertilizer like it’s a hobby—started describing his Halloween party menu. I wasn’t expecting cooking advice from my accountant, but there I was, sitting in a leather chair that squeaked every time I moved, listening to him explain exactly how to make deviled eggs that look like spiders. He pulled out his phone to show me a photo, and honestly, I almost dropped my coffee. They were creepy, clever, and completely doable. I mean, who knew the guy who does my taxes had such a fun side?
That conversation stuck with me. I went home that evening and tried making them myself, and let me tell you—my first batch looked more like sad blobs than spiders. I forgot to chill the eggs long enough, and the olive “legs” kept sliding off. But by the third try, I had a platter of spooky spider deviled eggs that made my kids actually squeal with delight. They’re the kind of thing you bring to a Halloween party and watch people do a double-take before grabbing one. Maybe you’ve been there—you want something festive that isn’t just another bag of candy corn, but you also don’t want to spend hours in the kitchen. These eggs are your answer.
The best part? They taste exactly like classic deviled eggs, which means even picky eaters will go for them. The spider design is just a garnish trick with olives and chives, so there’s no weird flavor surprise. You get the creamy, tangy filling everyone loves, plus a little Halloween drama. I keep making them because they’re the one dish that disappears first at every party, and honestly, watching someone’s face light up when they realize it’s just a clever olive on top never gets old.
Why You’ll Love This Recipe
These spooky spider deviled eggs aren’t just a gimmick—they’re genuinely the best version of a classic appetizer with a Halloween twist. I’ve tested this recipe at four different parties now, and here’s what makes it stand out from every other deviled egg recipe I’ve tried.
- Quick & Easy: Ready in about 30 minutes, with only 10 minutes of active prep. Perfect for last-minute Halloween cravings or when you realize the party starts in an hour.
- Simple Ingredients: Eggs, mayo, mustard, olives, and chives. You probably have most of these in your kitchen right now.
- Perfect for Halloween Parties: These are the star of any appetizer table. Kids love the spider look, and adults appreciate the clever presentation.
- Crowd-Pleaser: I’ve brought these to potlucks, office parties, and family gatherings. They always get rave reviews, even from people who “don’t like deviled eggs.”
- Unbelievably Delicious: The filling is extra creamy thanks to a secret ingredient—a tiny splash of pickle juice. It sounds weird, but trust me, it makes the flavor pop.
What makes this recipe different from other spider deviled eggs is the technique. I learned the hard way that if you don’t chill the assembled eggs for at least 15 minutes before serving, the olive legs slide right off. Also, I use a piping bag for the filling instead of spooning it in—it looks way more professional and takes the same amount of time. This isn’t just another version of deviled eggs; it’s the one that makes people ask for the recipe.
Honestly, this recipe is the kind that makes you close your eyes after the first bite. It’s comfort food reimagined—familiar and satisfying, but with a playful Halloween edge. Perfect for impressing guests without stress, or turning a simple snack into something memorable.
What Ingredients You Will Need
This recipe uses simple, wholesome ingredients to deliver bold flavor and satisfying texture without the fuss. Most of these are pantry staples, and the few specialty items are easy to find at any grocery store.
For the Deviled Eggs
- 12 large eggs – Use the freshest eggs you can find for easy peeling. I prefer organic, free-range eggs for better flavor and color.
- 1/3 cup mayonnaise – I recommend Duke’s or Hellmann’s for the creamiest texture. Avoid low-fat mayo—it makes the filling runny.
- 1 tablespoon yellow mustard – Adds tang and that classic deviled egg color. You can substitute Dijon for a sharper flavor.
- 1 teaspoon pickle juice – This is my secret ingredient. It adds brightness and cuts through the richness. Use dill pickle juice for best results.
- 1/4 teaspoon salt – Fine sea salt works best.
- 1/8 teaspoon black pepper – Freshly ground is ideal.
- 1/4 teaspoon paprika – For garnish and a subtle smoky flavor. Smoked paprika adds an extra layer of depth.
For the Spider Decorations
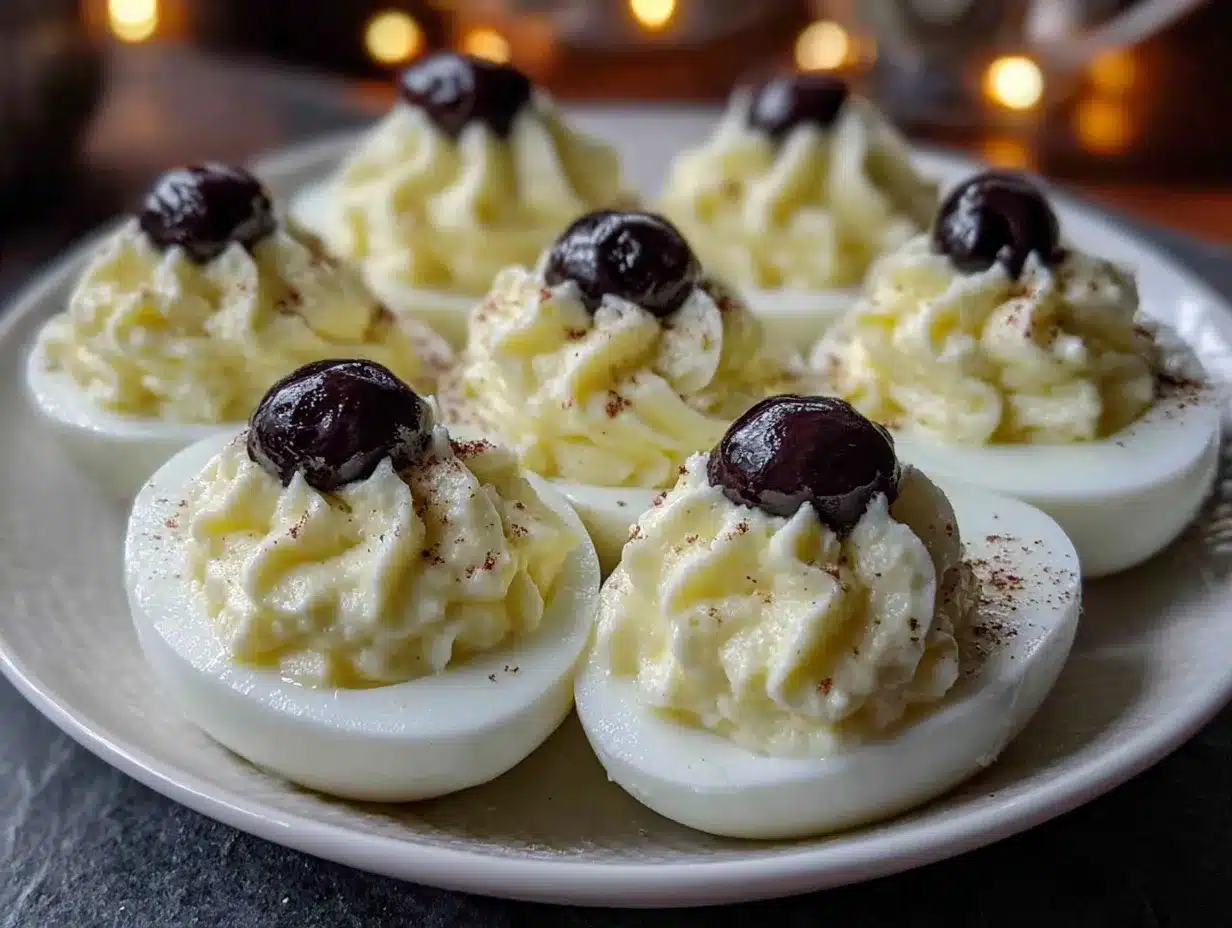
- 12 large black olives – Use pitted olives for easy slicing. I like California Ripe Olives because they’re firm and hold their shape.
- 24 chives or thin green onion strips – These become the spider legs. Chives are easier to work with because they’re naturally thin and flexible.
- 1 tablespoon cream cheese, softened – This helps the olive “spider body” stick to the egg yolk filling. A tiny dab is all you need.
Ingredient Selection Tips
For the best texture, look for eggs that are at least a week old—they peel much easier after boiling. If you’re using fresh farm eggs, add an extra minute to the boiling time and plunge them into ice water immediately. For the olives, avoid pre-sliced or seasoned varieties; plain black olives work best because they’re sturdy and have a neutral flavor that pairs well with the eggs.
If you’re serving these to someone with dietary restrictions, you can swap the mayonnaise for vegan mayo and use dairy-free cream cheese. The flavor will be slightly different, but the spider design still works perfectly.
Equipment Needed
You don’t need fancy tools to make these spooky spider deviled eggs, but a few key items make the process smoother.
- Large pot – For boiling the eggs. Use a pot big enough that the eggs sit in a single layer.
- Mixing bowl – For mashing the yolks and mixing the filling.
- Fork or potato masher – For breaking up the yolks. A fork works fine, but a potato masher is faster.
- Piping bag or zip-top bag – For filling the egg whites neatly. I’ve used both, and a piping bag with a star tip gives a prettier result.
- Sharp knife – For slicing olives cleanly. A dull knife will squish them.
- Cutting board – For prepping olives and chives.
- Small offset spatula or butter knife – For spreading the cream cheese on the olives.
- Platter or egg tray – For serving. A deviled egg tray with indentations keeps them from sliding around.
If you don’t have a piping bag, just snip the corner of a zip-top bag—it works perfectly. I’ve also used a small cookie scoop for the filling in a pinch, though it’s not as precise. For the chives, kitchen scissors are faster than a knife if you have them.
Preparation Method
- Boil the eggs: Place 12 large eggs in a large pot in a single layer. Cover with cold water by about 1 inch. Bring to a rolling boil over high heat. Once boiling, cover the pot, remove from heat, and let sit for exactly 10 minutes. (Set a timer—this is crucial for perfectly cooked yolks.)
- Ice bath: While the eggs sit, fill a large bowl with ice and cold water. After 10 minutes, transfer the eggs to the ice bath using a slotted spoon. Let them cool for at least 5 minutes. This stops the cooking and makes peeling much easier.
- Peel the eggs: Gently tap each egg on the counter to crack the shell, then roll it between your palms to loosen the shell. Start peeling from the wide end where the air pocket is. Rinse under cool water to remove any shell fragments. Pat dry with paper towels.
- Slice the eggs: Using a sharp knife, slice each egg in half lengthwise. Carefully pop out the yolks into a mixing bowl. Arrange the egg white halves on a serving platter, cut side up.
- Make the filling: Add 1/3 cup mayonnaise, 1 tablespoon yellow mustard, 1 teaspoon pickle juice, 1/4 teaspoon salt, and 1/8 teaspoon black pepper to the yolks. Mash with a fork until smooth and creamy. Taste and adjust seasoning—I usually add a pinch more salt.
- Pipe the filling: Spoon the yolk mixture into a piping bag fitted with a star tip (or a zip-top bag with the corner snipped). Pipe a generous amount into each egg white half, mounding it slightly. Don’t worry if it’s not perfect—the spider covers the top.
- Prepare the olives: Slice each black olive in half crosswise. You’ll have 24 olive halves. Set aside 12 halves for the spider bodies. For the remaining 12 halves, slice each into thin strips lengthwise to create the spider legs. You should get 4-6 strips per half.
- Assemble the spiders: Take one olive half (the body) and spread a tiny dab of softened cream cheese on the flat side. Press it gently onto the center of a filled egg. Insert 4 chive pieces or olive strips on each side of the body to form legs. Repeat for all 12 eggs.
- Chill before serving: Place the platter in the refrigerator for at least 15 minutes. This helps the cream cheese set and keeps the legs in place. Sprinkle with paprika just before serving for a pop of color.
Sensory cues: The yolks should be bright yellow and crumbly when mashed. The filling should be thick enough to hold its shape when piped—if it’s too runny, add another yolk or a tablespoon of cream cheese. The olive legs should feel secure after chilling, not wobbly.
Troubleshooting tip: If your eggs are hard to peel, try steaming them instead of boiling. Place eggs in a steamer basket over boiling water, cover, and steam for 12 minutes. The shells practically fall off.
Cooking Tips & Techniques
After making these spooky spider deviled eggs about a dozen times, I’ve collected a few tricks that make the process foolproof.
Perfect hard-boiled eggs every time: The biggest mistake people make is overcooking. If you boil eggs for too long, the yolks develop a gray-green ring and get a sulfurous smell. The 10-minute rest method I described above gives you perfectly cooked yolks every time. For extra insurance, add a teaspoon of baking soda to the boiling water—it raises the pH and makes peeling even easier.
Keep the filling stable: If your filling seems too soft, refrigerate it for 10 minutes before piping. Cold filling holds its shape better and doesn’t slide off the egg whites. I learned this the hard way when my first batch turned into a melty mess at a warm outdoor party.
Olive leg strategy: Chives are more reliable than olive strips for legs because they don’t break as easily. If you’re using olive strips, cut them as thinly as possible and handle them gently. I’ve also used thin carrot strips for a pop of orange color—they look surprisingly spooky.
Timing and multitasking: Boil the eggs and prep the olives while the eggs cool. You can make the filling and assemble everything in about 15 minutes once the eggs are cold. For parties, I often make the deviled eggs (without the spider decorations) a day ahead and add the spiders just before serving. The eggs stay fresh, and the olives don’t get soggy.
Consistency tip: For the best texture, let the cream cheese come to room temperature before spreading it on the olives. Cold cream cheese is too stiff and can tear the olive halves.
Variations & Adaptations
One of the best things about this recipe is how easily you can adapt it to different tastes and dietary needs.
Spicy spider deviled eggs: Add 1/2 teaspoon of sriracha or chipotle powder to the filling for a smoky heat. The spice pairs beautifully with the creamy yolk and briny olive. I made these for a Halloween party last year, and they were gone in 10 minutes.
Vegan version: Use silken tofu as the base for the filling instead of egg yolks. Blend 1 block of silken tofu with 2 tablespoons vegan mayo, 1 tablespoon mustard, 1 teaspoon pickle juice, and salt. The texture is surprisingly close to the real thing. Use vegan cream cheese for the olive glue.
Gluten-free option: This recipe is naturally gluten-free, but double-check your mustard and pickle juice labels if you have celiac disease. Some brands add wheat-based ingredients.
Seasonal twist: In the fall, swap the chives for thin strips of roasted red pepper for a pop of color. In spring, use fresh dill fronds for the legs—they look like fuzzy spider legs and add a lovely herbal note.
Different spider designs: Instead of olive halves, try using cherry tomatoes cut in half for a red spider body. Or use small mozzarella balls for a white spider—it looks especially creepy against the yellow filling. I tried the mozzarella version once, and my kids called them “ghost spiders.”
Serving & Storage Suggestions
These spooky spider deviled eggs are best served cold, straight from the refrigerator. Arrange them on a black platter or a tray lined with black parchment paper for maximum Halloween effect. I like to sprinkle extra paprika around the edges of the platter for a “blood splatter” look—it’s a fun touch that gets compliments.
Complementary dishes: Serve alongside other Halloween appetizers like mummy hot dogs, pumpkin-shaped cheese balls, or witch finger cookies. For beverages, a crisp apple cider or a dark stout beer pairs nicely with the creamy eggs. If you’re hosting a kid-friendly party, try a sparkling grape juice punch.
Storage instructions: Store leftover deviled eggs in an airtight container in the refrigerator for up to 2 days. The olive legs may soften slightly after 24 hours, but the flavor remains good. Do not freeze—the texture of the filling will become grainy.
Reheating: These are meant to be served cold, so no reheating needed. If they’ve been sitting out for more than 2 hours at a party, discard any leftovers for food safety reasons.
How flavors develop: The filling actually tastes better after a few hours in the fridge—the flavors meld together and become more balanced. If you’re making these for a party, prepare them the morning of and refrigerate until serving. The spiders should be added no more than 2 hours before serving to keep the legs crisp.
Nutritional Information & Benefits
Each spooky spider deviled egg (one half) contains approximately:
- Calories: 85
- Protein: 6g
- Fat: 6g
- Carbohydrates: 1g
- Fiber: 0g
- Sugar: 0.5g
Health benefits: Eggs are an excellent source of high-quality protein and contain choline, which supports brain health. The yolks provide vitamin D, vitamin B12, and selenium. Olives offer healthy monounsaturated fats and antioxidants. This recipe is naturally low-carb and keto-friendly, making it a great option for guests with dietary preferences.
Dietary considerations: This recipe contains eggs and dairy (cream cheese). For a dairy-free version, omit the cream cheese and use a tiny dab of hummus or vegan mayo to stick the olives. Always check mustard labels for gluten if serving someone with celiac disease.
Personal perspective: I love that these deviled eggs feel indulgent but are actually quite balanced. They’re a satisfying snack that doesn’t leave you feeling heavy—perfect for a party where you want to enjoy yourself without overdoing it.
Conclusion
These spooky spider deviled eggs are proof that Halloween food can be fun without being complicated. They look impressive, taste amazing, and come together with ingredients you probably already have. Whether you’re hosting a big party or just want to surprise your family with something festive, this recipe delivers every time.
I’d love to hear how yours turn out! Did you try a different variation? Did your kids help with the spider legs? Drop a comment below and share your experience—I read every single one. And if you’re looking for more Halloween inspiration, check out my mummy hot dogs and pumpkin-shaped cheese ball recipes. They make the perfect trio for any spooky spread.
Happy Halloween, and happy cooking! Remember, the best recipes are the ones you make your own—so don’t be afraid to get creative with those spiders.
Frequently Asked Questions
Can I make these spider deviled eggs a day ahead?
Yes! Prepare the deviled eggs (without the spider decorations) up to 24 hours in advance. Store them in an airtight container in the refrigerator. Add the olive spiders and chive legs no more than 2 hours before serving to keep everything looking fresh.
How do I keep the olive legs from falling off?
The key is a tiny dab of cream cheese on the flat side of the olive half. It acts like glue. Also, chill the assembled eggs for at least 15 minutes before serving—this helps the cream cheese set and keeps the legs secure.
Can I use different types of olives?
Absolutely! Kalamata olives add a richer flavor and a darker color, which looks even spookier. Green olives work too, but they’re milder in taste. Just make sure they’re pitted so you can slice them easily.
What if I don’t have chives for the legs?
No problem! Thin strips of green onion, carrot, or even bell pepper work great. You can also use thin pretzel sticks for a crunchy leg option—just insert them gently into the filling.
How long can these sit out at a party?
For food safety, don’t leave deviled eggs at room temperature for more than 2 hours. If your party is longer, place the platter on a bed of ice or serve them in batches from the refrigerator.
Pin This Recipe!
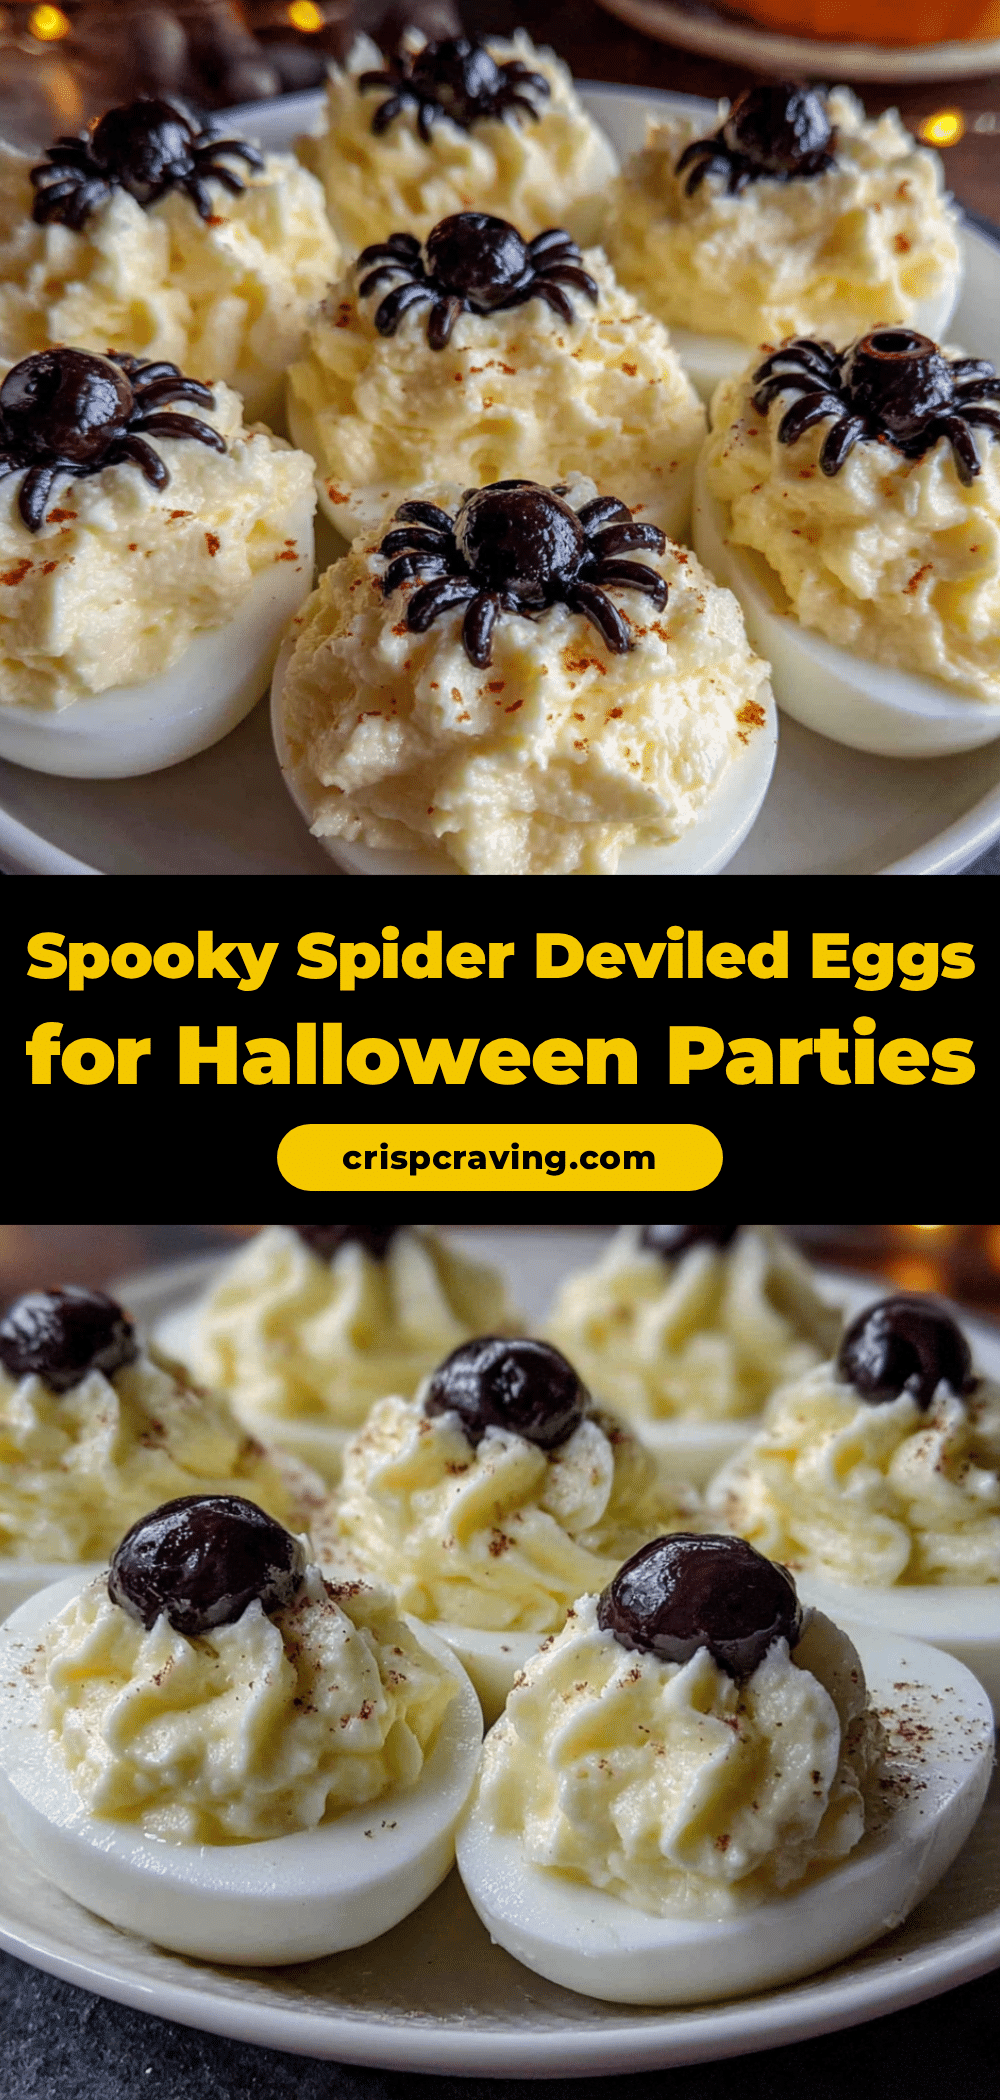
Best Easy Spooky Spider Deviled Eggs for Halloween Parties
These spooky spider deviled eggs are a fun and festive Halloween appetizer that tastes just like classic deviled eggs. With a creamy, tangy filling and a clever olive-and-chive spider garnish, they’re sure to be the star of any party.
- Prep Time: 10 minutes
- Cook Time: 10 minutes
- Total Time: 30 minutes
- Yield: 24 deviled egg halves (12 servings of 2 halves each) 1x
- Category: Appetizer
- Cuisine: American
Ingredients
- 12 large eggs
- 1/3 cup mayonnaise (recommended: Duke’s or Hellmann’s)
- 1 tablespoon yellow mustard
- 1 teaspoon pickle juice (dill pickle juice preferred)
- 1/4 teaspoon fine sea salt
- 1/8 teaspoon freshly ground black pepper
- 1/4 teaspoon paprika (for garnish; smoked paprika optional)
- 12 large black olives (pitted, such as California Ripe Olives)
- 24 chives or thin green onion strips
- 1 tablespoon cream cheese, softened
Instructions
- Boil the eggs: Place 12 large eggs in a large pot in a single layer. Cover with cold water by about 1 inch. Bring to a rolling boil over high heat. Once boiling, cover the pot, remove from heat, and let sit for exactly 10 minutes.
- Ice bath: While the eggs sit, fill a large bowl with ice and cold water. After 10 minutes, transfer the eggs to the ice bath using a slotted spoon. Let them cool for at least 5 minutes.
- Peel the eggs: Gently tap each egg on the counter to crack the shell, then roll it between your palms to loosen the shell. Start peeling from the wide end. Rinse under cool water to remove any shell fragments. Pat dry with paper towels.
- Slice the eggs: Using a sharp knife, slice each egg in half lengthwise. Carefully pop out the yolks into a mixing bowl. Arrange the egg white halves on a serving platter, cut side up.
- Make the filling: Add 1/3 cup mayonnaise, 1 tablespoon yellow mustard, 1 teaspoon pickle juice, 1/4 teaspoon salt, and 1/8 teaspoon black pepper to the yolks. Mash with a fork until smooth and creamy. Taste and adjust seasoning.
- Pipe the filling: Spoon the yolk mixture into a piping bag fitted with a star tip (or a zip-top bag with the corner snipped). Pipe a generous amount into each egg white half, mounding it slightly.
- Prepare the olives: Slice each black olive in half crosswise. You’ll have 24 olive halves. Set aside 12 halves for the spider bodies. For the remaining 12 halves, slice each into thin strips lengthwise to create the spider legs (4-6 strips per half).
- Assemble the spiders: Take one olive half (the body) and spread a tiny dab of softened cream cheese on the flat side. Press it gently onto the center of a filled egg. Insert 4 chive pieces or olive strips on each side of the body to form legs. Repeat for all 12 eggs.
- Chill before serving: Place the platter in the refrigerator for at least 15 minutes. Sprinkle with paprika just before serving.
Notes
For easier peeling, use eggs that are at least a week old. If the filling is too soft, refrigerate it for 10 minutes before piping. Chives are more reliable than olive strips for legs because they don’t break as easily. The assembled eggs should be chilled for at least 15 minutes before serving to keep the legs in place. For a dairy-free version, omit the cream cheese and use a tiny dab of hummus or vegan mayo to stick the olives.
Nutrition
- Serving Size: 2 deviled egg halves
- Calories: 170
- Sugar: 1
- Sodium: 320
- Fat: 12
- Saturated Fat: 3
- Carbohydrates: 2
- Protein: 12
Keywords: spider deviled eggs, Halloween deviled eggs, spooky deviled eggs, Halloween appetizer, deviled eggs recipe, spider eggs



