Love this? Save it for later!
Share the inspiration with your friends
My neighbor, a guy named Leo who I’d only ever seen in a stained mechanic’s jumpsuit, asked me why I couldn’t just bake the wings instead of dealing with a messy pot of hot oil. I started to explain why that wouldn’t work — something about the skin not getting crispy, the sacred tradition of deep-frying, the whole nine yards. Then I stopped. Honestly, I had no good reason other than “that’s how I’ve always done it.” So I tried it his way. And let me tell you, I was wrong. So, so wrong.
It was a Tuesday night, and the power had flickered a few times during a weird spring storm. I was already committed to making buffalo wings, a personal comfort food ritual for when the world feels a little off. I had the chicken, the hot sauce, the butter. But the thought of pulling out the deep fryer and heating up a gallon of oil felt like too much work for a night that was supposed to be about winding down. Leo’s suggestion, which I initially dismissed, was actually the perfect solution.
These aren’t just any buffalo wings. They’re my new go-to, the ones I make when I want that deep, spicy, tangy flavor without the deep-fryer hassle. The baking method, combined with a little trick I picked up from a restaurant cookbook, gives you skin that’s shatteringly crisp. The meat stays juicy, and the sauce, a simple mix of Frank’s RedHot and melted butter, clings to every nook and cranny. I call them “Bat Wing Buffalo Wings” because they come out of the oven looking gloriously dark, sticky, and a little bit wicked — perfect for a cozy night in. Maybe you’ve been there, standing in your kitchen, craving something that feels like a celebration but not wanting to put on a show. This is that recipe.
Why You’ll Love This Recipe
These wings have become a staple in my house for a good reason. They deliver everything you want from a classic buffalo wing but with a whole lot less fuss. I’ve tested this method about a dozen times, tweaking the temperature and the baking powder ratio until I got it just right. It’s not just a recipe; it’s a reliable system for perfect wings every single time.
- Oven-Baked, Not Fried: You get that incredible crispy skin without the mess, smell, and danger of deep-frying. It’s a game-changer for a weeknight dinner.
- Simple Pantry Ingredients: You probably have almost everything already. Chicken wings, hot sauce, butter, and a few pantry staples are all it takes.
- Perfect for Game Day or a Cozy Night: These wings are just as at home on a platter for a crowd as they are on a plate for one while you watch a movie.
- Seriously Crispy Skin: The secret is a light coating of baking powder. It sounds weird, I know, but it works magic in the oven, creating tiny bubbles that crisp up beautifully.
- That Classic Tangy Heat: The sauce is pure, unadulterated buffalo wing perfection. It’s buttery, spicy, and just a little bit vinegary. It’s the flavor I crave.
What makes this recipe different is the technique. It’s not just “bake the wings and toss in sauce.” There’s a crucial drying-out step in the fridge that makes all the difference. This isn’t another version of baked wings that come out soggy. This is the best version, born from a stubborn cook being proven wrong by a neighbor’s simple suggestion.
What Ingredients You Will Need
This recipe relies on a short list of high-impact ingredients. The magic is in the method, not a long grocery list. Here’s what you’ll need to grab.
- Chicken Wings (3 lbs / 1.4 kg): Look for party wings, which are already separated into drumettes and flats. If you buy whole wings, you’ll need to cut them yourself at the joint and save the tips for stock. I usually grab a big family pack from Costco.
- Baking Powder (2 teaspoons): This is the non-negotiable secret to crispy skin. It must be baking powder, not baking soda. Baking soda will give your wings a weird, metallic taste. Aluminum-free baking powder is best.
- Salt (1 teaspoon): Use a fine sea salt or kosher salt. It helps draw out moisture from the skin, which is the first step to getting it crispy.
- Black Pepper (½ teaspoon): Freshly ground is always better for a little kick.
- Garlic Powder (½ teaspoon): This adds a subtle savory depth to the chicken itself. Don’t skip it.
- Frank’s RedHot Original Cayenne Pepper Sauce (½ cup / 120 ml): This is the gold standard for buffalo wings. Its flavor is vinegary and spicy, with a distinct tang that you just can’t replicate with other hot sauces. I’ve tried others, and I always come back to Frank’s.
- Unsalted Butter (¼ cup / 4 tablespoons / 56 g): Melted butter mellows out the heat of the hot sauce and gives it that rich, velvety texture that coats the wings perfectly. Use unsalted so you can control the salt level.
- Blue Cheese Dressing (for serving): The cool, tangy, funky flavor of blue cheese is the classic counterpart to spicy buffalo sauce. You can use store-bought (I like Marie’s), but making your own is incredibly easy and way more delicious.
- Celery and Carrot Sticks (for serving): These are non-negotiable for me. The cool crunch of the vegetables is the perfect palate cleanser between spicy, rich wings.
Equipment Needed
You don’t need a deep fryer or any fancy gadgets for this recipe. A few basic kitchen tools will do the trick just fine.
- Baking Sheet: A large, rimmed baking sheet is essential. The rim catches any rendered fat and prevents a mess in your oven. I use a half-sheet pan.
- Wire Rack: This is a key piece of equipment. Placing a wire rack inside your baking sheet allows air to circulate all around the wings, ensuring they get crispy on the bottom, too. If you don’t have one, you can flip the wings halfway through, but the rack is better.
- Paper Towels: You’ll need these to pat the chicken wings very dry. This is a crucial step that you shouldn’t skip.
- Large Bowl: For tossing the wings with the baking powder mixture and later with the sauce.
- Small Saucepan or Microwave-Safe Bowl: For melting the butter and mixing the sauce.
- Tongs: For moving the hot wings around without piercing the skin.
Preparation Method
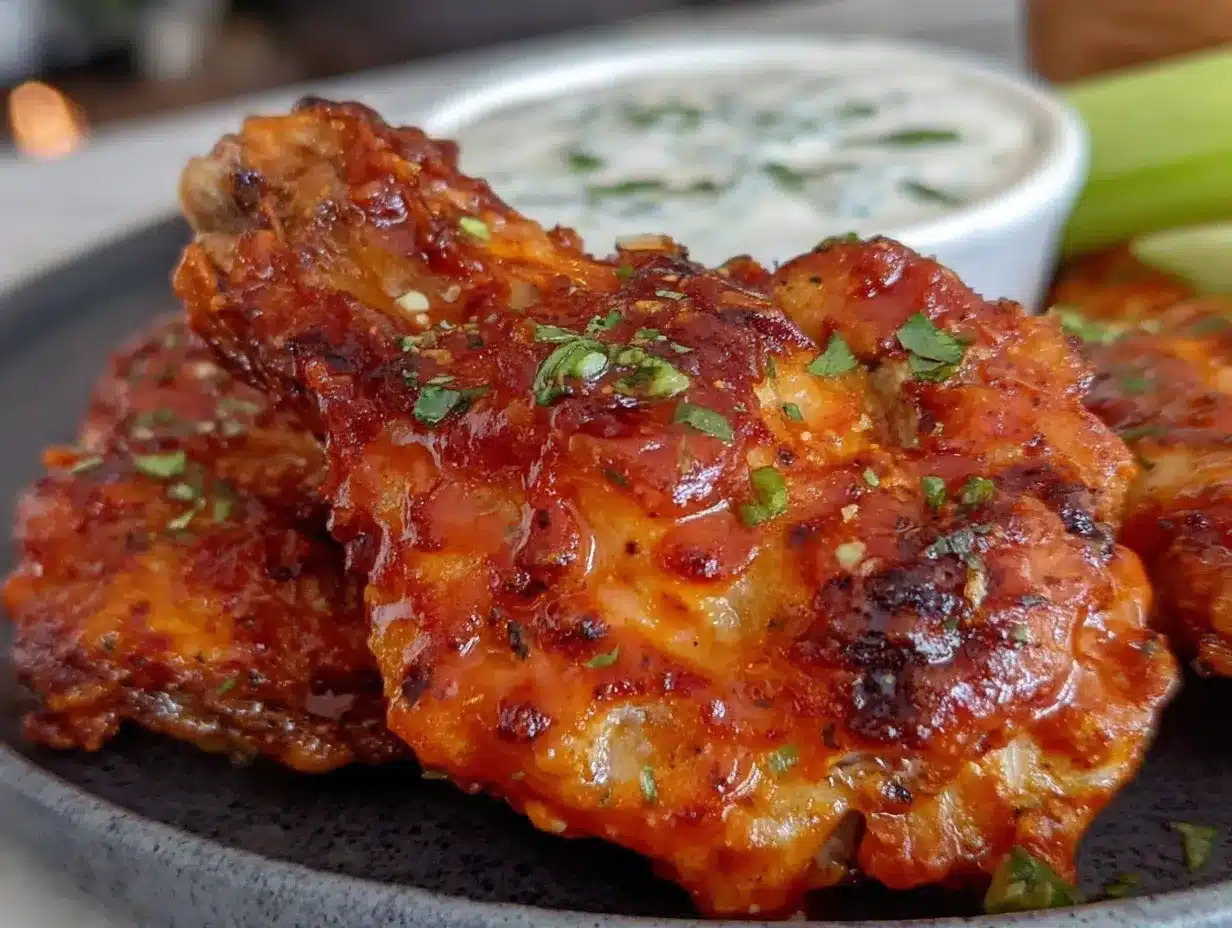
This process has two main stages: drying the wings and baking them. The first stage is the most important for achieving that perfect crunch.
- Prep the Wings (Do this the night before or at least 1 hour ahead): Pat the chicken wings completely dry with paper towels. This is not a step to rush. The drier they are, the crispier they will be. In a large bowl, whisk together the baking powder, salt, black pepper, and garlic powder. Add the dried wings to the bowl and toss thoroughly until every piece is evenly coated.
- The Resting Period (Crucial for Crispiness): Arrange the coated wings in a single layer on the wire rack set inside your baking sheet. Place the baking sheet in the refrigerator, uncovered, for at least 1 hour, or up to 24 hours. This allows the baking powder to work its magic and the skin to dry out further. The longer they rest, the crispier they will be. I usually do this in the morning before work.
- Preheat the Oven: When you’re ready to bake, preheat your oven to 425°F (220°C). Make sure the rack is in the middle position. A hot oven is key to getting a good sear on the skin.
- Bake the Wings: Take the wings directly from the fridge and place them in the preheated oven. Bake for 45-50 minutes, flipping the wings once halfway through with tongs. You’re looking for deep golden brown, crispy skin. The wings should look a little like they’ve been fried. The internal temperature should reach 165°F (74°C), but the visual cue of the crispy skin is a good indicator.
- Make the Buffalo Sauce: While the wings are baking, make your sauce. In a small saucepan over low heat, melt the butter. Once melted, whisk in the Frank’s RedHot sauce until fully combined. Keep the sauce warm on the lowest setting. You can also do this in a microwave-safe bowl in 30-second bursts.
- Toss and Serve: Once the wings are out of the oven, let them rest on the rack for just a minute. Transfer them to a large, clean bowl. Pour the warm buffalo sauce over the wings and toss gently with tongs until every wing is beautifully coated. Be careful not to toss too hard, or you might break the crispy skin.
- Plate and Garnish: Pile the saucy wings onto a platter. Serve immediately with a generous bowl of blue cheese dressing and plenty of fresh celery and carrot sticks. The contrast of hot, spicy wings and cold, crunchy veggies is what it’s all about.
Cooking Tips & Techniques
I’ve made a lot of mistakes with wings over the years. Here are the lessons I learned the hard way so you don’t have to.
- Don’t Skip Drying the Wings: The number one reason baked wings come out soggy is that they were too wet. Pat them dry with paper towels until they feel tacky. That’s the goal.
- Baking Powder, Not Baking Soda: I cannot stress this enough. I once grabbed the wrong box in a hurry, and the wings tasted like a chemical experiment. Baking powder is essential for crispiness; baking soda is for cakes and will ruin your dinner.
- The Wire Rack is Your Friend: If you don’t have a wire rack, you can still make these wings. You’ll just need to flip them twice during baking and make sure the skin isn’t sitting in rendered fat. A rack makes it foolproof.
- Don’t Overcrowd the Pan: Give the wings some breathing room. If they are too close together, they will steam instead of roast. Use two baking sheets if you have to.
- Serve Immediately: Buffalo wings are best the second they are tossed in sauce. As they sit, the sauce can soften the crispy skin. Plan your timing so the wings are the last thing you prepare.
Variations & Adaptations
Once you master the basic technique, the possibilities are endless. Here are a few of my favorite ways to change it up.
- Spicy Honey Garlic: After baking, toss the wings in a sauce made of ½ cup honey, ¼ cup soy sauce, 4 minced garlic cloves, and 1 tablespoon sriracha. Simmer the sauce on the stove until it thickens slightly before tossing. It’s a sweet and sticky alternative.
- Lemon Pepper: Skip the buffalo sauce entirely. Before baking, add 1 tablespoon of lemon zest and 1 tablespoon of cracked black pepper to the baking powder mixture. After baking, toss the hot wings with melted butter and a squeeze of fresh lemon juice. It’s bright, peppery, and incredibly simple.
- Smoky Chipotle: For a deeper, smokier heat, replace the Frank’s RedHot with ½ cup of adobo sauce from a can of chipotle peppers in adobo. Mix it with the melted butter for a sauce that has a complex, earthy heat. You can even mince one of the chipotle peppers and add it to the sauce for extra fire.
- Air Fryer Method: You can absolutely make these in an air fryer. Follow the same drying and coating steps. Cook at 400°F (200°C) for 20-25 minutes, shaking the basket halfway through. The results are just as crispy, if not more so, and it’s even faster.
Serving & Storage Suggestions
These wings are a whole experience, not just a dish. Here’s how to make the most of them.
- Serving Temperature: Serve the wings piping hot, straight from the oven. The blue cheese dressing and vegetables should be ice cold. The temperature contrast is a big part of the appeal.
- Presentation: Pile the wings high on a large wooden board or a white platter. Place the bowl of blue cheese dressing in the center or on the side. Scatter the celery and carrot sticks around the wings like a garnish that’s meant to be eaten.
- What to Serve With It: These wings are a meal on their own, but they pair perfectly with other game-day favorites. Try them with a side of crispy garlic chicken for a full-on poultry feast, or balance the heat with a simple creamy mac and cheese.
- Storage: Leftover wings (if you have any) should be stored in an airtight container in the refrigerator. They will last for 3-4 days. The skin will soften as they sit, but the flavor will still be fantastic.
- Reheating: The best way to reheat these wings is in the oven or an air fryer. Reheat at 350°F (175°C) for 10-15 minutes, or until heated through and the skin crisps up again. The microwave will make them soggy, so avoid it if you can.
Nutritional Information & Benefits
While these are a treat, they do have some redeeming qualities. Chicken wings are a good source of protein, which is essential for muscle repair and keeping you full. The skin does contain fat, but baking instead of frying significantly reduces the overall fat content. Celery is a great low-calorie source of fiber and vitamins, and the capsaicin in the hot sauce can give your metabolism a tiny boost. Of course, the blue cheese dressing adds fat and calories, but it’s all about balance. This recipe is naturally gluten-free and low-carb, making it a great option for those following a keto or paleo diet. Just be sure to check your hot sauce and blue cheese dressing labels for any hidden gluten or sugars.
Conclusion
Honestly, I’m glad Leo called me out that night. These oven-baked buffalo wings have become my absolute favorite way to make them. They are less stressful, less messy, and somehow, they taste even better because I know I’m not standing over a pot of hot oil. The crispy skin, the tangy heat, the cool blue cheese — it’s a perfect combination of flavors and textures that just feels like a hug on a plate.
I really hope you give these a try. Don’t be afraid to tweak the spice level or try one of the variations. Cooking is all about making a recipe your own. If you make these, please come back and leave a comment to let me know how they turned out! Did you serve them for a party, or was it just a quiet night in for yourself? I’d love to hear your story. Until next time, happy cooking!
Frequently Asked Questions
Can I use frozen chicken wings for this recipe?
Yes, you can, but you must thaw them completely in the refrigerator first. Once thawed, pat them incredibly dry with paper towels. Frozen wings will release a lot of water as they thaw, so drying them well is even more critical for getting crispy skin.
My wings didn’t get crispy. What went wrong?
The most common reasons are that the wings weren’t dried well enough before coating, they were overcrowded on the baking sheet, or they didn’t rest in the fridge long enough. Make sure your oven is fully preheated to 425°F and that the wings have plenty of space for air to circulate.
Can I make the blue cheese dressing from scratch?
Absolutely! It’s very easy. Combine ½ cup of sour cream, ¼ cup of mayonnaise, ¼ cup of crumbled blue cheese, 1 tablespoon of lemon juice, 1 tablespoon of milk, and a pinch of salt and pepper. Stir it together and let it sit in the fridge for at least 30 minutes for the flavors to meld.
How do I make the wings less spicy?
You can easily adjust the heat level. For milder wings, use less Frank’s RedHot or add more melted butter to the sauce. You can also substitute a milder hot sauce, like a standard Louisiana-style hot sauce, for a less intense kick.
Can I prep these wings ahead of time for a party?
Yes! The best way to prep ahead is to follow the recipe through Step 2. Coat the wings and let them rest, uncovered, on the wire rack in the fridge for up to 24 hours. When your guests arrive, all you have to do is bake them. This is my favorite party trick.
Pin This Recipe!
Best Homemade Bat Wing Buffalo Wings with Blue Cheese

These oven-baked buffalo wings deliver shatteringly crispy skin and juicy meat without the mess of deep-frying. Coated in a classic buttery hot sauce, they’re perfect for game day or a cozy night in.
- Prep Time: 15 minutes
- Cook Time: 45 minutes
- Total Time: 1 hour (plus at least 1 hour resting time)
- Yield: 4 servings 1x
- Category: Appetizer
- Cuisine: American
Ingredients
- 3 lbs (1.4 kg) chicken wings (party wings, drumettes and flats)
- 2 teaspoons baking powder (aluminum-free)
- 1 teaspoon fine sea salt or kosher salt
- ½ teaspoon freshly ground black pepper
- ½ teaspoon garlic powder
- ½ cup (120 ml) Frank’s RedHot Original Cayenne Pepper Sauce
- ¼ cup (4 tablespoons / 56 g) unsalted butter, melted
- Blue cheese dressing, for serving
- Celery and carrot sticks, for serving
Instructions
- Prep the Wings (Do this the night before or at least 1 hour ahead): Pat the chicken wings completely dry with paper towels. In a large bowl, whisk together the baking powder, salt, black pepper, and garlic powder. Add the dried wings and toss thoroughly until every piece is evenly coated.
- The Resting Period (Crucial for Crispiness): Arrange the coated wings in a single layer on a wire rack set inside a rimmed baking sheet. Place the baking sheet in the refrigerator, uncovered, for at least 1 hour, or up to 24 hours.
- Preheat the Oven: When ready to bake, preheat your oven to 425°F (220°C) with the rack in the middle position.
- Bake the Wings: Take the wings directly from the fridge and place them in the preheated oven. Bake for 45-50 minutes, flipping the wings once halfway through with tongs, until deep golden brown and crispy. Internal temperature should reach 165°F (74°C).
- Make the Buffalo Sauce: While the wings are baking, melt the butter in a small saucepan over low heat. Whisk in the Frank’s RedHot sauce until fully combined. Keep warm on the lowest setting.
- Toss and Serve: Once the wings are out of the oven, let them rest on the rack for a minute. Transfer to a large clean bowl, pour the warm buffalo sauce over the wings, and toss gently with tongs until every wing is coated.
- Plate and Garnish: Pile the saucy wings onto a platter. Serve immediately with blue cheese dressing and celery and carrot sticks.
Notes
The key to crispy skin is drying the wings thoroughly and letting them rest uncovered in the fridge. Use baking powder, not baking soda. Serve immediately for best texture. For less spicy wings, reduce hot sauce or add more butter.
Nutrition
- Serving Size: 1 serving (about 6-8
- Calories: 420
- Sugar: 1
- Sodium: 1200
- Fat: 28
- Saturated Fat: 10
- Carbohydrates: 2
- Protein: 38
Keywords: buffalo wings, oven-baked wings, crispy chicken wings, game day appetizer, spicy wings, blue cheese



