Love this? Save it for later!
Share the inspiration with your friends
It was 10:43 PM on a random Wednesday, and I was hit with this odd, unwavering urge for something chewy and sweet—but also kind of wholesome enough to sneak into a school lunchbox. I didn’t have the usual fancy ingredients that a “perfect” recipe would call for, but I did have overripe bananas languishing on the counter and a nearly empty bag of chocolate chips that begged for some company. Honestly, the late hour made me throw the rulebook out the window. I grabbed a cracked mixing bowl (the one with the chip on the rim, because of course), mashed those bananas, and started tossing things together like a sleep-deprived mad scientist.
You know that feeling when the kitchen’s quiet except for the hum of the fridge, and suddenly baking feels like a little nighttime rebellion? That’s exactly how these Chewy Chocolate Chip Banana Bars came to be. I forgot to set the timer once, and the first batch came out a little darker than intended—yet somehow, that only added to their charm. Maybe you’ve been there, improvising under weird conditions and stumbling on something unexpectedly good. That first batch disappeared faster than I could blink, and since then, these bars have been a reliable staple in my kids’ school lunches. They’re chewy, chocolaty, and just sweet enough to make that midday snack feel like a secret treat. Let me tell you, these bars stick with you — in the best possible way.
Why You’ll Love This Recipe
Making chewy chocolate chip banana bars isn’t just about throwing ingredients together—it’s about crafting a snack that’s both satisfying and practical for hectic school mornings. I’ve tested this recipe countless times, tweaking it for texture, sweetness, and that perfect chewy bite. Here’s why this recipe will quickly become your go-to:
- Quick & Easy: Everything comes together in under 30 minutes, perfect for those rushed weekday afternoons or last-minute lunchbox fillers.
- Simple Ingredients: No need for specialty stores; you probably already have ripe bananas, pantry staples, and chocolate chips on hand.
- Perfect for School Lunches: These bars pack well, don’t crumble easily, and satisfy kids’ cravings without the sugar overload.
- Crowd-Pleaser: I’ve never met a kid (or adult) who didn’t ask for seconds. The combination of chewy banana and melty chocolate chips is just irresistible.
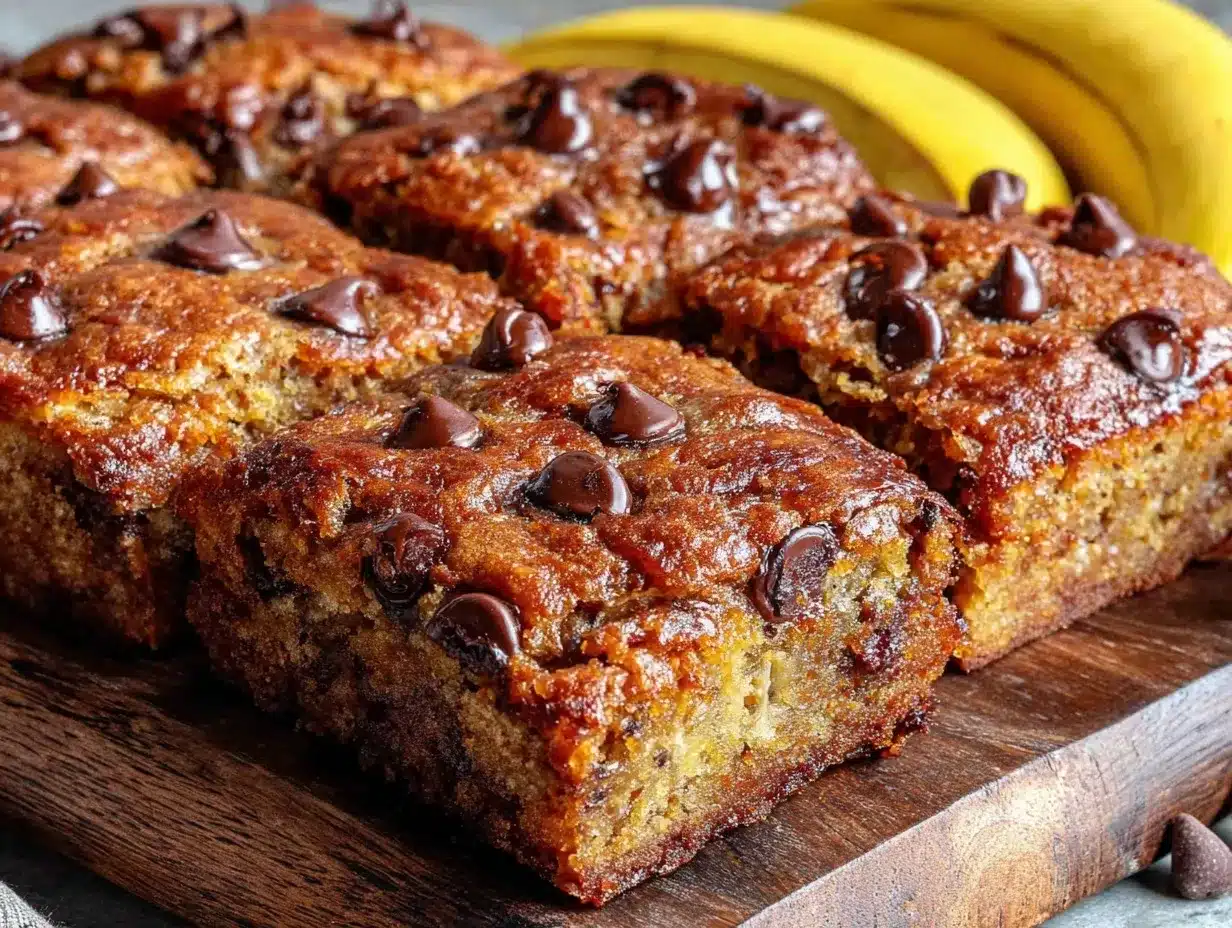
- Unbelievably Delicious: Unlike traditional banana bread, these bars are dense and chewy, almost like a cookie–but better.
What sets this recipe apart? It’s the balance—moist bananas, just enough sugar to bring out their natural sweetness, and chocolate chips that melt into gooey pockets throughout the bars. No fancy equipment, no complicated steps, just pure, comforting flavor. Honestly, these bars feel like a little hug in your lunchbox. Whether you’re packing for school, a picnic, or need a quick snack that doesn’t scream “store-bought,” these banana bars bring both nostalgia and a fresh twist.
What Ingredients You Will Need
This recipe uses simple, wholesome ingredients to deliver bold flavor and a satisfyingly chewy texture without any fuss. Most are pantry staples, and a few tips on picking the right ones can make all the difference.
- Ripe bananas (3 medium, mashed) – the riper, the better for natural sweetness and moisture.
- All-purpose flour (1 ½ cups / 190 grams) – you can swap with whole wheat for a nuttier flavor or almond flour for gluten-free.
- Brown sugar (¾ cup / 150 grams, packed) – adds moisture and that chewy quality; I prefer dark brown sugar for richer flavor.
- Unsalted butter (½ cup / 115 grams, melted) – brings richness; use coconut oil for a dairy-free twist.
- Large egg (1, room temperature) – binds everything together.
- Baking soda (1 teaspoon) – essential for rise and lightness.
- Salt (½ teaspoon) – balances sweetness and enhances flavor.
- Vanilla extract (1 teaspoon) – a must for that warm, inviting aroma.
- Chocolate chips (1 cup / 170 grams) – semi-sweet or milk chocolate, depending on your preference; I usually reach for Ghirardelli for melt and flavor.
For variations, feel free to toss in chopped nuts, shredded coconut, or even a handful of oats to add texture. When bananas are out of season or you want a lower sugar option, swapping part of the sugar for maple syrup works surprisingly well.
Equipment Needed
Not much is required here—just a few basics that most home kitchens already have:
- Mixing bowls: One large for combining wet and dry ingredients. I like glass or stainless steel for easy cleanup.
- Measuring cups and spoons: Accurate measurements are key for chewy texture.
- Hand mixer or whisk: While you can mix by hand, a handheld mixer speeds things up and ensures a smooth batter.
- Baking pan: An 8×8-inch square pan works perfectly. If you don’t have one, a similarly sized round or rectangular pan will do.
- Parchment paper: For lining the pan, so bars lift out easily without sticking.
- Spatula: A flexible silicone spatula helps scrape every last bit of batter into the pan.
For budget-friendly options, simply grease your pan thoroughly if you don’t have parchment paper. I’ve made these bars in everything from cast iron to glass, and they all work fine—just adjust baking time slightly and keep an eye on browning.
Preparation Method
- Preheat your oven to 350°F (175°C). Line an 8×8-inch baking pan with parchment paper, leaving some overhang to lift the bars out easily later. This step saves you from wrestling with sticky bars, trust me. (5 minutes)
- In a large bowl, combine the mashed bananas and melted butter. Stir until creamy and well blended. The bananas should be soft and lumpy, not pureed smooth—this adds to the texture. (3 minutes)
- Add the brown sugar, egg, and vanilla extract to the banana mixture. Beat together until fully incorporated and slightly fluffy. I find that beating well here helps give bars a nice lift. (3 minutes)
- In a separate bowl, whisk together the flour, baking soda, and salt. This ensures even distribution of the leavening and salt, which is key for balanced flavor and texture. (2 minutes)
- Gradually add the dry ingredients into the wet mixture. Fold gently using a spatula until just combined—don’t overmix, or your bars might end up tough. The batter will be thick and sticky. (3 minutes)
- Fold in the chocolate chips. Save a small handful to sprinkle on top for a pretty finish. (1 minute)
- Pour the batter into the prepared pan, smoothing the top evenly. Sprinkle the reserved chocolate chips over the surface. (2 minutes)
- Bake for 25-30 minutes, or until the edges are golden and a toothpick inserted in the center comes out with a few moist crumbs. Ovens vary, so start checking at 25 minutes. (25-30 minutes)
- Cool completely in the pan on a wire rack. This cooling step is crucial for the bars to set and develop their chewy texture. Trying to cut them while warm will lead to crumbs and breakage. (30 minutes)
- Lift the bars out using the parchment overhang and cut into squares. Enjoy immediately, or pack them up for school lunches. (5 minutes)
Cooking Tips & Techniques
Getting chewy chocolate chip banana bars right can feel like a bit of a balancing act, but some hard-earned tips can save you from common pitfalls.
- Don’t overmix the batter. I’ve learned the hard way that beating flour too much toughens the bars. Fold gently until just combined.
- Use ripe, spotty bananas. The sweeter and softer, the better—they add natural moisture and flavor without extra sugar.
- Watch your baking time closely. Baking too long makes bars dry and crumbly. Take them out when a toothpick shows moist crumbs, not wet batter.
- Melted butter adds chewiness. I tried using oil once, and while it worked, butter gives that rich mouthfeel you want in chewy bars.
- Rest the bars before slicing. Cooling completely helps them firm up and slice cleanly. If you’re impatient like me, a quick chill in the fridge works wonders.
- Substitutions work, but tweak accordingly. For example, if using almond flour, expect a denser texture, so add an extra egg or two to help bind.
Letting the chocolate chips melt into the warm bars right after baking is one of those moments where you realize why you bother making things from scratch. And hey, if you ever want to try a crowd-favorite with a twist, these bars pair beautifully with a glass of cold milk or even a cup of homemade hot chocolate for a cozy after-school treat.
Variations & Adaptations
One of the best things about this chewy chocolate chip banana bars recipe is how well it adapts to your needs or whims. Here are three ways I’ve played with it over time:
- Nut-free and allergy-friendly: Skip nuts entirely and swap butter for coconut oil to suit dairy-free diets. Use dairy-free chocolate chips like Enjoy Life brand for safe snacking.
- Seasonal fruit twist: In summer, add fresh or frozen blueberries for a burst of tartness. I once tossed in chopped strawberries for a sweet surprise, and it was a hit!
- Protein boost: Stir in a scoop of vanilla protein powder or add chopped walnuts for extra crunch and nutrition. These versions hold up well in lunchboxes and keep hunger at bay longer.
For baking method adjustments, these bars can also be made in muffin tins for grab-and-go portions. Just reduce baking time to 18-22 minutes and check for doneness. If you want to go gluten-free, almond or oat flour substitutions work well, but expect a softer texture.
Serving & Storage Suggestions
These chewy chocolate chip banana bars are best enjoyed at room temperature, but I’ve found that serving them slightly warmed (10-15 seconds in the microwave) brings out that melty chocolate goodness. Presentation-wise, a simple dusting of powdered sugar or a drizzle of peanut butter can add flair for lunchbox smiles.
They store beautifully—wrap tightly in plastic wrap or keep in an airtight container at room temperature for up to 3 days. For longer storage, I freeze them individually wrapped; they thaw quickly and maintain their chewy texture. Reheat frozen bars in the microwave for about 20 seconds to enjoy fresh-baked vibes.
Flavors actually deepen after a day or two, making these bars a great make-ahead snack. Pair them with a cold glass of milk or a cup of tea for an afternoon pick-me-up that’s both nostalgic and satisfying.
Nutritional Information & Benefits
Each chewy chocolate chip banana bar contains approximately 180-200 calories, with a balanced mix of carbohydrates, healthy fats, and protein. The ripe bananas provide natural sweetness along with potassium and dietary fiber, supporting heart health and digestion. Using brown sugar instead of white adds a bit of molasses flavor and trace minerals, while the dark chocolate chips offer antioxidants.
This recipe can easily be adapted for gluten-free or dairy-free diets by swapping ingredients, making it accessible for various dietary needs. Because it relies on real fruit for sweetness, it’s a more wholesome choice than many pre-packaged snacks, making it a simple way to sneak some nutrition into school lunches while still keeping things delicious.
Conclusion
Chewy chocolate chip banana bars are exactly the kind of snack that turns a rushed school lunch into a moment of joy. They’re easy to make, packed with flavor, and flexible enough to fit your kitchen’s mood and pantry. I love these bars because they remind me that sometimes the best recipes come from late-night improvisations and a little bit of kitchen chaos.
Try customizing them with your favorite mix-ins or tweaks—you might just find your family’s new favorite. If you give this recipe a go, I’d love to hear how it turned out or what creative spins you added. After all, sharing those little kitchen victories is what makes cooking so fun!
Happy baking and packing those lunchboxes with love!
FAQs
Can I make these banana bars ahead of time?
Yes! These bars store well at room temperature for a few days and freeze beautifully for up to 3 months. Just thaw before serving.
What can I substitute for bananas if I don’t have any?
Ripe mashed pumpkin or applesauce can work in a pinch, but the flavor and texture will shift. Bananas are key for chewiness and sweetness here.
Are these bars suitable for freezing?
Absolutely. Wrap bars individually in plastic wrap and place in a freezer-safe container. Warm slightly before eating for best texture.
Can I use different types of chocolate chips?
Yes, semi-sweet, milk, or dark chocolate chips all work. You can even try white chocolate or peanut butter chips for a fun twist.
How do I make these bars gluten-free?
Swap all-purpose flour for almond flour or a gluten-free baking blend, but expect a softer, more delicate texture. Adding an extra egg can help bind the batter.
Pin This Recipe!
Chewy Chocolate Chip Banana Bars
These chewy chocolate chip banana bars are a quick, easy, and wholesome snack perfect for school lunches. They combine ripe bananas and melty chocolate chips for a dense, chewy treat that kids and adults love.
- Prep Time: 15 minutes
- Cook Time: 25-30 minutes
- Total Time: 45 minutes
- Yield: 16 bars 1x
- Category: Snack
- Cuisine: American
Ingredients
- 3 medium ripe bananas, mashed
- 1 ½ cups all-purpose flour (190 grams)
- ¾ cup brown sugar, packed (150 grams)
- ½ cup unsalted butter, melted (115 grams)
- 1 large egg, room temperature
- 1 teaspoon baking soda
- ½ teaspoon salt
- 1 teaspoon vanilla extract
- 1 cup chocolate chips (170 grams), semi-sweet or milk chocolate
Instructions
- Preheat your oven to 350°F (175°C). Line an 8×8-inch baking pan with parchment paper, leaving some overhang to lift the bars out easily later.
- In a large bowl, combine the mashed bananas and melted butter. Stir until creamy and well blended, with some lumps remaining.
- Add the brown sugar, egg, and vanilla extract to the banana mixture. Beat together until fully incorporated and slightly fluffy.
- In a separate bowl, whisk together the flour, baking soda, and salt.
- Gradually add the dry ingredients into the wet mixture. Fold gently using a spatula until just combined; do not overmix.
- Fold in the chocolate chips, reserving a small handful to sprinkle on top.
- Pour the batter into the prepared pan, smoothing the top evenly. Sprinkle the reserved chocolate chips over the surface.
- Bake for 25-30 minutes, or until the edges are golden and a toothpick inserted in the center comes out with a few moist crumbs.
- Cool completely in the pan on a wire rack to allow the bars to set and develop their chewy texture.
- Lift the bars out using the parchment overhang and cut into squares. Enjoy immediately or pack for school lunches.
Notes
[‘Do not overmix the batter to avoid tough bars.’, ‘Use ripe, spotty bananas for natural sweetness and moisture.’, ‘Watch baking time closely; remove bars when toothpick shows moist crumbs.’, ‘Melted butter adds chewiness; coconut oil can be used for dairy-free version.’, ‘Cool bars completely before slicing to prevent crumbling.’, ‘For gluten-free, substitute all-purpose flour with almond or oat flour and consider adding extra eggs for binding.’, ‘Bars can be baked in muffin tins; reduce baking time to 18-22 minutes.’, ‘Bars store well at room temperature for 3 days or frozen for up to 3 months.’]
Nutrition
- Serving Size: 1 bar (assuming 16 b
- Calories: 190
- Sugar: 15
- Sodium: 150
- Fat: 8
- Saturated Fat: 5
- Carbohydrates: 28
- Fiber: 2
- Protein: 2
Keywords: banana bars, chocolate chip bars, chewy banana bars, school lunch snacks, easy baking, quick snack, homemade bars



