Love this? Save it for later!
Share the inspiration with your friends
The neighborhood chili cook-off was in three days and I’d completely forgotten. Everyone else would be bringing their great-grandma’s secret recipes, slow-simmered for twenty-four hours, with fancy garnishes and mysterious spice blends passed down through generations. I had a pound of ground beef thawing on the counter and a pantry that looked pretty sad honestly. I mean, I love a good bean-filled chili as much as the next person, but I was out of beans. Completely out. And no time to run to the store because my kid had a science project due and the dog needed a bath. You know that feeling when everything piles on at once?
So I did what any reasonable person would do—I panicked for about ten minutes, then I grabbed what I had. Ground beef, canned tomatoes, an onion that was starting to sprout just a little, and a jar of smoked paprika I’d bought on a whim last spring. I figured, hey, Texas chili doesn’t have beans anyway, right? That’s a real thing. I’d make a no-bean version and hope for the best. Honestly, I was expecting it to be fine. Edible. Nothing special.
The smoked paprika was the game-changer. That first whiff as it hit the hot pot—smoky, warm, a little sweet—I knew something good was happening. The whole house smelled like a backyard barbecue in the middle of winter. I let it simmer for about an hour, stirring occasionally, and by the time I ladled it into a bowl, I was already planning to make it again. At the cook-off, my little no-bean chili with the accidental smoked paprika won second place. Second place! The guy who won first had been cooking his for three days. I’m not bitter. Okay, maybe a little. But honestly, this cozy no bean Texas chili with smoked paprika is the recipe I make more than any other now. It’s simple, it’s fast, and it tastes like you spent hours when you really didn’t. Let me show you how to make it.
Why You’ll Love This Recipe
This isn’t just another chili recipe—it’s the one you’ll reach for again and again. I’ve tested it a dozen times, tweaking the spice levels and the cooking time until it was just right. Here’s what makes it stand out:
- Quick & Easy: Ready in under an hour, with just one pot to clean. Perfect for those nights when you need dinner on the table fast.
- Simple Ingredients: No fancy grocery trips needed. You probably have most of these in your kitchen right now.
- Perfect for Cozy Nights: This chili was made for cold weather, football Sundays, or any time you need a big bowl of comfort.
- Crowd-Pleaser: Everyone loves it—kids, adults, even picky eaters who “don’t like chili.”
- Unbelievably Delicious: The smoked paprika gives it a deep, rich flavor that tastes like it simmered all day.
What makes this version different from all the others? It’s the smoked paprika, honestly. Most chili recipes use regular chili powder and call it a day. But that smoky, almost bacon-like flavor from the smoked paprika adds a whole new dimension. It’s warm and complex without being overwhelming. Plus, skipping the beans means the meat and spices take center stage. Every bite is pure, beefy, smoky goodness. This isn’t just another chili—it’s your new favorite chili.
I remember the first time I made this for my family. My husband took one bite and said, “What did you do differently? This is incredible.” My kids, who usually pick at their dinner, asked for seconds. That’s when I knew I had something special. It’s the kind of recipe that makes you feel like a rockstar in the kitchen without any of the stress.
What Ingredients You Will Need
This recipe uses simple, wholesome ingredients to deliver bold flavor and satisfying texture without any fuss. Most are pantry staples, which makes this perfect for last-minute dinners.
For the Chili Base
- 2 pounds ground beef (80/20 works best for flavor, but you can use 90/10 if you prefer leaner)
- 1 large yellow onion, diced (about 1 ½ cups)
- 4 cloves garlic, minced
- 1 (15-ounce) can diced tomatoes (fire-roasted adds extra flavor)
- 1 (8-ounce) can tomato sauce
- 2 tablespoons tomato paste
- 1 cup beef broth (low-sodium is best so you can control the salt)
For the Spice Blend
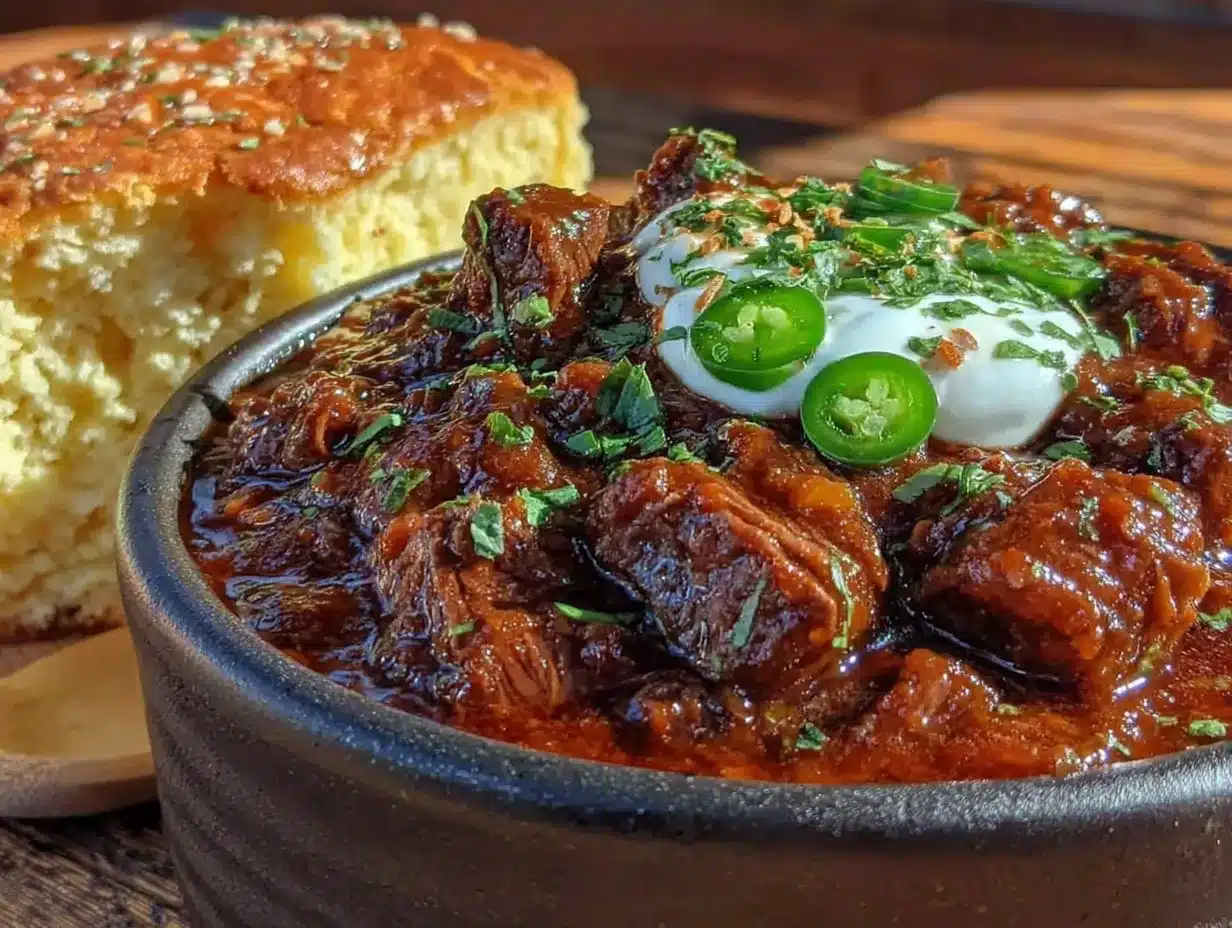
- 2 tablespoons smoked paprika (this is the star—don’t skip it)
- 1 tablespoon chili powder (I like McCormick for consistent heat)
- 1 teaspoon ground cumin
- 1 teaspoon dried oregano
- ½ teaspoon cayenne pepper (optional, for heat—adjust to your liking)
- 1 teaspoon salt (plus more to taste)
- ½ teaspoon black pepper
For Garnish (Optional but Recommended)
- Shredded cheddar cheese
- Chopped fresh cilantro
- Sour cream or Greek yogurt
- Diced avocado
- Sliced green onions
A few notes on ingredients. For the smoked paprika, I recommend La Chinata or Simply Organic—they have a deep, authentic smoky flavor that really makes a difference. If you only have sweet paprika, it won’t be the same, so try to get the smoked kind. For the ground beef, I like 80/20 because the extra fat adds richness, but if you’re watching your intake, you can drain the fat after browning. And for the tomatoes, fire-roasted diced tomatoes add a subtle charred flavor that complements the smoked paprika beautifully. Just a little tip from my kitchen to yours.
If you want to make this a bit heartier, you can add a diced bell pepper or some chopped mushrooms. They’ll soak up all that smoky flavor and add extra texture. But honestly, the recipe is perfect as is.
Equipment Needed
You don’t need much for this recipe, which is part of the beauty. Here’s what you’ll need:
- Large Dutch oven or heavy-bottomed pot (5-6 quarts is ideal)
- Wooden spoon or spatula for stirring
- Chef’s knife and cutting board
- Measuring spoons
- Can opener
If you don’t have a Dutch oven, a large stockpot or even a deep skillet will work. The key is a heavy bottom so the chili doesn’t scorch. I’ve used my trusty Le Creuset for years, but a Lodge enameled cast iron pot is a great budget-friendly option. If you’re using a stainless steel pot, just keep an eye on the heat and stir more frequently. Honestly, I’ve made this in a nonstick skillet in a pinch, and it still turned out great. Don’t let equipment hold you back.
Preparation Method
Let’s get cooking! This comes together in about 45 minutes, and most of that is hands-off simmering time.
- Brown the beef. Heat your Dutch oven over medium-high heat. Add the ground beef and cook, breaking it apart with a wooden spoon, until it’s browned all over—about 6-8 minutes. Don’t rush this step; you want some nice brown bits on the bottom of the pot for flavor. If there’s a lot of fat, spoon off all but about 2 tablespoons. Leave those 2 tablespoons in—they add flavor.
- Sauté the aromatics. Add the diced onion to the pot with the beef. Cook for 4-5 minutes, stirring occasionally, until the onion is soft and translucent. Add the minced garlic and cook for another 30 seconds until fragrant. Your kitchen should smell amazing at this point.
- Add the spices. Sprinkle the smoked paprika, chili powder, cumin, oregano, cayenne (if using), salt, and black pepper over the meat and onions. Stir well and cook for 1 minute. This toasts the spices and wakes up their flavors. Be careful not to burn them—if your pot is too hot, lower the heat a bit.
- Add the tomatoes and broth. Pour in the diced tomatoes (with their juices), tomato sauce, tomato paste, and beef broth. Stir everything together, scraping up any browned bits from the bottom of the pot. Those bits are pure flavor gold.
- Simmer. Bring the chili to a boil, then reduce the heat to low. Cover and let it simmer for 25-30 minutes, stirring occasionally. The longer it simmers, the more the flavors meld together. If you have time, let it go for 45 minutes. The chili will thicken and deepen in flavor.
- Taste and adjust. After simmering, taste your chili. Does it need more salt? A pinch of sugar to balance the acidity? More cayenne for heat? Adjust to your liking. I usually add another ¼ teaspoon of smoked paprika at this point because I can’t get enough of that smoky flavor.
- Serve. Ladle the chili into bowls and top with your favorite garnishes. Shredded cheddar, a dollop of sour cream, and some fresh cilantro are my go-to. Serve with cornbread or crusty bread for dipping.
A few visual cues during cooking. When you add the spices, the mixture should look dark and fragrant, like a rich red-brown paste. When you add the liquids, it should be a deep, brick-red color. As it simmers, it will thicken and darken slightly. If it looks too thick, add a splash more broth. Too thin, let it simmer uncovered for a few extra minutes.
Cooking Tips & Techniques
I’ve made this chili more times than I can count, and I’ve learned a few things along the way. Here are my best tips for perfect results every time.
Don’t skip the browning step. I know it’s tempting to just dump everything in the pot and save time, but browning the beef properly adds so much flavor. Those browned bits on the bottom of the pot—called fond—are packed with savory goodness. Scrape them up when you add the liquid, and you’ll have a richer, more complex chili.
Toast your spices. That 1-minute step after adding the spices is crucial. It takes the raw edge off and brings out their essential oils. I once skipped this step when I was in a hurry, and the chili tasted flat. Never again.
Let it rest. If you can, let the chili sit for 10-15 minutes after cooking before serving. The flavors continue to meld and deepen. Some people even say it’s better the next day. I wouldn’t know because it never lasts that long in my house.
Watch the heat. Smoked paprika can burn if exposed to high heat for too long. Keep your heat at medium or medium-low when adding it, and stir constantly. Burnt paprika tastes bitter and will ruin your chili.
A common mistake I made early on. I used to add all the spices at the beginning, including the salt. But salt can draw moisture out of the meat and make it tough. Now I add salt with the other spices and let the chili tell me if it needs more at the end. It’s a small change that makes a big difference.
If you’re multitasking, this chili is forgiving. You can brown the beef, then walk away for a bit after adding the liquids. Just keep the heat low and give it a stir every 10 minutes or so. It’s perfect for busy weeknights when you need to help with homework or fold laundry while dinner cooks itself.
Variations & Adaptations
This recipe is flexible, so feel free to make it your own. Here are some variations I’ve tried and loved.
Make It Spicier
If you like heat, add 1-2 minced jalapeños with the onion, or stir in a chopped chipotle pepper in adobo sauce. The chipotle adds smokiness plus heat, which pairs beautifully with the smoked paprika. I did this once when I had a cold, and it cleared my sinuses right up.
Make It Milder
For kids or sensitive palates, skip the cayenne pepper entirely. The smoked paprika and chili powder provide plenty of flavor without heat. My youngest loves this version with extra cheese on top.
Make It Leaner
Use ground turkey or chicken instead of beef. The flavor will be lighter, but the smoked paprika still shines. Just add a tablespoon of olive oil when browning to keep it from drying out. I’ve also used ground bison, which is lean but has a rich, beefy flavor.
Make It Heartier
Add diced bell peppers, zucchini, or mushrooms with the onion. They’ll soak up the smoky flavor and add extra nutrients. I sometimes add a can of drained and rinsed black beans when I’m not being a Texas purist. Don’t tell anyone.
Slow Cooker Version
Brown the beef and sauté the aromatics on the stovetop first, then transfer everything to a slow cooker. Cook on low for 6-8 hours or high for 3-4 hours. The flavors will be even more developed. This is my go-to for game days.
Instant Pot Version
Use the sauté function to brown the beef and cook the onions. Add the remaining ingredients, close the lid, and cook on high pressure for 15 minutes. Let the pressure release naturally for 10 minutes before opening. Dinner in under 30 minutes.
Serving & Storage Suggestions
This chili is versatile and can be served in so many ways. Here are my favorites.
Serving temperature: Serve it hot, straight from the pot. The garnishes should be cold or room temperature to create a nice contrast. I like to set out a little topping bar so everyone can customize their bowl.
What to serve with it: Cornbread is the classic pairing, and for good reason. The sweet, crumbly bread is perfect for soaking up the chili. But crusty bread, tortilla chips, or even over rice are all excellent. For a low-carb option, serve it over cauliflower rice or with a side salad.
Storage: Let the chili cool completely, then transfer it to an airtight container. It will keep in the refrigerator for up to 5 days. The flavors actually get better after a day or two. I often make a double batch just for leftovers.
Freezing: This chili freezes beautifully. Portion it into freezer-safe bags or containers, leaving a little room for expansion. It will keep for up to 3 months. Thaw overnight in the refrigerator and reheat on the stovetop or microwave.
Reheating: Reheat gently on the stovetop over medium-low heat, stirring occasionally. Add a splash of broth or water if it’s too thick. You can also microwave individual portions in 30-second bursts, stirring between each. The texture stays great either way.
One thing I love about this chili is how the flavors develop over time. The first day, it’s bold and bright. The second day, it’s deeper and more mellow. By the third day, it’s positively magical. If you can resist eating it all at once, you’re in for a treat.
Nutritional Information & Benefits
This cozy no bean Texas chili is not just delicious—it also has some nutritional perks. Here’s an approximate breakdown per serving (based on 6 servings, without garnishes):
- Calories: 380
- Protein: 32g
- Fat: 22g
- Carbohydrates: 12g
- Fiber: 3g
- Sugar: 6g
- Sodium: 780mg
Health benefits: The ground beef provides high-quality protein and iron, which supports energy and muscle health. Smoked paprika is rich in antioxidants, including vitamin A and capsaicin, which may help reduce inflammation. Garlic and onions are known for their immune-boosting properties. And tomatoes are packed with lycopene, a powerful antioxidant linked to heart health.
Dietary considerations: This recipe is naturally gluten-free, dairy-free (if you skip the cheese garnish), and low-carb. For a keto-friendly version, serve it without any high-carb sides. It’s also Whole30-compliant if you use a compliant beef broth and skip the sugar.
Potential allergens: This recipe contains no common allergens, but if you’re sensitive to nightshades (tomatoes, peppers, paprika), you may want to adjust accordingly. Always check your spice blends for hidden ingredients.
I love that this chili feels indulgent but is actually pretty balanced. It’s the kind of meal that satisfies your cravings while still fitting into a healthy lifestyle. You can feel good about serving it to your family.
Conclusion
So there you have it—my cozy no bean Texas chili with smoked paprika. It’s the recipe that started with a panic and ended with a second-place ribbon, and it’s been a staple in my kitchen ever since. I love it because it’s simple, it’s forgiving, and it always delivers. Whether you’re cooking for a crowd or just for yourself on a quiet night, this chili is pure comfort in a bowl.
Don’t be afraid to make it your own. Add more heat, swap in different garnishes, or let it simmer all afternoon if you have the time. The beauty of this recipe is that it works with whatever you have and whatever you’re in the mood for. And honestly, that’s the kind of cooking I love most.
I’d love to hear how yours turns out. Did you add any twists? What garnishes did you use? Drop a comment below and let me know. And if you loved this recipe, share it with a friend who needs a little cozy comfort in their life. Happy cooking, friends!
Frequently Asked Questions
Can I use a different type of meat?
Absolutely. Ground turkey, chicken, or even ground pork work well. Just adjust the cooking time as needed and add a little oil if using lean meat.
Is this chili spicy?
It has a mild warmth from the chili powder and smoked paprika, but it’s not overly spicy. If you want more heat, add the cayenne pepper or some chopped jalapeños.
Can I make this in advance?
Yes! This chili tastes even better the next day. Make it up to 3 days ahead and reheat gently on the stovetop.
How do I thicken the chili?
If you prefer a thicker chili, let it simmer uncovered for an extra 10-15 minutes. You can also mash some of the beef against the side of the pot to release its starches, which will naturally thicken the liquid.
Can I add beans?
If you’re not a Texas chili purist, go ahead and add a can of drained and rinsed kidney beans or black beans. Stir them in during the last 10 minutes of simmering.
Pin This Recipe!
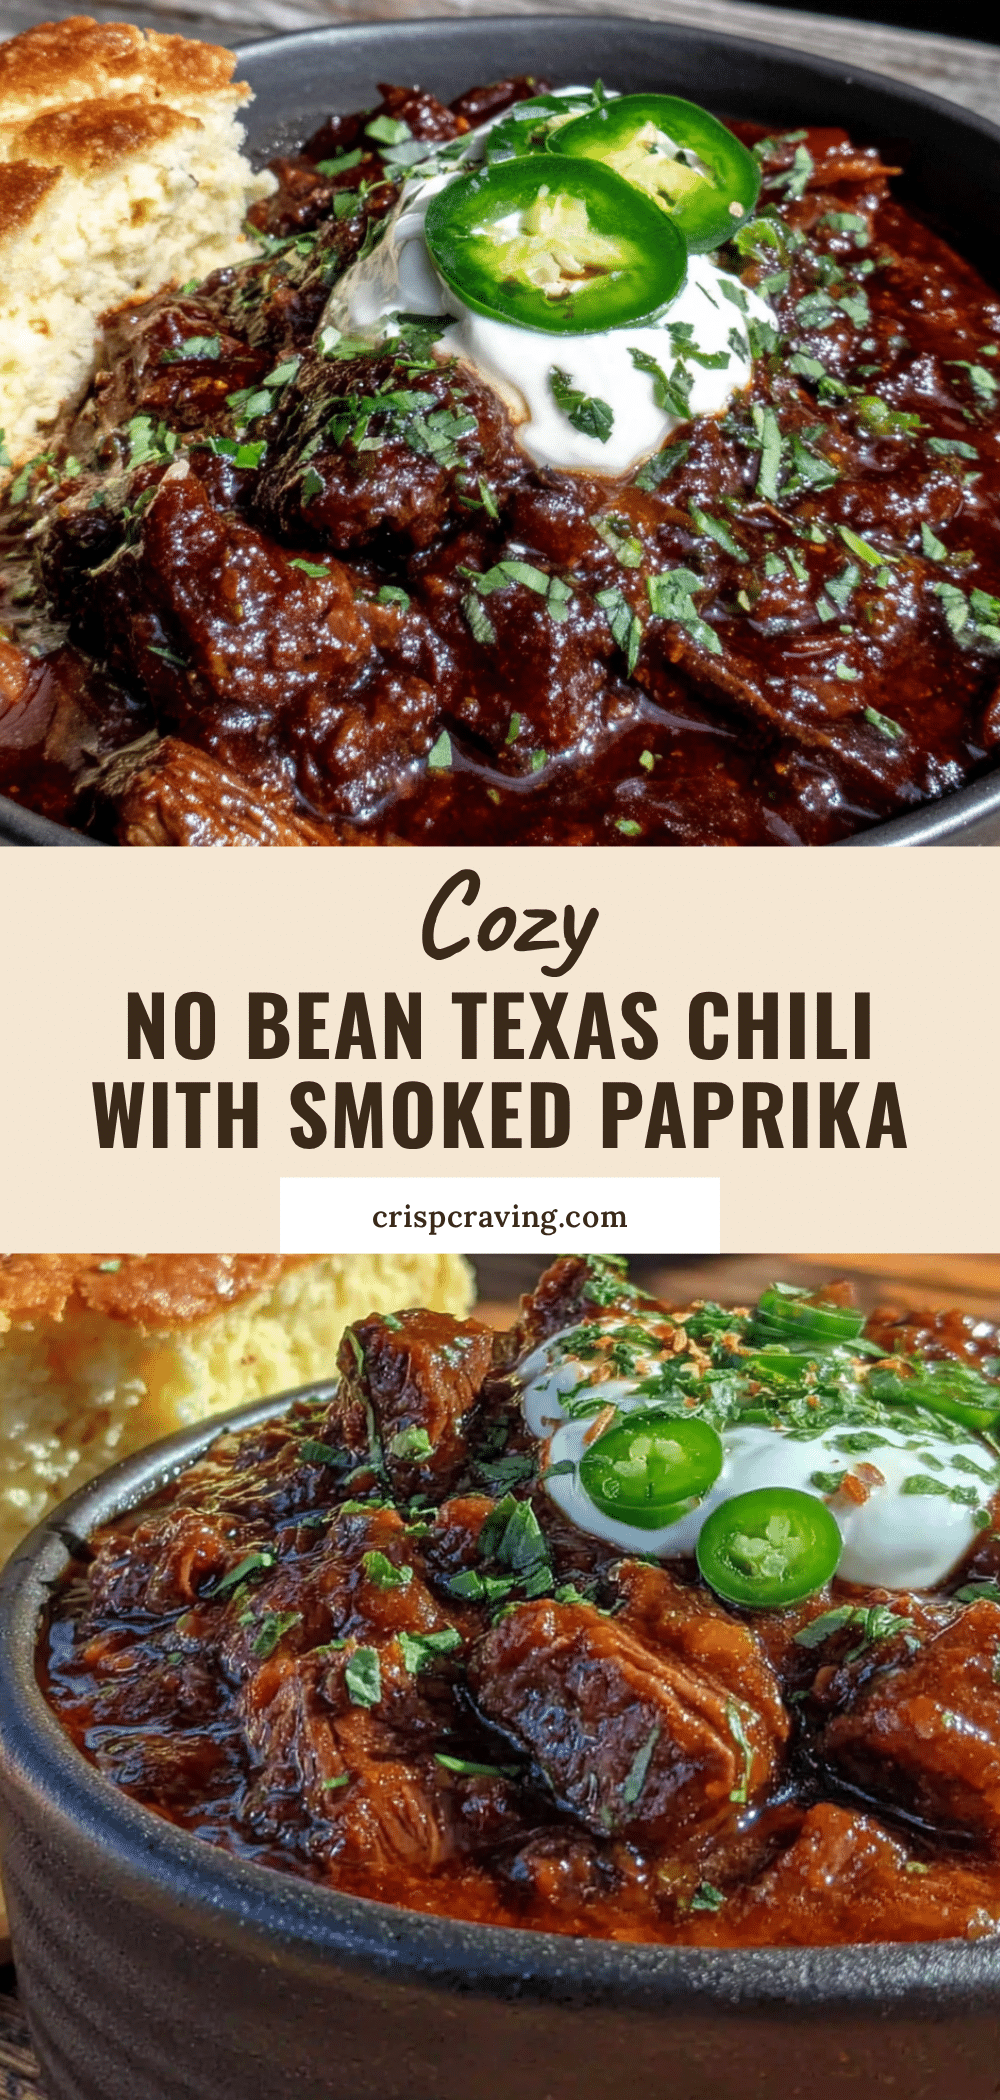
Cozy No Bean Texas Chili with Smoked Paprika: Easy One-Pot Dinner

A quick and easy one-pot Texas chili made without beans, featuring ground beef and a smoky, rich flavor from smoked paprika. Perfect for busy weeknights, this chili is ready in under an hour and tastes like it simmered all day.
- Prep Time: 10 minutes
- Cook Time: 35 minutes
- Total Time: 45 minutes
- Yield: 6 servings 1x
- Category: Main Course
- Cuisine: American (Texas)
Ingredients
- 2 pounds ground beef (80/20 works best)
- 1 large yellow onion, diced (about 1 ½ cups)
- 4 cloves garlic, minced
- 1 (15-ounce) can diced tomatoes (fire-roasted preferred)
- 1 (8-ounce) can tomato sauce
- 2 tablespoons tomato paste
- 1 cup beef broth (low-sodium)
- 2 tablespoons smoked paprika
- 1 tablespoon chili powder
- 1 teaspoon ground cumin
- 1 teaspoon dried oregano
- ½ teaspoon cayenne pepper (optional, for heat)
- 1 teaspoon salt (plus more to taste)
- ½ teaspoon black pepper
- Shredded cheddar cheese (for garnish, optional)
- Chopped fresh cilantro (for garnish, optional)
- Sour cream or Greek yogurt (for garnish, optional)
- Diced avocado (for garnish, optional)
- Sliced green onions (for garnish, optional)
Instructions
- Brown the beef: Heat a large Dutch oven over medium-high heat. Add the ground beef and cook, breaking it apart with a wooden spoon, until browned all over, about 6-8 minutes. Spoon off all but about 2 tablespoons of fat.
- Sauté the aromatics: Add the diced onion to the pot with the beef. Cook for 4-5 minutes, stirring occasionally, until soft and translucent. Add the minced garlic and cook for another 30 seconds until fragrant.
- Add the spices: Sprinkle the smoked paprika, chili powder, cumin, oregano, cayenne (if using), salt, and black pepper over the meat and onions. Stir well and cook for 1 minute to toast the spices.
- Add the tomatoes and broth: Pour in the diced tomatoes (with their juices), tomato sauce, tomato paste, and beef broth. Stir everything together, scraping up any browned bits from the bottom of the pot.
- Simmer: Bring the chili to a boil, then reduce the heat to low. Cover and let it simmer for 25-30 minutes, stirring occasionally. For deeper flavor, simmer up to 45 minutes.
- Taste and adjust: After simmering, taste the chili and adjust seasoning as needed. Add more salt, a pinch of sugar, or extra cayenne to your liking.
- Serve: Ladle the chili into bowls and top with your favorite garnishes such as shredded cheddar, sour cream, cilantro, avocado, or green onions.
Notes
For best flavor, use smoked paprika (La Chinata or Simply Organic recommended). 80/20 ground beef adds richness; drain excess fat if desired. Fire-roasted diced tomatoes add a subtle charred flavor. Let chili rest 10-15 minutes before serving for deeper flavor. Chili tastes even better the next day. Freezes well for up to 3 months.
Nutrition
- Serving Size: 1 bowl (about 1 ½ cu
- Calories: 380
- Sugar: 6
- Sodium: 780
- Fat: 22
- Saturated Fat: 8
- Carbohydrates: 12
- Fiber: 3
- Protein: 32
Keywords: Texas chili, no bean chili, smoked paprika chili, one-pot chili, easy chili recipe, ground beef chili, cozy chili, quick chili



