Love this? Save it for later!
Share the inspiration with your friends
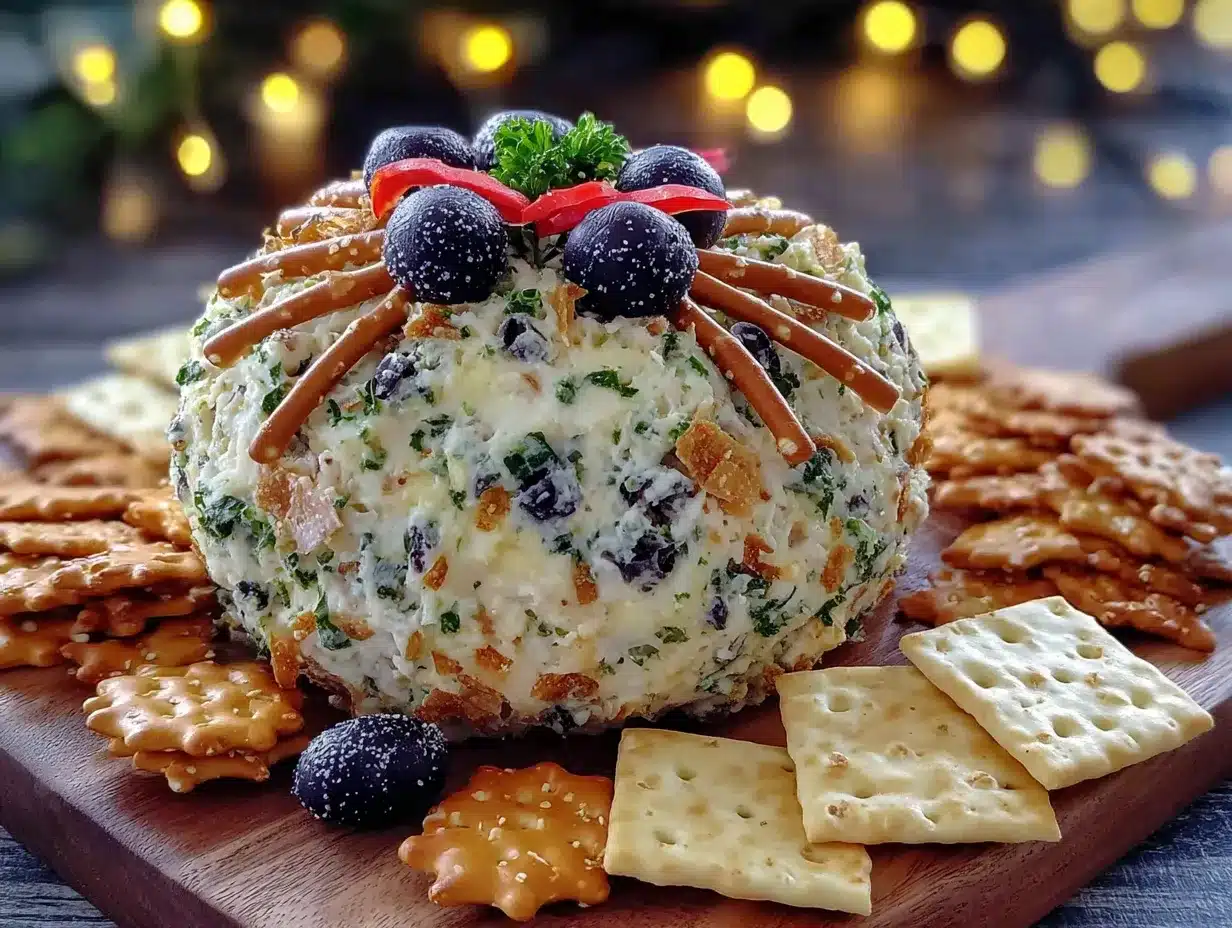
There used to be a tiny, quirky café in the East Village called The Witching Hour that made the most incredible savory cheese ball. It wasn’t just any cheese ball, though. It was shaped like a spider, with salty pretzel legs sticking out at perfect angles, and it sat on a platter of dark rye crackers that looked like little tombstones. When they closed their doors three years ago, I genuinely mourned that cheese ball. I mean, I actually tried to bribe the owner for the recipe. No luck. After twelve tries—twelve, let me tell you—I finally got it. This cozy spooky spider cheese ball with crackers is the exact recreation of that memory, and honestly, it tastes even better than I remembered.
The first few attempts were disasters. One version was so sticky it looked more like a sad, melted spider than a festive appetizer. Another fell apart the second I tried to move it to a serving board. I almost gave up, but the thought of that first bite—the creamy, garlicky, herb-flecked cheese against the crunch of a perfect cracker—kept me going. Maybe you’ve been there, chasing a flavor from a place that no longer exists. It’s a little obsessive, sure, but when you finally nail it, the satisfaction is unreal.
This spider cheese ball is the star of any Halloween party. It’s creepy in the cutest way, but it’s also genuinely delicious. The combination of sharp cheddar, creamy cream cheese, and a punch of savory seasonings creates a spread that’s addictive. And the best part? It’s surprisingly simple to put together. You don’t need any fancy equipment or culinary skills—just a little patience and a love for all things spooky. This recipe stayed with me because it proves that comfort food and Halloween fun can coexist perfectly.
Why You’ll Love This Recipe
This isn’t just another cheese ball. This is the cheese ball that will make your guests gasp, laugh, and then go back for thirds. I’ve tested this recipe at three different Halloween parties, and it’s never failed to disappear within the first hour. It’s the kind of appetizer that sparks conversation before anyone even takes a bite.
- Quick & Easy: Comes together in under 20 minutes of active prep time. The hardest part is waiting for it to chill in the fridge.
- Simple Ingredients: No fancy grocery trips needed. You likely already have cream cheese, cheddar, and a few pantry spices in your kitchen right now.
- Perfect for Halloween: Whether it’s a spooky movie night, a costume party, or just a cozy October evening, this cheese ball sets the mood instantly.
- Crowd-Pleaser: Both kids and adults love it. The “spider” design is playful enough for little ones, but the flavor is sophisticated enough for grown-up palates.
- Unbelievably Delicious: The texture is perfectly creamy, the seasoning is balanced, and the pretzel legs add that irresistible salty crunch.
What makes this recipe different from the rest is the technique. Instead of just mixing everything together and hoping for the best, I’ve refined the process to ensure the cheese ball holds its shape perfectly. The secret? A brief chill before shaping and a specific ratio of cream cheese to shredded cheddar that prevents stickiness. This isn’t just another version—it’s my best version, born from a dozen failed attempts and one unforgettable café memory.
This recipe isn’t just good—it’s the kind that makes you close your eyes after the first bite. It’s comfort food reimagined for Halloween: festive, fun, but with the same soul-soothing satisfaction as a classic cheese ball. Perfect for impressing guests without stress, or turning a simple snack into something memorable.
What Ingredients You Will Need
This recipe uses simple, wholesome ingredients to deliver bold flavor and satisfying texture without the fuss. Most of these are pantry staples, so you can whip this up on a whim for any spooky gathering.
- Cream cheese: 16 ounces (two 8-ounce blocks), softened to room temperature. This is the base of your cheese ball, so make sure it’s truly soft for a smooth, lump-free mixture.
- Sharp cheddar cheese: 2 cups (about 8 ounces), freshly shredded. I recommend shredding it yourself from a block—pre-shredded cheese has anti-caking agents that can make the texture grainy. Cabot or Tillamook are my go-to brands for sharp, nutty flavor.
- Garlic powder: 1 teaspoon. It adds a savory depth without the harshness of fresh garlic.
- Onion powder: 1 teaspoon. Balances the garlic and adds a subtle sweetness.
- Worcestershire sauce: 1 tablespoon. This is the secret ingredient that gives the cheese ball a rich, umami kick. Don’t skip it.
- Dried parsley: 1 tablespoon, plus extra for coating. It adds color and a mild, fresh herb note.
- Salt: ½ teaspoon, or to taste. Adjust based on how salty your cheddar and crackers are.
- Black pepper: ¼ teaspoon, freshly ground.
- Pretzel sticks: About 20-24 sticks, for the spider legs. Look for sturdy, thick pretzel sticks—thin ones can break when you press them into the cheese ball.
- Black olives: 2 large olives, sliced into thin rounds, for the spider eyes. Use pitted olives for easier slicing.
- Crackers: 1 box (about 10 ounces) of your favorite crackers. Dark rye or pumpernickel crackers create a lovely “tombstone” effect, but buttery round crackers or even pretzel crisps work beautifully too.
For the coating, you’ll need an extra ¼ cup of dried parsley or a mix of dried herbs. This gives the spider a slightly textured, “furry” look that’s delightfully creepy. If you want to get creative, you can also use finely chopped chives or even black sesame seeds for a darker, more dramatic finish.
Substitution guidance: Use dairy-free cream cheese and vegan cheddar shreds for a dairy-free option. Gluten-free pretzel sticks and crackers make this recipe celiac-friendly. If you don’t have Worcestershire sauce, a splash of soy sauce or tamari works in a pinch.
Equipment Needed
You don’t need a fully stocked kitchen to make this spider cheese ball. Here’s what you’ll need:
- Large mixing bowl: For combining the cheese and seasonings. A glass or stainless steel bowl works best.
- Hand mixer or stand mixer: While you can mix by hand with a sturdy spatula, a mixer ensures a perfectly smooth, lump-free texture. I’ve done it both ways, and the mixer saves about five minutes of arm workout.
- Plastic wrap: Essential for shaping and chilling the cheese ball. It prevents sticking and keeps the cheese ball moist.
- Baking sheet or plate: For chilling the cheese ball in the fridge.
- Serving platter or board: A dark-colored board or black slate platter really makes the spider pop. If you don’t have one, a regular white plate works fine.
- Small knife: For slicing the olives into eye rounds.
- Spatula: For scraping every last bit of cheesy goodness from the bowl.
A budget-friendly tip: If you don’t have a hand mixer, you can absolutely mix this by hand. Just make sure your cream cheese is fully softened—leave it on the counter for at least an hour. A sturdy wooden spoon and some elbow grease will get the job done.
Preparation Method
- Soften the cream cheese: Remove the cream cheese from the refrigerator about 1 hour before you start. It should be soft to the touch but not melted. If you’re in a hurry, you can microwave it on low power in 10-second bursts, but be careful—you don’t want it hot, just soft.
- Mix the base: In a large mixing bowl, combine the softened cream cheese, freshly shredded sharp cheddar, garlic powder, onion powder, Worcestershire sauce, dried parsley, salt, and black pepper. Using a hand mixer on medium speed, beat until everything is fully combined and smooth. Scrape down the sides of the bowl with a spatula to make sure no streaks of plain cream cheese remain.
- Taste and adjust: This is the most important step. Dip a clean finger or a cracker into the mixture and taste it. Does it need more salt? Another dash of garlic powder? Adjust the seasonings now, before it chills. I once forgot to taste and ended up with a bland cheese ball—learn from my mistake.
- Chill the mixture: Scoop the cheese mixture onto a large piece of plastic wrap. Shape it into a rough ball, then wrap it tightly. Place it on a baking sheet or plate and refrigerate for at least 2 hours. This chilling step is non-negotiable—it firms up the cheese so you can shape it into a perfect spider body without it sticking to your hands.
- Shape the spider: After chilling, unwrap the cheese ball. It should be firm but still pliable. Using your hands, shape it into a smooth, round ball. Don’t worry about perfection—the coating will hide minor imperfections. If the cheese starts to stick to your hands, dust them lightly with a bit of dried parsley.
- Apply the coating: Spread the extra dried parsley (or herb mix) on a small plate. Gently roll the cheese ball in the herbs, pressing lightly so they stick. The goal is a textured, slightly fuzzy look that mimics a spider’s body. Set the coated cheese ball on your serving platter.
- Add the legs: This is where the magic happens. Gently insert the pretzel sticks into the sides of the cheese ball, angling them slightly outward to resemble spider legs. You’ll want about 8 legs total—4 on each side. Press them in about 1 inch deep so they’re secure. If a pretzel breaks, just eat it and try another one.
- Create the eyes: Slice the black olives into thin rounds. Place two olive rounds on the front of the cheese ball to create the spider’s eyes. For an extra spooky touch, you can add a tiny dab of cream cheese in the center of each olive to look like a pupil.
- Chill again: Place the finished spider cheese ball back in the refrigerator for at least 30 minutes before serving. This helps everything set and makes the pretzel legs extra crunchy.
- Arrange the crackers: Just before serving, arrange your crackers around the spider cheese ball. If you’re using dark rye crackers, place them in a semi-circle like tombstones around the spider. It creates a spooky graveyard effect that’s absolutely perfect for Halloween.
Cooking Tips & Techniques
Let me save you from the mistakes I made. The first time I made this, I used pre-shredded cheddar, and the cheese ball had a weird, gritty texture. Freshly shredding your own cheddar makes a world of difference—it melts into the cream cheese smoothly and creates a much creamier result.
Another common mistake is over-mixing. Once the ingredients are combined, stop. Over-mixing can make the cheese ball too soft and almost greasy. You want it cohesive but not overworked.
Timing is everything with this recipe. I’ve learned to make the cheese mixture the night before and let it chill overnight. The flavors meld together beautifully, and it makes party day stress-free. Just shape, coat, and add the legs about an hour before guests arrive.
If your cheese ball is too soft to shape after chilling, don’t panic. Pop it back in the freezer for 15 minutes. That usually firms it up enough to work with. On the flip side, if it’s too firm to insert the pretzel legs, let it sit at room temperature for 10 minutes. The sweet spot is when the cheese ball is cold but still gives slightly when you press it.
For consistent results, always use a kitchen scale to measure your cheese. Two cups of shredded cheddar can vary wildly depending on how finely you shred it. Weighing ensures you get the exact amount every time.
Variations & Adaptations
This recipe is endlessly customizable. Here are a few variations I’ve tried and loved:
- Spicy Spider: Add ½ teaspoon of cayenne pepper or a minced chipotle pepper in adobo sauce to the cheese mixture. The spicy kick pairs wonderfully with the salty pretzels.
- Bacon Cheddar Spider: Crumble 4 slices of crispy cooked bacon into the cheese mixture before shaping. The smoky, salty crunch takes this to another level. My husband declared this version “the best thing I’ve ever made.”
- Herb & Garlic Spider: Swap the dried parsley for a mix of dried dill, chives, and thyme. This creates a more sophisticated, garden-party vibe that works for non-Halloween occasions too.
- Dairy-Free Spider: Use dairy-free cream cheese and vegan cheddar shreds. I’ve tested this with Kite Hill cream cheese and Violife cheddar, and it works surprisingly well. Just note that the texture is slightly softer, so chill it for an extra 30 minutes.
- Sweet Spider: For a dessert version, use a mixture of cream cheese, powdered sugar, and cocoa powder. Shape it into a ball, roll it in crushed chocolate cookies, and use chocolate pretzel sticks for the legs. It’s a fun, unexpected twist for a Halloween dessert table.
Serving & Storage Suggestions
Serve this spider cheese ball chilled, straight from the fridge. The cold cheese contrasts perfectly with the crunchy pretzel legs and crisp crackers. I like to arrange the crackers in a spiral pattern around the spider, creating a web-like effect. A few strategically placed candy corn or candy pumpkins around the platter add a pop of color and extra Halloween flair.
For drinks, this cheese ball pairs beautifully with a crisp apple cider, a dark stout beer, or a glass of chilled Chardonnay. If you’re serving it at a kids’ party, offer apple slices and carrot sticks alongside the crackers for a healthier option.
Storage is simple. Leftover cheese ball (if there is any) can be wrapped tightly in plastic wrap and stored in the refrigerator for up to 5 days. The pretzel legs will soften over time, so if you’re storing leftovers, remove the pretzels first and add fresh ones when you serve it again. You can also freeze the cheese ball (without the pretzels and coating) for up to 1 month. Thaw it overnight in the refrigerator, then coat and add legs before serving.
The flavors actually develop and deepen after a day or two in the fridge, so this is one of those recipes that tastes even better as leftovers. Just don’t expect it to last that long—it’s too good.
Nutritional Information & Benefits
While this is an indulgent treat, it’s not without its redeeming qualities. A 2-tablespoon serving of the cheese mixture (without crackers) contains approximately 110 calories, 9 grams of fat, 3 grams of protein, and 1 gram of carbohydrates. The crackers add about 30-50 calories per serving depending on the type you choose.
Cheese is a good source of calcium and protein, which support bone health and muscle function. The cream cheese provides a small amount of vitamin A. If you use whole-grain crackers, you’ll get a bit of fiber too. The herbs in the coating offer trace amounts of antioxidants.
For those watching their sodium intake, you can reduce the added salt and use low-sodium crackers. The Worcestershire sauce and cheese already provide plenty of savory flavor. This recipe is naturally vegetarian and can be made gluten-free and dairy-free with the substitutions mentioned earlier.
My personal take? This is a treat for special occasions, and it’s absolutely worth every bite. Life is too short to skip the cheese ball.
Conclusion
This cozy spooky spider cheese ball with crackers is more than just a Halloween appetizer—it’s a conversation starter, a memory-maker, and a delicious tribute to a café that no longer exists. I’ve poured twelve attempts and a lot of love into perfecting this recipe, and I honestly believe it’s the best version out there. The creamy, savory cheese, the crunchy pretzel legs, and the playful presentation come together to create something truly special.
I encourage you to make this your own. Add more spice, swap the herbs, or turn it into a sweet treat. The beauty of this recipe is its flexibility. And when you bring it to your next Halloween gathering, watch the smiles spread as everyone realizes they get to eat the spider.
If you make this recipe, I’d love to hear about it. Leave a comment below and tell me how your spider turned out. Did you add your own twist? Did the kids love it? Share your photos and tag me on social media—I can’t wait to see your creepy creations. Happy Halloween, and happy snacking!
Frequently Asked Questions
Can I make this spider cheese ball ahead of time?
Absolutely! In fact, I recommend it. You can prepare the cheese mixture up to 3 days in advance and store it wrapped in plastic wrap in the refrigerator. Shape, coat, and add the legs on the day of your event for the best texture and presentation.
My cheese ball is too soft to shape. What should I do?
Don’t worry—this happens to everyone. Simply pop the mixture back in the refrigerator or freezer for 15-20 minutes. It should firm up enough to shape into a ball. If it’s still sticky, dust your hands with a little dried parsley or even a pinch of cornstarch.
Can I use low-fat cream cheese?
You can, but I don’t recommend it. Low-fat cream cheese has a higher water content, which can make the cheese ball softer and less stable. It also won’t have the same rich, creamy texture. For best results, stick with full-fat cream cheese.
How do I keep the pretzel legs from falling off?
Make sure you insert the pretzel sticks at least 1 inch deep into the cheese ball. The cheese should be cold enough to hold them firmly. If a leg still feels loose, you can use a dab of cream cheese to “glue” it in place. Also, use thick, sturdy pretzel sticks—thin ones break too easily.
What crackers go best with this cheese ball?
Dark rye or pumpernickel crackers create the best visual effect, but any sturdy cracker works. Buttery round crackers, pretzel crisps, or even bagel chips are all excellent choices. Avoid thin, delicate crackers that might break when you spread the cheese.
Pin This Recipe!
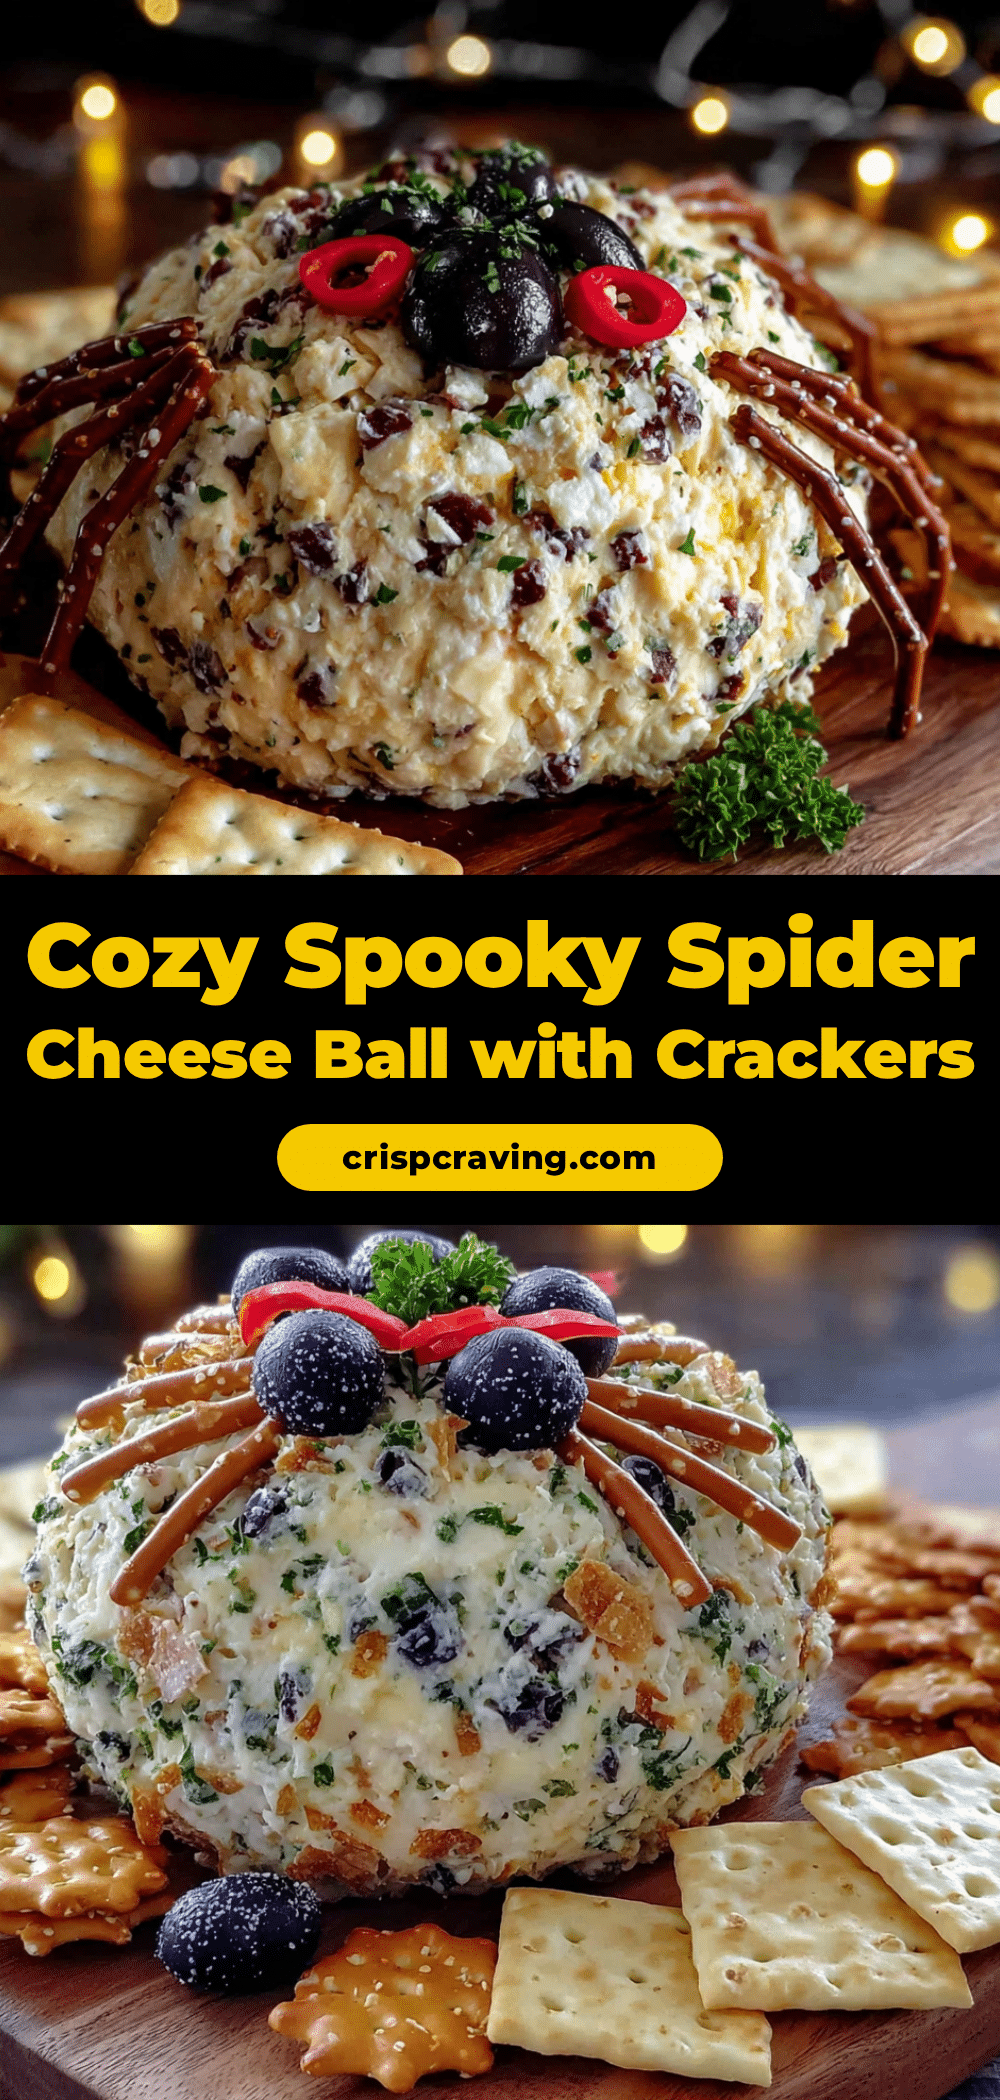
Cozy Spooky Spider Cheese Ball: Easy Halloween Appetizer

A creamy, savory cheese ball shaped like a spider with salty pretzel legs, perfect for Halloween parties. This easy appetizer combines sharp cheddar, cream cheese, and savory seasonings for a crowd-pleasing treat that’s both fun and delicious.
- Prep Time: 20 minutes
- Cook Time: 0 minutes
- Total Time: 2 hours 50 minutes (includes chilling time)
- Yield: 16 servings 1x
- Category: Appetizer
- Cuisine: American
Ingredients
- 16 ounces cream cheese (two 8-ounce blocks), softened to room temperature
- 2 cups (about 8 ounces) sharp cheddar cheese, freshly shredded
- 1 teaspoon garlic powder
- 1 teaspoon onion powder
- 1 tablespoon Worcestershire sauce
- 1 tablespoon dried parsley, plus extra for coating
- ½ teaspoon salt
- ¼ teaspoon black pepper, freshly ground
- 20–24 pretzel sticks
- 2 large black olives, pitted and sliced into thin rounds
- 1 box (about 10 ounces) crackers (dark rye or pumpernickel recommended)
- ¼ cup dried parsley or mixed dried herbs for coating
Instructions
- Soften the cream cheese: Remove from refrigerator about 1 hour before starting. It should be soft to the touch but not melted. Alternatively, microwave on low power in 10-second bursts until soft.
- Mix the base: In a large mixing bowl, combine softened cream cheese, freshly shredded sharp cheddar, garlic powder, onion powder, Worcestershire sauce, dried parsley, salt, and black pepper. Beat with a hand mixer on medium speed until fully combined and smooth. Scrape down sides of bowl with a spatula.
- Taste and adjust: Dip a clean finger or cracker into the mixture and taste. Adjust seasonings as needed before chilling.
- Chill the mixture: Scoop cheese mixture onto a large piece of plastic wrap. Shape into a rough ball, wrap tightly, and place on a baking sheet or plate. Refrigerate for at least 2 hours.
- Shape the spider: After chilling, unwrap the cheese ball. Using your hands, shape into a smooth, round ball. If sticky, dust hands lightly with dried parsley.
- Apply the coating: Spread extra dried parsley (or herb mix) on a small plate. Gently roll the cheese ball in the herbs, pressing lightly so they stick. Set coated cheese ball on serving platter.
- Add the legs: Gently insert pretzel sticks into the sides of the cheese ball, angling slightly outward. Use about 8 legs total—4 on each side. Press them in about 1 inch deep.
- Create the eyes: Slice black olives into thin rounds. Place two olive rounds on the front of the cheese ball for eyes. Optionally, add a tiny dab of cream cheese in the center of each olive for a pupil effect.
- Chill again: Place finished spider cheese ball back in refrigerator for at least 30 minutes before serving.
- Arrange the crackers: Just before serving, arrange crackers around the spider cheese ball in a semi-circle or spiral pattern.
Notes
For best results, use full-fat cream cheese and freshly shredded cheddar. Pre-shredded cheese can make the texture grainy. The cheese mixture can be made up to 3 days in advance. For dairy-free, use dairy-free cream cheese and vegan cheddar shreds. For gluten-free, use gluten-free pretzel sticks and crackers. Leftover cheese ball (without pretzels) can be stored wrapped in plastic wrap in the refrigerator for up to 5 days, or frozen for up to 1 month.
Nutrition
- Serving Size: 2 tablespoons cheese
- Calories: 110
- Sugar: 1
- Sodium: 200
- Fat: 9
- Saturated Fat: 5
- Carbohydrates: 1
- Protein: 3
Keywords: Halloween appetizer, spider cheese ball, cheese ball recipe, easy Halloween recipe, spooky snack, party appetizer, cream cheese ball, cheddar cheese ball



