Love this? Save it for later!
Share the inspiration with your friends
I was folding laundry last October when a whiff of vanilla extract from the kitchen hit me — and suddenly I was eight years old at my neighbor Mrs. Kowalski’s kitchen table. She wasn’t a grandmotherly type, more like a woman who wore clogs and grew her own rosemary, but every year before Halloween she’d invite me over to make “something spooky but sweet.” I remember the way her hands moved, quick and sure, piping these tiny ghost shapes onto a baking sheet. I didn’t know then that meringue could be so fragile or so forgiving all at once. I just thought they were magic. The power went out halfway through our baking session that day — a storm rolled in, and we sat in the dark eating slightly underbaked ghosts by candlelight. That memory, honestly, is probably why I still make them every single October. Maybe you’ve been there, chasing a taste that feels like a warm blanket for your memory. This recipe for cozy ghost meringue cookies is my attempt to bottle that exact feeling. They’re light, they’re sweet, and they melt on your tongue like a whispered secret. I keep making them because they remind me that comfort doesn’t always come in a heavy dish — sometimes it floats.
Why You’ll Love This Recipe
Let me tell you, these aren’t just any Halloween cookies. I’ve tested this recipe six times over the past two years, tweaking the sugar ratio and oven temperature until the texture was absolutely perfect — crisp on the outside, airy on the inside, with that satisfying snap when you bite into them. Here’s why I think you’ll fall for them too:
- Quick & Easy: From start to finish, these come together in about an hour and a half — but most of that is hands-off baking time. The actual prep is maybe 15 minutes.
- Simple Ingredients: You probably have everything in your pantry right now. Egg whites, sugar, vanilla, cream of tartar. That’s it. No weird grocery store runs.
- Perfect for Cozy Nights: These are made for a slow evening at home, maybe with a hot drink and a scary movie (or a not-so-scary one, I won’t judge).
- Crowd-Pleaser: I brought these to a Halloween potluck last year and watched grown adults actually squeal. Kids love them, adults love them, everyone loves a tiny ghost.
- Unbelievably Delicious: The texture is what gets you — it’s like eating a sweet cloud that dissolves into nothing. The vanilla flavor is subtle but present, and the slight chewiness at the center is pure perfection.
What makes this recipe different from the rest? It’s the technique. I’ve figured out the exact moment to add the sugar so the meringue stays glossy and stable, and I’ve nailed the low-and-slow baking temperature that prevents cracking. This isn’t just another meringue cookie — it’s the one that makes you close your eyes after the first bite. Trust me on this.
What Ingredients You Will Need
This recipe uses simple, wholesome ingredients that come together to create something surprisingly magical. No fancy stabilizers or complicated components here — just basic pantry staples that transform into something ethereal.
- Egg whites — 4 large, room temperature (cold eggs won’t whip up as well; trust me on this one)
- Granulated sugar — 1 cup (200 grams) (I prefer Domino for consistent results)
- Cream of tartar — 1/2 teaspoon (this stabilizes the meringue and prevents it from collapsing)
- Vanilla extract — 1 teaspoon (pure vanilla, not imitation — it makes a real difference in flavor)
- Pinch of salt — just a tiny one (it balances the sweetness)
- Mini chocolate chips — 2 tablespoons, optional (for adding eyes to your ghosts, if you want them)
A few notes on ingredient selection: Make sure your eggs are at room temperature — I usually take them out of the fridge about 30 minutes before I start. If you’re in a hurry, place them in a bowl of warm water for 5 minutes. For the sugar, I’ve tried both regular granulated and superfine, and honestly, regular works perfectly as long as you add it slowly. The cream of tartar isn’t negotiable here — you can substitute with 1 teaspoon of lemon juice or white vinegar if you’re in a pinch, but cream of tartar gives the most reliable results. If you’re making these for someone with dietary restrictions, note that these are naturally gluten-free and dairy-free (as long as you skip the chocolate chips or use dairy-free ones).
Equipment Needed
You don’t need a professional kitchen for these, but having the right tools makes a world of difference. Here’s what I use:
- Stand mixer or hand mixer — A stand mixer is ideal because you can walk away while it whips, but a hand mixer works perfectly fine. I’ve made these with both.
- Large mixing bowl — Make sure it’s spotless and completely dry. Any grease or moisture will ruin your meringue.
- Piping bag with a round tip — I use a Wilton #12 tip for the perfect ghost shape. If you don’t have a piping bag, a zip-top bag with the corner snipped off works in a pinch.
- Baking sheet — Line it with parchment paper. Do not skip the parchment — these cookies will stick to a bare pan.
- Electric scale — Optional but helpful for consistent results. I measure my sugar by weight for accuracy.
- Cooling rack — For letting the ghosts cool completely before storing.
I once tried using a cheap piping bag that burst halfway through — what a mess. Invest in a good reusable one if you bake often. Or just use the zip-top bag method; I’ve done it many times and it works fine.
Preparation Method
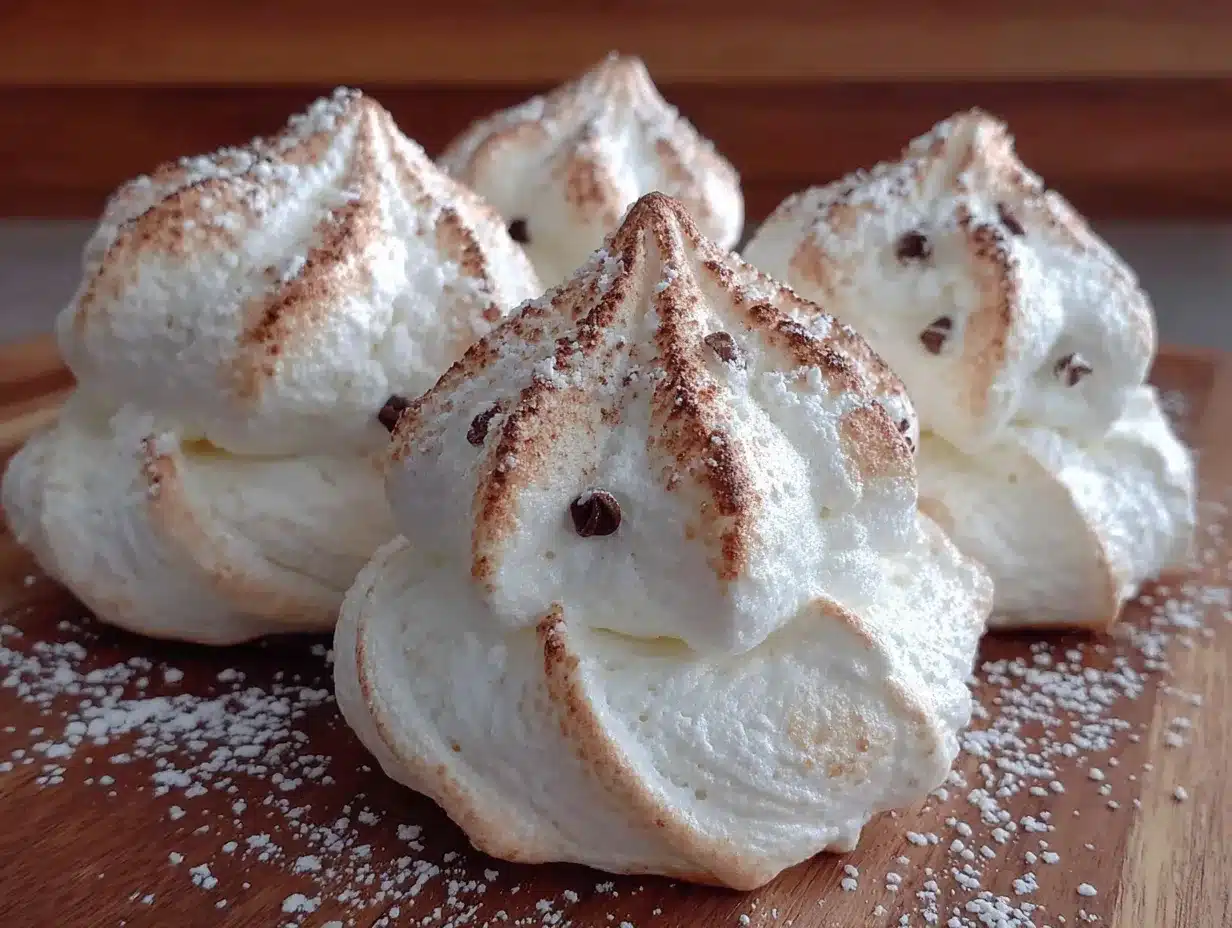
Alright, let’s make some ghosts. Here’s how I do it:
- Preheat your oven to 200°F (93°C). Yes, that’s low. We’re not baking these so much as drying them out. Line a baking sheet with parchment paper and set it aside.
- Separate your eggs while they’re cold. Cold eggs separate more easily, and you don’t want any yolk in your whites. I separate each egg into a small bowl first, then add the white to my mixing bowl. That way, if one yolk breaks, you haven’t ruined the whole batch.
- Let the egg whites come to room temperature. This takes about 20-30 minutes. Don’t rush this step — cold egg whites won’t whip up to their full volume. I usually do this while I’m cleaning up from separating them.
- Add the cream of tartar and salt to the egg whites. Start whipping on medium speed until they become foamy and slightly opaque. This takes about 1-2 minutes. You’ll see small bubbles forming.
- Gradually add the sugar. Here’s the trick: add it one tablespoon at a time, with the mixer running on medium-high. I know it’s tedious, but if you dump it all in at once, your meringue won’t be as stable. This process takes about 3-4 minutes. The mixture should start looking glossy and smooth.
- Add the vanilla extract. Pour it in and whip for another 30 seconds. The meringue should be stiff and glossy — when you lift the whisk, it should form a peak that holds its shape without drooping.
- Test the meringue. Rub a tiny bit between your fingers. If it feels gritty, keep whipping. If it feels smooth, you’re done. This is the most important test — gritty meringue means the sugar hasn’t dissolved fully, and your cookies might weep.
- Transfer the meringue to your piping bag. If you’re using a zip-top bag, snip about 1/2 inch off one corner. I like to twist the top of the bag to keep the meringue from escaping while I work.
- Pipe the ghosts. Hold the piping bag straight up and down, about 1/2 inch above the baking sheet. Squeeze gently to form a round base, then lift the bag straight up while continuing to squeeze. When you reach the desired height, stop squeezing and pull the bag away in a quick upward motion. You should get a little peak on top — that’s the ghost’s head. Each ghost should be about 1.5 inches wide and 2 inches tall. Leave about 1 inch between them.
- Add eyes (optional). If you’re using chocolate chips, gently press two into each ghost before the meringue sets. I do this immediately after piping, while the surface is still wet.
- Bake for 60 minutes. Place the baking sheet on the center rack and bake for 60 minutes. Do not open the oven door during this time — the temperature change can cause cracking.
- Turn off the oven and let them cool inside. After 60 minutes, turn off the oven but leave the ghosts inside for another 30 minutes. This gradual cooling prevents them from cracking.
- Remove and cool completely. Take the baking sheet out of the oven and let the ghosts cool on the pan for 10 minutes, then transfer them to a cooling rack. They should lift easily off the parchment paper.
A note on timing: The total time from start to finish is about 2 hours, but most of that is hands-off. I usually make these while I’m catching up on a podcast or watching a show.
Cooking Tips & Techniques
I’ve made a lot of mistakes with meringue over the years, so you don’t have to. Here’s what I’ve learned:
The biggest mistake is not cleaning your bowl properly. Any trace of grease or egg yolk will prevent your egg whites from whipping up. I wash my bowl with hot soapy water, then wipe it down with a little lemon juice or vinegar on a paper towel to remove any remaining residue. Yes, I’m that paranoid, and it works.
Humidity is your enemy. Meringue hates humidity. If it’s a rainy day, your cookies might end up sticky and chewy instead of crisp. I’ve made that mistake exactly once — now I check the weather forecast before I start. If it’s humid, I either wait for a drier day or accept that the texture will be slightly different.
Don’t overbake. The low temperature is key. I’ve tried baking these at 225°F and they browned slightly — not ideal for white ghosts. Stick to 200°F and be patient. If you’re in a hurry, you can increase the temperature to 225°F and reduce the time to 45 minutes, but watch them carefully.
Multitasking strategy: I separate my eggs and let them come to room temperature while I clean the kitchen. Then I whip the meringue while the oven preheats. While the ghosts are baking, I clean up the dishes. By the time they’re done, the kitchen is clean and I can enjoy the fruits of my labor.
For consistent shapes: I use a small offset spatula to scrape the meringue off the piping bag tip between ghosts. This keeps the shapes uniform. It’s a small thing, but it makes a big difference in presentation.
Variations & Adaptations
These ghosts are pretty perfect as-is, but I’ve played around with variations over the years. Here are a few of my favorites:
Chocolate Ghosts: Substitute 2 tablespoons of the granulated sugar with 2 tablespoons of cocoa powder. Sift the cocoa powder with the sugar before adding it to the egg whites. The result is a subtle chocolate flavor and a pale brown color — perfect for “spooky” ghosts.
Peppermint Ghosts: Replace the vanilla extract with 1/2 teaspoon of peppermint extract. These are especially good around the holidays. I made these for a Christmas party once and they disappeared in minutes.
Lemon Ghosts: Replace the vanilla with 1 teaspoon of lemon extract and add 1 teaspoon of lemon zest. The citrus flavor brightens the sweetness and gives the ghosts a slightly tangy finish. These are my personal favorite for spring.
Vegan Version: You can use aquafaba (the liquid from a can of chickpeas) instead of egg whites. Use 1/2 cup of aquafaba for 4 egg whites and add an extra 1/4 teaspoon of cream of tartar. The texture is slightly different — a bit chewier — but still delicious. I’ve tested this and it works.
Colored Ghosts: Add a drop of gel food coloring to the meringue before piping. I’ve made purple ghosts for Halloween and pink ones for Valentine’s Day. Just be careful not to overmix — you want streaks of color, not a uniform shade.
Serving & Storage Suggestions
These ghosts are best served at room temperature, straight from the cooling rack. They have a delicate, crisp texture that’s perfect for snacking. I like to serve them on a platter with a few whole chocolate chips scattered around for contrast.
Storage: Store the ghosts in an airtight container at room temperature. Do not refrigerate — the moisture in the fridge will make them sticky. They’ll stay fresh for up to 2 weeks, though honestly, they never last that long in my house.
Freezing: You can freeze these for up to 3 months. Place them in a single layer in a freezer-safe container with parchment paper between layers. Thaw at room temperature for about 15 minutes before serving. The texture might be slightly less crisp after freezing, but they’re still delicious.
Reheating: If your ghosts have lost their crispness, place them on a baking sheet in a 200°F oven for 5-10 minutes. Let them cool completely before serving. This usually restores their texture.
Flavor development: These cookies actually taste better the next day. The flavors meld together and the texture becomes more uniformly crisp. I often make them a day ahead for parties.
Pairing suggestions: These pair beautifully with hot chocolate, coffee, or a glass of cold milk. I also love serving them alongside a fruit platter — the sweetness of the meringue contrasts nicely with tart berries.
Nutritional Information & Benefits
Here’s the good news: these cookies are surprisingly low in calories compared to most treats. Each ghost (without chocolate chips) has about 25 calories, 0 grams of fat, and 6 grams of sugar. They’re also gluten-free, dairy-free, and nut-free, making them a great option for people with dietary restrictions.
The egg whites provide a small amount of protein — about 1 gram per ghost — and the sugar gives you a quick energy boost. While they’re not exactly health food, they’re a lighter alternative to traditional cookies or candy.
One thing I love about these is that they satisfy a sweet craving without feeling heavy. I can eat three or four and still feel good, unlike with a slice of cake or a handful of chocolate chip cookies. That said, they are still sugar, so moderation is key.
If you’re watching your sugar intake, you can reduce the sugar to 3/4 cup (150 grams) without significantly affecting the texture. The cookies will be slightly less crisp and a bit more chewy, but still delicious.
Conclusion
These cozy ghost meringue cookies are more than just a Halloween treat — they’re a little piece of nostalgia that you can hold in your hand. They’re light, they’re sweet, and they bring a smile to everyone who sees them. I love that they’re simple enough for a beginner baker but impressive enough to serve at a party. Honestly, I think they’re the perfect way to celebrate the season without going overboard on sugar or stress.
I’d love to hear how yours turn out. Did you add eyes? Did you try a flavor variation? Drop a comment below and let me know — I read every single one. And if you share a photo on Pinterest, tag me so I can see your beautiful ghosts.
Happy baking, friend. May your ghosts be crisp, your kitchen be warm, and your heart be full.
FAQs
Can I make these without a stand mixer?
Absolutely. A hand mixer works perfectly, and you can even whip them by hand with a whisk if you’re feeling ambitious. It’ll take about 10-15 minutes of vigorous whisking, but it’s doable. I’ve done it when my mixer broke, and honestly, it was a good arm workout.
Why did my meringue collapse?
This usually happens for one of three reasons: your bowl had grease or moisture, you added the sugar too quickly, or your egg whites weren’t at room temperature. Make sure your bowl is spotless, add the sugar slowly, and let your eggs come to room temperature before starting.
Can I use liquid egg whites from a carton?
You can, but the results won’t be as good. Carton egg whites are pasteurized at a higher temperature, which can affect their ability to whip up. If you’re in a pinch, use 1/2 cup of carton egg whites for 4 large egg whites. The texture might be slightly less stable, but it’ll still work.
How do I know when the meringue is ready?
The meringue is ready when it’s glossy, stiff, and holds a peak without drooping. You should also be able to rub a tiny bit between your fingers without feeling any graininess. If it feels gritty, keep whipping — the sugar hasn’t dissolved yet.
Can I make these ahead for a party?
Yes! These are actually perfect for making ahead. Store them in an airtight container at room temperature for up to 2 weeks. They’ll stay crisp and delicious. Just make sure they’re completely cool before storing them, or they’ll trap moisture and get sticky.
Pin This Recipe!
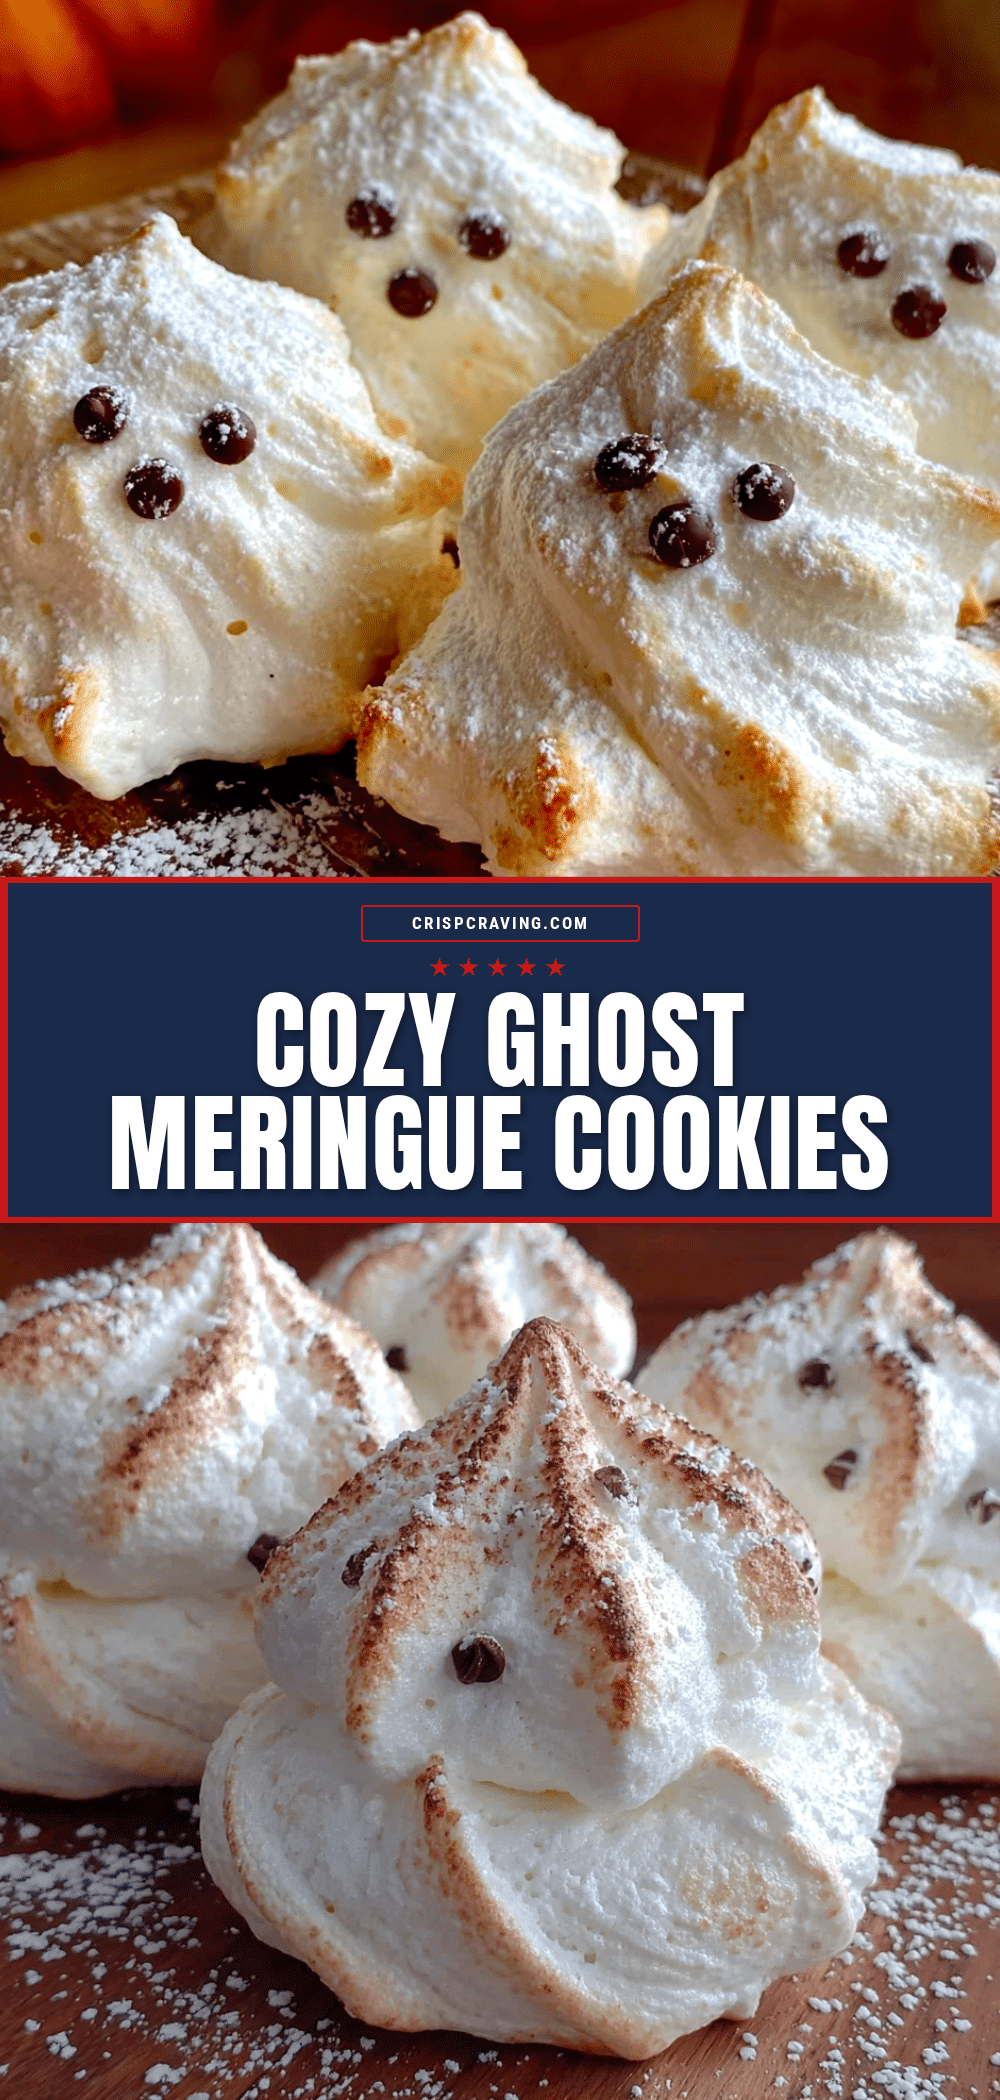
Easy Ghost Meringue Cookies Recipe (Best Cozy Treat)
Light, sweet, and melt-in-your-mouth ghost-shaped meringue cookies that are perfect for Halloween or any cozy night. These simple treats use basic pantry ingredients and come together in about 2 hours, most of which is hands-off baking time.
- Prep Time: 15 minutes
- Cook Time: 60 minutes
- Total Time: 2 hours
- Yield: 24 servings 1x
- Category: Dessert
- Cuisine: American
Ingredients
- 4 large egg whites, room temperature
- 1 cup (200 grams) granulated sugar
- 1/2 teaspoon cream of tartar
- 1 teaspoon pure vanilla extract
- Pinch of salt
- 2 tablespoons mini chocolate chips (optional, for eyes)
Instructions
- Preheat your oven to 200°F (93°C). Line a baking sheet with parchment paper and set aside.
- Separate your eggs while they’re cold. Cold eggs separate more easily. Separate each egg into a small bowl first, then add the white to your mixing bowl to avoid yolk contamination.
- Let the egg whites come to room temperature for 20-30 minutes.
- Add the cream of tartar and salt to the egg whites. Start whipping on medium speed until they become foamy and slightly opaque, about 1-2 minutes.
- Gradually add the sugar one tablespoon at a time with the mixer running on medium-high. This process takes about 3-4 minutes. The mixture should start looking glossy and smooth.
- Add the vanilla extract and whip for another 30 seconds. The meringue should be stiff and glossy, forming a peak that holds its shape without drooping.
- Test the meringue by rubbing a tiny bit between your fingers. If it feels gritty, keep whipping. If it feels smooth, you’re done.
- Transfer the meringue to a piping bag fitted with a round tip (or a zip-top bag with the corner snipped off).
- Pipe the ghosts: Hold the piping bag straight up and down, about 1/2 inch above the baking sheet. Squeeze gently to form a round base, then lift the bag straight up while continuing to squeeze. When you reach the desired height, stop squeezing and pull the bag away in a quick upward motion. Each ghost should be about 1.5 inches wide and 2 inches tall. Leave about 1 inch between them.
- If using chocolate chips, gently press two into each ghost immediately after piping, while the surface is still wet.
- Bake for 60 minutes on the center rack. Do not open the oven door during this time.
- Turn off the oven and let the ghosts cool inside for another 30 minutes.
- Remove the baking sheet from the oven and let the ghosts cool on the pan for 10 minutes, then transfer them to a cooling rack to cool completely.
Notes
Make sure your bowl is spotless and completely dry—any grease or moisture will ruin the meringue. Humidity is the enemy; avoid making these on rainy days. For best results, let eggs come to room temperature before whipping. The meringue is ready when it’s glossy and holds a stiff peak, and no graininess is felt when rubbed between fingers. Store in an airtight container at room temperature for up to 2 weeks. Do not refrigerate.
Nutrition
- Serving Size: 1 ghost cookie
- Calories: 25
- Sugar: 6
- Sodium: 10
- Carbohydrates: 6
- Protein: 1
Keywords: ghost meringue cookies, Halloween cookies, meringue cookies, easy meringue, gluten-free cookies, dairy-free cookies, spooky treats



