Love this? Save it for later!
Share the inspiration with your friends
This was supposed to be a proper Halloween party spread. I had grand visions of a bubbling cauldron of punch, homemade spiderweb cupcakes, and maybe even a batch of those fancy meringue ghosts that look like they belong on a baking competition show. But then Tuesday happened. The kind of Tuesday where the grocery store was out of the very specific candy I needed, my mixer decided to make a sound like a dying lawnmower, and I realized the Halloween party was in two hours. Not tomorrow. Two hours. I stood in my kitchen, staring at a bag of Oreos, a package of instant pudding I’d bought for a different dessert entirely, and a sad little bag of gummy worms that were meant to be a snack for my commute. Honestly, I almost just ordered pizza and called it a night. But something made me grab the food processor instead. I figured, worst case scenario, the kids would just eat crushed cookies out of a bowl. And you know what? That frantic, messy, slightly panicked experiment turned into the most popular thing at the party. The adults were sneaking seconds, the kids were covered in chocolate “dirt,” and I was standing there with flour on my shirt and a very smug feeling. These Quick Halloween Dirt Cups with Oreos and Gummy Worms became the thing I’m now known for, which is funny, considering they were born from a total kitchen meltdown. Maybe you’ve been there, staring at a clock and a half-baked plan. This is the dessert that saves you.
Why You’ll Love This Recipe
Let’s be real for a second. Halloween desserts can be a huge pain. Between the fondant, the food coloring, and the multiple layers of frosting, you can spend a whole weekend on something that gets devoured in five minutes. This is not that dessert. This is the dessert you make when you want to be the cool parent, the one who shows up with something fun, without losing your entire evening. I’ve tested this method about a dozen times now, tweaking the pudding-to-crumb ratio, the chilling time, and even the type of gummy worm (sour vs. regular makes a difference, people). What you get here is my absolute best version.
- Quick & Easy: We’re talking 15 minutes of active prep time. Seriously. The hardest part is crushing the cookies, and that’s just fun.
- Simple Ingredients: Oreos, instant pudding, milk, Cool Whip, and gummy worms. That’s it. No weird baking aisle finds required.
- Perfect for a Halloween Party or School Treat: These are the undisputed champions of classroom parties, potlucks, and last-minute gatherings. Kids go absolutely nuts for them.
- Crowd-Pleaser: I’ve yet to meet a single person who doesn’t smile when they see a dirt cup. It’s pure, nostalgic joy.
- Unbelievably Delicious: The texture is the real star here. You get the crunch of the Oreo “dirt,” the silky smoothness of the chocolate pudding, and the chewy, fruity surprise of the gummy worms. It’s a party in a cup.
What makes this version different from the rest? It’s the ratio. Most recipes are too pudding-heavy or too dry. I’ve found the perfect balance so every spoonful has a bit of everything. Plus, I’ll share my secret for getting that “dirt” to look extra realistic. This isn’t just another version—it’s the one you’ll come back to every October.
What Ingredients You Will Need
This recipe uses simple, store-bought ingredients to deliver maximum Halloween fun with minimum effort. Everything is designed to be quick and foolproof, so you can focus on the fun part—assembling the cups.
- 1 (14.3-ounce) package Oreo cookies: This is the classic. Don’t use Double Stuf for the dirt, as the extra cream filling makes the crumbs clump up and look less like soil. Regular Oreos are perfect. I prefer the name brand here, as the cookie part has that perfect dark, crumbly texture. (Pro tip: You’ll use the whole cookie, cream and all, for the dirt.)
- 1 (3.9-ounce) package instant chocolate pudding mix: This is the foundation of your “mud.” I’ve tested this with cook-and-serve pudding, and it just doesn’t set up the same way. Instant is key for that quick, creamy texture. Jell-O brand is my go-to for consistent results.
- 2 cups cold milk: Whole milk will give you the richest, creamiest pudding, but 2% works just fine. For a dairy-free version, you can use oat milk or unsweetened almond milk. Just make sure it’s ice cold to help the pudding set up properly.
- 1 (8-ounce) container frozen whipped topping, thawed (like Cool Whip): This is what makes the pudding extra light and fluffy. It also helps create a nice layer between the dirt and the worms. If you want to be fancy, you can whip your own heavy cream with a little powdered sugar, but honestly, Cool Whip is easier and holds its shape better for this project.
- 1 (5-ounce) bag gummy worms: The stars of the show! Look for the classic, colorful worms. I like to get a mix of sour and regular for a little tangy surprise. You can also find Halloween-themed gummy worms that have a little more orange and black color.
- Optional for decoration: A few extra crushed Oreos for the top, and maybe some green-tinted shredded coconut to look like “moss” or “grass” poking out of the dirt. A little plastic spider on top is also a fun touch.
Equipment Needed
You really don’t need any fancy gadgets for this recipe, which is part of its beauty. Here’s what you’ll need:
- Food processor or a sturdy zip-top bag and rolling pin: A food processor makes quick work of crushing the Oreos into a fine “dirt.” If you don’t have one, don’t worry. Just put the cookies in a gallon-sized zip-top bag, squeeze all the air out, and go to town with a rolling pin. It’s a great way to let out some pre-Halloween stress!
- Large mixing bowl and whisk: For making the pudding. A hand mixer also works if you want to go faster.
- Rubber spatula: For folding in the Cool Whip and scraping every last bit of pudding out of the bowl. I have a soft silicone one that I use for everything.
- Small cups, clear plastic cups, or mason jars: Clear cups are best so you can see the layers of dirt, mud, and worms. You can find packs of 9-ounce clear plastic cups at any grocery store or party supply store. I’ve also used small mason jars, which look adorable and are reusable.
- Measuring cups and spoons: For the milk.
Preparation Method
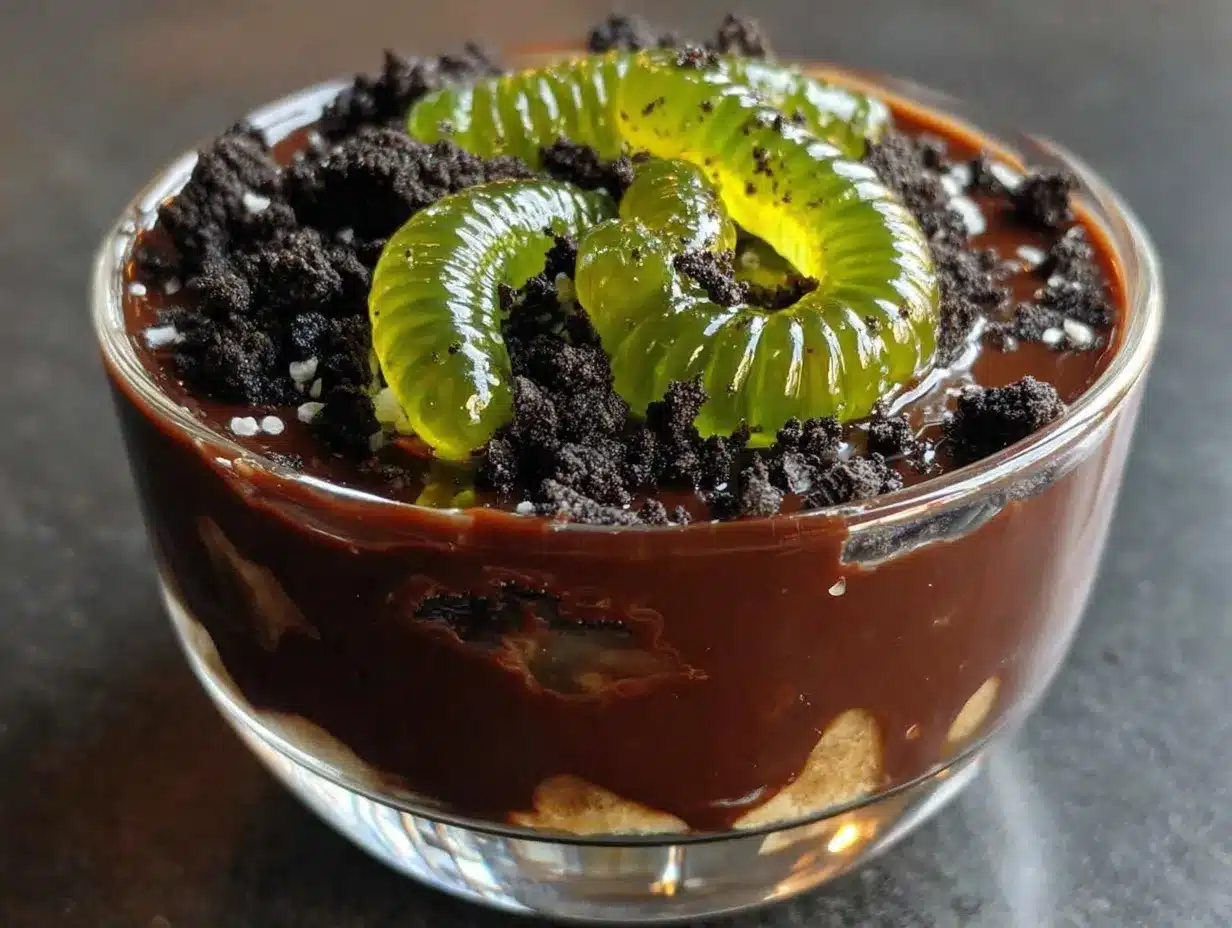
- Crush the Oreos into Dirt (5 minutes): Place the entire package of Oreos (cream filling and all) into your food processor. Pulse until the cookies are broken down into fine crumbs that resemble potting soil. You want a mostly uniform texture, but a few slightly bigger pieces are fine—they look like little rocks. If you’re using the bag method, make sure the cookies are fully crushed. Set the “dirt” aside in a bowl.
- Make the Chocolate Mud (5 minutes): In your large mixing bowl, whisk together the instant chocolate pudding mix and the 2 cups of cold milk. Whisk vigorously for about 2 minutes, until the pudding starts to thicken. It will be quite thin at first, then suddenly it will start to set. This is normal.
- Fold in the Cool Whip (2 minutes): Add the entire container of thawed Cool Whip to the pudding mixture. Use your rubber spatula to gently fold it together. Don’t stir vigorously—you want to keep the mixture light and airy. Fold until there are no more white streaks, and you have a uniform, mousse-like chocolate cream. This is your “mud.”
- Start Layering (5 minutes): Grab your 6 to 8 clear cups. Start with a generous tablespoon of the Oreo “dirt” at the bottom of each cup. This gives a nice foundation.
- Add the Mud and Worms (5 minutes): Spoon or pipe the chocolate pudding mixture on top of the dirt layer, filling the cup about halfway. Now for the fun part! Push a couple of gummy worms into the pudding so they are partially sticking out, looking like they are crawling out of the mud. I like to have one worm diving in and one worm trying to escape.
- Finish with More Dirt (5 minutes): Add another layer of the chocolate pudding mixture on top of the worms, almost to the top of the cup. Then, sprinkle a generous layer of the Oreo dirt over the top to completely cover the pudding. It should look like a little cup of soil.
- Garnish and Chill (2 minutes + 30 minutes): Add one final gummy worm on top, perhaps looking like it’s just surfacing. You can also add a few extra cookie crumbs on the top for a messy, realistic look. Place the cups in the refrigerator for at least 30 minutes to allow the pudding to fully set and the flavors to meld. This step is important—it makes the texture perfect.
Personal Tip: Don’t overmix the pudding. As soon as it thickens, stop. Overmixing can make it grainy. And when you’re folding in the Cool Whip, be gentle. You want that airy texture.
Cooking Tips & Techniques
I’ve made these dirt cups about a hundred times now, and I’ve learned a few things the hard way. Here are my best tips to make sure yours turn out perfectly.
- The Cold Milk Secret: This is non-negotiable. Your milk must be ice cold for the instant pudding to set up correctly. If your milk is even slightly warm, the pudding will stay runny, and you’ll end up with a soupy mess. I keep a carton in the fridge specifically for this.
- Don’t Skip the Chilling Time: I know, you’re in a rush. But those 30 minutes in the fridge are crucial. It gives the Oreo crumbs time to soften slightly against the pudding, creating that perfect “dirt” texture. If you serve them immediately, the cookies are too crunchy and the pudding is too loose. Patience, my friend.
- The Bag Method is Your Friend: If you don’t have a food processor, don’t sweat it. The zip-top bag and rolling pin method works beautifully. Just make sure the bag is sealed tight. I once had a bag explode mid-roll, and I was finding Oreo dust in my kitchen for weeks. Learn from my mistake!
- Pipe the Pudding for Cleaner Layers: For a super professional look, spoon the chocolate mixture into a large piping bag or a zip-top bag with the corner snipped off. This lets you pipe the pudding into the cups neatly without smearing it on the sides. It makes the layers much more defined through the clear cup.
- Make-Ahead Magic: These are actually better when made a few hours ahead. You can assemble them fully up to 24 hours in advance and keep them in the fridge. The flavors meld together beautifully, and the texture gets even better. This is a lifesaver for party prep.
Variations & Adaptations
One of the best things about this recipe is how easy it is to change up. Don’t be afraid to make it your own.
- Peanut Butter Dirt Cups: For a richer flavor, use peanut butter cookies instead of Oreos for the dirt. You can also swirl a little creamy peanut butter into the chocolate pudding before layering. It’s incredible. Just be mindful of peanut allergies if you’re serving these at a school event.
- Pumpkin Patch Dirt Cups: Swirl some canned pumpkin puree and pumpkin pie spice into the pudding mixture before folding in the Cool Whip. Use crushed graham crackers for the “dirt” instead of Oreos, and top with a little green candy pumpkin. It tastes like fall in a cup.
- Vegan & Dairy-Free Version: This is super easy to adapt. Use a dairy-free instant chocolate pudding mix (like Jell-O’s) and your favorite plant-based milk (oat milk works best). Swap the Cool Whip for a vegan whipped topping like CocoWhip. And check that your Oreos are vegan—they usually are! Everything else is naturally vegan-friendly.
- Gluten-Free Dirt Cups: Simply swap the regular Oreos for gluten-free chocolate sandwich cookies. They are widely available now and taste just as good. The rest of the ingredients are naturally gluten-free, so you’re good to go.
- Spiderweb Dirt Cups: For a fancy twist, drizzle a little white chocolate or marshmallow creme over the top of the dirt in a spiral pattern. Use a toothpick to drag the lines from the center outwards to create a spiderweb effect. It looks super impressive with almost no extra effort.
Serving & Storage Suggestions
These dirt cups are best served cold, straight from the fridge. The contrast between the cool, creamy pudding and the crunchy Oreo dirt is the whole point. I like to serve them on a tray with a little sign that says “Worm Sanctuary” or “Eat Dirt!” for a fun, spooky touch.
For a Halloween party, you can get really creative with the presentation. Serve them in little plastic cauldrons, or bury a few plastic spider rings in the dirt for a creepy surprise. They pair perfectly with a warm apple cider or a pumpkin spice latte for the adults. For kids, a glass of milk is the obvious choice.
Storage: These keep beautifully in the refrigerator for up to 3 days. Just make sure to cover them with plastic wrap or a lid so they don’t pick up any other smells from your fridge. The Oreo dirt will soften over time, which some people actually prefer. I think they are perfect the next day.
Freezing: I don’t recommend freezing these, as the pudding can become watery and the texture of the Cool Whip will change. They are so quick to make that you really don’t need to freeze them anyway.
Nutritional Information & Benefits
Let’s be honest—this is a treat, not a health food. But that doesn’t mean we can’t be smart about it. Here’s a rough estimate per serving (based on 8 servings):
- Calories: ~380
- Fat: 18g
- Carbohydrates: 52g
- Protein: 6g
- Sugar: 38g
Potential Allergens: This recipe contains dairy (milk, cream), gluten (Oreos), and soy (in the Oreos and Cool Whip). It may also contain traces of peanuts and tree nuts depending on the brands you use. Always check labels if you are serving someone with allergies.
Healthier Swaps: If you want to lighten it up, you can use sugar-free instant pudding, fat-free milk, and light Cool Whip. The taste is still great, and you’ll save about 100 calories per serving. It’s not a superfood, but it’s a fun, portion-controlled dessert that brings a lot of joy. And honestly, a little joy is good for your health too.
Conclusion
These Quick Halloween Dirt Cups with Oreos and Gummy Worms are the definition of a happy accident. They’re fast, they’re fun, and they require zero baking skills. Whether you’re a seasoned baker or someone who burns toast, you can make these. I love this recipe because it reminds me that perfection is overrated. The best things in life—and in the kitchen—often come from a little bit of chaos and a willingness to just try something.
So go ahead, grab a bag of Oreos and some gummy worms. Make a mess. Get cookie dust on your counter. And then watch the faces of your kids, your friends, or your coworkers light up when they see these little cups of dirt. It’s the best feeling. If you make these, I’d love to know! Drop a comment below and tell me how they turned out. Did you add your own twist? Did the kids go crazy? Share your dirt cup stories with me. Happy Halloween, and happy snacking!
Frequently Asked Questions
Can I use homemade whipped cream instead of Cool Whip?
Absolutely! You can whip 1 cup of heavy cream with 2 tablespoons of powdered sugar until stiff peaks form. Fold it into the pudding just like you would the Cool Whip. It will be a little less stable, but it tastes incredible.
How far in advance can I make these dirt cups?
You can make them up to 24 hours ahead of time. In fact, they are even better the next day because the flavors have had time to meld. Just keep them covered in the refrigerator.
Can I use a different flavor of pudding?
Yes! While chocolate is the classic “dirt” flavor, you can use vanilla, butterscotch, or even cheesecake-flavored pudding. For a fun twist, try a white chocolate pudding and use crushed Golden Oreos for the “sand.”
Why is my pudding not setting up?
This usually happens for two reasons: your milk wasn’t cold enough, or you didn’t whisk it long enough. Make sure your milk is ice cold and whisk for a full 2 minutes. If it still seems thin, let it sit for 5 minutes—it will thicken as it rests.
Can I make these without a food processor?
Definitely! The zip-top bag and rolling pin method works like a charm. Just place the Oreos in a sturdy bag, seal it, and crush them with a rolling pin or even a heavy skillet. It’s a great way to get the kids involved in the kitchen.
Pin This Recipe!
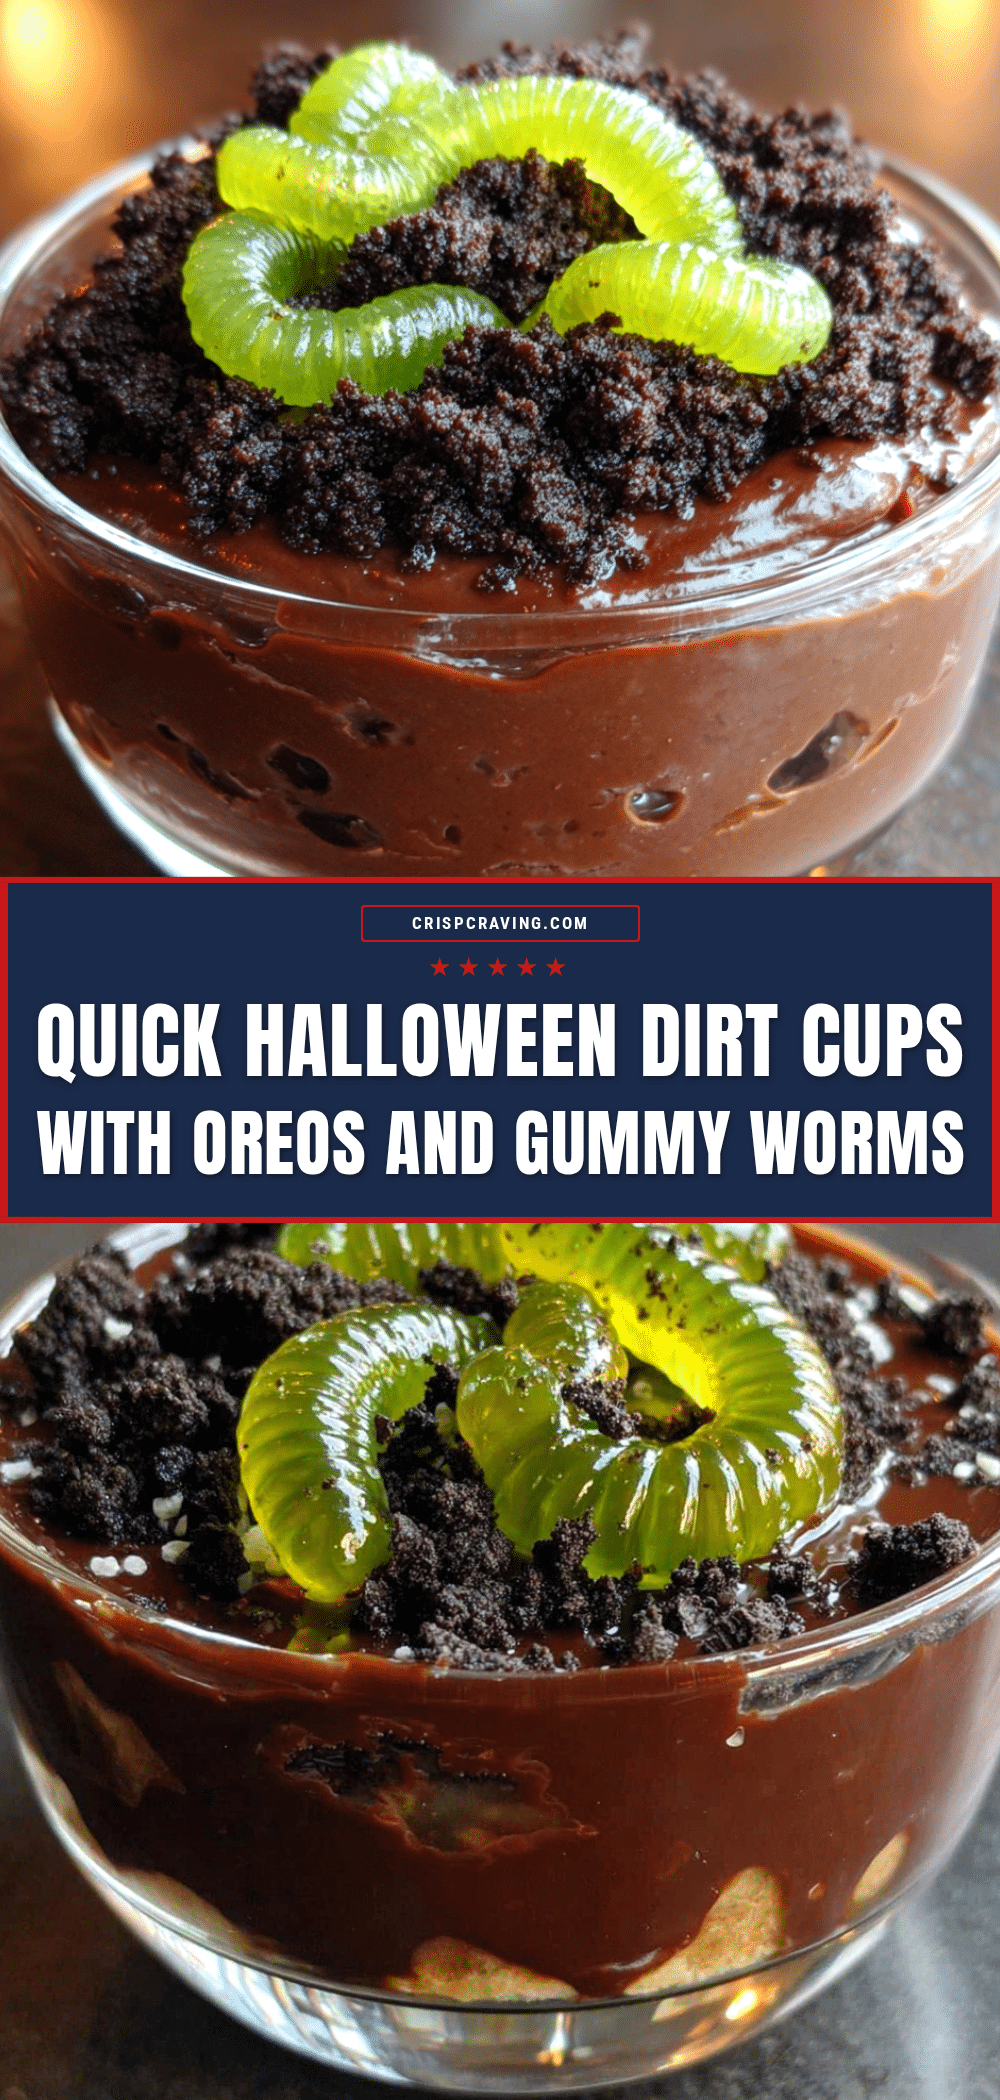
Easy Halloween Dirt Cups: Best Oreo & Gummy Worm Dessert
Quick and easy Halloween dirt cups made with Oreos, chocolate pudding, and gummy worms. A no-bake dessert that’s perfect for parties and school treats.
- Prep Time: 15 minutes
- Cook Time: 0 minutes
- Total Time: 45 minutes
- Yield: 8 servings 1x
- Category: Dessert
- Cuisine: American
Ingredients
- 1 (14.3-ounce) package Oreo cookies
- 1 (3.9-ounce) package instant chocolate pudding mix
- 2 cups cold milk
- 1 (8-ounce) container frozen whipped topping, thawed (like Cool Whip)
- 1 (5-ounce) bag gummy worms
- Optional: extra crushed Oreos for topping, green-tinted shredded coconut, plastic spiders
Instructions
- Crush the Oreos into fine crumbs using a food processor or a zip-top bag and rolling pin. Set aside.
- In a large bowl, whisk together the instant chocolate pudding mix and cold milk for about 2 minutes until thickened.
- Gently fold the thawed whipped topping into the pudding until no white streaks remain.
- Place a generous tablespoon of Oreo crumbs at the bottom of each clear cup.
- Spoon or pipe the pudding mixture over the crumbs, filling each cup halfway. Push a few gummy worms into the pudding so they partially stick out.
- Add another layer of pudding mixture almost to the top, then sprinkle a generous layer of Oreo crumbs over the top.
- Garnish with a final gummy worm on top. Refrigerate for at least 30 minutes before serving.
Notes
Use regular Oreos, not Double Stuf, for the best ‘dirt’ texture. Milk must be ice cold for pudding to set. Chilling for at least 30 minutes is essential for perfect texture. Can be made up to 24 hours in advance.
Nutrition
- Serving Size: 1 cup
- Calories: 380
- Sugar: 38
- Fat: 18
- Carbohydrates: 52
- Protein: 6
Keywords: Halloween dirt cups, Oreo dirt cups, gummy worm dessert, no-bake Halloween dessert, easy Halloween treat



