Love this? Save it for later!
Share the inspiration with your friends
It was last Tuesday, just as the sun was starting to dip below the roofline, casting those long, spooky shadows across the porch. I was wrestling with a stubborn wreath on the front door, trying to make it look festive without looking like I’d bought it at the last minute. That’s when Arthur, our neighbor who usually communicates in nods and occasional waves, walked by with a bag of apples. He stopped, leaned against his fence, and pointed at my half-finished decoration.
“You know,” he said, adjusting his glasses, “the kids don’t care about the wreath. They care about the table.”
I laughed, thinking he was joking. Arthur is an accountant. His idea of excitement is balancing a ledger. But he didn’t laugh. He told me about the snack board he’d made the previous Halloween. It wasn’t just cheese and crackers. It was a landscape. He described it with such passion that I actually dropped my wreath. He spoke of “witches’ brew” punch bowls and “zombie finger” grapes. He explained how he used simple, safe ingredients to create a scene that terrified and delighted his grandkids simultaneously.
Let’s face it, I had spent hours on decorations and zero time on food. I felt that familiar pang of guilt every parent knows—the one where you realize the magic is in the details, not the drapes. Arthur saw my expression and shrugged. “It’s easy,” he said. “Just arrange it like a story. Don’t overthink the spooky part. Just make it fun.”
I went inside, threw together a few things from my pantry, and waited. When the trick-or-treaters arrived, I set the board out on the coffee table. The silence was instant. Then, the screams. Not of fear, but of pure, unadulterated joy. One kid pretended a pretzel stick was a spider leg. Another dipped a cauliflower floret into ranch like it was a ghostly nugget. It was chaotic. It was messy. It was perfect.
That night changed how I approach holiday hosting. I realized that the best memories aren’t bought; they’re assembled. And honestly, you know that feeling when you’re trying to please a room full of sugar-fueled children? It’s exhausting. But this approach? It’s liberating. Arthur’s easy Halloween snack board for kids became my new tradition. It stays with me because it proved that you don’t need to be a chef to create magic. You just need a little creativity and some grapes.
Why You’ll Love This Recipe
Creating a festive spread doesn’t have to mean spending hours in the kitchen or breaking the bank on themed packaging. This easy Halloween snack board for kids is designed for real life. It’s the kind of recipe that saves your evening while still delivering that “wow” factor. Here is why this specific arrangement works so well for families:
- Quick & Easy: The entire board comes together in under 15 minutes. You aren’t cooking anything that requires an oven or a stovetop. It’s purely assembly, which means you can actually enjoy the party instead of hiding in the kitchen.
- Simple Ingredients: No fancy grocery trips needed. You likely already have most of these items in your fridge and pantry. We are using staples like cheese, crackers, fruits, and dips, just arranged in a fun way.
- Perfect for Parties: Whether it’s a Halloween party at school, a neighborhood drop-off station, or a cozy night in with cousins, this board adapts to any crowd size. It’s great for potlucks where parents are looking for something kid-friendly but not overly processed.
- Crowd-Pleaser: Kids love dipping. They love colors. They love things that look like something they shouldn’t be eating. By framing ordinary foods as spooky treats, you get rave reviews from even the pickiest eaters.
- Unbelievably Delicious: The texture and flavor combo is next-level comfort food. The crunch of the pretzels, the creaminess of the dip, the snap of the apple—it’s a sensory experience that keeps them coming back for seconds.
What makes this recipe different from the rest is the balance. Many kid-friendly boards are just a mountain of candy. This one offers actual nutrition disguised as fun. It’s comfort food reimagined—healthier, faster, but with the same soul-soothing satisfaction. It allows you to impress guests without stress, turning a simple meal into something memorable without the culinary pressure.
What Ingredients You Will Need
This recipe uses simple, wholesome ingredients to deliver bold flavor and satisfying texture without the fuss. The key here is variety. You want a mix of colors (orange, black, green, purple) and textures (crunchy, creamy, chewy) to keep little hands and palates engaged. Most of these are pantry staples, but a few specific choices make a big difference in the final presentation.
For the Base and Crunch
- Cheddar Cheese Slices: Look for a sharp cheddar that holds its shape. I prefer Organic Valley or Tillamook for their consistent color and melt resistance. You can also use cheese sticks cut into shapes.
- Pretzel Sticks: These are perfect for making “spider legs” or “witches’ brooms.” Get the standard salted variety for that savory contrast.
- Crackers: Use square crackers like Triscuits or Water Crackers. They provide a sturdy base and are less likely to crumble when kids grab them.
- Popcorn: Plain or lightly buttered popcorn adds volume and looks like “witch’s hair” when scattered loosely.
For the “Spooky” Elements
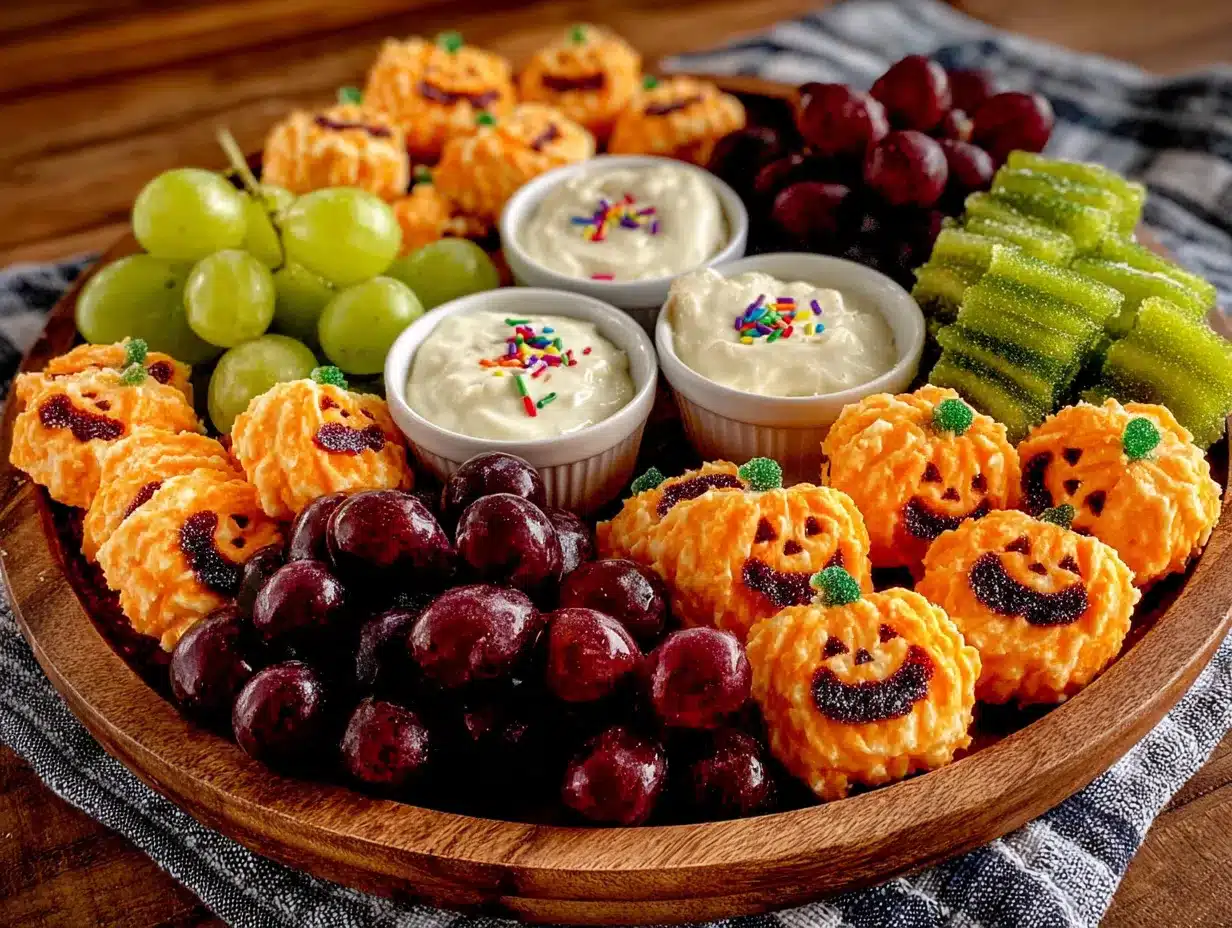
- Grapes: Red or green grapes work best. Freeze them an hour before for a “frozen zombie” effect. They are easy to eat and naturally round.
- Cauliflower Florets: These look exactly like little ghosts or cauliflower “trees.” Serve them raw for a healthy crunch.
- Mini Bell Peppers: Cut in half, these look like little pumpkins or bats. Choose orange ones if you can find them, but red or green work too.
- Olives: Black olives are essential for making “eyes” or “pumpkin seeds.” Sliced olives are easier for younger kids to handle.
For the Dips and Binders
- Ranch or Ranch-Style Dip: This is the classic dipping sauce. It’s a crowd favorite. You can make your own or use a trusted brand like Hidden Valley.
- Peanut Butter or Almond Butter: Use this as a “glue” for apple slices or to dip pretzel sticks. It adds protein and healthy fats.
- Cream Cheese: Use this to make “mummy” shapes by wrapping it around grapes or cheese cubes. It’s smooth and easy to spread.
- Apple Slices: Use firm apples like Honeycrisp or Granny Smith. Toss them in a little lemon juice to prevent browning.
For seasonal variations, you can swap the grapes for dried cranberries for a purple hue, or use orange bell pepper strips instead of pretzels. If you have nut allergies, simply swap the nut butter for sunflower seed butter or hummus. The flexibility here is what makes this board so reliable.
Equipment Needed
You don’t need fancy gadgets to pull this off. A large wooden board or a simple platter is all you really need. I recommend a rectangular board because it gives you more surface area to arrange the items in a “scene” rather than just a pile. If you don’t have a board, a large baking sheet lined with parchment paper works perfectly.
You will also need a small knife for cutting the cheese and fruits. A paring knife is best for precision, but a butter knife can work if you are careful. Small ramekins or bowls are necessary for the dips. If you don’t have matching ramekins, use small plastic cups or even crumpled foil balls to hold the dips in place so they don’t spill. I’ve used old mason jar lids in a pinch, and they look rustic and charming.
For maintenance, wooden boards should be hand-washed and oiled occasionally to prevent cracking. Plastic boards are easier to sanitize, which is a bonus when dealing with kids. Budget-friendly options include using a clean, flat stone or a slate tile from a hardware store. Just make sure it’s food-safe. The key is having a stable surface that won’t tip over when a child leans on it.
Preparation Method
Preparing the easy Halloween snack board for kids is about layering and placement. Follow these steps to create a visually appealing and functional spread.
- Prep the Fruits and Vegetables (5 minutes): Wash all produce thoroughly. Cut the apples into thin slices. If using grapes, you can leave them whole or cut them in half for easier eating. Cut the bell peppers into strips or halves. Slice the cheddar cheese into squares or triangles. Set these aside on a clean plate.
- Arrange the Base Items (5 minutes): Start with the crackers and pretzels. Place them along the edges of the board or in small clusters. This creates a foundation. Scatter the popcorn loosely in the empty spaces to fill gaps and add texture. Think of this as the “ground” of your spooky landscape.
- Add the “Spooky” Shapes (5 minutes): This is the fun part. Take the cauliflower florets and place them as “ghosts.” Use the black olives to create eyes on the cauliflower or scatter them like seeds. Cut the bell peppers into bat shapes if you have a cookie cutter, or just place the halves as pumpkins. Arrange the cheese slices in a fan shape or stack them like a tower.
- Create the Dips (5 minutes): Place your ramekins or bowls on the board. Fill them with ranch, peanut butter, or cream cheese. If using cream cheese, you can pipe it into mummy shapes by rolling grapes in it and adding an olive slice for an eye. Place these dips strategically so they are accessible but not too close to the salty items.
- Final Touches and Garnish: Add the pretzel sticks as “spider legs” near the olives. Tuck the apple slices in between the other items. If you want a pop of color, add some candy corn or orange sprinkles, but keep it minimal. The goal is to make the natural ingredients look festive.
Keep an eye on the apples; if they start to brown, add a squeeze of lemon juice before placing them. The entire process should take no more than 20 minutes from start to finish. If you are short on time, skip the cutting and use pre-sliced cheese and baby carrots. The effort you put into the arrangement matters more than the complexity of the ingredients.
Cooking Tips & Techniques
When assembling a snack board, presentation is everything. Here are some professional techniques to make your board look like it came from a magazine.
Height and Layers: Don’t just lay everything flat. Stack the cheese. Pile the popcorn. Use the ramekins to create height variation. This makes the board look abundant and inviting. I’ve learned the hard way that a flat board looks boring. Adding vertical elements draws the eye.
Color Blocking: Group similar colors together, but leave space for contrast. For example, cluster the orange items (peppers, cheddar) together, then break it up with green (grapes, apples) or black (olives, pretzels). This creates a visually pleasing pattern that isn’t chaotic.
Common Mistakes: One common error is overcrowding. Leave some empty space on the board. It looks more elegant and gives kids room to grab items without knocking everything over. Another mistake is using too many dips. Stick to two or three max. Too many options can overwhelm young eaters.
Timing: Prepare the board about 15-20 minutes before serving. If you leave it out too long, the fruits will oxidize and the crackers will get stale. If you need to prep ahead, cut the fruits and store them in airtight containers in the fridge. Assemble right before guests arrive.
Consistency: Cut all items into similar sizes for uniformity. This makes the board look more professional and easier for small hands to pick up. Consistency in size also ensures that every bite has a good mix of flavors.
Variations & Adaptations
This recipe is highly adaptable. Here are a few ways to tweak it based on your needs or dietary restrictions.
- Gluten-Free: Swap the regular crackers and pretzels for gluten-free alternatives. There are many great rice crackers or almond flour crackers that work well. Ensure your dips are also gluten-free.
- Nut-Free: Replace peanut butter with sunflower seed butter or hummus. This is crucial for school parties where nut allergies are common. Hummus adds a savory element that pairs well with veggies.
- Vegan: Use vegan cheese slices and dairy-free dips. The fruits and vegetables are naturally vegan, so this is an easy swap. Just check the labels on crackers and pretzels.
- Seasonal Twist: In the fall, add apple chips or pumpkin seeds. In the spring, you could use strawberries and kiwi for a colorful spring board, keeping the same layout.
- Personal Variation: I once added “worms” by using gummy worms hidden under the popcorn. The kids loved the surprise element. You can also use mini muffins as “cauldrons” to hold the dips.
These variations allow you to cater to different dietary needs without sacrificing the fun theme. The key is to maintain the color scheme and the “spooky” narrative, regardless of the ingredients.
Serving & Storage Suggestions
Serve the board at room temperature. Cold fruits and cheeses can lose their flavor, so let them sit out for about 15 minutes before serving. Present it on a low table or counter where kids can easily reach it. Pair it with a spooky drink, like apple cider or “witch’s brew” punch.
For storage, any leftovers should be covered tightly with plastic wrap and refrigerated. The fruits and vegetables will stay fresh for 2-3 days. The crackers and pretzels should be stored in an airtight container to maintain crispness. Do not store the assembled board in the fridge, as the crackers will become soggy.
Reheating is not necessary, as this is a cold snack. However, if you made warm dips, reheat them gently. The flavors develop over time, with the fruits absorbing some of the dip flavors, which can be a nice surprise for second-day snacks.
Nutritional Information & Benefits
This snack board offers a balanced mix of macronutrients. The cheese and nut butter provide protein and healthy fats, while the fruits and vegetables offer vitamins and fiber. The crackers and pretzels provide carbohydrates for energy. It’s a much healthier alternative to a bowl of candy.
Key ingredients like apples and grapes provide antioxidants, while cheddar cheese is a good source of calcium. For families looking to reduce sugar intake, this board allows kids to enjoy a festive treat without the sugar crash. It’s a great way to sneak in more produce by making it fun. Always check labels for allergens, especially for nuts and dairy.
Conclusion
Creating an easy Halloween snack board for kids doesn’t have to be a stressful ordeal. It’s about creativity, simplicity, and having fun. This recipe is worth trying because it combines nutrition with entertainment, making it a hit with both parents and children. I love this recipe because it brings back the joy of simple hosting. It reminds me that the best memories are made with simple ingredients and a little imagination.
I encourage you to customize this board based on your kids’ preferences. Add their favorite colors or snacks. Make it your own. And please, share your creations! I’d love to see how you interpret the spooky theme. Leave a comment below with your favorite addition or a photo of your board. Happy Halloween!
Frequently Asked Questions
Can I make this snack board a day ahead?
You can prep the ingredients a day ahead, but assemble the board just before serving. This keeps the crackers crisp and the fruits fresh. Store the cut produce in airtight containers in the fridge.
What dips work best for kids?
Ranch dressing, peanut butter, and cream cheese are the most popular. Hummus is also a great option for a savory, healthy dip. Avoid dips that are too spicy or sour.
How do I keep the apples from browning?
Toss the apple slices in a mixture of water and lemon juice for a few minutes before arranging them on the board. This prevents oxidation and keeps them looking fresh.
Can I use this board for a birthday party?
Absolutely! You can change the colors to match the party theme. The layout and ingredients are versatile enough for any occasion.
What if I don’t have a large board?
Use multiple plates or platters. You can arrange them close together on a table to create the effect of a single large board. The key is the arrangement, not the single surface.
Pin This Recipe!
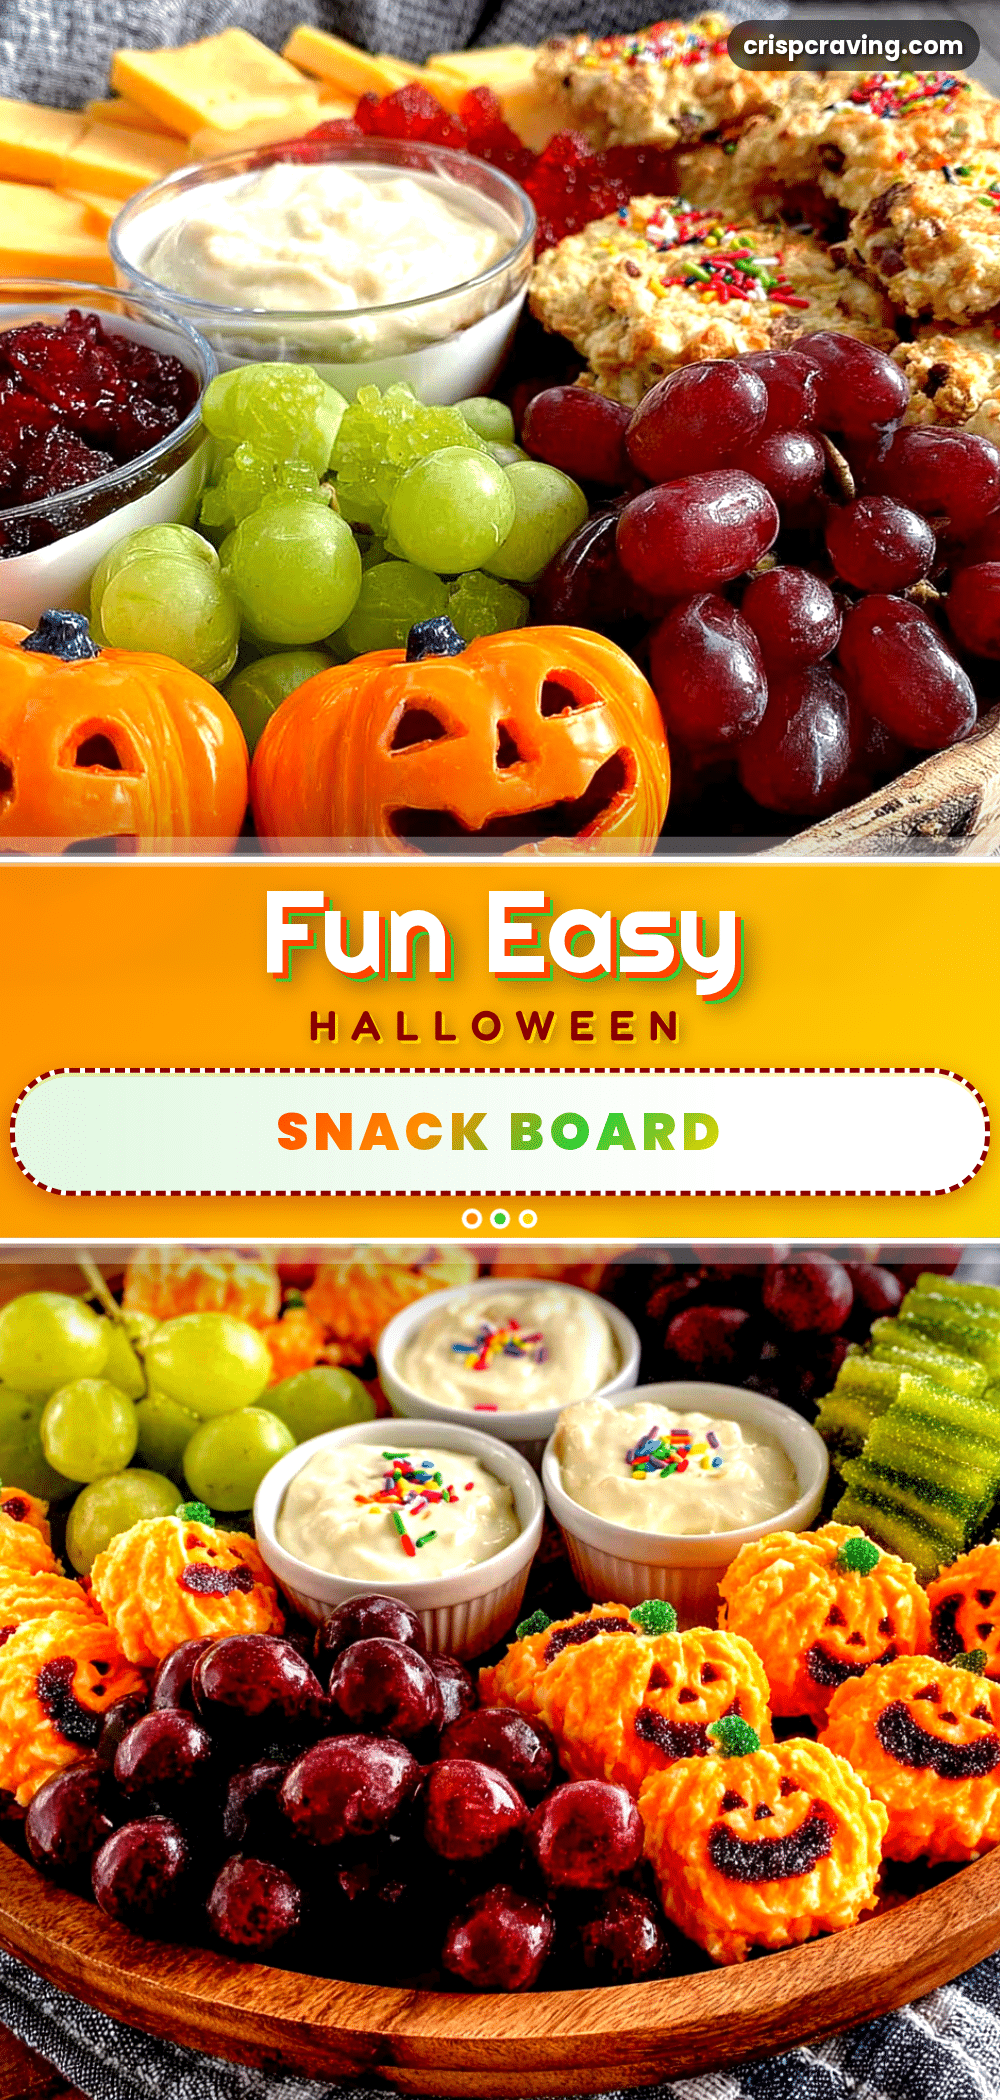
Easy Halloween Snack Board for Kids: 5 Spooky Ideas
A fun, no-cook Halloween snack board designed for kids that combines healthy ingredients with spooky presentations like ghosts, spiders, and witches’ brew. It comes together in under 20 minutes using simple pantry staples.
- Prep Time: 20 minutes
- Cook Time: 0 minutes
- Total Time: 20 minutes
- Yield: 8-10 servings
- Category: Appetizer
- Cuisine: American
Ingredients
- Cheddar Cheese Slices
- Pretzel Sticks
- Square Crackers (e.g., Triscuits or Water Crackers)
- Popcorn (plain or lightly buttered)
- Grapes (red or green)
- Cauliflower Florets
- Mini Bell Peppers (orange, red, or green)
- Black Olives
- Ranch or Ranch-Style Dip
- Peanut Butter or Almond Butter
- Cream Cheese
- Apple Slices (firm varieties like Honeycrisp or Granny Smith)
- Lemon Juice (for preventing apple browning)
Instructions
- Wash all produce thoroughly. Cut apples into thin slices, bell peppers into strips or halves, and cheddar cheese into squares or triangles. Set aside on a clean plate.
- If using grapes, leave them whole or cut in half. For a ‘frozen zombie’ effect, freeze grapes an hour before serving.
- Arrange crackers and pretzel sticks along the edges of the board or in small clusters to create a foundation.
- Scatter popcorn loosely in empty spaces to fill gaps and add texture.
- Place cauliflower florets as ‘ghosts’ and use black olives to create eyes or scatter them like seeds.
- Arrange bell peppers as pumpkins or bats. Fan out cheese slices or stack them.
- Place small ramekins or bowls on the board and fill with ranch, peanut butter, or cream cheese.
- For ‘mummy’ shapes, roll grapes in cream cheese and add an olive slice for an eye.
- Add pretzel sticks as ‘spider legs’ near olives and tuck apple slices in between other items.
- Toss apple slices in lemon juice before arranging to prevent browning.
- Serve at room temperature after letting ingredients sit out for 15 minutes.
Notes
Prepare the board 15-20 minutes before serving to keep crackers crisp and fruits fresh. If prepping ahead, store cut produce in airtight containers in the fridge. Do not store the assembled board in the fridge as crackers will become soggy. For nut allergies, swap nut butter for sunflower seed butter or hummus. For gluten-free needs, use gluten-free crackers and pretzels.
Nutrition
- Serving Size: Varied assortment of
- Calories: 250
- Sugar: 15
- Sodium: 350
- Fat: 12
- Saturated Fat: 5
- Carbohydrates: 30
- Fiber: 4
- Protein: 8
Keywords: Halloween snack, kids party food, healthy snacks, no-cook recipes, snack board, spooky treats, gluten-free options, nut-free snacks



