Love this? Save it for later!
Share the inspiration with your friends
My neighbor wasn’t trying to impress me. I’d stopped by to borrow a ladder on a random Tuesday afternoon, and the smell hit me before I even got to her back door. Buttered bread, warm ham, and melted cheese—the kind of smell that makes you suddenly realize you haven’t eaten since breakfast. She was standing at the counter, casually rolling up what looked like tiny sandwiches with the practiced ease of someone who’d done it a thousand times. “Oh, these?” she said when I asked, barely looking up. “Just something for the kids’ lunches.”
She handed me one while I waited for her to find the ladder in the garage, and honestly? That first bite stopped me mid-sentence. The bread was perfectly golden, the cheese was stretchy and warm, and the whole thing felt like a hug in handheld form. I stood there in her kitchen, eating another one (she insisted), and watched her crank out a dozen more in about four minutes flat. She made it look like nothing—like she wasn’t doing anything special at all. But I knew better.
That was three years ago, and these easy ham and cheese school sandwich roll-ups have been in regular rotation in my kitchen ever since. I’ve tweaked them a little, added my own tricks, and figured out what works best for busy mornings and lazy afternoons alike. Maybe you’ve been there too—staring at a loaf of bread and a pack of ham, wondering how to make lunch feel just a little more exciting without spending an hour in the kitchen. These roll-ups are the answer. They’re simple, they’re fast, and they’re the kind of thing that makes you feel like you’ve got it all together, even on the days you absolutely don’t.
Why You’ll Love This Recipe
Let me tell you why these roll-ups have become my go-to for school lunches, quick snacks, and even casual get-togethers. I’ve tested this recipe about a dozen times—using different breads, different cheeses, different folding techniques—and this version is the one that works every single time.
- Quick & Easy: From start to finish, these come together in under 15 minutes. That’s faster than waiting in line at the deli counter, and way more satisfying.
- Simple Ingredients: You probably already have everything in your kitchen right now. Bread, ham, cheese, butter—that’s it. No fancy trips to specialty stores required.
- Perfect for Lunchboxes: These roll-ups hold up beautifully in lunch bags, stay fresh for hours, and are easy for little hands to manage. No messy sandwiches falling apart.
- Crowd-Pleaser: I’ve served these to kids, adults, picky eaters, and even my mother-in-law who “doesn’t do sandwiches.” Everyone loves them.
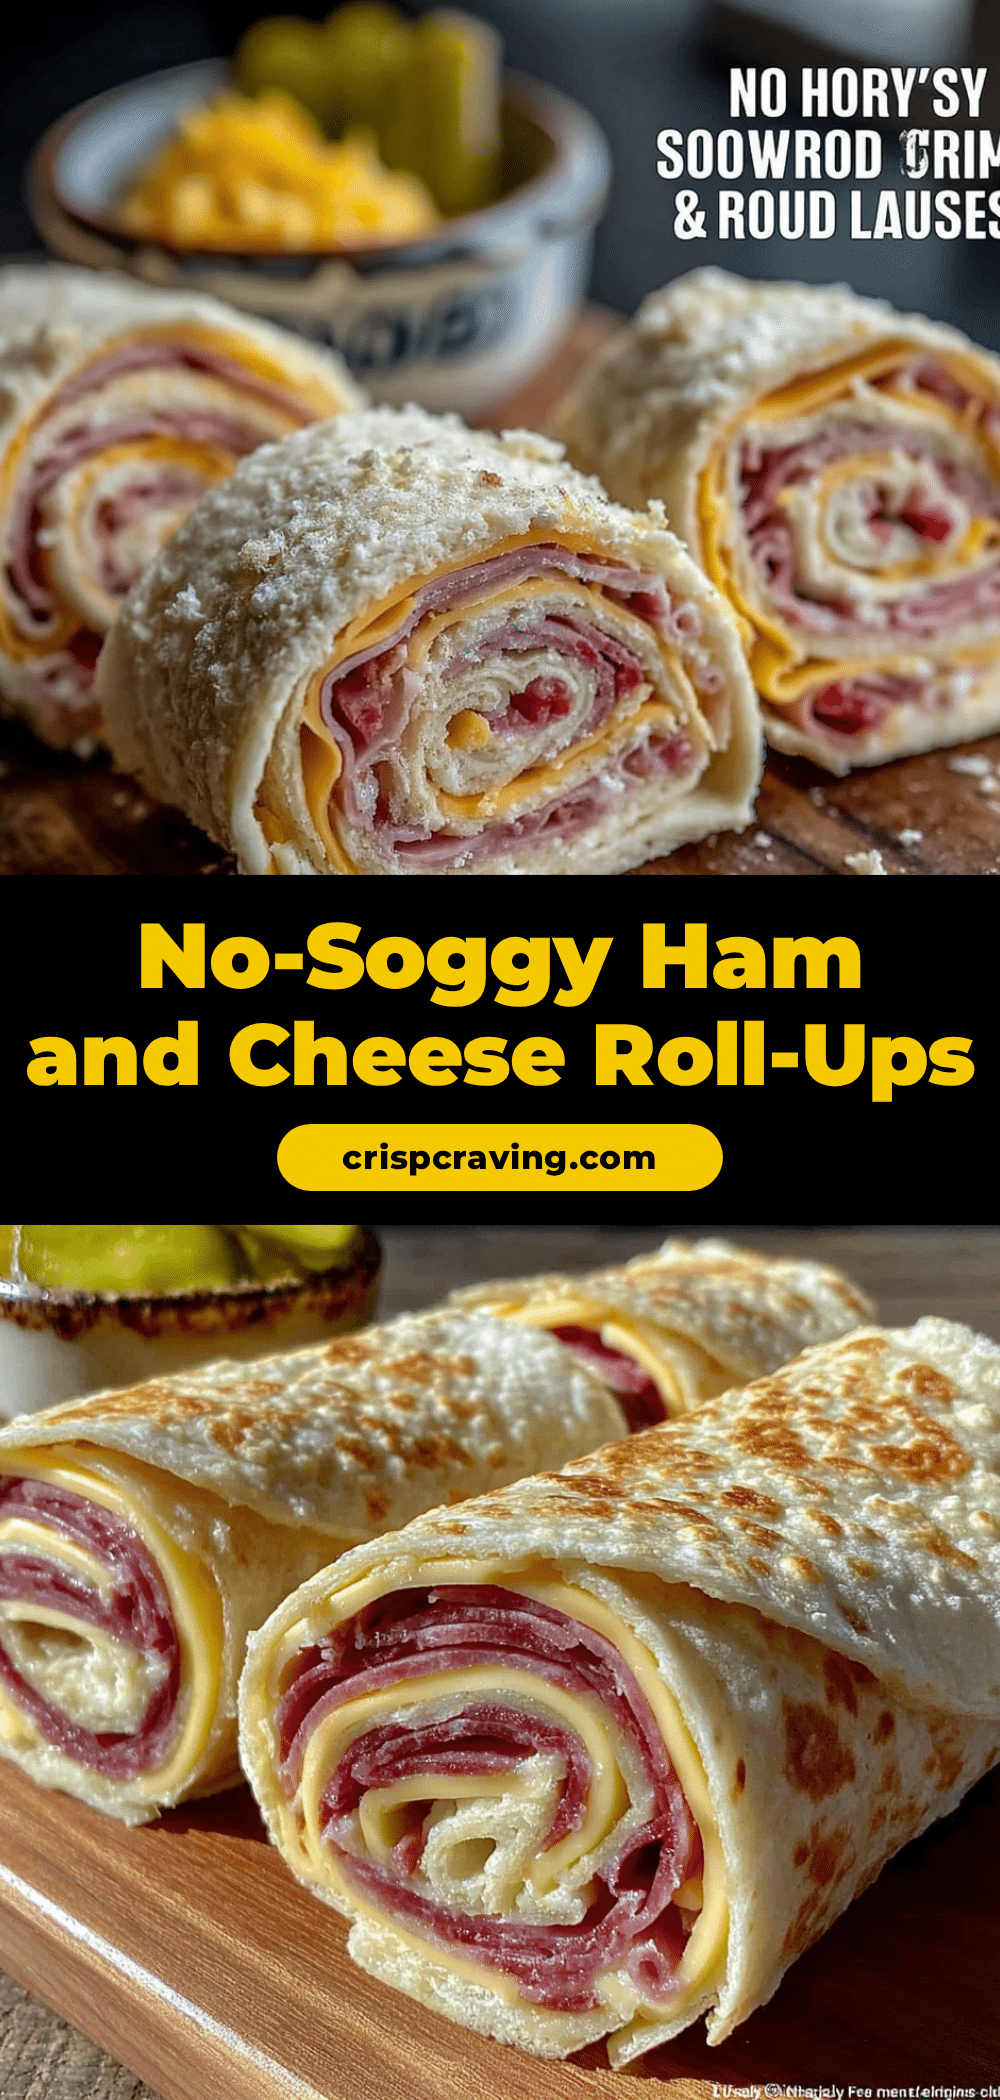
- Unbelievably Delicious: The texture is what gets me every time—crispy on the outside, soft and melty on the inside, with that perfect ham-and-cheese combo that never gets old.
What makes these different from just making a regular sandwich? It’s the rolling technique and the quick butter-toast finish. Instead of a flat, boring sandwich, you get these cute little spirals that feel like a treat. The cheese melts into the ham, the bread gets this gorgeous golden crust, and the whole thing stays together perfectly. No sogginess, no sliding fillings, no disappointment.
This recipe isn’t just good—it’s the kind that makes you close your eyes after the first bite. It’s comfort food reimagined: faster, simpler, but with the same soul-soothing satisfaction. Perfect for impressing your kids without stress, or turning a regular Tuesday lunch into something memorable.
What Ingredients You Will Need
This recipe uses simple, everyday ingredients to deliver big flavor without any fuss. Most of these are pantry staples you probably already have on hand, which is exactly why I love this recipe for busy mornings.
- Bread slices (8 slices, white or whole wheat) — Look for soft, fresh bread that rolls easily without cracking. I prefer a standard sandwich loaf, not too thick. (Pro tip: Day-old bread actually works better here—it’s less likely to tear.)
- Ham slices (8 slices, deli-style) — Use your favorite deli ham. Honey ham, smoked ham, or regular roast ham all work beautifully. I like Boar’s Head or Applegate for consistent quality.
- Cheese slices (8 slices, Swiss, provolone, or cheddar) — Swiss is classic, but provolone gives a milder flavor and cheddar adds a sharper kick. Pick what your family loves.
- Unsalted butter (3 tablespoons, softened) — Softened butter spreads more easily and gives that perfect golden crust. Salted butter works too—just skip any extra salt.
- Mustard (1 tablespoon, optional) — Yellow mustard or Dijon adds a tangy kick. Totally optional, but I love it. The kids might prefer theirs plain.
- Mayonnaise (1 tablespoon, optional) — A thin spread adds moisture and richness. Some folks swear by it. I say try both ways and see what you like.
Ingredient Selection Tip: For the best texture, choose bread that’s soft but sturdy enough to roll. Thin-sliced bread can tear, so stick with regular slices. If you’re using whole wheat, look for softer brands—some dense whole wheat breads crack when rolled.
Substitution Guidance: Use gluten-free bread for a gluten-free option (just warm it slightly before rolling to prevent cracking). Turkey or chicken work great instead of ham. Dairy-free cheese melts differently but still works—just cook a minute or two longer.
Equipment Needed
You don’t need much for these roll-ups, which is part of their charm. Here’s what you’ll want to have handy:
- Rolling pin — To flatten the bread slices evenly. No rolling pin? A clean wine bottle or even your hands work in a pinch.
- Sharp knife — For trimming crusts and slicing the finished roll-ups. A serrated bread knife works best for clean cuts.
- Non-stick skillet or griddle — A 10-inch skillet works perfectly. Cast iron gives an amazing crust, but non-stick is easier for beginners.
- Spatula — For flipping the roll-ups without losing their shape. A thin metal spatula is my favorite.
- Cutting board — For rolling and slicing. Any clean surface works.
- Pastry brush (optional) — For brushing melted butter onto the bread. A paper towel works too, honestly.
I’ve made these with everything from a fancy cast iron skillet to a beat-up non-stick pan from college, and they turn out great either way. Don’t stress about having the perfect equipment—your regular kitchen tools will do just fine.
Preparation Method

Let me walk you through this step by step. I’ve included all the little tricks I’ve picked up along the way, so you get perfect roll-ups every time.
- Flatten the bread slices. Take each slice of bread and use a rolling pin to flatten it gently. You want it about half its original thickness—thin enough to roll easily, but not so thin it tears. (I forgot to do this the first time, and let me tell you, un-flattened bread cracks like crazy when you try to roll it. Learn from my mistake.)
- Trim the crusts. Using a sharp knife, cut off the crusts from all four sides of each bread slice. Save the crusts for breadcrumbs or croutons—don’t throw them away! (My kids actually eat the crusts as a snack while I’m making these, so nothing goes to waste.)
- Spread your condiments. If you’re using mustard or mayonnaise, spread a thin, even layer on one side of each flattened bread slice. Don’t overdo it—too much moisture will make the bread soggy. A thin swipe is all you need.
- Layer the ham and cheese. Place one slice of ham on each bread slice, followed by one slice of cheese. Make sure the cheese covers most of the ham. If your cheese slice is bigger than the bread, just fold it to fit.
- Roll them up tightly. Starting from one edge, roll each bread slice as tightly as you can without squeezing the filling out the sides. Think of it like rolling a sleeping bag—firm but gentle. The seam should be on the bottom when you’re done.
- Melt the butter. Place your skillet over medium heat and add about 1 tablespoon of butter. Let it melt and foam slightly, but don’t let it brown. Swirl the pan to coat the bottom evenly.
- Cook the roll-ups. Place the roll-ups seam-side down in the skillet. Cook for 2-3 minutes, until the bottom is golden brown and crispy. Use your spatula to carefully flip each one. Cook for another 2-3 minutes on the second side.
- Check for doneness. The roll-ups are ready when both sides are golden brown and the cheese is melted and bubbly. If you see cheese starting to ooze out, that’s perfect—that crispy cheese edge is the best part.
- Let them rest. Transfer the cooked roll-ups to a cutting board and let them rest for 1-2 minutes. This helps the cheese set slightly so it doesn’t all ooze out when you cut them.
- Slice and serve. Using a sharp knife, slice each roll-up into 3-4 even pieces. You’ll see those beautiful spiral layers—ham, cheese, bread, all wrapped together. Serve warm or at room temperature.
Sensory Cue: When the roll-ups are ready, you’ll hear a satisfying sizzle in the pan, and the kitchen will smell like buttery toast and melted cheese. The bread should be deep golden brown, not pale. If it’s browning too fast, turn the heat down—slow and steady wins this race.
Time Estimate: Prep takes about 5 minutes, cooking takes about 6-8 minutes total. You can have a batch of 8 roll-ups ready in under 15 minutes. That’s faster than a drive-through run.
Cooking Tips & Techniques
After making these about fifty times (I’m not exaggerating), I’ve picked up a few tricks that make a real difference. Here’s what I wish someone had told me from the start.
Don’t skip flattening the bread. I know it seems like an extra step, but it’s the difference between a roll-up that holds together and one that cracks apart. Flattened bread rolls smoothly and evenly, and it also cooks more uniformly. I forgot this once when I was in a hurry, and three out of eight roll-ups fell apart in the pan. Never again.
Room temperature butter is your friend. Cold butter tears the bread. Melted butter makes everything soggy. Softened butter spreads like a dream and gives you that perfect golden crust. Leave your butter out for 15-20 minutes before starting, or microwave it for 5-7 seconds if you’re in a rush.
Medium heat is the sweet spot. I’ve burned these on high heat (impatient morning me) and ended up with pale, sad roll-ups on low heat. Medium heat gives you that beautiful golden color in just the right amount of time for the cheese to melt completely. Trust the medium heat.
Let them rest before cutting. This was a hard lesson for me. I was so excited to eat them that I’d slice right away, and the cheese would just pour out everywhere. Waiting 60-90 seconds lets the cheese set just enough that it stays inside the roll-ups where it belongs. Patience pays off.
Multitask like a pro. While the first batch is cooking, prep the next batch. Flatten the bread, trim the crusts, layer the fillings. By the time the first batch is done, you’ll have the second batch ready to go. This cuts your total time in half.
Variations & Adaptations
One of the best things about these roll-ups is how adaptable they are. Here are some variations I’ve tried and loved.
Breakfast Roll-Ups: Swap the ham for cooked breakfast sausage or bacon, and use cheddar cheese. Add a thin layer of scrambled egg if you’re feeling fancy. These are amazing for weekend brunch or make-ahead breakfasts.
Veggie Roll-Ups: Skip the ham and use roasted red peppers, spinach, and provolone cheese. Spread a thin layer of pesto instead of mustard for extra flavor. My vegetarian friends go crazy for these.
Spicy Roll-Ups: Use pepper jack cheese and add a thin smear of sriracha or chipotle mayo. The heat cuts through the richness beautifully. My husband requests these every time.
Gluten-Free Version: Use your favorite gluten-free bread. The key is to warm the bread slightly (10 seconds in the microwave) before rolling—gluten-free bread tends to be more brittle and needs that extra flexibility. Cook as directed.
Air Fryer Method: Brush the roll-ups with melted butter and place them in the air fryer basket at 350°F for 5-6 minutes, flipping halfway through. They come out extra crispy with less oil. I use this method when I’m making a big batch.
My personal favorite variation? I add a thin slice of apple inside with the ham and cheddar. The sweetness of the apple with the salty ham and melty cheese is absolutely incredible. My kids think I’m some kind of culinary genius, but really I just got bored one afternoon and tried something random. Sometimes the best recipes come from happy accidents.
Serving & Storage Suggestions
These roll-ups are versatile enough for any occasion. Here’s how to serve and store them for the best results.
Serving Temperature: These are delicious warm, right out of the pan, with the cheese still stretchy and the bread perfectly crispy. But they’re also fantastic at room temperature—which makes them ideal for lunchboxes, picnics, and road trips. Honestly, I eat them cold straight from the fridge sometimes and they’re still great.
Presentation Ideas: For lunchboxes, slice the roll-ups into pinwheels and arrange them in a container with some grapes, carrot sticks, or apple slices. For parties, arrange them on a platter with toothpicks stuck through each piece. For a casual dinner, serve them alongside a simple tomato soup or a crisp green salad.
Complementary Dishes: These pair beautifully with tomato soup, vegetable soup, or a simple side salad. For breakfast, serve with fresh fruit and yogurt. For a snack, they’re perfect on their own with a cold glass of milk.
Storage Instructions: Store leftover roll-ups in an airtight container in the refrigerator for up to 3 days. Layer them with parchment paper to prevent sticking. They actually get better after a day in the fridge—the flavors meld together beautifully.
Freezer Instructions: You can freeze uncooked roll-ups for up to 2 months. Assemble them, place them on a baking sheet in the freezer until solid, then transfer to a freezer bag. Cook from frozen—just add 2-3 minutes to the cooking time. This is my secret weapon for busy mornings.
Reheating Methods: Microwave for 20-30 seconds if you’re in a hurry. For crispier results, reheat in a skillet over medium heat for 1-2 minutes per side, or pop them in the air fryer at 350°F for 3 minutes. The oven works too—350°F for 5-7 minutes.
Nutritional Information & Benefits
These roll-ups are a balanced option for lunch or snacks, with protein from the ham and cheese and carbohydrates from the bread. Here’s what you need to know.
Estimated Nutritional Values (per roll-up, using white bread, ham, and Swiss cheese):
- Calories: 180-220
- Protein: 12-15g
- Carbohydrates: 18-22g
- Fat: 8-10g
- Fiber: 1-2g
- Sodium: 500-600mg
Health Benefits: Ham provides high-quality protein for sustained energy. Cheese offers calcium for strong bones and teeth. Using whole wheat bread adds fiber and B vitamins. You can easily boost the nutrition by adding spinach, tomato slices, or avocado to the roll-ups.
Dietary Considerations: For a lower-sodium option, use low-sodium ham and cheese. For reduced fat, use low-fat cheese and trim visible fat from the ham. For gluten-free needs, use gluten-free bread as mentioned above. These roll-ups are naturally egg-free and nut-free, making them school-friendly.
Potential Allergens: Contains wheat/gluten (bread), dairy (butter, cheese), and may contain mustard. Always check your ingredient labels if cooking for someone with allergies.
From a wellness perspective, I love that these roll-ups give you control over what’s going into your family’s lunch. No preservatives, no mystery ingredients—just real food that tastes great.
Conclusion
These easy ham and cheese school sandwich roll-ups have become a staple in my kitchen for good reason. They’re quick, they’re simple, and they make everyone happy—from the pickiest kindergartner to the hungriest teenager to the grown-up who just needs a moment of comfort food after a long day.
I love that this recipe lets you be creative. Change the fillings, switch up the bread, add your favorite spreads. Make it your own. That’s the beauty of cooking—you take something simple and make it yours. My neighbor probably has no idea that her casual Tuesday afternoon lunch prep turned into one of my most-made recipes, but I think about that day every time I roll up a batch.
So go ahead—give these a try. I promise you’ll be amazed at how something so simple can feel so special. And when your family asks for them again and again (which they will), you’ll know exactly what to do.
I’d love to hear how yours turn out! Drop a comment below and let me know what variations you tried, or share a photo of your roll-ups. Happy cooking, friend!
Frequently Asked Questions
Can I make these ham and cheese roll-ups ahead of time?
Absolutely! You can assemble them up to 24 hours in advance and keep them covered in the refrigerator. Cook them just before serving for the best texture. You can also freeze them uncooked for up to 2 months—just cook from frozen, adding a few extra minutes.
What’s the best bread to use for roll-ups?
Soft, fresh white bread or whole wheat sandwich bread works best. Avoid thin-sliced bread (it tears easily) and dense artisan bread (it cracks when rolled). Day-old bread is actually ideal because it’s slightly drier and rolls more easily without tearing.
Why are my roll-ups falling apart in the pan?
This usually happens for one of three reasons: the bread wasn’t flattened enough, the roll-ups weren’t rolled tightly enough, or the heat was too high. Make sure to flatten the bread to half its original thickness, roll firmly with the seam on the bottom, and cook over medium heat—not high.
Can I use different types of cheese?
Definitely! Swiss, provolone, cheddar, mozzarella, gouda, and pepper jack all work beautifully. Just avoid very soft cheeses like brie or very dry cheeses like aged parmesan, which won’t melt as well. Hard cheeses like cheddar should be thinly sliced for even melting.
How do I keep the roll-ups from getting soggy in lunchboxes?
Let the roll-ups cool completely before packing them. Wrap them in parchment paper or a paper towel to absorb any excess moisture. If using condiments like mustard or mayo, use a very thin layer. Pack them in a container with a tight seal, and they’ll stay perfect for hours.
Pin This Recipe!
Easy Ham and Cheese School Sandwich Roll-Ups

Quick and easy ham and cheese roll-ups made with simple ingredients, perfect for school lunches, snacks, or casual get-togethers. These golden, buttery spirals are crispy on the outside and melty on the inside.
- Prep Time: 5 minutes
- Cook Time: 8 minutes
- Total Time: 13 minutes
- Yield: 8 roll-ups 1x
- Category: Lunch
- Cuisine: American
Ingredients
- 8 slices bread (white or whole wheat)
- 8 slices deli ham
- 8 slices cheese (Swiss, provolone, or cheddar)
- 3 tablespoons unsalted butter, softened
- 1 tablespoon mustard (optional)
- 1 tablespoon mayonnaise (optional)
Instructions
- Flatten each bread slice with a rolling pin to about half its original thickness.
- Trim the crusts from all four sides of each bread slice.
- If using, spread a thin layer of mustard or mayonnaise on one side of each flattened bread slice.
- Place one slice of ham on each bread slice, followed by one slice of cheese.
- Roll each bread slice tightly from one edge, keeping the seam on the bottom.
- Melt 1 tablespoon of butter in a non-stick skillet over medium heat.
- Place the roll-ups seam-side down in the skillet and cook for 2-3 minutes until golden brown.
- Flip carefully and cook for another 2-3 minutes until the second side is golden and the cheese is melted.
- Transfer to a cutting board and let rest for 1-2 minutes.
- Slice each roll-up into 3-4 even pieces and serve warm or at room temperature.
Notes
Flattening the bread is crucial to prevent cracking. Use room temperature butter for easy spreading. Medium heat is ideal for even browning and melting. Let roll-ups rest before cutting to keep cheese inside. For gluten-free, use gluten-free bread and warm slightly before rolling. For variations, try breakfast roll-ups with sausage and egg, veggie roll-ups with roasted peppers and spinach, or spicy roll-ups with pepper jack and sriracha. Store in an airtight container in the refrigerator for up to 3 days. Freeze uncooked roll-ups for up to 2 months.
Nutrition
- Serving Size: 1 roll-up
- Calories: 200
- Sugar: 2
- Sodium: 550
- Fat: 9
- Saturated Fat: 5
- Carbohydrates: 20
- Fiber: 1
- Protein: 13
Keywords: ham and cheese roll-ups, school lunch, easy sandwich, kid-friendly, quick snack, lunchbox idea



