Love this? Save it for later!
Share the inspiration with your friends
This was supposed to be a batch of regular pancakes. You know, the kind you stand over the stove flipping, one by one, while the first ones get cold and the last ones burn because you answered a text. I had the batter ready, the griddle heating up, and then my toddler decided that 7:00 AM was the perfect time to dump an entire box of Cheerios onto the kitchen floor. By the time I cleaned up the mess, the griddle was smoking, I was flustered, and the batter had been sitting out way too long.
Honestly, I almost just threw it all away. But I had a brand new mini muffin tin sitting in the cupboard—bought it on a whim months ago and never used it. On a desperate whim, I greased the tin, poured the batter into the little cups, and tossed it in the oven. I figured, at worst, I’d have weird pancake pucks the dog wouldn’t even eat. What came out were these perfect, fluffy, golden little bites that my kids devoured before they even cooled down.
I stood there in my messy kitchen, holding a warm mini pancake muffin, and had one of those quiet moments where you realize you accidentally stumbled onto something brilliant. No standing at the stove. No flipping. No unevenly cooked stacks. Just perfectly portioned, grab-and-go pancake perfection. Maybe you’ve been there—that moment when a kitchen disaster turns into a total win. That morning, these mini pancake muffins saved breakfast. And now, they’re the reason I actually look forward to packing lunchboxes.
Why You’ll Love This Recipe
Let me tell you why these mini pancake muffins have become a non-negotiable in my weekly meal prep. I’ve tested this recipe at least a dozen times, tweaking the flour ratio, the baking time, and the mix-in amounts until everything was just right. What I landed on is a recipe that works every single time, no matter how chaotic your morning gets.
- Quick & Easy: From mixing bowl to cooling rack in under 25 minutes. No standing over a hot stove, no flipping, no fuss. Just pour, bake, and done.
- Simple Ingredients: You probably have everything in your pantry right now. Flour, eggs, milk, baking powder, a little sugar, and butter. That’s it. No fancy trips to specialty stores.
- Perfect for Lunchboxes: These little guys are the ultimate lunchbox win. They’re portable, not messy, and kids actually eat them cold or at room temperature. No more sad, uneaten sandwiches coming home.
- Crowd-Pleaser: I’ve brought these to playdates, school events, and even a brunch potluck. Adults grab them just as fast as kids do. They’re universally loved.
- Unbelievably Delicious: The texture is what gets me every time. They’re soft and fluffy on the inside with a slightly golden, tender edge. Dip them in maple syrup or eat them plain—either way, they’re comfort food in bite-sized form.
What makes this recipe different from every other pancake muffin out there is the technique. I use a slightly thicker batter than regular pancakes, which gives the muffins structure without making them dense. And I bake them at a specific temperature that creates that signature golden top while keeping the inside perfectly moist. It’s not just another version of a pancake muffin—it’s the best version, born from a morning that went completely wrong.
What Ingredients You Will Need
This recipe uses simple, everyday ingredients to create something that feels surprisingly special. Most of these are pantry staples, which is exactly what you want in a make-ahead recipe that you’ll be making on repeat.
- All-purpose flour – 1 ½ cups (180g). Provides the structure for the muffins. I’ve tested this with whole wheat flour too, and it works, but the texture is slightly denser. For the fluffiest results, stick with all-purpose.
- Granulated sugar – 3 tablespoons (36g). Just enough sweetness to make them taste like pancakes, not plain muffins. You can reduce it to 2 tablespoons if you prefer a less sweet version.
- Baking powder – 2 teaspoons. This is what gives the muffins their rise. Make sure your baking powder is fresh—if it’s been sitting in your cabinet for over a year, it might be flat.
- Baking soda – ½ teaspoon. Works with the buttermilk to create that tender, fluffy texture.
- Salt – ¼ teaspoon. Balances the sweetness and enhances the overall flavor. Don’t skip it, even if you’re using salted butter.
- Buttermilk – 1 cup (240ml). This is the secret ingredient. Buttermilk makes the muffins incredibly tender and gives them that classic pancake tang. If you don’t have buttermilk, you can make a quick substitute by adding 1 tablespoon of lemon juice or white vinegar to regular milk and letting it sit for 5 minutes.
- Large egg – 1, at room temperature. Helps bind everything together and adds richness. If you forget to take it out of the fridge, place it in a bowl of warm water for 5 minutes.
- Unsalted butter – 3 tablespoons (42g), melted and slightly cooled. Adds moisture and flavor. I use unsalted so I can control the salt level, but salted butter works if you reduce the added salt to a pinch.
- Vanilla extract – 1 teaspoon. A little vanilla goes a long way in making these taste bakery-quality. I recommend pure vanilla extract, not imitation, for the best flavor.
- Mix-ins of your choice – ½ cup total. Mini chocolate chips, blueberries, diced strawberries, or sprinkles all work beautifully. If you’re using frozen berries, don’t thaw them first—add them straight to the batter to prevent them from bleeding color.
One thing I’ve learned from making these so many times is that the mix-ins really define the muffin. My kids go crazy for mini chocolate chips, but my personal favorite is fresh blueberries with a tiny sprinkle of lemon zest on top. It makes them feel a little more grown-up.
Equipment Needed
You don’t need a lot of fancy equipment for this recipe, which is part of why I love it so much. Here’s what you’ll need to pull these together:
- Mini muffin tin – A standard 24-cup mini muffin tin is ideal. If you only have a 12-cup tin, you’ll need to bake in batches. I use a non-stick tin, which makes cleanup a breeze.
- Mixing bowls – One medium bowl for dry ingredients and one large bowl for wet ingredients. Nothing fancy needed.
- Whisk – For combining everything smoothly. A fork works in a pinch, but a whisk gives you a lump-free batter faster.
- Measuring cups and spoons – Accurate measurements matter in baking, even for something this simple. Use dry measuring cups for flour and sugar, and a liquid measuring cup for the buttermilk.
- Rubber spatula – For folding in the mix-ins and scraping every last bit of batter into the muffin cups.
- Cookie scoop or small spoon – A 1-tablespoon cookie scoop makes filling the muffin cups quick and mess-free. If you don’t have one, a small spoon works fine.
- Cooling rack – Lets the muffins cool evenly so they don’t get soggy on the bottom.
If you don’t own a mini muffin tin, I honestly think it’s worth picking one up. They’re usually under $15 and open up a whole world of mini baked goods. But if you’re not ready to commit, you can make these in a regular 12-cup muffin tin—just increase the baking time to about 12-15 minutes.
Preparation Method
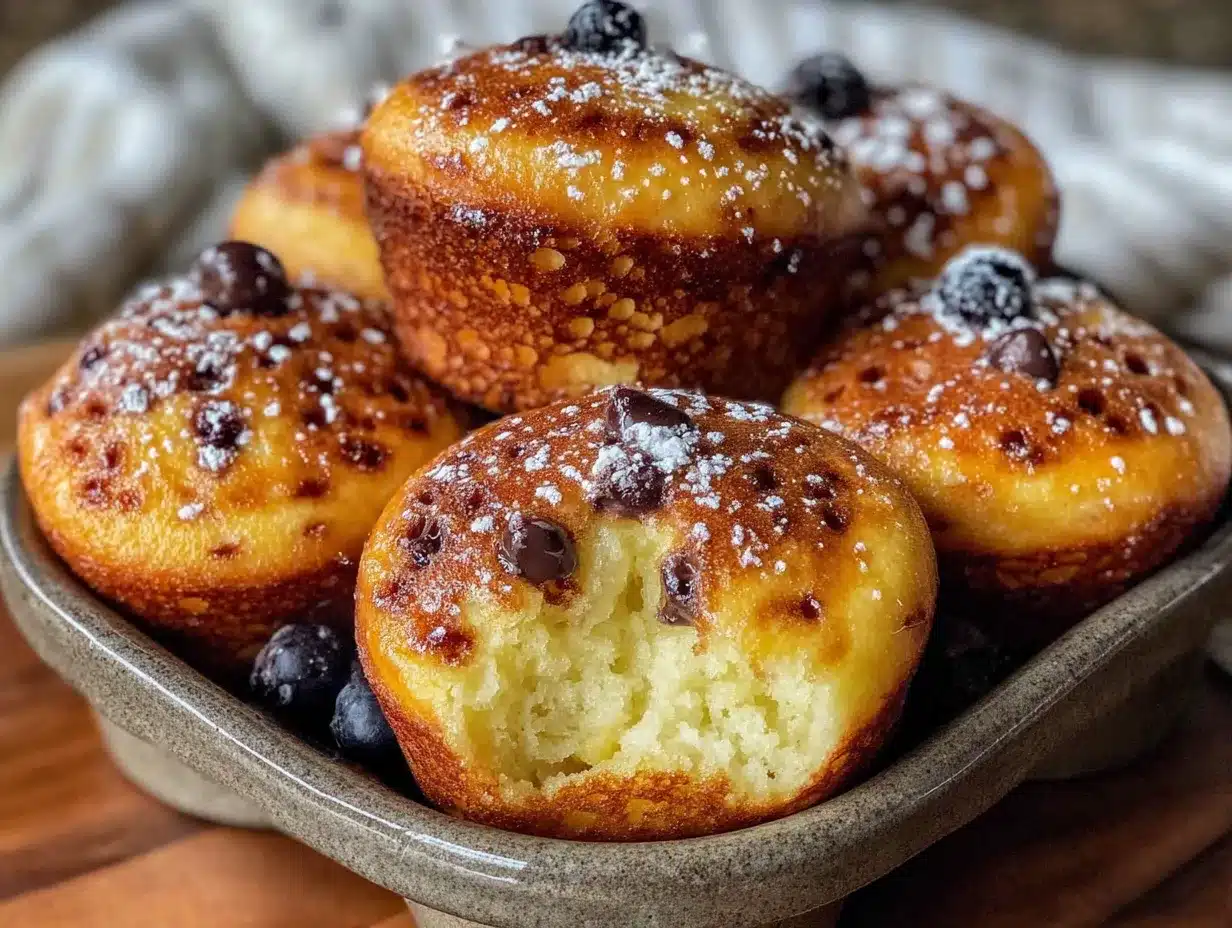
Alright, let’s get to the fun part. I’ve broken this down step by step so you can follow along without any hiccups. Trust me, if I can pull this off while refereeing a toddler meltdown, you’ve got this.
- Preheat your oven to 375°F (190°C). Give it a full 15 minutes to come to temperature. While it’s heating, generously grease your mini muffin tin with butter or non-stick spray. I like to use a pastry brush to make sure every nook and cranny is coated—nothing worse than muffins that stick.
- Mix the dry ingredients. In a medium bowl, whisk together the all-purpose flour, granulated sugar, baking powder, baking soda, and salt. Give it a good 30 seconds of whisking to make sure the baking powder and soda are evenly distributed. This step matters more than you think—nobody wants a pocket of baking powder in their muffin.
- Combine the wet ingredients. In a large bowl, whisk together the buttermilk, egg, melted butter, and vanilla extract. Whisk until the egg is fully incorporated and everything looks smooth and pale yellow. Don’t worry if the butter solidifies a little when it hits the cold buttermilk—it’ll all come together in the oven.
- Make the batter. Pour the dry ingredients into the wet ingredients. Stir gently with a rubber spatula until just combined. A few lumps are totally fine—overmixing will make the muffins tough. The batter should be thick but scoopable, thicker than regular pancake batter but thinner than muffin batter.
- Fold in the mix-ins. Gently fold in your chosen mix-ins using just a few strokes. If you’re using chocolate chips, save a handful to sprinkle on top of the muffins before baking—it makes them look prettier and gives each muffin a little chocolate crown.
- Fill the muffin cups. Using a 1-tablespoon cookie scoop or a small spoon, fill each mini muffin cup almost to the top. The batter will rise slightly but won’t overflow if you fill them about ¾ full. I usually get exactly 24 mini muffins from this recipe.
- Bake. Place the muffin tin on the middle rack and bake for 8-10 minutes. At the 8-minute mark, start checking them. They’re done when the tops are golden brown and a toothpick inserted into the center comes out clean or with just a few moist crumbs. The edges should be pulling away from the sides of the pan slightly.
- Cool in the pan. Let the muffins cool in the tin for 2 minutes. This is crucial—they need that short rest to set properly. After 2 minutes, transfer them to a cooling rack. If any stick, gently run a butter knife around the edge to loosen them.
- Repeat if needed. If you only have one mini muffin tin, let it cool completely before greasing and filling it again for the next batch. A hot pan will cause the batter to spread and cook unevenly.
One thing I always do is taste-test the first batch while it’s still warm. It’s not just about quality control—it’s the best part of making these. The way the chocolate chips are still slightly melty, the soft texture, the little crunch on the edge. Honestly, it’s dangerous how good they are straight out of the oven.
Cooking Tips & Techniques
After making these mini pancake muffins more times than I can count, I’ve picked up a few tricks that make the process smoother and the results more consistent. Here are the ones I swear by:
Don’t overmix the batter. This is the number one mistake I see people make. Stir until the flour is just incorporated—lumps are your friend. Overmixing develops the gluten and gives you dense, rubbery muffins instead of light, fluffy ones. I learned this the hard way when I made a batch that could have doubled as hockey pucks.
Use a cookie scoop for even portions. A 1-tablespoon cookie scoop is my favorite tool for this recipe. It ensures every muffin is the same size, which means they all bake evenly. No more tiny burnt ones next to undercooked ones. If you don’t have a scoop, use two spoons—one to scoop and one to push the batter into the cup.
Let the batter rest for 5 minutes. This is a trick I picked up from a professional baker friend. After you mix the batter, let it sit on the counter for 5 minutes before scooping. This allows the gluten to relax and the baking powder to start working, which gives you taller, fluffier muffins. It’s a small step that makes a real difference.
Grease the pan generously. Mini muffin tins are notorious for sticking. I use a combination of butter and a light dusting of flour, or a baking spray that contains flour. Even non-stick pans need a good coating. I learned this after spending 20 minutes chiseling a batch of muffins out of the tin with a butter knife.
Check your oven temperature. Ovens run hot or cold more often than you’d think. I use an inexpensive oven thermometer to make sure my oven is actually at 375°F. If your muffins are browning too quickly on top but still raw in the middle, your oven is running hot. If they’re pale after 10 minutes, it’s running cool.
Variations & Adaptations
One of the best things about this recipe is how easily it adapts to different tastes, diets, and occasions. Here are some of my favorite variations that I’ve tested and loved:
Gluten-Free Version: Substitute the all-purpose flour with a 1:1 gluten-free baking flour blend. I’ve had great results with King Arthur Measure for Measure and Bob’s Red Mill. The texture is slightly more delicate, so handle them gently when removing from the pan. Add an extra tablespoon of buttermilk if the batter seems too thick.
Dairy-Free Version: Use a plant-based milk like oat or almond milk mixed with 1 tablespoon of lemon juice to mimic buttermilk. Substitute the melted butter with coconut oil or a dairy-free butter alternative. The flavor changes slightly, but the texture stays remarkably similar.
Savory Pancake Muffins: This is my secret adult-only variation. Reduce the sugar to 1 tablespoon, omit the vanilla, and add ½ cup of shredded cheddar cheese, 2 tablespoons of chopped chives, and ¼ cup of cooked crumbled bacon. Bake as directed. These are incredible for brunch or as a quick savory snack.
Seasonal Berry Blast: In the summer, I use fresh blueberries or diced strawberries. In the fall, I swap in finely diced apples with a sprinkle of cinnamon. In winter, dried cranberries and a touch of orange zest are my go-to. Each season brings a new flavor profile that keeps the recipe feeling fresh.
Protein-Packed Version: Add 2 tablespoons of vanilla or unflavored protein powder to the dry ingredients. You’ll need to add an extra 2-3 tablespoons of buttermilk to compensate for the extra dry ingredient. This version is slightly less fluffy but much more filling—perfect for hungry teenagers or post-workout snacks.
Serving & Storage Suggestions
These mini pancake muffins are incredibly versatile when it comes to serving and storing. Here’s everything I’ve learned about getting the most out of them:
Serving Temperature: They’re delicious warm, at room temperature, or even straight from the fridge. For lunchboxes, I pack them cold or at room temperature—they soften slightly by lunchtime and taste just like mini pancakes. If you want to serve them warm, pop them in the microwave for 10 seconds or in a 300°F oven for 3-4 minutes.
Presentation Ideas: For a brunch spread, arrange them on a platter with small bowls of maple syrup, honey, and whipped cream for dipping. For kids’ parties, I stick a festive toothpick in each one and serve them on a tiered tray. They look adorable and are easy for little hands to grab.
Storage Instructions: Store in an airtight container at room temperature for up to 2 days, or in the refrigerator for up to 5 days. Layer them between sheets of parchment paper to prevent sticking. I use a glass container with a tight-fitting lid, and they stay perfectly fresh.
Freezing for Later: These freeze like a dream. Arrange the cooled muffins in a single layer on a baking sheet and freeze for 1 hour. Transfer to a freezer-safe bag or container, removing as much air as possible. They’ll keep for up to 3 months. To thaw, leave them at room temperature for 30 minutes, or microwave for 15-20 seconds.
Reheating Tips: For the best texture, reheat in a toaster oven or air fryer at 350°F for 3-4 minutes. The outside gets slightly crisp while the inside stays soft. The microwave works in a pinch, but the texture becomes a bit chewy. If you’re packing them for lunch, don’t reheat them at all—they’re perfect as-is.
One thing I’ve noticed is that the flavors actually meld together after a day in the fridge. The chocolate chip version tastes even better on day two, with the chocolate flavor spreading evenly throughout each muffin. It’s like they get a chance to settle into themselves.
Nutritional Information & Benefits
I’m not a nutritionist, but I’ve calculated the approximate nutritional values for these mini pancake muffins based on the standard recipe with mini chocolate chips. Here’s what you can expect per muffin (based on 24 muffins):
| Nutrient | Amount per Muffin |
|---|---|
| Calories | 85 |
| Total Fat | 3.5g |
| Saturated Fat | 2g |
| Carbohydrates | 12g |
| Fiber | 0.5g |
| Protein | 2g |
| Sugar | 5g |
| Sodium | 95mg |
The buttermilk in this recipe provides calcium and probiotics, which are great for bone health and digestion. Eggs add high-quality protein and essential vitamins like B12 and D. If you use whole wheat flour, you’ll get an extra boost of fiber and nutrients like iron and magnesium.
For dietary considerations, these muffins can easily be made gluten-free or dairy-free using the substitutions I mentioned earlier. They’re naturally nut-free, which makes them a safe option for school lunchboxes with allergy restrictions. If you’re watching sugar intake, you can reduce the sugar to 2 tablespoons without sacrificing texture—just add a little extra vanilla for sweetness.
I personally love that these muffins give me a way to sneak a little protein and calcium into my kids’ lunchboxes without them even noticing. They think they’re getting a treat, and I know they’re getting something that’s not totally empty calories. It’s a win-win in my book.
Conclusion
These easy make-ahead mini pancake muffins have genuinely changed the way I approach weekday mornings and lunchbox packing. What started as a kitchen disaster—a forgotten griddle, a distracted mom, and batter that was going to waste—turned into one of the most reliable recipes in my rotation. They’re quick, they’re forgiving, and they make everyone happy.
I love that this recipe is a blank canvas. You can make them sweet or savory, seasonal or classic, indulgent or protein-packed. They adapt to whatever you have in your fridge and whatever your family craves. And honestly, knowing I have a batch of these in the freezer feels like having a secret weapon against busy mornings.
I’d love to hear how these turn out for you. Did you try a variation I haven’t thought of? Did your kids gobble them up? Drop a comment below and let me know—I read every single one and I’m always looking for new ideas to try. And if you loved this recipe, share it with a friend who’s tired of the lunchbox struggle. Trust me, they’ll thank you.
Happy baking, friends. Your mornings just got a whole lot easier.
Frequently Asked Questions
Can I use regular milk instead of buttermilk?
Yes, you can. Make a quick buttermilk substitute by adding 1 tablespoon of lemon juice or white vinegar to 1 cup of regular milk. Let it sit for 5 minutes before using. The acid helps activate the baking soda and keeps the muffins tender.
How do I keep the muffins from sticking to the pan?
Grease the pan generously with butter or a baking spray that contains flour. Let the muffins cool in the pan for exactly 2 minutes before removing them. If they still stick, gently run a butter knife around the edge of each muffin to loosen it.
Can I make these ahead and freeze them?
Absolutely. Freeze them in a single layer on a baking sheet, then transfer to a freezer bag. They’ll keep for up to 3 months. Thaw at room temperature or microwave for 15-20 seconds. They’re perfect for grab-and-go breakfasts or lunchboxes.
What mix-ins work best for this recipe?
Mini chocolate chips, fresh or frozen blueberries, diced strawberries, and sprinkles are all excellent choices. For savory versions, try shredded cheddar, cooked bacon, and chives. Stick to about ½ cup total of mix-ins to keep the batter balanced.
Why did my muffins turn out dense and flat?
This usually happens from overmixing the batter or using old baking powder. Mix just until the flour is incorporated—lumps are fine. Check that your baking powder is less than a year old and store it in a cool, dry place. Also, make sure your oven is fully preheated before baking.
Pin This Recipe!
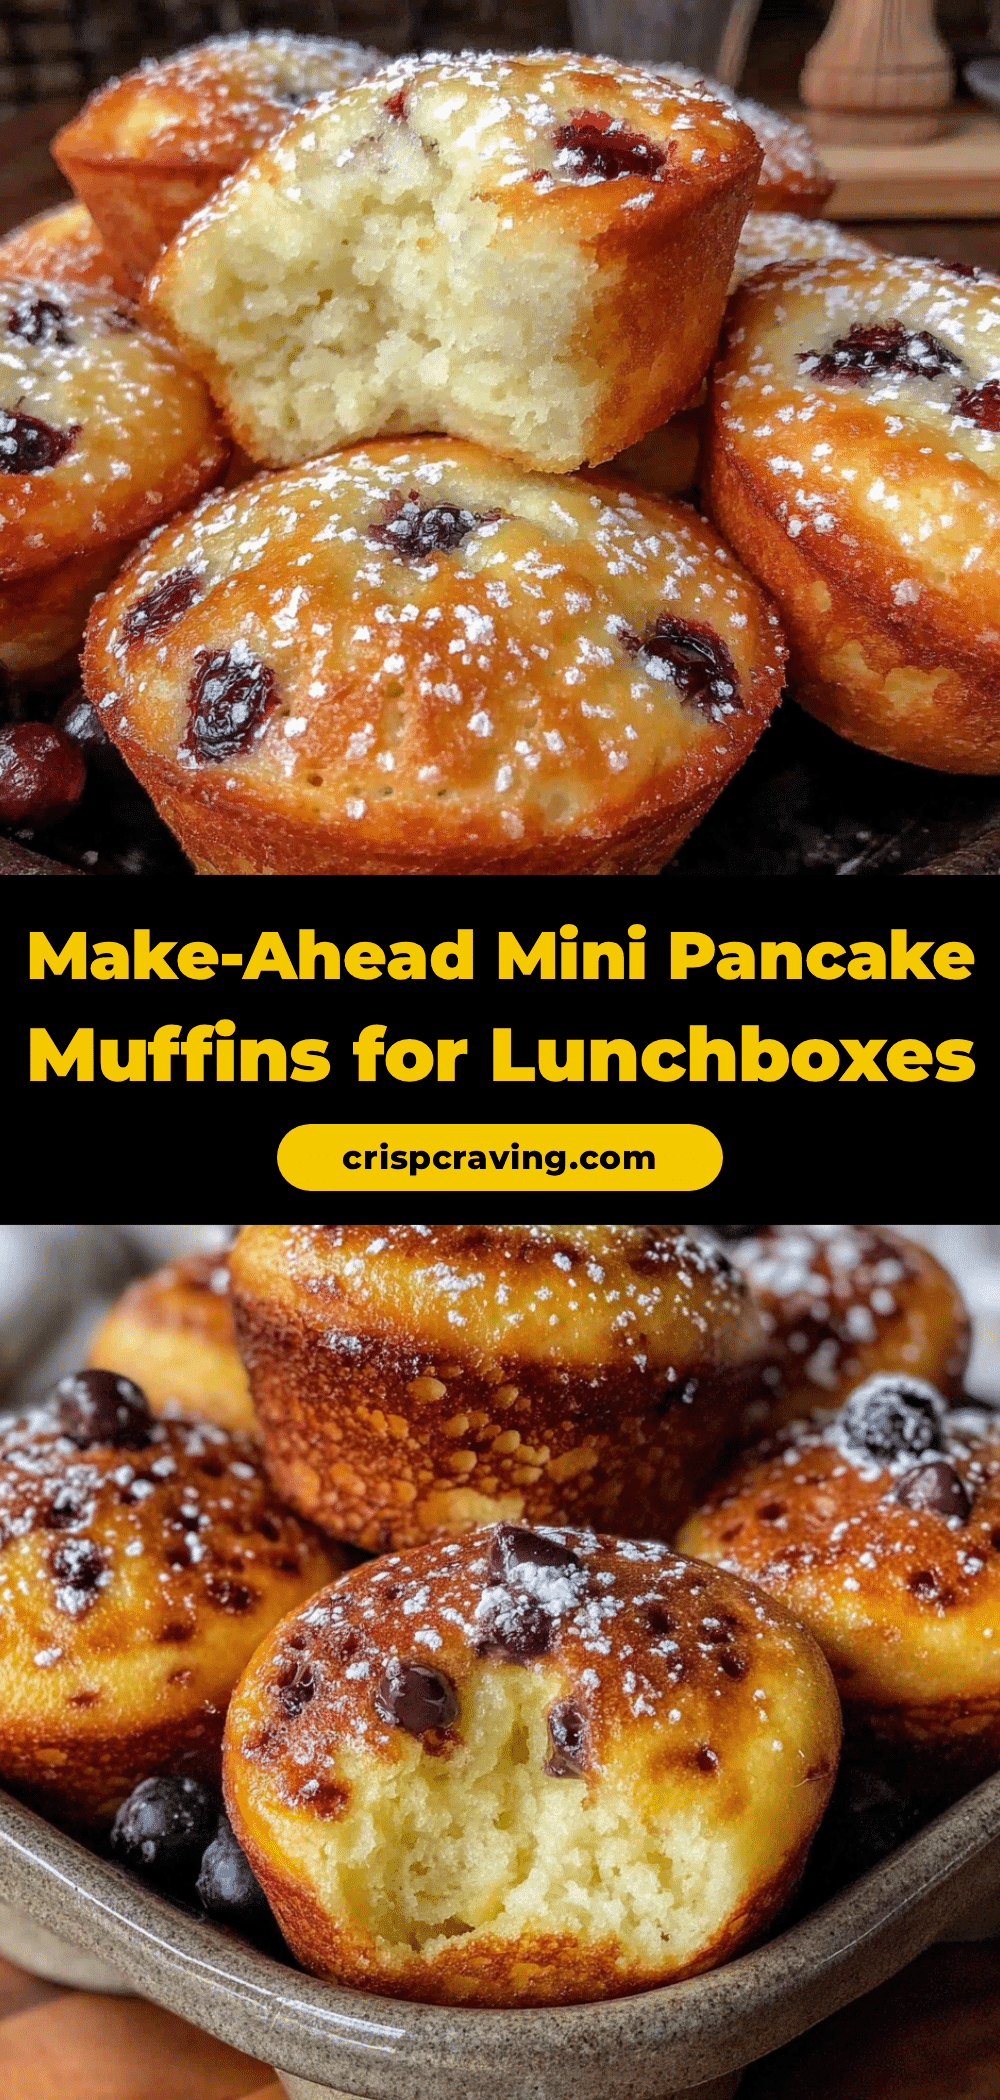
Easy Make-Ahead Mini Pancake Muffins for Lunchboxes

These mini pancake muffins are fluffy, golden, and perfect for lunchboxes or grab-and-go breakfasts. Made with simple pantry ingredients, they bake in under 25 minutes and are endlessly customizable with your favorite mix-ins.
- Prep Time: 10 minutes
- Cook Time: 10 minutes
- Total Time: 20 minutes
- Yield: 24 mini muffins 1x
- Category: Breakfast
- Cuisine: American
Ingredients
- 1 ½ cups (180g) all-purpose flour
- 3 tablespoons (36g) granulated sugar
- 2 teaspoons baking powder
- ½ teaspoon baking soda
- ¼ teaspoon salt
- 1 cup (240ml) buttermilk
- 1 large egg, at room temperature
- 3 tablespoons (42g) unsalted butter, melted and slightly cooled
- 1 teaspoon vanilla extract
- ½ cup mix-ins of your choice (mini chocolate chips, blueberries, diced strawberries, or sprinkles)
Instructions
- Preheat your oven to 375°F (190°C). Generously grease a 24-cup mini muffin tin with butter or non-stick spray.
- In a medium bowl, whisk together the all-purpose flour, granulated sugar, baking powder, baking soda, and salt.
- In a large bowl, whisk together the buttermilk, egg, melted butter, and vanilla extract until smooth.
- Pour the dry ingredients into the wet ingredients. Stir gently with a rubber spatula until just combined (a few lumps are fine).
- Gently fold in your chosen mix-ins.
- Using a 1-tablespoon cookie scoop or small spoon, fill each mini muffin cup about ¾ full.
- Bake for 8-10 minutes, until the tops are golden brown and a toothpick inserted into the center comes out clean.
- Let the muffins cool in the pan for 2 minutes, then transfer to a cooling rack.
- If baking in batches, let the pan cool completely before greasing and filling again.
Notes
Don’t overmix the batter; lumps are fine. Let the batter rest for 5 minutes before scooping for fluffier muffins. Grease the pan generously to prevent sticking. For best results, use fresh baking powder.
Nutrition
- Serving Size: 1 mini muffin
- Calories: 85
- Sugar: 5
- Sodium: 95
- Fat: 3.5
- Saturated Fat: 2
- Carbohydrates: 12
- Fiber: 0.5
- Protein: 2
Keywords: mini pancake muffins, lunchbox pancakes, make-ahead breakfast, easy pancake muffins, kid-friendly breakfast



