Love this? Save it for later!
Share the inspiration with your friends
Someone asked me last week why I always seem to have a batch of something sweet and crispy ready to go on game day. I laughed, because the truth is, it’s not always pretty. The summer I turned thirty, I decided to throw a big watch party for the championship game. I had grand plans—homemade dips, fancy sliders, the whole deal. And then, about two hours before everyone showed up, I realized I had forgotten to make dessert. I mean, completely blanked on it. I stood in my kitchen, staring at the pantry, feeling that familiar flutter of panic. That’s when my eyes landed on a box of cereal and a bag of marshmallows. Honestly, I almost went with plain old squares. But then I spotted the mini football helmet silicone mold I’d bought on a whim months ago and never used. It felt like a long shot, but I was out of time and options.
Let me tell you, the moment I popped those little helmets out of the mold, I knew I had stumbled onto something special. They looked ridiculously cute, and the best part? They took maybe fifteen minutes of actual work. My guests went crazy for them. People were grabbing two and three at a time, laughing at how fun they looked. I spent the rest of the night pretending I had planned it all along. But between us, it was pure, panicked luck. Now, years later, these Easy Mini Football Helmet Rice Krispie Treats have become my go-to for every game day gathering, potluck, and even school party. They’re the kind of recipe that makes you look like a hero without breaking a sweat. Maybe you’ve been there—needing a quick, crowd-pleasing dessert that doesn’t require a trip to the store or a culinary degree. These little helmets are your answer.
Why You’ll Love This Recipe
These aren’t just any rice krispie treats. They are tiny, adorable football helmets that bring a huge smile to everyone’s face. I’ve tested this recipe more times than I can count, tweaking the marshmallow-to-butter ratio to get that perfect, chewy-yet-crisp texture that holds its shape in the mold. Let me break down why this recipe is a total winner.
- Incredibly Quick & Easy: From start to finish, you’re looking at about 20 minutes of hands-on time. This is a lifesaver for busy weeknights or when you need a last-minute contribution to a party. No baking, no complicated steps.
- Simple, Pantry-Friendly Ingredients: You likely have everything you need in your kitchen right now. Rice cereal, marshmallows, butter, and a little vanilla extract. No fancy grocery store runs required.
- Perfect for Game Day & Parties: These mini helmets are the ultimate football-themed treat. They’re perfect for Super Bowl parties, tailgates, sports-themed birthdays, or even just a fun snack while watching the big game with family.
- Crowd-Pleasing Fun: Kids and adults alike can’t resist these. They’re bite-sized, cute, and taste exactly like the classic treat everyone loves. I’ve seen grown men get genuinely excited over a tiny marshmallow helmet.
- Unbelievably Delicious: The texture is spot-on. They are crispy, buttery, and perfectly sweet. The vanilla adds a warmth that makes them taste homemade, not just like a boxed mix. Honestly, they disappear faster than any other snack on the table.
What makes this recipe different from the rest is the technique. Most recipes just tell you to melt and mix, but I’ve learned that letting the marshmallow mixture cool for just a minute before pressing it into the mold prevents the treats from becoming rock hard. It’s a small step, but it makes all the difference. This isn’t just another version of a classic—it’s the best version for achieving that perfect, mold-friendly texture. It’s comfort food reimagined for fun, and it delivers the same soul-soothing satisfaction in a tiny, celebratory package.
What Ingredients You Will Need
This recipe uses simple, wholesome ingredients to deliver that classic, nostalgic flavor and the perfect crispy texture. These are all pantry staples you probably already have on hand, which makes this recipe even more appealing when the craving strikes.
- 6 cups crispy rice cereal (like Rice Krispies). I recommend using a fresh box for the best crunch. Stale cereal will result in less crispy treats.
- 4 tablespoons unsalted butter. Using unsalted butter lets you control the salt level. If you only have salted butter, just skip the extra pinch of salt later.
- 10 ounces mini marshmallows (about one standard bag). Mini marshmallows melt faster and more evenly than large ones, which is key for a smooth, gooey mixture.
- 1 teaspoon pure vanilla extract. This adds a lovely depth of flavor that makes them taste homemade. Imitation vanilla works in a pinch, but pure is better.
- Pinch of salt. Don’t skip this! A small pinch of salt balances the sweetness and makes the buttery flavor pop. It’s the secret to not having them taste like pure sugar.
- Non-stick cooking spray. This is essential for greasing your spatula and the molds. Without it, you’ll be fighting a sticky mess.
- Optional for decorating: 1/2 cup white chocolate melting wafers or white chocolate chips. You’ll use these to draw the football laces on the helmets. It’s a small touch that makes them look incredibly professional.
- Optional: Orange and brown gel food coloring. If you want to get fancy, you can tint some of the white chocolate to make team colors for the laces or stripes.
For the best results, I always use Kraft Jet-Puffed marshmallows. They have a consistent melt that I trust. If you’re looking for a gluten-free option, most crispy rice cereals are naturally gluten-free, but always double-check the label on your specific brand. In a pinch, you can substitute vegan butter and vegan marshmallows to make these dairy-free and plant-based. Just be aware that vegan marshmallows can behave a little differently and might need an extra minute of melting time.
Equipment Needed
You don’t need a professional kitchen to make these, but having the right tools makes the process much smoother. Here’s what you’ll need.
- Mini football helmet silicone mold. This is the star of the show. You can find these online or at craft stores. A standard 6-cavity mold works great, and you’ll probably want to make a few batches.
- Large pot or Dutch oven. You need a pot big enough to stir all the cereal into the marshmallow mixture without spilling everywhere. I use a 5-quart pot.
- Rubber spatula. A sturdy, heat-resistant silicone spatula is your best friend here. It won’t scratch your pot and it’s easy to scrape every last bit of the mixture out.
- Large microwave-safe bowl. If you prefer the microwave method, you’ll need a bowl that’s big enough to hold the marshmallows and cereal without overflowing when you stir.
- Piping bag or small zip-top bag. For decorating the laces with white chocolate. A small zip-top bag with the corner snipped off works perfectly and requires no special equipment.
- Measuring cups and spoons. Accuracy matters, even in a simple recipe like this. A standard set will do.
Honestly, if you don’t have a silicone mold, you can absolutely press this mixture into a greased 9×13-inch pan and cut them into squares. They won’t be helmets, but they’ll taste just as good. I’ve done that plenty of times when I was in a hurry and couldn’t find my mold. For the mold, I recommend washing it by hand with warm, soapy water and letting it air dry completely before storing. It will last for years.
Preparation Method

Follow these steps carefully, and you’ll have a batch of adorable, delicious mini helmets in no time. The key is to work quickly once the marshmallows are melted, as the mixture sets up fast.
- Prepare your mold. Lightly spray the inside of your mini football helmet silicone mold with non-stick cooking spray. Make sure you get into all the little grooves. Set the mold aside on a flat, stable surface, like a baking sheet. This makes it easier to move later.
- Melt the butter. In your large pot, melt the 4 tablespoons of unsalted butter over medium-low heat. Stir it occasionally with your rubber spatula. You want it fully melted but not browned. This should take about 2 minutes.
- Add the marshmallows. Pour the entire 10-ounce bag of mini marshmallows into the pot with the melted butter. Stir constantly until the marshmallows are completely melted and the mixture is smooth and glossy. This will take about 3-4 minutes. Don’t walk away—burnt marshmallows are a tragedy.
- Remove from heat and add flavor. Once the marshmallow mixture is smooth, take the pot off the burner. Immediately stir in the 1 teaspoon of vanilla extract and the pinch of salt. Stir until they are fully incorporated. You’ll smell that amazing vanilla aroma.
- Cool slightly (crucial step!). Let the marshmallow mixture sit in the pot for about 1 minute. This is the trick to soft, chewy treats that hold their shape. If you add the cereal immediately, the treats will be harder and more difficult to press into the mold without cracking. Trust me on this.
- Add the cereal. Pour the 6 cups of crispy rice cereal into the pot. Gently fold the cereal into the marshmallow mixture using your rubber spatula. Be careful not to crush the cereal too much. You want to coat every piece evenly. This takes about 1 minute of gentle folding.
- Press into the mold. Working quickly, scoop a small handful of the mixture into your hands. It will be warm and sticky, so lightly spray your hands with non-stick cooking spray first. Gently shape it into a ball and press it firmly into one of the helmet cavities. Make sure the mixture gets into all the details of the mold, especially the face mask area. Repeat until all cavities are filled. Don’t overfill—you want them to be level with the top of the mold.
- Let them set. Allow the treats to cool and set in the mold for at least 30 minutes at room temperature. You can speed this up by placing the baking sheet in the refrigerator for 15 minutes. They are ready when they feel firm to the touch.
- Unmold carefully. Gently flex the silicone mold to loosen the treats. They should pop right out. If any stick, give the mold a little more time to cool. Place the unmolded helmets on a piece of parchment paper.
Cooking Tips & Techniques
I’ve made these Easy Mini Football Helmet Rice Krispie Treats more times than I can count, and I’ve learned a few things the hard way. Here are my best tips to ensure your success.
The biggest mistake I see is overheating the marshmallow mixture. If you cook it too long or on too high heat, the sugar can seize up, and your treats will turn out hard and brittle. Always use low to medium heat and stir constantly. When the marshmallows are just melted and smooth, you’re done. Another common issue is not greasing your hands or spatula enough. This mixture is incredibly sticky. I keep a small bowl of non-stick spray next to my work station and reapply it every time I handle the mixture. It saves so much frustration.
Timing is everything here. Once you add the cereal, you have a short window before the mixture starts to set. If it becomes too stiff to press into the mold, you can microwave it for 10 seconds to soften it up again. But be careful—microwaving it too long can make it hard again. I learned this after a particularly stubborn batch that I had to abandon and just eat out of the bowl (which, honestly, wasn’t a bad consolation prize). For perfect consistency, make sure your marshmallows are fresh. Stale marshmallows don’t melt as smoothly and can result in a grainy texture. If your bag has been open for a while, it’s worth buying a new one.
Variations & Adaptations
One of the best things about this recipe is how easy it is to customize. I love playing around with different flavors and colors to match the occasion.
- Chocolate Lover’s Version: Stir 1/2 cup of mini chocolate chips into the mixture right after you add the cereal. The chips will melt slightly, creating pockets of chocolatey goodness. You can also drizzle melted dark chocolate over the finished helmets for a decadent touch.
- Team Color Twist: Add a few drops of food coloring to the marshmallow mixture after you remove it from the heat. A few drops of red and blue make purple, or use orange and brown for a classic football look. Stir gently to create a marbled effect or mix thoroughly for a solid color.
- Peanut Butter Dream: Add 2 tablespoons of creamy peanut butter along with the butter. Melt it together for a rich, nutty flavor that pairs perfectly with the crispy cereal. This is my personal favorite variation. I tried it one Sunday when I was out of vanilla, and it was a happy accident.
- Dietary Adaptations: To make these gluten-free, simply use a certified gluten-free crispy rice cereal. For a vegan version, use plant-based butter and vegan marshmallows (like Dandies). The texture will be slightly different, but they are still delicious.
You can also swap the vanilla extract for almond or coconut extract for a different flavor profile. If you’re making these for a birthday party, skip the laces and press a small candle into the top of each helmet before it sets completely. They make the cutest individual birthday treats!
Serving & Storage Suggestions
These mini helmets are best served at room temperature. They are the perfect finger food for a party. Arrange them on a platter lined with green tissue paper or a green cloth napkin to look like a football field. For an extra festive touch, you can draw white laces on each helmet using melted white chocolate. I like to do this after they’ve set and are out of the mold. Just dip a toothpick or use a piping bag to draw two small lines.
These treats pair wonderfully with other game day snacks. They go great with spicy buffalo wings, salty pretzels, or a bowl of chili. For drinks, a cold beer or a tall glass of lemonade is perfect. The sweet, buttery flavor of the treats balances out savory and spicy foods beautifully.
For storage, place the treats in an airtight container at room temperature. They will stay fresh for up to 3 days. Do not refrigerate them, as the cold will make them hard and stale. If you need to make them ahead of time, you can freeze them for up to a month. To freeze, place them in a single layer on a baking sheet and freeze for an hour. Then transfer them to a freezer-safe bag or container. Thaw them at room temperature for about 30 minutes before serving. The flavor actually improves slightly after a day, as the marshmallow and butter meld together. But honestly, they rarely last that long in my house.
Nutritional Information & Benefits
Let’s be real—these are a treat, not a health food. But knowing what’s in them helps you enjoy them mindfully. Per serving (one mini helmet, without decoration), the estimated nutritional values are:
- Calories: 110
- Fat: 4g
- Saturated Fat: 2.5g
- Carbohydrates: 19g
- Sugar: 10g
- Protein: 1g
- Sodium: 95mg
These numbers are estimates and can vary based on the specific brands you use. The main ingredients—rice cereal and marshmallows—are low in fat but high in simple carbohydrates, which provide quick energy. This makes them a great pre-game snack for kids who need a boost of energy before running around. The butter adds a small amount of vitamin A and healthy fats. If you are watching your sugar intake, you can use a sugar-free marshmallow alternative, though the texture will be slightly different. As always, be mindful of portion sizes, and enjoy them as part of a balanced diet. I personally see them as a fun, occasional indulgence that brings joy—and sometimes, that’s just as important as the nutritional value.
Conclusion
These Easy Mini Football Helmet Rice Krispie Treats are more than just a dessert. They are a conversation starter, a crowd-pleaser, and a little piece of game day magic. They prove that you don’t need hours in the kitchen or a list of exotic ingredients to create something truly special. With just a few pantry staples and a simple mold, you can whip up a treat that looks like you spent all day on it. Honestly, that’s my favorite kind of recipe.
I encourage you to make these your own. Maybe you’ll add a drizzle of caramel, or use a different color for the laces to match your favorite team. The possibilities are endless. Every time I make them, I think back to that panicked afternoon and laugh. Now, they are a staple I look forward to making. I’d love to hear how yours turn out! Leave a comment below and let me know what variations you tried, or share a photo of your helmet treats. Don’t forget to pin this recipe for later and share it with your fellow football fans. Happy snacking, and may your team win!
Frequently Asked Questions
Can I use a regular 9×13 pan instead of a mold?
Absolutely! If you don’t have a football helmet mold, you can press the entire mixture into a greased 9×13-inch pan. Let it set, then cut it into squares or use a football-shaped cookie cutter. They will taste just as delicious.
How do I keep the treats from sticking to my hands?
This is the most common struggle. Lightly spray your hands with non-stick cooking spray before handling the mixture. I also keep a small bowl of water nearby to wet my fingers slightly, which helps prevent sticking. Reapply the spray as needed.
Can I make these treats ahead of time?
Yes! You can make them up to 3 days in advance. Store them in an airtight container at room temperature. For longer storage, freeze them for up to a month. Just thaw them at room temperature before serving.
My treats turned out hard. What did I do wrong?
This usually happens when the marshmallow mixture is overheated or cooked too long. Always melt the marshmallows over low heat and remove them from the heat as soon as they are smooth. Letting the mixture cool for a minute before adding the cereal also helps keep them soft.
Can I use a different type of cereal?
You can experiment with other crispy rice cereals, but the texture will vary. Cocoa rice cereal will give you a chocolate flavor. Avoid using flaked or puffed cereals, as they don’t hold their shape as well and can become soggy. Stick to a similar shape and density for the best results.
Pin This Recipe!
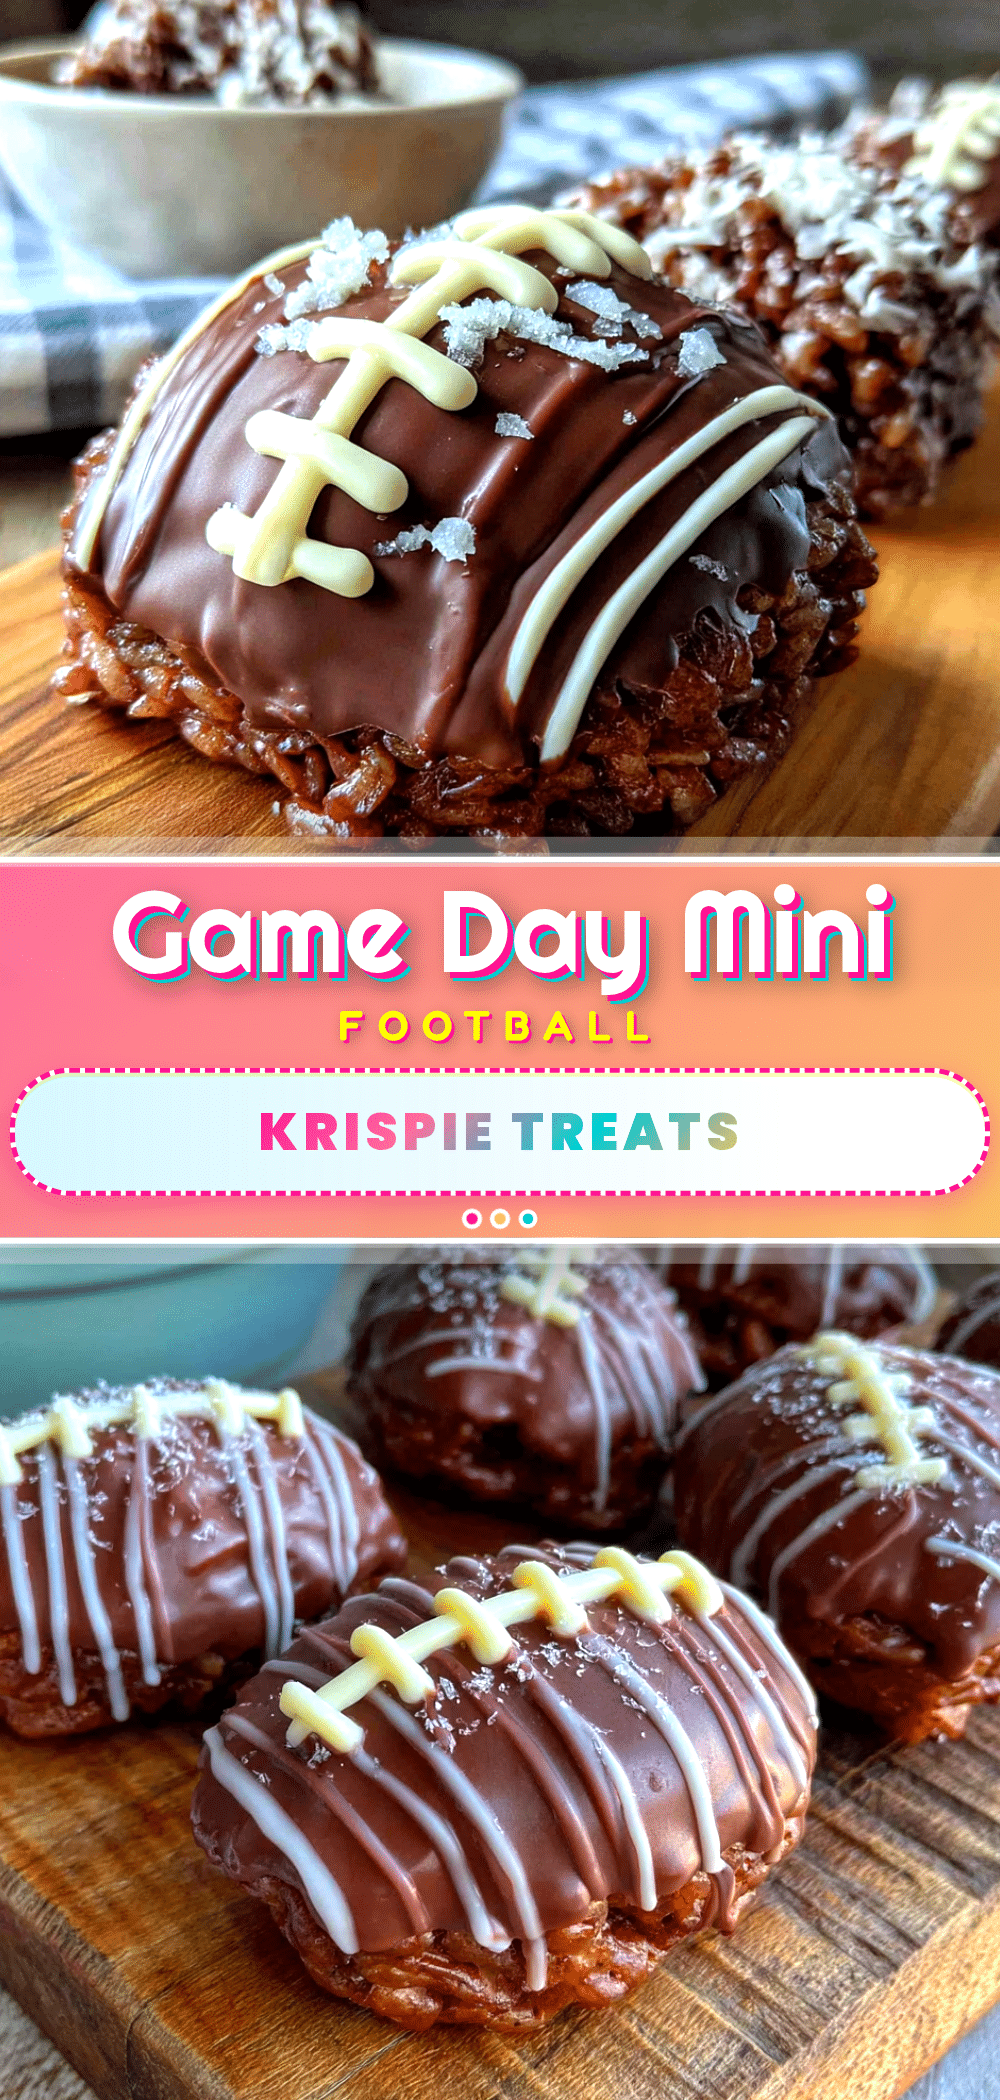
Easy Mini Football Helmet Rice Krispie Treats

These adorable mini football helmet Rice Krispie treats are the perfect game day dessert. Quick to make with simple pantry ingredients, they’re a crowd-pleasing, fun snack that looks like you spent hours on them.
- Prep Time: 15 minutes
- Cook Time: 5 minutes
- Total Time: 20 minutes
- Yield: 12 servings 1x
- Category: Dessert
- Cuisine: American
Ingredients
- 6 cups crispy rice cereal (like Rice Krispies)
- 4 tablespoons unsalted butter
- 10 ounces mini marshmallows (about one standard bag)
- 1 teaspoon pure vanilla extract
- Pinch of salt
- Non-stick cooking spray
- Optional for decorating: 1/2 cup white chocolate melting wafers or white chocolate chips
- Optional: Orange and brown gel food coloring
Instructions
- Prepare your mold. Lightly spray the inside of your mini football helmet silicone mold with non-stick cooking spray. Make sure you get into all the little grooves. Set the mold aside on a flat, stable surface, like a baking sheet.
- Melt the butter. In your large pot, melt the 4 tablespoons of unsalted butter over medium-low heat. Stir it occasionally with your rubber spatula. You want it fully melted but not browned. This should take about 2 minutes.
- Add the marshmallows. Pour the entire 10-ounce bag of mini marshmallows into the pot with the melted butter. Stir constantly until the marshmallows are completely melted and the mixture is smooth and glossy. This will take about 3-4 minutes.
- Remove from heat and add flavor. Once the marshmallow mixture is smooth, take the pot off the burner. Immediately stir in the 1 teaspoon of vanilla extract and the pinch of salt. Stir until they are fully incorporated.
- Cool slightly (crucial step!). Let the marshmallow mixture sit in the pot for about 1 minute. This is the trick to soft, chewy treats that hold their shape.
- Add the cereal. Pour the 6 cups of crispy rice cereal into the pot. Gently fold the cereal into the marshmallow mixture using your rubber spatula. Be careful not to crush the cereal too much. This takes about 1 minute of gentle folding.
- Press into the mold. Working quickly, scoop a small handful of the mixture into your hands. It will be warm and sticky, so lightly spray your hands with non-stick cooking spray first. Gently shape it into a ball and press it firmly into one of the helmet cavities. Make sure the mixture gets into all the details of the mold, especially the face mask area. Repeat until all cavities are filled. Don’t overfill—you want them to be level with the top of the mold.
- Let them set. Allow the treats to cool and set in the mold for at least 30 minutes at room temperature. You can speed this up by placing the baking sheet in the refrigerator for 15 minutes. They are ready when they feel firm to the touch.
- Unmold carefully. Gently flex the silicone mold to loosen the treats. They should pop right out. If any stick, give the mold a little more time to cool. Place the unmolded helmets on a piece of parchment paper.
Notes
Let the marshmallow mixture cool for 1 minute before adding cereal to ensure soft, chewy treats. Grease hands well with non-stick spray when pressing mixture into molds. For best results, use fresh marshmallows. Treats can be stored in an airtight container at room temperature for up to 3 days, or frozen for up to a month.
Nutrition
- Serving Size: 1 mini helmet
- Calories: 110
- Sugar: 10
- Sodium: 95
- Fat: 4
- Saturated Fat: 2.5
- Carbohydrates: 19
- Protein: 1
Keywords: football helmet rice krispie treats, game day dessert, easy rice krispie treats, mini football treats, Super Bowl snacks, no-bake dessert, kid-friendly dessert



