Love this? Save it for later!
Share the inspiration with your friends
My sister-in-law, Karen, claimed for years that she “didn’t do” no-bake desserts. Something about the texture. Or the lack of oven commitment. Honestly, I think she just liked being difficult. For three whole summers, she’d show up to every family barbecue with a store-bought pie, looking smug. Then last August, I made a batch of these no-bake peanut butter bars for a Labor Day cookout, purely as a backup dessert. I found her standing over the pan at 10 PM, fork in hand, telling me she was “just checking the consistency.” Sure, Karen.
The thing is, these bars have a way of catching people off guard. They’re not trying to be fancy. They’re not pretending to be something they’re not. They’re just really, really good peanut butter, chocolate, and graham cracker crumbs pressed into a pan and chilled until firm. That’s it. But the first time you bite into one—that cold, creamy layer of peanut butter filling against the snap of the chocolate topping—you understand why Karen got caught red-handed.
I made them that day because the forecast said ninety-seven degrees and I wasn’t about to turn on my oven. Honestly, that’s half the appeal. You don’t need to preheat anything. You don’t need to wait for butter to soften. You just mix, press, chill, and try not to eat the whole pan before anyone else arrives. Maybe you’ve been there, standing in front of an open fridge at 11 PM, cutting “just one more” bar while telling yourself you’ll stop.
The recipe stuck with me because it’s the kind of thing you can make without thinking too hard. It’s forgiving. It’s fast. And it somehow tastes like the best parts of summer without any of the fuss. I keep making it because every time I bring it somewhere, someone asks for the recipe. And honestly? I love watching them take that first bite and realize they were wrong about no-bake desserts too.
Why You’ll Love These Easy No-Bake Peanut Butter Labor Day Bars
I’ve tested this recipe more times than I care to admit. I’ve tried different ratios of peanut butter to butter. I’ve experimented with dark chocolate versus milk chocolate. I’ve even made a version with almond butter, which was good but not the same. What I’ve landed on is a bar that hits every single note you want from a peanut butter dessert: creamy, crunchy, salty, sweet, and completely satisfying.
Here’s what makes these bars stand out from every other recipe you’ve seen:
- No Oven Required: When it’s ninety degrees and humid, the last thing you want to do is turn on your oven. These bars come together entirely on the stovetop and in the fridge. Your kitchen stays cool, and you stay sane.
- Simple Ingredients: You probably have everything in your pantry right now. Peanut butter, butter, powdered sugar, graham crackers, and chocolate chips. No fancy extracts. No obscure flours. Just real, honest ingredients.
- Perfect for Labor Day: Whether you’re hosting a barbecue, heading to a potluck, or just relaxing at home, these bars travel well, hold their shape, and please literally everyone. Kids love them. Adults pretend they don’t and then eat three.
- Crowd-Pleaser Status: I’ve brought these to cookouts, birthday parties, and even a work meeting. Not a single person has ever said, “These are okay.” They disappear fast. I’m not exaggerating.
- Unbelievably Delicious: The texture is what gets you. The graham cracker crust is slightly crumbly but holds together. The peanut butter filling is rich and creamy. The chocolate topping sets with a satisfying snap. Together, it’s comfort food at its finest.
What makes this version different is the balance. Some recipes are too sweet. Some are too dense. Some use way too much butter and end up greasy. I’ve dialed in the ratios so that every bite tastes like peanut butter first, sweetness second, and chocolate as the perfect finish. It’s the kind of bar that makes you close your eyes after the first bite. You know that feeling.
These bars are comfort food reimagined—simpler, faster, and somehow more satisfying than anything you could bake. Perfect for impressing guests without stress, or turning a casual Labor Day into something memorable.
What Ingredients You Will Need
This recipe uses simple, pantry-friendly ingredients to deliver big flavor and satisfying texture without any fuss. Most of these are things you probably already have on hand, which is exactly how a last-minute Labor Day dessert should work.
For the Crust
- 2 cups graham cracker crumbs (about 14-15 full sheets, crushed finely) — I recommend using a food processor for the most consistent texture. You can also crush them in a zip-top bag with a rolling pin, but expect a few bigger pieces.
- 1/2 cup unsalted butter, melted — Salted butter works in a pinch, but unsalted lets you control the salt level. I use Land O’Lakes or Kerrygold for the richest flavor.
- 1/4 cup granulated sugar — Just enough to give the crust a little sweetness without overpowering the peanut butter.
- Pinch of salt — If using salted butter, skip this.
For the Peanut Butter Filling
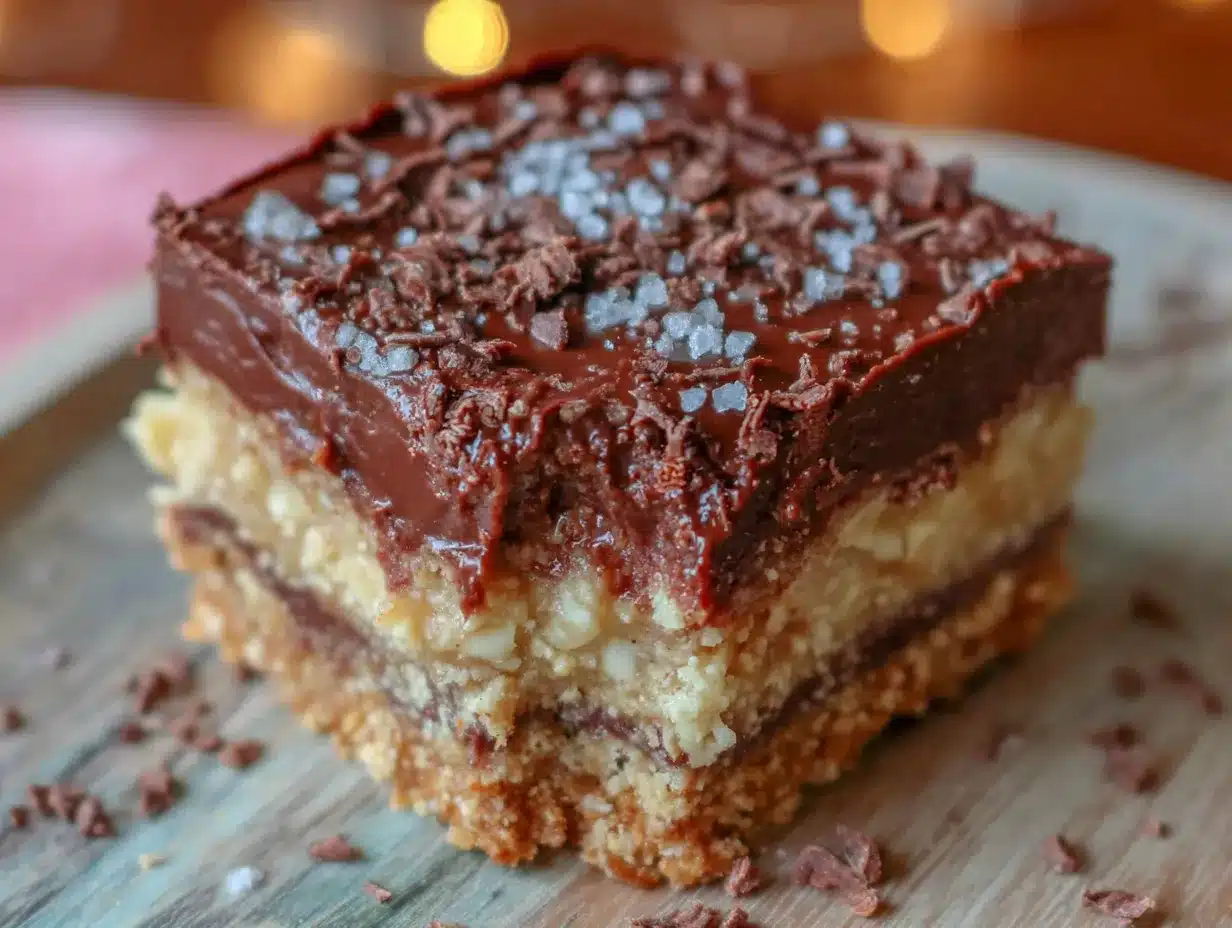
- 1 cup creamy peanut butter — I strongly recommend using a standard brand like Jif or Skippy for this. Natural peanut butter that separates tends to make the filling oily and less stable. You want something that’s already emulsified.
- 1/2 cup unsalted butter, softened — Let it sit out for about 30 minutes. Cold butter won’t cream properly with the peanut butter.
- 2 cups powdered sugar — Sift it if you’re feeling fancy, but honestly, I never do. Just make sure there are no big lumps.
- 1 teaspoon vanilla extract — Pure vanilla extract makes a noticeable difference. Imitation works, but the flavor is flat.
- 1-2 tablespoons milk — Only if your filling seems too thick. I usually add one tablespoon and see how it looks. Whole milk works best, but any milk will do.
For the Chocolate Topping
- 1 1/2 cups semi-sweet chocolate chips — Ghirardelli is my go-to. They melt smoothly and set with a nice shine. Milk chocolate chips work too, but the bars will be sweeter.
- 2 tablespoons creamy peanut butter — This helps the chocolate melt smoothly and adds another layer of peanut butter flavor. Don’t skip it.
- 1 tablespoon coconut oil or vegetable shortening — Optional, but it gives the chocolate a glossy finish and helps it cut cleanly.
Substitution Guidance: If you need a gluten-free option, use gluten-free graham crackers or crushed gluten-free cookies. For a dairy-free version, use vegan butter and dairy-free chocolate chips. The texture will be slightly different, but still delicious. If you’re out of graham crackers, crushed digestive biscuits or vanilla wafers work surprisingly well. I’ve tried both, and honestly, the vanilla wafers add a nice extra sweetness.
Equipment Needed
You don’t need anything fancy for these bars, which is part of the appeal. Here’s what you’ll need:
- 9×9-inch baking pan — An 8×8 pan works too, but your bars will be slightly thicker. Line it with parchment paper for easy removal. Trust me on this.
- Mixing bowls — One medium bowl for the crust, one large bowl for the filling, and one small microwave-safe bowl for the chocolate.
- Food processor or zip-top bag — For crushing the graham crackers. A food processor gives you fine, even crumbs. A rolling pin and a bag work if you don’t mind a little arm workout.
- Electric hand mixer or stand mixer — You can mix the filling by hand, but it takes some elbow grease. A hand mixer makes it light and fluffy in under a minute.
- Spatula — For spreading the filling and the chocolate. A silicone spatula is ideal because it doesn’t scratch your pan.
- Measuring cups and spoons — Standard stuff. Nothing special.
- Refrigerator — The most important tool. You need at least two hours of chill time, preferably four.
Budget-friendly tip: If you don’t have a food processor, buy pre-crushed graham cracker crumbs. They’re usually in the baking aisle and cost about the same as a box of crackers. Also, skip the coconut oil for the chocolate topping if you don’t have it. The chocolate will still set fine without it.
Preparation Method
Let’s get to the fun part. These bars come together in about 20 minutes of active work, then the fridge does the rest. Here’s exactly how to do it.
Step 1: Prepare Your Pan
Line your 9×9-inch baking pan with parchment paper. Leave enough overhang on two opposite sides so you can lift the bars out later. If you don’t have parchment, lightly grease the pan with butter or non-stick spray. The parchment method is better because it gives you clean edges and easy removal.
Step 2: Make the Crust
In a medium bowl, combine the graham cracker crumbs, melted butter, granulated sugar, and a pinch of salt. Stir with a fork until the mixture looks like wet sand. Every crumb should be coated in butter. Press this mixture firmly into the bottom of your prepared pan. Use the bottom of a measuring cup or a flat glass to really pack it down. A loose crust will fall apart when you cut the bars. Take your time here. I usually spend about two minutes pressing it evenly.
Pop the pan in the fridge while you make the filling. This helps the crust set up before you add the next layer.
Step 3: Make the Peanut Butter Filling
In a large mixing bowl, combine the softened butter and creamy peanut butter. Beat with an electric hand mixer on medium speed until smooth and well combined, about 1 minute. Add the powdered sugar and vanilla extract. Start mixing on low speed so the sugar doesn’t fly everywhere, then increase to medium. Beat until the mixture is light, fluffy, and holds together. If it seems too thick to spread, add one tablespoon of milk and beat again. If it’s too thin, add another tablespoon of powdered sugar.
The filling should be spreadable but not runny. It should hold its shape when you scoop it. Taste it. I dare you not to eat a spoonful.
Step 4: Assemble the Layers
Remove the crust from the fridge. Spoon the peanut butter filling over the crust. Use your spatula to spread it evenly, going all the way to the edges. Wetting the spatula slightly helps if the filling is sticky. Press the filling down gently to remove any air pockets. Return the pan to the fridge while you make the topping.
Step 5: Make the Chocolate Topping
In a small microwave-safe bowl, combine the chocolate chips, peanut butter, and coconut oil (if using). Microwave in 30-second intervals, stirring after each, until smooth and fully melted. This usually takes about 90 seconds total. Be careful not to overheat the chocolate, or it will seize up and turn grainy. If that happens, stir in a teaspoon of vegetable oil to bring it back.
Pour the melted chocolate over the peanut butter layer. Use your spatula to spread it evenly. Tilt the pan gently if needed to get the chocolate into the corners. Tap the pan on the counter a few times to release any air bubbles.
Step 6: Chill and Set
Place the pan in the refrigerator for at least 2 hours, but 4 hours is better. Overnight is ideal. The bars need time to firm up completely. If you try to cut them too early, the layers will squish together and you’ll have a delicious mess instead of clean bars.
When the bars are fully set, use the parchment overhang to lift them out of the pan. Place them on a cutting board. Use a sharp knife to cut into squares. Wipe the knife clean between cuts for the neatest edges. I usually get 16 small bars or 9 large ones.
Cooking Tips & Techniques
I’ve made these bars at least a dozen times, and I’ve learned a few things the hard way. Here’s what I wish someone had told me.
Don’t skip the parchment paper. The first time I made these, I greased the pan and hoped for the best. The bars came out in pieces. The second time, I used parchment, and they lifted out perfectly. It’s a small step that makes a huge difference.
Use room temperature butter for the filling. Cold butter won’t cream properly with the peanut butter, and you’ll end up with lumps. Let it sit on the counter for at least 30 minutes. If you forgot to take it out, microwave it for 10 seconds. Not 20. Ten.
Press the crust firmly. This is the most common mistake I see. If the crust is too loose, it will crumble when you cut the bars. Use the bottom of a glass or a measuring cup to really pack it down. You want it to feel solid, not sandy.
Let the chocolate cool slightly before pouring. If the chocolate is too hot, it can melt the peanut butter layer and create a muddy swirl effect. Let it sit for 2-3 minutes after microwaving before you pour it over the filling.
Be patient with the chill time. I know it’s hard to wait. I’ve cut into these bars after an hour, and they were still soft. The texture is significantly better after 4 hours. Overnight is even better. The bars cut cleaner and taste more cohesive.
Clean knife technique. Run your knife under hot water, dry it, then cut. Wipe the blade clean between each cut. This gives you those beautiful, Instagram-worthy edges. If you don’t care about looks, just cut them rough. They’ll taste the same.
Variations & Adaptations
One of the best things about this recipe is how easy it is to adapt. Here are some variations I’ve tried and loved.
Chocolate Peanut Butter Cup Version
Before pouring the chocolate topping, press mini peanut butter cups into the filling. Use about 10-12 mini cups, spaced evenly. Then pour the chocolate over them. When you cut the bars, each piece has a little surprise inside. I made this for a friend’s birthday, and she said it was the best dessert I’ve ever brought.
Crunchy Peanut Butter Swirl
Use crunchy peanut butter in the filling for added texture. The little pieces of peanut add a nice crunch that contrasts with the smooth chocolate. I prefer this version when I’m making the bars just for myself. It feels more substantial.
Gluten-Free Adaptation
Substitute the graham crackers with gluten-free graham crackers or crushed gluten-free vanilla cookies. I’ve used Schar brand graham crackers, and the texture was almost identical. Just make sure to crush them finely so the crust holds together.
Dark Chocolate Lover’s Version
Use dark chocolate chips (60% cacao or higher) for the topping. The bitterness of the dark chocolate balances the sweetness of the peanut butter filling beautifully. This is my husband’s favorite version. He claims it’s “more sophisticated.” I think he just likes being dramatic.
Add a Pretzel Crunch
Crush a handful of pretzels and mix them into the crust for a salty-sweet twist. Reduce the graham cracker crumbs by 1/4 cup to accommodate the pretzels. The saltiness cuts through the sweetness and makes the bars dangerously addictive. I brought this version to a potluck, and someone asked me if I was “a professional chef.” I said yes.
Serving & Storage Suggestions
These bars are best served cold, straight from the fridge. The texture is firmer, the chocolate snaps cleanly, and the peanut butter filling is perfectly creamy. If you let them sit at room temperature for too long, the chocolate can get a little soft. I usually pull them out of the fridge about 10 minutes before serving, just to take the chill off.
How to serve: Cut them into squares and arrange them on a platter. A sprinkle of flaky sea salt on top before serving adds a nice touch. If you’re feeling fancy, drizzle a little melted peanut butter over the top. For a Labor Day barbecue, serve them alongside fresh fruit or a scoop of vanilla ice cream. The combination is heavenly.
Storage: Store leftover bars in an airtight container in the refrigerator. They will keep for up to one week, though I doubt they’ll last that long. Layer them between sheets of parchment paper so they don’t stick together.
Freezing: These bars freeze beautifully. Place the cut bars on a baking sheet and freeze until solid, about 1 hour. Transfer to a freezer-safe container or zip-top bag. They will keep for up to 3 months. Thaw in the refrigerator overnight before serving. I always keep a batch in the freezer for emergencies. You know, like a Tuesday.
Flavor development: Honestly, these bars taste even better the next day. The flavors meld together, the crust softens slightly, and everything becomes more cohesive. If you can wait 24 hours, you’ll be rewarded.
Nutritional Information & Benefits
Let’s be real: these are not health food. They’re a treat. But they do have some redeeming qualities. Here’s the estimated nutritional breakdown for one bar (based on 16 servings):
- Calories: 320
- Fat: 20g
- Saturated Fat: 9g
- Carbohydrates: 34g
- Sugar: 24g
- Protein: 6g
- Fiber: 2g
Health highlights: Peanut butter is a good source of protein and healthy fats. It also contains vitamin E, magnesium, and potassium. The graham cracker crust provides a small amount of fiber. The dark chocolate (if you use it) is rich in antioxidants. So there’s that.
Dietary considerations: This recipe contains peanuts, dairy, and gluten. For a gluten-free version, use gluten-free graham crackers. For a dairy-free version, use vegan butter and dairy-free chocolate chips. There is no easy egg-free substitution because the recipe doesn’t use eggs. The peanut butter can be swapped for sunflower seed butter for a nut-free option, but the flavor will be different.
My perspective: I believe in balance. These bars are meant to be enjoyed without guilt. Make them for a special occasion, share them with people you love, and savor every bite. Life is too short to skip dessert.
Conclusion
These easy no-bake peanut butter bars are the kind of recipe you’ll come back to again and again. They’re simple enough for a Tuesday night, impressive enough for a Labor Day party, and delicious enough to convert even the most stubborn no-bake skeptics. I know from experience.
What I love most about this recipe is how forgiving it is. You can tweak the crust, swap the chocolate, add mix-ins, and it still works. It’s a canvas for your creativity, but it’s also perfect exactly as written. The first time I made them, I was just looking for a quick dessert. Now I make them because they remind me of that hot August day, my sister-in-law standing over the pan with a fork, and the way we all laughed when she got caught.
I’d love to hear how these turn out for you. Did you add any fun variations? Did they disappear as fast as mine always do? Leave a comment below and let me know. And if you’re feeling generous, share this recipe with someone who needs a last-minute dessert idea. Trust me, they’ll thank you.
Now go make some bars. Your Labor Day weekend deserves it.
Frequently Asked Questions
Can I use natural peanut butter for this recipe?
I don’t recommend it. Natural peanut butter that separates tends to make the filling oily and less stable. The bars may not set properly. Stick with a standard brand like Jif or Skippy for the best results.
How long do these bars need to chill?
At least 2 hours, but 4 hours is better. Overnight is ideal. The longer they chill, the cleaner they cut and the better the texture.
Can I freeze these bars?
Absolutely. Freeze the cut bars on a baking sheet until solid, then transfer to a freezer-safe container. They will keep for up to 3 months. Thaw in the refrigerator before serving.
What can I use instead of graham crackers?
Crushed digestive biscuits, vanilla wafers, or shortbread cookies all work well. For a gluten-free option, use gluten-free graham crackers or gluten-free vanilla cookies.
Why did my chocolate topping turn out streaky?
The chocolate was probably too hot when you poured it over the peanut butter layer. Let the melted chocolate cool for 2-3 minutes before pouring. Also, make sure the filling is fully chilled before adding the chocolate.
Pin This Recipe!
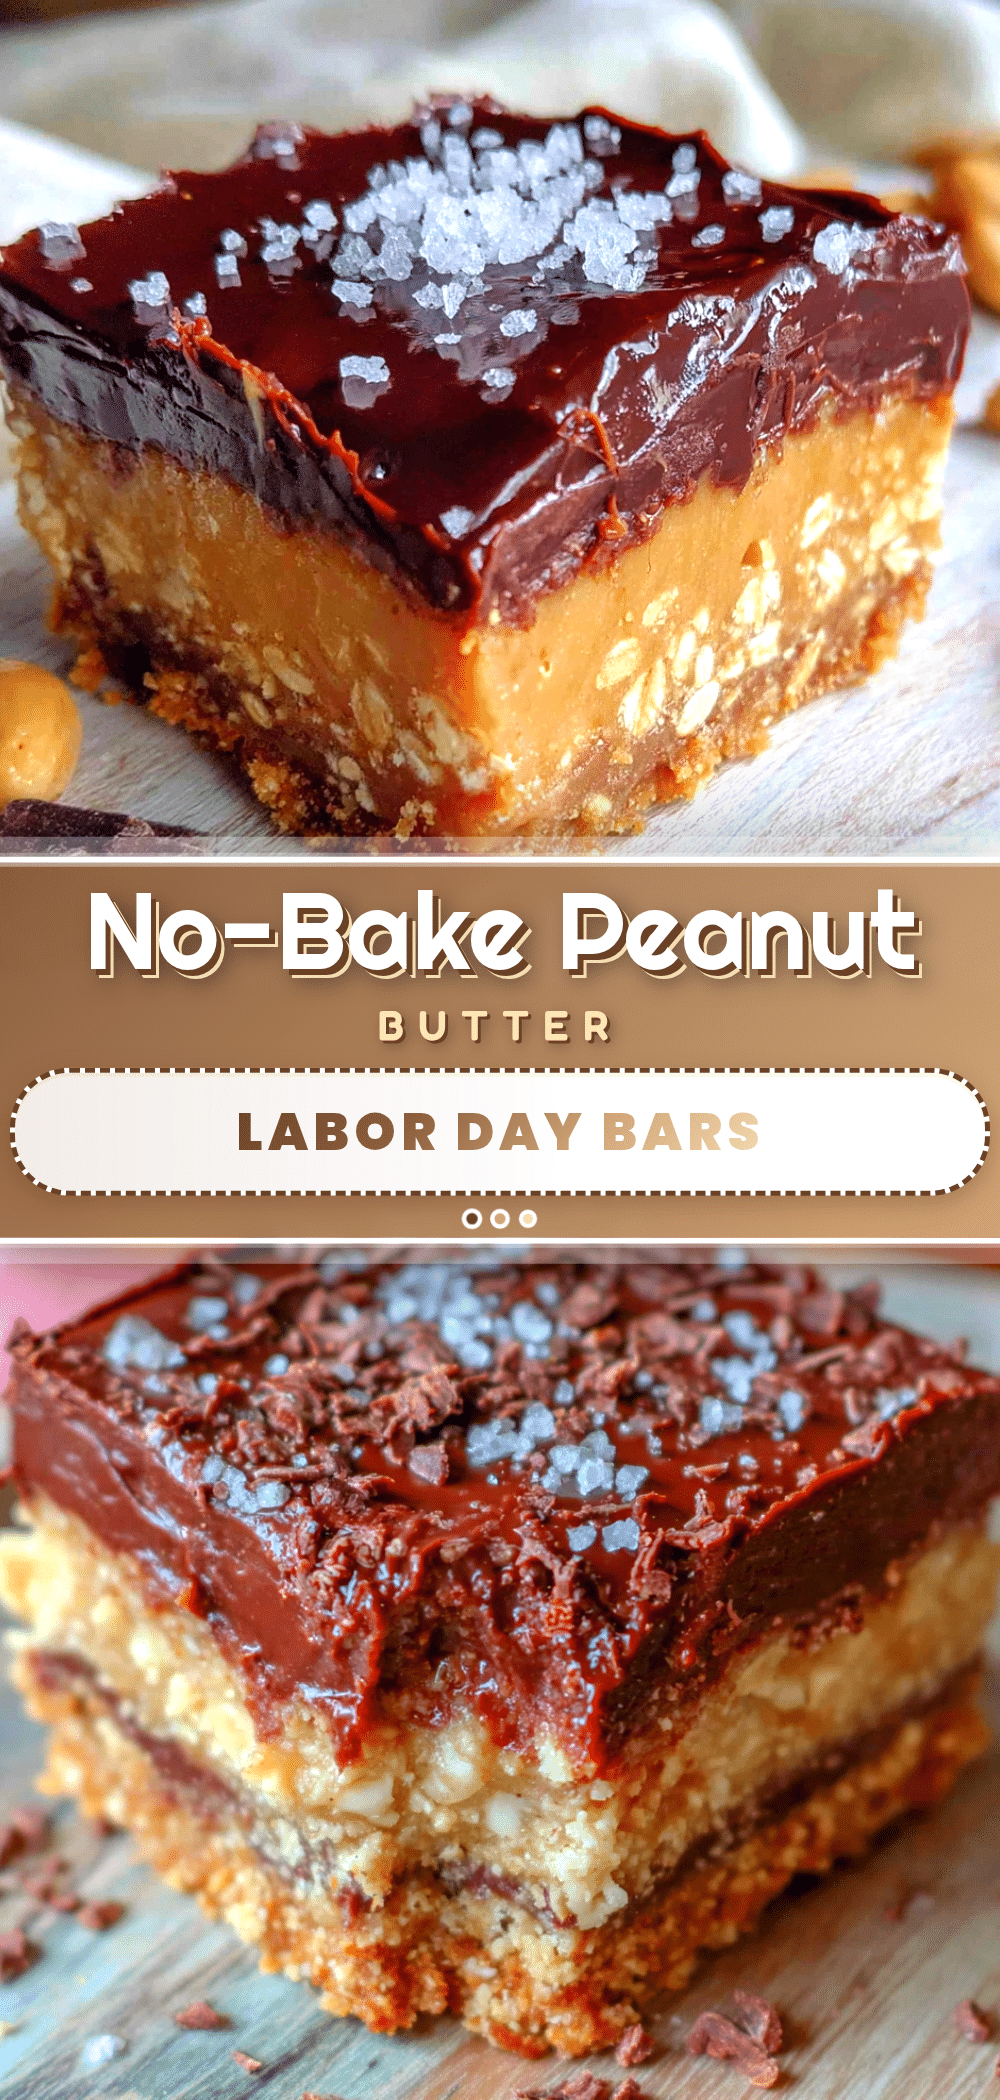
Easy No-Bake Peanut Butter Bars for Labor Day
These no-bake peanut butter bars are the perfect Labor Day dessert—creamy, crunchy, salty, sweet, and completely satisfying. Made with simple pantry ingredients and no oven required, they’re a crowd-pleaser that will convert even the most stubborn no-bake skeptics.
- Prep Time: 20 minutes
- Cook Time: 0 minutes
- Total Time: 4 hours 20 minutes (includes chilling)
- Yield: 16 servings 1x
- Category: Dessert
- Cuisine: American
Ingredients
- 2 cups graham cracker crumbs (about 14–15 full sheets, crushed finely)
- 1/2 cup unsalted butter, melted
- 1/4 cup granulated sugar
- Pinch of salt
- 1 cup creamy peanut butter (standard brand like Jif or Skippy)
- 1/2 cup unsalted butter, softened
- 2 cups powdered sugar
- 1 teaspoon vanilla extract
- 1–2 tablespoons milk (optional, if filling is too thick)
- 1 1/2 cups semi-sweet chocolate chips
- 2 tablespoons creamy peanut butter
- 1 tablespoon coconut oil or vegetable shortening (optional)
Instructions
- Line a 9×9-inch baking pan with parchment paper, leaving overhang on two opposite sides.
- In a medium bowl, combine graham cracker crumbs, melted butter, granulated sugar, and a pinch of salt. Stir until mixture resembles wet sand. Press firmly into the bottom of the prepared pan using the bottom of a measuring cup or flat glass. Refrigerate while making the filling.
- In a large mixing bowl, beat softened butter and creamy peanut butter with an electric hand mixer on medium speed until smooth, about 1 minute. Add powdered sugar and vanilla extract. Mix on low speed, then increase to medium and beat until light, fluffy, and holds together. If too thick, add 1-2 tablespoons milk; if too thin, add more powdered sugar.
- Remove crust from fridge. Spoon peanut butter filling over crust and spread evenly with a spatula, going to the edges. Return pan to fridge while making topping.
- In a small microwave-safe bowl, combine chocolate chips, 2 tablespoons peanut butter, and coconut oil (if using). Microwave in 30-second intervals, stirring after each, until smooth and fully melted (about 90 seconds total). Let cool for 2-3 minutes.
- Pour melted chocolate over peanut butter layer and spread evenly. Tap pan on counter to release air bubbles.
- Refrigerate for at least 2 hours, preferably 4 hours or overnight, until fully set.
- Use parchment overhang to lift bars out of pan. Place on cutting board and cut into squares with a sharp knife, wiping blade clean between cuts. Serve cold.
Notes
For best results, use standard creamy peanut butter (not natural). Press crust firmly to prevent crumbling. Let chocolate cool slightly before pouring to avoid melting the filling. Chill at least 4 hours for clean cuts. Bars taste even better the next day. Store in airtight container in refrigerator for up to 1 week, or freeze for up to 3 months.
Nutrition
- Serving Size: 1 bar
- Calories: 320
- Sugar: 24
- Sodium: 180
- Fat: 20
- Saturated Fat: 9
- Carbohydrates: 34
- Fiber: 2
- Protein: 6
Keywords: no-bake peanut butter bars, Labor Day dessert, easy dessert, no-bake dessert, peanut butter bars, chocolate peanut butter bars, summer dessert, potluck dessert



