Love this? Save it for later!
Share the inspiration with your friends
My neighbor Margaret watched me wrestling with a bag of grocery store chocolate pudding cups last October, my two kids bouncing off the walls while I tried to get a quick dessert together for their school harvest party. She didn’t say anything at first. Then she just walked over to her side of the porch and came back with a small glass jar filled with layers of chocolate, crushed cookies, and a tiny plastic pumpkin decoration stuck on top. “You’re overthinking it,” she said, handing it over. “It’s just dirt and worms for the grown-ups who actually want to enjoy fall.”
I laughed, but honestly, I was a little embarrassed. Here I was, someone who writes about food for a living, and I’d completely forgotten that sometimes the best recipes aren’t complicated at all. Margaret’s little jar of pudding cups became the talk of that party, and I’ve been making my version ever since. These Easy Pumpkin Patch Pudding Cups with Oreo Dirt are basically that same idea—layered chocolate pudding, crushed Oreos, and a cute little pumpkin on top—but I’ve tweaked it enough that it feels like mine now. You know that feeling when you take someone else’s good idea and make it just a little bit better? That’s this recipe.
The whole thing comes together in about fifteen minutes, which is exactly what you need when you’re staring down a weeknight and the kids are asking for something fun. I mean, let’s be real—I’ve made these at nine o’clock at night after realizing I forgot to sign up for the classroom treat. They’re that forgiving. And the best part? You probably already have most of the ingredients in your pantry. No special trips to three different stores, no fancy equipment, just good old-fashioned chocolate pudding and crushed cookies dressed up for fall. Margaret would approve, I think.
Why You’ll Love This Recipe
I’ve tested these Easy Pumpkin Patch Pudding Cups with Oreo Dirt about a dozen times now, tweaking the ratios and trying different pudding brands to get the texture just right. Here’s why I keep coming back to this version, and why I think you will too:
- Quick & Easy : From start to finish, you’re looking at about 15 minutes of active time. The hardest part is waiting for the pudding to set, which is really just a fridge nap.
- Simple Ingredients : Chocolate pudding mix, milk, Oreos, cream cheese, Cool Whip, and some candy pumpkins. That’s it. Nothing weird, nothing expensive.
- Perfect for Fall Gatherings : These are a hit at Halloween parties, Thanksgiving dinners, classroom celebrations, or just a random Tuesday when you want something festive.
- Crowd-Pleaser : I’ve served these to kids, grandparents, and everyone in between. The combination of creamy pudding and crunchy Oreo crumbles is basically impossible to resist.
- Unbelievably Delicious : The texture here is next-level comfort food. The cream cheese layer adds a tangy richness that elevates it way beyond boxed pudding.
What makes this recipe different from the dozens of similar ones out there? It’s the cream cheese layer. Most versions just do pudding and crushed Oreos, which is fine but a little one-note. By adding a quick cream cheese and Cool Whip layer, you get this beautiful tangy-sweet contrast that makes every spoonful interesting. Plus, the cream cheese layer acts as a barrier that keeps the Oreo crumbles from getting soggy too fast. I figured that out after my first batch turned into a sad brown mush overnight. Lesson learned.
This isn’t just another pudding cup recipe. It’s the kind that makes you close your eyes after the first bite. It’s comfort food reimagined for busy people who still want something special. Perfect for impressing guests without stress, or turning a simple weeknight into something memorable.
What Ingredients You Will Need
This recipe uses simple, mostly pantry-staple ingredients to deliver that nostalgic pudding cup experience with a grown-up twist. Here’s what you’ll need to grab:
- 1 box (3.9 oz) instant chocolate pudding mix (I prefer Jell-O brand for the smoothest texture, but store brands work fine too)
- 2 cups cold milk (whole milk gives the creamiest result, but 2% works well. For a dairy-free version, use oat milk or almond milk)
- 4 oz cream cheese, softened (this is the secret ingredient! Let it sit out for 20 minutes so it blends smoothly)
- 1/4 cup powdered sugar (adds sweetness without grittiness to the cream cheese layer)
- 1/2 cup Cool Whip, thawed (or any whipped topping. You can also use homemade whipped cream, but Cool Whip holds its shape better for layering)
- 1 package (14.3 oz) Oreo cookies (regular or double stuf both work. You’ll need about 20 cookies total)
- 12-15 candy pumpkins (I use the Brach’s Mellowcreme Pumpkins, but any orange candy pumpkin works)
- Optional: Green sprinkles or green colored sugar (for the “pumpkin stems” on top)
A few notes on ingredient selection that I’ve learned through trial and error. First, don’t skimp on the cream cheese. I tried using reduced-fat once and the layer came out grainy and weird. Full-fat cream cheese gives that luscious, tangy texture that makes these cups special. Second, if you’re using a store-brand Oreo, just know they tend to be a little less chocolatey. That’s fine for the crumble layer, but you might want to add an extra cookie or two to compensate.
For the candy pumpkins, I’ve tried a few different brands. The Brach’s ones are the most recognizable and have that classic candy corn flavor that screams fall. But if you can’t find them, any orange candy pumpkin or even small candy corn pieces will work. The kids don’t care about the brand, trust me.
One more thing—if you’re making these for a classroom or party with allergies, check your Oreo packaging. Regular Oreos are actually vegan (surprise!), but they do contain wheat and soy. For a gluten-free version, use gluten-free chocolate sandwich cookies. For nut-free, these are naturally nut-free as long as your chocolate pudding mix doesn’t have any nut warnings.
Equipment Needed
You don’t need much for these Easy Pumpkin Patch Pudding Cups with Oreo Dirt, which is honestly my favorite part. Here’s what you’ll want to have on hand:
- Two medium mixing bowls (one for the pudding, one for the cream cheese layer)
- Hand mixer or whisk (I use my trusty KitchenAid hand mixer, but a strong arm and a whisk work too)
- Measuring cups and spoons
- Small cups or jars (I use 8-ounce mason jars for that cute layered look, but small plastic cups, tumblers, or even wine glasses work)
- Ziploc bag or rolling pin (for crushing the Oreos. I prefer the bag method because it contains the mess)
- Spatula (for scraping every last bit of that cream cheese layer into the cups)
If you don’t have a hand mixer, no worries. I made these for years with just a whisk and some elbow grease. The cream cheese just needs to be really softened first. As for the cups, I’ve used everything from fancy stemless wine glasses to Solo cups. The presentation is nice, but the taste is the same. If you’re buying new jars, I like the 8-ounce wide-mouth mason jars from Ball—they’re cheap, reusable, and you can find them at any grocery store.
Preparation Method
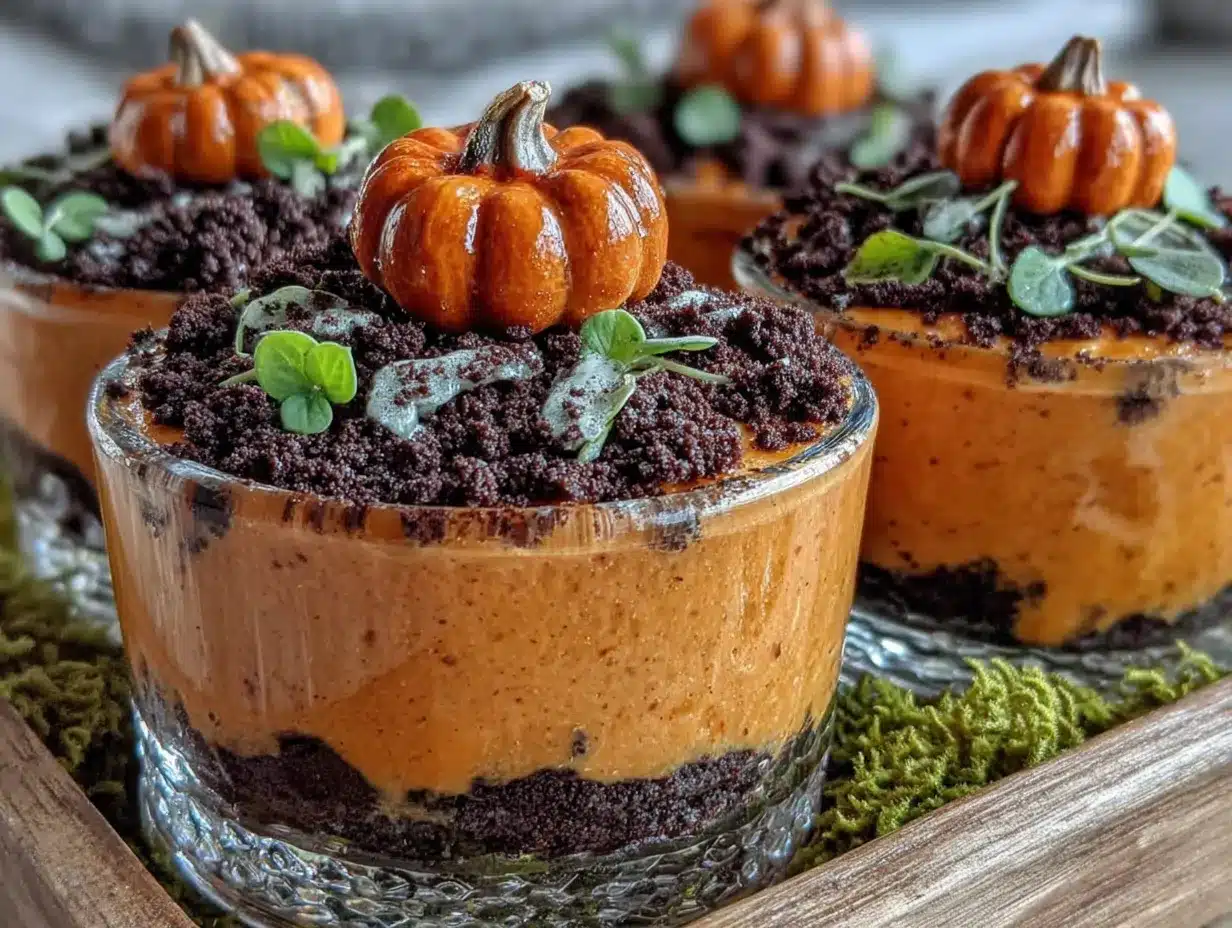
Alright, let’s get to the fun part. Here’s how to make these Easy Pumpkin Patch Pudding Cups with Oreo Dirt step by step:
- Make the chocolate pudding. In a medium bowl, whisk together the instant chocolate pudding mix and 2 cups of cold milk. Whisk for about 2 minutes until it starts to thicken. You’ll feel it getting heavier in the bowl. Set it aside for 5 minutes to fully set. Pro tip: use really cold milk straight from the fridge. Warm milk won’t thicken properly with instant pudding.
- Crush the Oreos. While the pudding sets, place about 20 Oreo cookies in a large Ziploc bag. Seal it up, then go to town with a rolling pin or even your hands. You want a mix of fine crumbs and small chunks—some texture is good. If you go too fine, it’ll turn into mud. Too chunky, and it won’t look like dirt. Aim for pea-sized pieces and smaller. Set aside about 1/4 cup of the crumbs for topping.
- Make the cream cheese layer. In a separate bowl, beat the softened cream cheese with the powdered sugar until smooth and creamy. I use a hand mixer on medium speed for about 2 minutes. Scrape down the sides, then fold in the thawed Cool Whip gently with a spatula. Don’t overmix or it’ll get runny. You want it light and fluffy, like a cloud.
- Start layering. Grab your cups or jars. Spoon about 2 tablespoons of the crushed Oreos into the bottom of each cup. Press down lightly with the back of a spoon to create a solid base. This is your “dirt” layer.
- Add the cream cheese layer. Spoon or pipe about 2 tablespoons of the cream cheese mixture over the Oreo layer. Use the back of a spoon to spread it gently to the edges. This layer acts as a barrier, so don’t skip it. I learned the hard way that skipping this step means soggy cookies by morning.
- Add the pudding layer. Spoon the chocolate pudding over the cream cheese layer, dividing it evenly among your cups. Fill each cup about 3/4 full. Give the cups a gentle tap on the counter to settle the pudding and remove any air bubbles.
- Top with Oreo dirt. Sprinkle the remaining crushed Oreos over the top of each cup. Use that reserved 1/4 cup for a generous final layer. You want it to look like a little patch of dirt, so don’t be shy.
- Add the pumpkins. Gently press one candy pumpkin into the center of each cup, leaving about half of it visible. If you’re using green sprinkles, add a tiny pinch next to the pumpkin to look like a stem or vine.
- Chill and set. Refrigerate the cups for at least 2 hours, but overnight is better. The layers need time to meld together, and the Oreo crumbles on top will soften just slightly. This is when the magic happens.
One thing I always tell people—don’t rush the chilling time. I’ve made these and served them after just 30 minutes, and they were good but not great. The pudding needs that time to fully set, and the flavors need to get to know each other. Trust the process.
Cooking Tips & Techniques
After making these Easy Pumpkin Patch Pudding Cups with Oreo Dirt more times than I care to count, I’ve picked up a few tricks that make the process smoother. Here’s what I wish someone had told me the first time:
Soften that cream cheese properly. I cannot stress this enough. Cold cream cheese will leave you with lumpy, sad cream cheese layer. Take it out of the fridge 20-30 minutes before you start. If you forgot, unwrap it and microwave it for 10 seconds on low power. Don’t go longer or it’ll melt and ruin the texture.
Use a piping bag for the cream cheese layer. This is my favorite hack. Spoon the cream cheese mixture into a Ziploc bag, snip off the corner, and pipe it into the cups. It’s cleaner, faster, and gives you a perfect even layer every time. Plus, less mess to clean up.
Don’t overcrush the Oreos. I made this mistake my first time. I put the cookies in the food processor and ended up with Oreo dust. It looked like mud, not dirt. You want some texture, some little chunks that look like rocks and pebbles. A rolling pin and a Ziploc bag give you the most control.
Layer in the right order. The order matters here. Oreo base, cream cheese barrier, pudding, then more Oreos on top. If you put the cream cheese on top of the pudding, it’ll sink and mix together. The cream cheese layer needs to be in the middle to keep everything distinct.
Make ahead for better flavor. These actually taste better the next day. The Oreo crumbs soften just enough to create this amazing texture contrast, and the flavors meld together overnight. I often make these the night before a party and they’re always a hit.
Watch out for condensation. If you’re serving these in glass jars, the cold pudding will cause condensation on the outside. I like to wipe the jars down right before serving so they look clean and pretty. A quick wipe with a paper towel does the trick.
Variations & Adaptations
One of the best things about these Easy Pumpkin Patch Pudding Cups with Oreo Dirt is how easy they are to customize. Here are some variations I’ve tried and loved:
Dairy-Free Version: Use dairy-free chocolate pudding mix (check the label—many are accidentally vegan), unsweetened oat milk, and dairy-free cream cheese. I like the Kite Hill brand for the cream cheese. Use coconut whipped cream instead of Cool Whip. The texture is slightly different but still delicious.
Gluten-Free Option: Swap the regular Oreos for gluten-free chocolate sandwich cookies. I’ve used the Glutino brand and they work perfectly. Everything else in the recipe is naturally gluten-free, so this is an easy swap.
Pumpkin Spice Twist: Add 1/2 teaspoon of pumpkin pie spice to the cream cheese layer. It gives the whole dessert a warm, fall-spiced flavor that pairs beautifully with the chocolate. I tried this last November and it was a game-changer.
Individual Trifle Version: Instead of small cups, make one large trifle dish. Layer everything in a clear glass bowl and top with extra candy pumpkins. It’s stunning on a Thanksgiving dessert table and serves a crowd.
No-Bake Pumpkin Cheesecake Cups: Replace the chocolate pudding with a layer of pumpkin pie filling mixed with vanilla pudding. Layer it the same way—Oreo base, cream cheese, pumpkin layer, more Oreos. It’s like pumpkin cheesecake in a cup.
Kid-Friendly Assembly: Set up a “build your own” bar with all the components in separate bowls. Let the kids layer their own cups. It’s messy but so much fun, and they’re always proud of their creations.
Serving & Storage Suggestions
These Easy Pumpkin Patch Pudding Cups with Oreo Dirt are best served cold, straight from the fridge. The contrast between the cool, creamy pudding and the slightly crunchy Oreo topping is part of the magic. I like to take them out about 5 minutes before serving so they’re not ice-cold, but that’s a personal preference.
For presentation, I arrange the cups on a wooden board or a white platter and scatter a few extra candy pumpkins around them. If I’m feeling fancy, I’ll add a small sprig of rosemary next to each cup to look like a little pumpkin vine. It’s a tiny touch that makes a big impression.
These pair beautifully with a warm apple cider, a pumpkin spice latte, or even a glass of cold milk. For adult gatherings, they’re wonderful with a dark stout or a bourbon on the rocks. The chocolate and cream cheese flavors stand up well to bold drinks.
Storage: Cover each cup tightly with plastic wrap or a lid and refrigerate for up to 3 days. The texture is best within the first 48 hours. After that, the Oreo crumbs start to get a little too soft, but they’re still perfectly edible.
Freezer: I don’t recommend freezing these. The cream cheese layer gets grainy and the pudding separates when thawed. If you need to make them way ahead, just prep the components separately (pudding, crushed Oreos, cream cheese layer) and assemble the day you plan to serve them.
One thing I love about this recipe is that the flavors actually get better after a day in the fridge. The Oreo crumbs soften just enough to create this amazing texture, and the cream cheese layer firms up beautifully. So if you’re planning ahead, these are a perfect make-ahead dessert.
Nutritional Information & Benefits
Let’s be honest—these Easy Pumpkin Patch Pudding Cups with Oreo Dirt are a treat, not a health food. But here’s the breakdown if you’re curious:
Per serving (based on 8 servings): Approximately 320 calories, 16g fat, 42g carbohydrates, 4g protein, 28g sugar. These numbers will vary based on the specific brands you use and the size of your cups.
That said, there are a few redeeming qualities. The cream cheese adds a small amount of protein and calcium. The milk in the pudding provides some vitamin D and calcium as well. And honestly, sometimes you just need a little joy in your weeknight dinner rotation. I’m a firm believer that dessert has its place in a balanced life.
For those with dietary concerns: This recipe contains dairy, wheat, and soy. It can be made gluten-free and dairy-free with the substitutions I mentioned earlier. It is not suitable for those with nut allergies unless you verify your specific brands are nut-free.
I always tell my readers to enjoy these in moderation. They’re a fun, festive treat for special occasions, not an everyday snack. But when you do make them, make them with love and don’t feel guilty about it. Food is meant to bring joy, and these little cups deliver plenty of that.
Conclusion
These Easy Pumpkin Patch Pudding Cups with Oreo Dirt are exactly what a weeknight dessert should be—fast, fun, and full of flavor. They come together in minutes with ingredients you probably already have, and they look impressive enough to serve at a party. That’s the kind of recipe I love sharing with you.
I hope you’ll make these your own. Maybe you’ll add a sprinkle of cinnamon, or use white chocolate pudding instead of chocolate, or top them with gummy worms instead of pumpkins. That’s the beauty of a simple recipe like this—it’s a canvas for your creativity. The basic technique is solid, but the variations are endless.
Honestly, every time I make these, I think of Margaret standing on her porch with that little jar. She didn’t give me a recipe that day. She gave me an idea, and I turned it into something that’s become a fall tradition in my house. I’d love to hear how these turn out for you. Drop a comment below and let me know what variation you tried, or tag me in your photos. You know I love seeing your creations.
Now go make some dirt. Your pumpkin patch is waiting.
Frequently Asked Questions
Can I make these pudding cups the night before?
Absolutely. In fact, I recommend it. Making them the night before gives the layers time to set properly and the flavors to meld. Just cover them tightly and refrigerate. They’ll be perfect the next day.
Can I use homemade chocolate pudding instead of instant?
You can, but the texture will be different. Homemade pudding is thinner and won’t set as firmly as instant. If you go that route, make sure your pudding is fully cooled and thickened before layering, and expect the layers to be a bit softer.
How do I keep the Oreo crumbs from getting soggy?
The cream cheese layer is your secret weapon here. It acts as a barrier between the moist pudding and the crunchy Oreos. Also, don’t add the top layer of crumbs until right before serving if you’re making these more than a day ahead. The bottom layer will soften slightly, but the top stays crunchy.
Can I use a different type of cookie?
Sure! Golden Oreos, chocolate wafers, or even graham crackers would work. Just keep in mind that different cookies have different textures and sweetness levels. Golden Oreos will give you a lighter, vanilla-flavored “dirt” that’s lovely with the chocolate pudding.
How many cups does this recipe make?
This recipe makes about 8 servings if you’re using 8-ounce cups or jars. If you’re using smaller cups (like 4-ounce shot glasses for a party), you can get 12-16 servings. Just adjust the layering amounts accordingly.
Pin This Recipe!
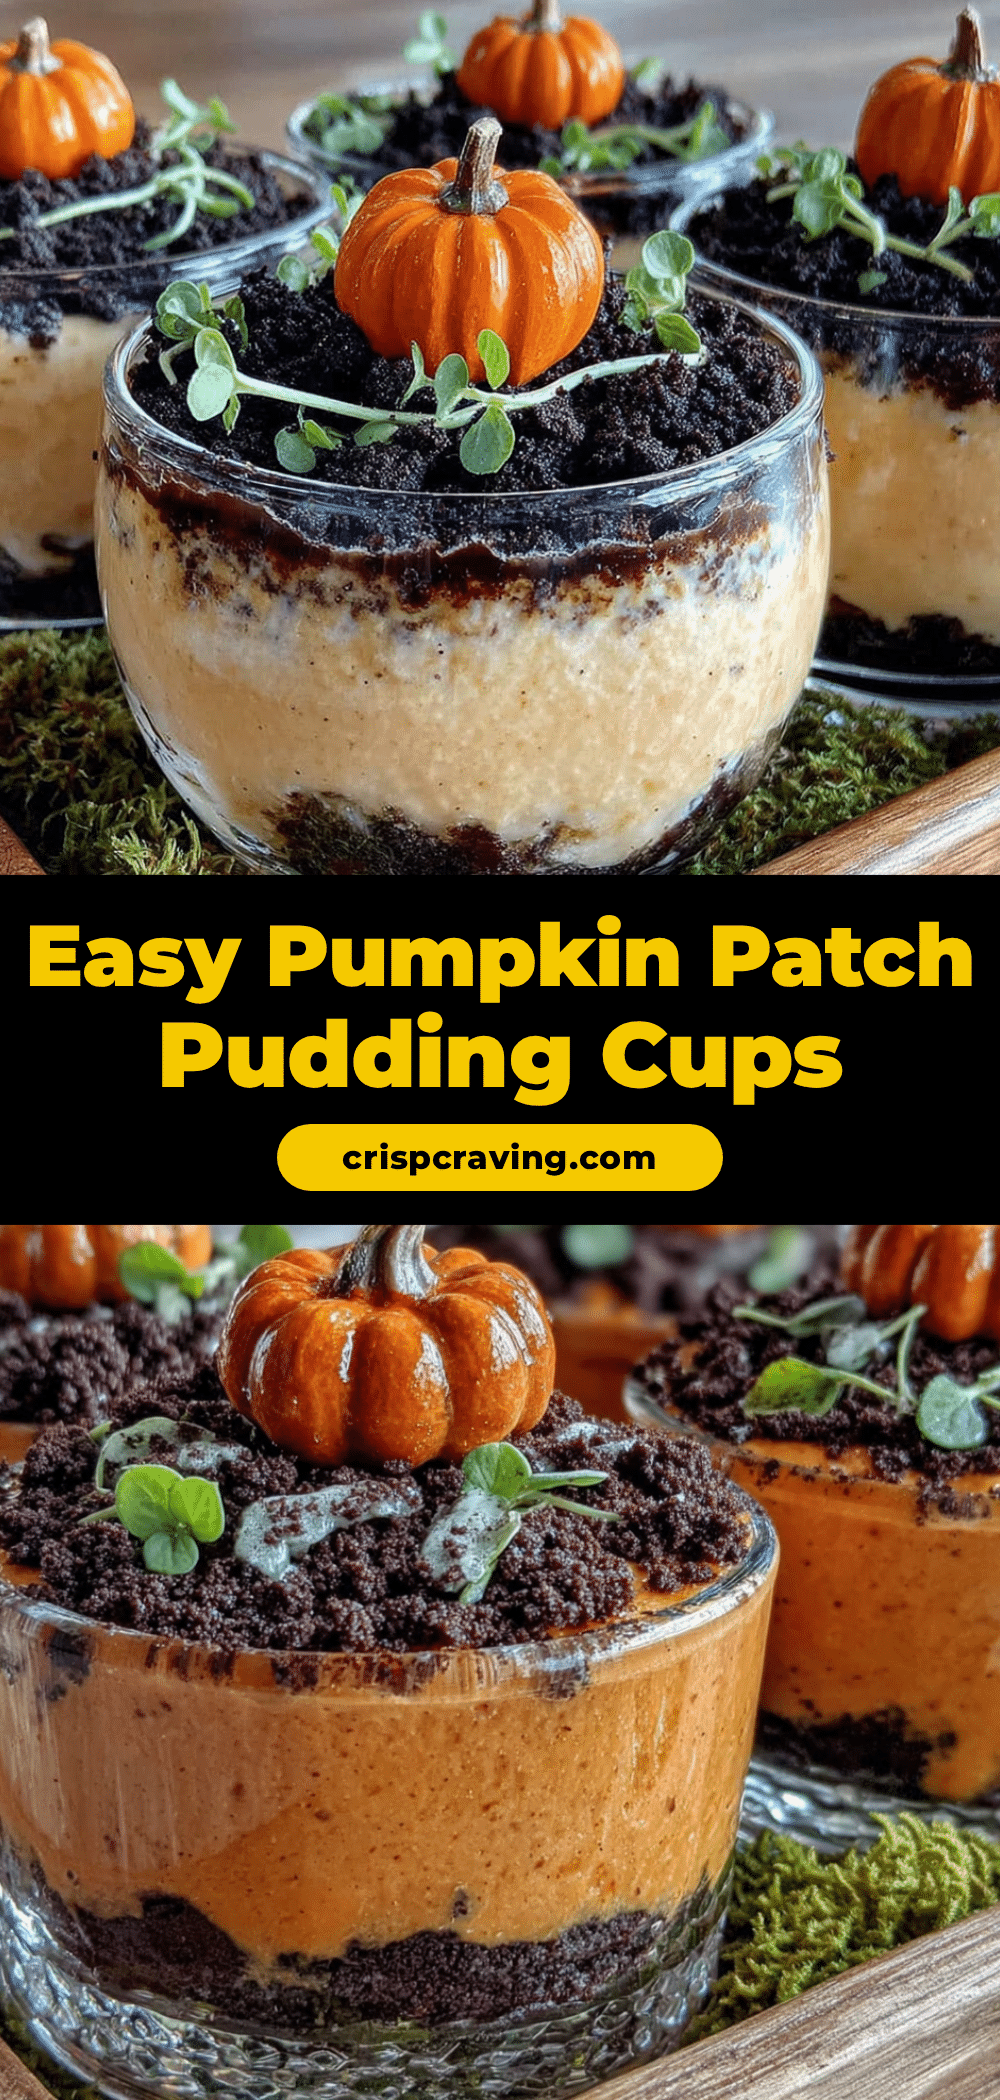
Easy Pumpkin Patch Pudding Cups with Oreo Dirt
These Easy Pumpkin Patch Pudding Cups with Oreo Dirt are layered chocolate pudding, crushed Oreos, and a cute little pumpkin on top. They come together in about fifteen minutes with simple ingredients, making them perfect for fall gatherings, Halloween parties, or a quick weeknight dessert.
- Prep Time: 15 minutes
- Cook Time: 0 minutes
- Total Time: 2 hours 15 minutes (includes chilling)
- Yield: 8 servings 1x
- Category: Dessert
- Cuisine: American
Ingredients
- 1 box (3.9 oz) instant chocolate pudding mix
- 2 cups cold milk
- 4 oz cream cheese, softened
- 1/4 cup powdered sugar
- 1/2 cup Cool Whip, thawed
- 1 package (14.3 oz) Oreo cookies (about 20 cookies)
- 12–15 candy pumpkins
- Optional: Green sprinkles or green colored sugar
Instructions
- Make the chocolate pudding. In a medium bowl, whisk together the instant chocolate pudding mix and 2 cups of cold milk. Whisk for about 2 minutes until it starts to thicken. Set it aside for 5 minutes to fully set.
- Crush the Oreos. While the pudding sets, place about 20 Oreo cookies in a large Ziploc bag. Seal it up, then crush with a rolling pin or your hands to a mix of fine crumbs and small chunks. Set aside about 1/4 cup of the crumbs for topping.
- Make the cream cheese layer. In a separate bowl, beat the softened cream cheese with the powdered sugar until smooth and creamy. Fold in the thawed Cool Whip gently with a spatula until light and fluffy.
- Start layering. Spoon about 2 tablespoons of the crushed Oreos into the bottom of each cup. Press down lightly with the back of a spoon to create a solid base.
- Add the cream cheese layer. Spoon or pipe about 2 tablespoons of the cream cheese mixture over the Oreo layer. Spread gently to the edges.
- Add the pudding layer. Spoon the chocolate pudding over the cream cheese layer, dividing it evenly among your cups. Fill each cup about 3/4 full. Tap gently on the counter to settle.
- Top with Oreo dirt. Sprinkle the remaining crushed Oreos over the top of each cup, using the reserved 1/4 cup for a generous final layer.
- Add the pumpkins. Gently press one candy pumpkin into the center of each cup, leaving about half visible. Add green sprinkles if desired.
- Chill and set. Refrigerate the cups for at least 2 hours, but overnight is better.
Notes
Don’t rush the chilling time; the pudding needs time to fully set and flavors to meld. The cream cheese layer acts as a barrier to keep Oreo crumbs from getting soggy. For best results, make the night before. If making ahead, add top layer of crumbs just before serving to maintain crunch.
Nutrition
- Serving Size: 1 cup (8 oz)
- Calories: 320
- Sugar: 28
- Sodium: 380
- Fat: 16
- Saturated Fat: 8
- Carbohydrates: 42
- Fiber: 1
- Protein: 4
Keywords: pumpkin patch pudding cups, Oreo dirt dessert, easy fall dessert, no-bake pudding cups, Halloween dessert, chocolate pudding cups, cream cheese pudding cups



