Love this? Save it for later!
Share the inspiration with your friends
My sister-in-law wasn’t trying to be a hero that Tuesday. I’d stopped by to drop off a book I’d borrowed, and this deep, jammy, almost floral smell hit me before I even got past the mudroom. She was standing at the stove, stirring a pot of deep purple liquid, looking like she was making a quick cup of tea. “Oh, it’s just some gummies for the kids,” she said when I asked, completely nonchalant. “They keep getting sick at school.”
I watched her pour that shimmering, dark syrup into little silicone bear molds, and honestly, I felt a little embarrassed. Here I was, buying those neon, sugar-coated vitamin gummies from the store, thinking I was doing a good thing. She was making hers from scratch, from a handful of dried berries that looked like they belonged in a witch’s pantry. She didn’t act like it was a big deal—she was just dealing with a problem in the most straightforward way possible. That casualness, that quiet confidence, was the whole point. She wasn’t trying to impress me; she was just making her kids feel better.
I took a mold home with me that day, and let me tell you, my own toddler turned into a little monster for them. I mean, he asks for these healthy homemade elderberry gummies for kids like they’re candy. And you know what? I’m totally fine with that. This recipe stayed with me because it’s not about being a perfect parent—it’s about finding a simple, real-food solution that actually works. Maybe you’ve been there, staring at the back of a vitamin bottle, wondering what half those ingredients are. This is the antidote to that.
Why You’ll Love This Recipe
Let’s be honest—getting kids to take anything healthy can feel like a negotiation with a tiny, stubborn CEO. But these healthy homemade elderberry gummies for kids change the game completely. They aren’t a chore to eat; they are a treat. This recipe isn’t just another version of a wellness trend—it’s the version that actually works for real families.
- Super Simple Ingredients: You only need four main ingredients—dried elderberries, raw honey, lemon juice, and gelatin. No weird preservatives, no artificial colors, no high-fructose corn syrup. You can pronounce everything in the bowl.
- Quick & Easy Prep: The active time is about 15 minutes. The hardest part is waiting for the gelatin to bloom and the gummies to set in the fridge. It’s totally doable on a Sunday afternoon while you’re doing other stuff.
- Immune-Boosting Powerhouse: Elderberries are packed with antioxidants and vitamins that help support the immune system. This is comfort food for your kid’s immune system—delicious and functional.
- Kids Actually Eat Them: This is the biggest win. My nephew, who refuses to swallow a pill, will happily munch on three of these. They taste like a sweet, fruity jelly, not medicine.
- Perfect for Busy Moms: You can make a batch on the weekend and have a week’s worth of immune support ready to go. It’s a set-it-and-forget-it kind of project that pays off all week long.
What makes this recipe different from the store-bought stuff? It’s the control you have. You decide the sweetness level, you pick the honey, you know the elderberries are real. It’s not just a gummy—it’s a little piece of peace of mind. This is the kind of recipe that makes you feel like a rockstar parent without actually having to do that much work. Honestly, it’s the best kind of kitchen win.
What Ingredients You Will Need
This recipe uses simple, wholesome ingredients to deliver a powerful immune boost without any of the junk. Most of these are pantry staples for anyone who dabbles in natural wellness, but you can find them easily online or at a health food store.
- Dried Elderberries (½ cup): These are the star of the show. Look for organic, dried black elderberries (Sambucus nigra). I usually get mine from a bulk spice store or online from Starwest Botanicals. They should smell faintly floral and earthy. Don’t use fresh elderberries—they need to be cooked to be safe.
- Water (3 cups): Just regular filtered water. It’s the base for steeping the berries to make a concentrated syrup.
- Raw Honey (¼ cup, or to taste): This adds sweetness and also has its own natural antibacterial properties. Use raw, unfiltered honey for the most benefit. If your kids are under one year old, you must substitute with maple syrup or agave nectar due to the risk of botulism.
- Lemon Juice (2 tablespoons, freshly squeezed): The acidity helps preserve the gummies and brightens the flavor. It also helps the gelatin set properly. Use a real lemon, not the bottled stuff, for the best taste.
- Unflavored Grass-Fed Gelatin (3 tablespoons): This is what gives the gummies their chewy texture. I recommend Great Lakes or Vital Proteins gelatin. It’s important to use gelatin, not collagen peptides—collagen won’t set into a firm gummy. (I learned this the hard way, and ended up with elderberry soup.)
That’s it. No pectin, no corn syrup, no artificial flavors. You can also add a pinch of ground cinnamon or ginger for extra immune support, but it’s totally optional. The honey and lemon do a beautiful job of masking the slightly tart, earthy flavor of the elderberries, so even picky eaters won’t complain.
Equipment Needed
You don’t need a fancy kitchen setup for this, but a few specific tools make the job much easier. Here’s what you’ll need to grab.
- Small Saucepan: For simmering the elderberries. A non-reactive pot (stainless steel or enamel) is best to avoid any metallic taste.
- Fine-Mesh Strainer or Cheesecloth: You need to strain out the cooked berries to get a clear syrup. A nut milk bag works great too. Press down on the berries to get every last drop of goodness.
- Silicone Gummy Molds: These are non-negotiable for getting that cute gummy shape. I use bear and dinosaur molds. You can find them on Amazon for a few bucks. Don’t use hard plastic molds—the gummies will stick.
- Liquid Dropper or Small Measuring Cup with Spout: For filling the molds without making a huge mess. A dropper gives you more control, but a small spouted cup works fine if you’re careful.
- Glass Bowl: For blooming the gelatin. Make sure it’s heat-safe.
- Whisk or Fork: For mixing the gelatin into the warm syrup. A fork works in a pinch, but a small whisk is better for getting rid of lumps.
If you don’t have silicone molds, you can pour the mixture into a small glass dish and cut it into squares once it sets. It’s not as cute, but it works just as well. I’ve done both, and honestly, the molds are worth the investment just for the smiles on the kids’ faces.
Preparation Method
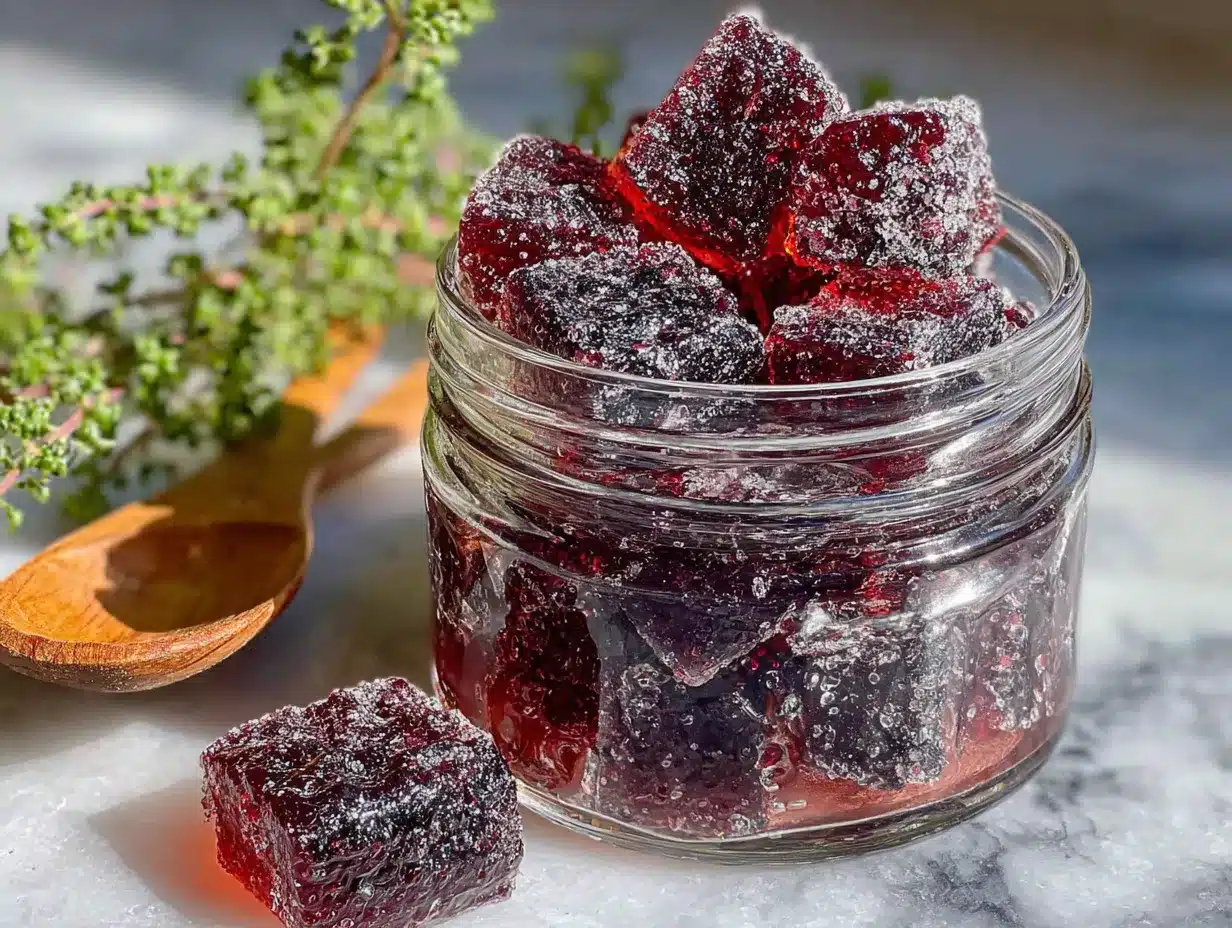
Making these healthy homemade elderberry gummies for kids is a straightforward process, but there are a few little tricks to get the perfect texture. Follow these steps closely, and you’ll have a perfect batch every time.
- Make the Elderberry Syrup: In your small saucepan, combine the ½ cup of dried elderberries and 3 cups of water. Bring it to a boil over medium-high heat, then reduce the heat to low and let it simmer, uncovered, for about 30-40 minutes. The liquid should reduce by about half. You’ll know it’s ready when the berries look plump and the liquid is a deep, dark purple. The smell will be incredible—like a sweet, floral tea.
- Strain the Berries: Place your fine-mesh strainer over a large glass bowl or measuring cup. Pour the mixture through the strainer, using the back of a spoon to press down on the berries and extract all the syrup. Discard the spent berries (or compost them). You should have about 1 to 1 ½ cups of concentrated syrup. Let it cool for a few minutes until it’s warm, not hot.
- Bloom the Gelatin: While the syrup is cooling, pour ½ cup of the warm elderberry syrup into a separate small bowl. Sprinkle the 3 tablespoons of gelatin evenly over the surface. Do not stir yet! Let it sit for about 5 minutes. This is called “blooming.” The gelatin will absorb the liquid and become a thick, spongy mass. This step is crucial—if you skip it or stir it in too early, you’ll get lumpy gummies.
- Combine and Warm: After 5 minutes, pour the bloomed gelatin mixture back into the pot with the remaining warm syrup. Add the ¼ cup of raw honey and 2 tablespoons of lemon juice. Place the pot back on the stove over the lowest heat setting. Whisk gently and constantly until the gelatin is completely dissolved and the mixture is smooth and glossy. Do not let it boil! Boiling will break down the gelatin and ruin the gummy texture. You just want it warm enough to melt the honey and gelatin.
- Fill the Molds: Place your silicone molds on a small baking sheet (this makes them easier to move). Using your dropper or spouted cup, carefully fill each cavity of the mold. Don’t overfill—just fill to the top of each cavity. If you get a few air bubbles, tap the baking sheet lightly on the counter to bring them to the surface. Work quickly, because the mixture will start to thicken as it cools. If it gets too thick, just warm it gently again for a few seconds.
- Set the Gummies: Carefully transfer the baking sheet with the filled molds to the refrigerator. Let them set for at least 2-3 hours, or until they are firm to the touch. I usually leave them overnight for the best texture. Patience is key here—if you try to pop them out too early, they’ll be a sticky mess.
- Unmold and Store: Once set, gently push the gummies out of the molds from the back. They should pop out easily. Store them in an airtight glass container in the refrigerator.
Cooking Tips & Techniques
I’ve made this recipe more times than I can count, and I’ve definitely had my share of failures. Here are the lessons I learned the hard way so you don’t have to.
- Don’t Overheat the Gelatin: This is the number one mistake. Gelatin is a protein, and if you boil it, it loses its ability to set. The mixture should be just warm to the touch—think warm bath water, not hot tea. If you see steam, you’re getting too hot.
- The Perfect Consistency: The texture of the gummies depends on the ratio of liquid to gelatin. If you want them softer, use 2 ½ tablespoons of gelatin. If you want them firmer (like a traditional gummy bear), use 3 ½ tablespoons. I’ve settled on 3 tablespoons as the sweet spot for kids—it’s firm enough to hold its shape but soft enough to chew easily.
- Work in Batches: If you’re using multiple small molds, don’t try to fill them all at once. The mixture will thicken as it sits. I fill one mold, pop it in the fridge, and then gently re-warm the remaining mixture before filling the next mold. It takes a little longer, but it saves you from a lumpy disaster.
- Sticky Molds? If your gummies are sticking, you didn’t let them set long enough. Give them a full 4 hours in the fridge. Also, make sure your molds are completely dry before you start. Any moisture can cause sticking.
- Flavor Adjustments: The elderberry flavor is naturally a bit tart and earthy. If your kids are sensitive to that, you can increase the honey to ⅓ cup. You can also add a teaspoon of vanilla extract for a warmer, sweeter flavor profile.
Variations & Adaptations
This base recipe is fantastic, but sometimes you want to mix things up. Here are a few variations I’ve tried that have all been hits.
- Spiced Immune Booster: Add a 1-inch piece of fresh ginger (sliced) and a cinnamon stick to the pot while simmering the elderberries. The ginger adds a nice little warmth, and the cinnamon makes it smell like the holidays. Strain them out with the berries. It’s my go-to during cold and flu season.
- Berry Blast Gummies: Replace ¼ cup of the water with ¼ cup of pure unsweetened cherry or pomegranate juice. This adds a different antioxidant profile and makes the flavor even fruitier. My kids love this version.
- Vegan Version (Pectin-Based): For a plant-based option, you can swap the gelatin for powdered pectin. Use about 2 tablespoons of pectin and mix it with ¼ cup of sugar before whisking it into the warm syrup. The texture will be softer—more like a fruit jelly—but it’s still delicious. Note that pectin requires a higher sugar content to set, so you may need to increase the honey or use a bit of maple syrup.
- Low-Sugar Option: If you’re watching sugar intake, you can reduce the honey to 2 tablespoons. The gummies will be more tart, but they’ll still set fine. You can also use a monk fruit sweetener that’s heat-stable, but I find honey works best for texture.
I’ve tried the ginger-cinnamon version during a particularly nasty cold snap, and it felt like a warm hug for my family’s immune systems. Don’t be afraid to experiment!
Serving & Storage Suggestions
These gummies are best enjoyed cold, straight from the fridge. The texture is perfect—snappy but chewy. Here’s how to serve and store them to keep them at their best.
- Serving Size: For kids ages 2-4, I give them 1-2 gummies per day. For older kids (5-12), 2-3 gummies is a good maintenance dose. During cold season, you can increase to 3-4 gummies, but don’t overdo it. They are a supplement, not a snack.
- How to Serve: I like to put them in a small bowl and let the kids pick them out themselves. It makes them feel in control. You can also pop them in a lunchbox for a fun surprise—they hold up well for a few hours at room temperature, but I wouldn’t leave them out all day.
- Storage: Store the gummies in an airtight glass container in the refrigerator. They will keep for up to 2-3 weeks. I use a small mason jar. Do not leave them at room temperature for more than a few hours, as they will become soft and sticky.
- Freezing: You can freeze these! Place the gummies in a single layer on a parchment-lined baking sheet and freeze until solid (about 1 hour). Then transfer them to a freezer-safe bag or container. They will keep for up to 3 months. Thaw them in the fridge overnight before eating.
- Flavor Development: Honestly, these taste even better the day after you make them. The flavors meld together, and the texture firms up perfectly. So don’t be disappointed if they seem a little soft on day one—they just need a little time.
Nutritional Information & Benefits
These gummies are a powerhouse of immune-supporting nutrients, but they’re also just a really smart way to get some good stuff into your kids. Here’s a quick look at what you’re getting.
- Elderberries: These little dark berries are loaded with antioxidants, particularly anthocyanins and flavonoids. They are known to help reduce the severity and duration of cold and flu symptoms by supporting the immune system.
- Raw Honey: A natural source of enzymes, antioxidants, and antibacterial properties. It can help soothe a sore throat and calm a cough. (Remember, not for children under 1 year.)
- Gelatin: Great for gut health! Gelatin contains glycine and proline, which support healthy digestion and joint health. It also gives the gummies that satisfying, chewy texture.
- Lemon Juice: A good source of vitamin C, which is another classic immune booster. It also helps balance the pH and preserve the gummies.
Approximate Nutritional Information (per 3-gummy serving):
| Nutrient | Amount |
|---|---|
| Calories | 35-45 |
| Carbohydrates | 9g |
| Sugars | 8g (from honey) |
| Protein | 2g |
| Vitamin C | 2-4% DV |
These are a low-sugar treat compared to store-bought gummies. They are naturally gluten-free, dairy-free, and soy-free. Always check your honey and gelatin labels if you have specific dietary concerns.
Conclusion
Honestly, this recipe changed the way I think about “healthy snacks.” It’s not about deprivation or tricking your kids into eating something they hate. It’s about making something that genuinely tastes good and happens to be good for them. These healthy homemade elderberry gummies for kids are proof that you don’t need a degree in nutrition or a fancy kitchen to give your family a little extra immune support. You just need a few simple ingredients and a little bit of time.
I love this recipe because it makes me feel prepared. When I hear that first sniffle of the season, I don’t panic—I just head to the fridge and grab the bear-shaped gummies. It’s a small thing, but it makes a big difference in how I feel as a parent. I hope you give them a try and make them your own. Maybe you’ll add a little extra ginger, or maybe you’ll use a different mold shape. Whatever you do, I’d love to hear about it.
Drop a comment below and let me know how your batch turned out! Did your kids love them? Did you try a fun variation? Sharing is caring, and your idea might be the one that helps another parent out. Until next time, happy cooking—and happy immune-boosting!
Frequently Asked Questions
Can I use elderberry syrup instead of dried berries?
Yes, you can! If you have a bottle of pre-made elderberry syrup, you can skip the simmering step. Use about 1 ¼ cups of syrup in place of the homemade version. Just warm it gently and proceed with the gelatin blooming step. Keep in mind that store-bought syrups often have added sugars or other ingredients, so the flavor and sweetness may vary.
My gummies turned out too soft. What went wrong?
This usually happens for one of three reasons: you didn’t use enough gelatin, you overheated the mixture after adding the gelatin, or you didn’t let them set long enough. Make sure you’re using a full 3 tablespoons of gelatin and that you’re only warming the mixture until the gelatin dissolves—no boiling. Also, give them a full 3-4 hours in the fridge to set properly.
Can I use flavored gelatin?
I don’t recommend it. Flavored gelatin is usually packed with artificial colors, sugars, and preservatives, which defeats the purpose of making a healthy homemade version. Stick with unflavored gelatin and let the elderberries and honey provide the flavor. It’s a cleaner, more wholesome result.
How long do these gummies last at room temperature?
They are best kept refrigerated. At room temperature, they will soften and become sticky after a few hours. If you’re packing them in a lunchbox, they’ll be fine for 2-3 hours, but I wouldn’t push it past that. For longer outings, use a small insulated container with an ice pack.
Can I make these gummies without honey?
Absolutely. If your child is under one year old, or if you simply want to avoid honey, you can substitute it with an equal amount of maple syrup, agave nectar, or a few drops of liquid stevia to taste. Keep in mind that the type of sweetener can affect the final texture slightly—maple syrup works beautifully and adds a nice flavor.
Pin This Recipe!
Healthy Homemade Elderberry Gummies Kids Love
These healthy homemade elderberry gummies are a simple, real-food solution for immune support that kids actually love. Made with just four main ingredients, they are a delicious and functional treat perfect for busy families.
- Prep Time: 15 minutes
- Cook Time: 40 minutes
- Total Time: 3 hours 55 minutes (includes setting time)
- Yield: 4 servings 1x
- Category: Snack
- Cuisine: American
Ingredients
- ½ cup dried elderberries
- 3 cups water
- ¼ cup raw honey (or maple syrup for children under 1 year)
- 2 tablespoons freshly squeezed lemon juice
- 3 tablespoons unflavored grass-fed gelatin
Instructions
- Make the Elderberry Syrup: In a small saucepan, combine ½ cup dried elderberries and 3 cups water. Bring to a boil over medium-high heat, then reduce heat to low and simmer uncovered for 30-40 minutes until liquid reduces by half and berries are plump.
- Strain the Berries: Place a fine-mesh strainer over a large glass bowl or measuring cup. Pour the mixture through the strainer, pressing down on the berries with a spoon to extract all syrup. Discard berries. You should have about 1 to 1½ cups of concentrated syrup. Let cool until warm.
- Bloom the Gelatin: Pour ½ cup of the warm elderberry syrup into a separate small bowl. Sprinkle 3 tablespoons of gelatin evenly over the surface. Let sit for 5 minutes without stirring until it becomes a thick, spongy mass.
- Combine and Warm: Pour the bloomed gelatin mixture back into the pot with the remaining warm syrup. Add ¼ cup raw honey and 2 tablespoons lemon juice. Place over lowest heat and whisk gently until gelatin is completely dissolved and mixture is smooth and glossy. Do not let it boil.
- Fill the Molds: Place silicone molds on a small baking sheet. Using a dropper or small spouted cup, carefully fill each cavity to the top. Tap the baking sheet lightly to release air bubbles. Work quickly as mixture thickens.
- Set the Gummies: Transfer the baking sheet with filled molds to the refrigerator. Let set for at least 2-3 hours, or overnight for best texture, until firm to the touch.
- Unmold and Store: Gently push gummies out of molds from the back. Store in an airtight glass container in the refrigerator.
Notes
Do not boil the mixture after adding gelatin as it will lose its setting ability. For softer gummies, use 2½ tablespoons gelatin; for firmer, use 3½ tablespoons. Gummies taste even better the day after making. Store in refrigerator for up to 2-3 weeks or freeze for up to 3 months.
Nutrition
- Serving Size: 3 gummies
- Calories: 3545
- Sugar: 8
- Sodium: 5
- Carbohydrates: 9
- Protein: 2
Keywords: elderberry gummies, homemade gummies, immune boosting gummies, healthy kids snacks, elderberry recipe, natural gummies



