Love this? Save it for later!
Share the inspiration with your friends
I was standing in the baking aisle last October, staring at a bag of marshmallows, when the smell hit me. Not the marshmallows themselves, but that weird, waxy scent of a Halloween costume package fresh out of the plastic. And suddenly I was seven years old at my neighbor Mrs. Kowalski’s kitchen table, her flour-dusted hands pressing a ghost-shaped cookie cutter into a sheet of marshmallow fondant. She wasn’t my grandmother, and I wasn’t related to her at all. She was just the lady next door who let me help her make “spooky treats” every year because she knew my mom worked late. I honestly haven’t thought about her in twenty years. But there I was, in Target, getting misty-eyed over a bag of Jet-Puffed.
The thing about those ghosts was that they were beautiful but also a total sugar bomb. You’d eat one and immediately crash. So when I decided to recreate that feeling for my own kids, I knew I had to do it differently. These Lighter Ghost Marshmallow Pop Cupcakes are my grown-up answer to that memory. They keep the whimsy and the adorable ghost face, but they swap out the heavy, cloying sweetness for something you can actually feel good about eating. I mean, you’re still eating a cupcake, let’s be real. But the marshmallow pops are lighter, the cake is fluffier, and the whole thing comes together in about twenty minutes. Maybe you’ve been there—wanting to give your kids that nostalgic Halloween magic without the sugar hangover that follows. That’s exactly why this recipe stuck with me, and why I keep making it every October.
Why You’ll Love This Recipe
Let me tell you, I tested this recipe about five times before I got it right. The first batch? The marshmallows sank to the bottom. The second batch? The ghosts looked like sad, melted blobs. But by batch three, I had cracked the code, and now this is the only Halloween cupcake recipe I use. Here’s why you’ll love it too:
- Quick & Easy: From start to finish, you’re looking at about 20 minutes of active work. The cupcakes bake in 12-14 minutes, and the marshmallow pops come together in five. Perfect for those “I need a classroom treat by tomorrow morning” panic moments.
- Simple Ingredients: No fancy bakery supplies needed. You probably already have flour, sugar, eggs, and butter in your kitchen. The marshmallows and candy eyes are the only specialty items, and you can grab both at any grocery store.
- Perfect for Halloween Parties: These are the kind of cupcakes that make people stop and say “oh my gosh, how cute!” They look impressive, but they’re secretly simple. Great for school parties, Halloween gatherings, or just a fun weekend project with the kids.
- Crowd-Pleaser: I brought a batch to my son’s soccer practice last year, and they were gone in ten minutes. The kids loved the marshmallow pop on top, and the parents loved that they weren’t sending their kids home on a sugar high.
- Unbelievably Delicious: The trick here is the lighter cake base. I use a combination of Greek yogurt and a touch of applesauce to replace some of the oil and butter. The result is a cupcake that’s incredibly moist and tender, but not heavy. The marshmallow pop on top adds that nostalgic campfire-toastiness without being cloying.
This isn’t just another Halloween cupcake recipe. It’s the one that makes you close your eyes after the first bite because it tastes like a happy memory, but it doesn’t leave you feeling like you need a nap. It’s comfort food reimagined—healthier, faster, but with the same soul-soothing satisfaction. Perfect for impressing guests without stress, or turning a simple October afternoon into something memorable.
What Ingredients You Will Need
This recipe uses simple, wholesome ingredients to deliver that nostalgic Halloween flavor without the heavy, sugary aftermath. Most of these are pantry staples, and the few specialty items are easy to find.
For the Cupcake Batter
- All-purpose flour, 1 ½ cups (180g) – Spoon and level for best results. I’ve tested this with whole wheat pastry flour too, and it works great for a fiber boost.
- Granulated sugar, ¾ cup (150g) – You can reduce this to ½ cup if you prefer less sweetness, but the cupcakes will be slightly less tender.
- Baking powder, 1 ½ teaspoons – Make sure it’s fresh for proper lift.
- Baking soda, ½ teaspoon – Helps with browning and tenderness.
- Salt, ¼ teaspoon – Balances the sweetness.
- Unsalted butter, ¼ cup (56g), softened – I use Kerrygold for the best flavor, but any good butter works.
- Greek yogurt, ½ cup (120g), plain – This is the secret to the lighter texture. It adds moisture and protein without the fat of oil. I recommend Fage or Chobani for thickness.
- Applesauce, ¼ cup (60g), unsweetened – Replaces some of the oil and keeps the cupcakes tender.
- Large eggs, 2, room temperature – Room temperature eggs incorporate more air into the batter.
- Vanilla extract, 2 teaspoons – Pure vanilla, not imitation, for the best flavor.
- Milk, ½ cup (120ml), any kind – I use 2% or oat milk. The fat content affects tenderness slightly, but any works.
For the Marshmallow Pops
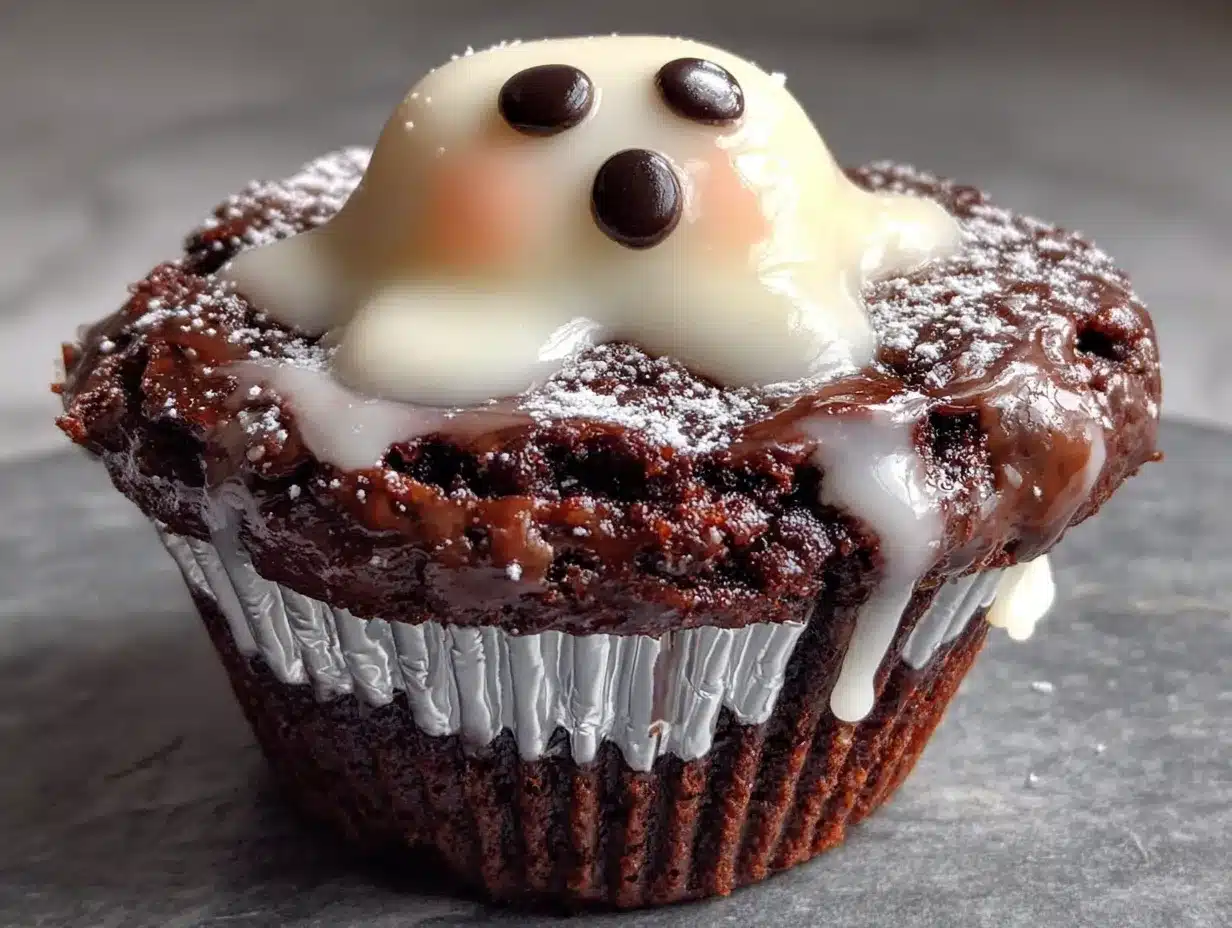
- Large marshmallows, 12 – Look for fresh, soft marshmallows. Stale ones won’t toast as nicely.
- Lollipop sticks, 12 – You can find these at craft stores or online. Popsicle sticks work too.
- White melting wafers, 1 cup (170g) – I like Ghirardelli or Wilton brands. You can also use white chocolate chips with a teaspoon of coconut oil.
- Black gel food coloring or black decorating icing – For the ghost faces. I prefer the gel because it’s easier to control.
- Orange and black sprinkles (optional) – For decorating the base.
For the Frosting
- Light cream cheese, 4 oz (113g), softened – Neufchâtel works beautifully here. It’s lower in fat but still creamy.
- Powdered sugar, 1 cup (120g) – Sift it to avoid lumps.
- Vanilla extract, 1 teaspoon
- Milk, 1-2 tablespoons – To thin the frosting to piping consistency.
Equipment Needed
You don’t need a fancy bakery setup for these. Here’s what I use:
- 12-cup muffin tin – Standard size. If you only have a 6-cup tin, just bake in batches.
- Cupcake liners – I like foil liners for Halloween because they hold their shape better. Paper works fine too.
- Mixing bowls – One large, one medium.
- Whisk and electric mixer – A hand mixer works great. You can whisk by hand, but it takes more elbow grease.
- Lollipop sticks – Or popsicle sticks, or even sturdy straws.
- Small microwave-safe bowl – For melting the white wafers.
- Piping bag or zip-top bag – For the frosting. I use a zip-top bag with the corner snipped off for easy cleanup.
- Wax paper or parchment paper – For setting the marshmallow pops.
Pro tip: If you don’t have a piping bag, a zip-top bag works perfectly. Just fill it, snip a tiny corner, and you’re good to go. I’ve been doing that for years because I’m too lazy to wash piping bags.
Preparation Method
- Preheat your oven to 350°F (175°C). Line your muffin tin with 12 cupcake liners. This is one of those steps where you really don’t want to skip the preheating—the batter needs that initial blast of heat to rise properly.
- Make the cupcake batter. In a large bowl, whisk together the flour, sugar, baking powder, baking soda, and salt. Add the softened butter and use your electric mixer on low speed to cut it into the dry ingredients until it looks like coarse sand. This takes about 30 seconds. Don’t overmix here.
- Add the wet ingredients. In a separate bowl, whisk together the Greek yogurt, applesauce, eggs, vanilla extract, and milk. Pour this mixture into the dry ingredients and mix on low speed until just combined. The batter will be thick and slightly lumpy—that’s okay. Overmixing at this stage makes tough cupcakes. Fold it a few times with a spatula to make sure the bottom is incorporated.
- Fill the liners. Divide the batter evenly among the 12 liners, filling each about ⅔ full. I use a cookie scoop for this, which is a game-changer for even baking. If you don’t have one, a ¼ cup measure works.
- Bake the cupcakes. Place the tin in the preheated oven and bake for 12-14 minutes. The tops should spring back when lightly touched, and a toothpick inserted into the center should come out clean or with a few moist crumbs. My oven runs hot, so I check at 11 minutes. Let them cool in the pan for 5 minutes, then transfer to a wire rack to cool completely. Do not frost warm cupcakes—the frosting will melt into a puddle.
- Make the marshmallow pops. While the cupcakes are cooling, line a baking sheet with wax paper. Insert a lollipop stick into each marshmallow, pushing about halfway through. Melt the white wafers in a microwave-safe bowl in 20-second intervals, stirring between each, until smooth. Dip each marshmallow into the melted coating, letting the excess drip off. Place on the wax paper to set. This takes about 10 minutes. If you’re in a humid environment, they might take longer.
- Add the ghost faces. Once the white coating is set, use the black gel food coloring or decorating icing to draw two eyes and a mouth on each ghost. I’ve found that using a toothpick dipped in the gel gives you the most control. Don’t worry about perfection—ghosts are supposed to look a little wonky.
- Make the frosting. In a medium bowl, beat the softened cream cheese with an electric mixer until smooth. Add the powdered sugar and vanilla extract, and beat on low speed until combined. Add milk one tablespoon at a time until the frosting reaches a pipeable consistency. It should be thick but not stiff.
- Frost the cupcakes. Spoon the frosting into a piping bag or zip-top bag. Pipe a swirl onto each cooled cupcake. I like to create a little well in the center of the swirl to hold the marshmallow pop.
- Assemble the ghosts. Gently insert the stick of each marshmallow pop into the center of a frosted cupcake. If you want, add orange and black sprinkles around the base of the ghost for a festive touch. Serve immediately or store as directed.
Cooking Tips & Techniques
I learned a few things the hard way so you don’t have to. Here are my best tips:
Don’t overmix the batter. I know I said this already, but it’s worth repeating. Overmixing develops gluten, and gluten makes cupcakes tough. You want them light and fluffy. Mix until the flour just disappears, then stop. A few lumps are fine.
Room temperature ingredients matter. Cold eggs and cold yogurt will make the batter seize up. Take them out of the fridge about 30 minutes before you start. If you forget (which I do, constantly), place the eggs in a bowl of warm water for 5 minutes, and microwave the yogurt for 10 seconds.
The marshmallow pop coating. If your white wafers are too thick, add a teaspoon of coconut oil or vegetable shortening. This thins them out and makes dipping easier. Also, tap the stick gently on the side of the bowl to remove excess coating. You want a thin, even layer, not a thick shell.
Make-ahead strategy. You can bake the cupcakes a day ahead and store them in an airtight container at room temperature. Make the marshmallow pops a day ahead too, but don’t draw the faces until just before serving. The black gel can bleed into the white coating if it sits too long.
My biggest failure. The first time I made these, I tried to speed things up by dipping the marshmallows while the coating was still too hot. The marshmallows partially melted and slid right off the sticks. It was a sticky, sad mess. Let the coating cool for a minute or two before dipping. You want it warm but not hot.
Variations & Adaptations
One of the best things about this recipe is how flexible it is. Here are some variations I’ve tried and loved:
- Gluten-Free Version: Substitute the all-purpose flour with a 1:1 gluten-free baking flour blend. I’ve tested this with Bob’s Red Mill, and it works beautifully. Add an extra tablespoon of milk because gluten-free flours tend to absorb more liquid.
- Dairy-Free Version: Use dairy-free butter, dairy-free yogurt (coconut or soy-based), and a dairy-free milk. For the frosting, use a dairy-free cream cheese alternative. The marshmallow pops themselves are dairy-free if you use dairy-free white wafers.
- Pumpkin Spice Twist: Add 1 teaspoon of pumpkin pie spice to the dry ingredients and substitute the applesauce with pumpkin puree. This gives the cupcakes a fall flavor that pairs perfectly with the marshmallow ghost.
- Chocolate Base: Replace ¼ cup of the flour with unsweetened cocoa powder for a chocolate cupcake. The ghost on top looks especially striking against a dark chocolate background.
- Mini Version: Use a mini muffin tin and mini marshmallows for bite-sized treats. Bake the mini cupcakes for 8-10 minutes. These are perfect for classroom parties where you need a lot of servings.
I personally love the pumpkin spice twist. It makes these feel like a Halloween and Thanksgiving hybrid, which is my favorite time of year.
Serving & Storage Suggestions
These cupcakes are best served at room temperature. The marshmallow pop is soft and chewy, the frosting is creamy, and the cake is tender. If you serve them straight from the fridge, the marshmallow will be firmer and the cake will be less fluffy.
For a Halloween party, arrange them on a platter lined with orange or black napkins. They look especially spooky if you place them on a dark-colored cake stand. Pair them with a glass of cold milk or a warm apple cider for the full fall experience.
Storage instructions: Store any leftovers in an airtight container in the refrigerator for up to 3 days. The marshmallow pops will soften slightly, but they’ll still be delicious. If you want to keep the marshmallow pops crunchy, store them separately and assemble just before serving.
Freezing: You can freeze the unfrosted cupcakes for up to 2 months. Wrap each one individually in plastic wrap and place them in a freezer bag. Thaw at room temperature, then frost and assemble. Do not freeze the assembled cupcakes—the marshmallow pop will become soggy.
Flavor development: Honestly, the cupcakes taste even better the next day. The flavors meld together, and the texture becomes even more tender. Just don’t add the marshmallow pop until you’re ready to serve.
Nutritional Information & Benefits
Per cupcake (based on 12 servings):
- Calories: 195
- Fat: 7g
- Saturated Fat: 4g
- Carbohydrates: 30g
- Sugar: 18g
- Protein: 4g
- Fiber: 1g
- Sodium: 120mg
Health benefits: The Greek yogurt adds protein and calcium, while the applesauce provides natural sweetness and fiber without added sugar. The cream cheese frosting is lighter than traditional buttercream, cutting the fat content almost in half. These cupcakes are also lower in sugar than most Halloween treats, thanks to the reduced sugar in the batter and the lighter frosting.
Dietary considerations: This recipe can be made gluten-free and dairy-free with simple substitutions (see Variations section). It contains eggs, dairy, and gluten in its standard form. If you have allergies, please check your specific ingredients carefully.
My wellness perspective: I believe in balance. These cupcakes are a treat, but they’re a treat that doesn’t leave you feeling terrible. They’re perfect for a Halloween celebration where you want to indulge without overdoing it. And honestly, seeing my kids’ faces light up when they see these ghosts? That’s worth every calorie.
Conclusion
These Lighter Ghost Marshmallow Pop Cupcakes are everything I wanted them to be. They capture that childhood Halloween magic without the sugar crash, they come together in about twenty minutes, and they’re genuinely adorable. Whether you’re making them for a school party, a family gathering, or just a fun October afternoon, I promise they’ll be a hit.
I’d love to see how yours turn out. Leave a comment below and let me know if you tried any of the variations, or if you came up with your own twist. Don’t forget to share your photos on Pinterest and tag me—I’m always looking for inspiration. And if you’re craving more easy, lighter treats, check out our healthy fall desserts for more seasonal ideas.
Happy Halloween, and happy baking! Remember, the ghosts don’t have to be perfect. Mine never are, and that’s what makes them so fun.
Frequently Asked Questions
Can I use store-bought frosting instead of making my own?
Absolutely. If you’re short on time, a can of cream cheese frosting works perfectly. Just give it a good stir before using to lighten the texture. You can also use vanilla frosting and tint it black or orange for a fun twist.
How do I keep the marshmallow pops from falling over?
Make sure you push the lollipop stick about halfway into the marshmallow. When you insert it into the cupcake, push it down gently until it touches the bottom of the cupcake. The frosting also helps hold it in place. If your marshmallow is particularly top-heavy, you can trim a tiny bit off the bottom to create a flat base.
Can I make these ahead of time for a party?
Yes! Bake the cupcakes up to 2 days ahead and store them in an airtight container. Make the marshmallow pops up to 1 day ahead, but don’t draw the faces until the day of the party. Assemble everything no more than 2 hours before serving for the best texture.
My marshmallow pops are cracking. What went wrong?
This usually happens if the white coating is too thick or if the marshmallows are too cold. Let the coating cool slightly before dipping, and make sure your marshmallows are at room temperature. If the coating is still cracking, try adding a teaspoon of coconut oil to thin it out.
Can I use this recipe for other holidays?
Definitely! Skip the ghost faces and use different sprinkles and decorations. For Christmas, you can make snowmen with mini chocolate chips for eyes. For Easter, tint the coating pink or yellow and add bunny ears made from paper. The base recipe is versatile enough for any occasion.
Pin This Recipe!
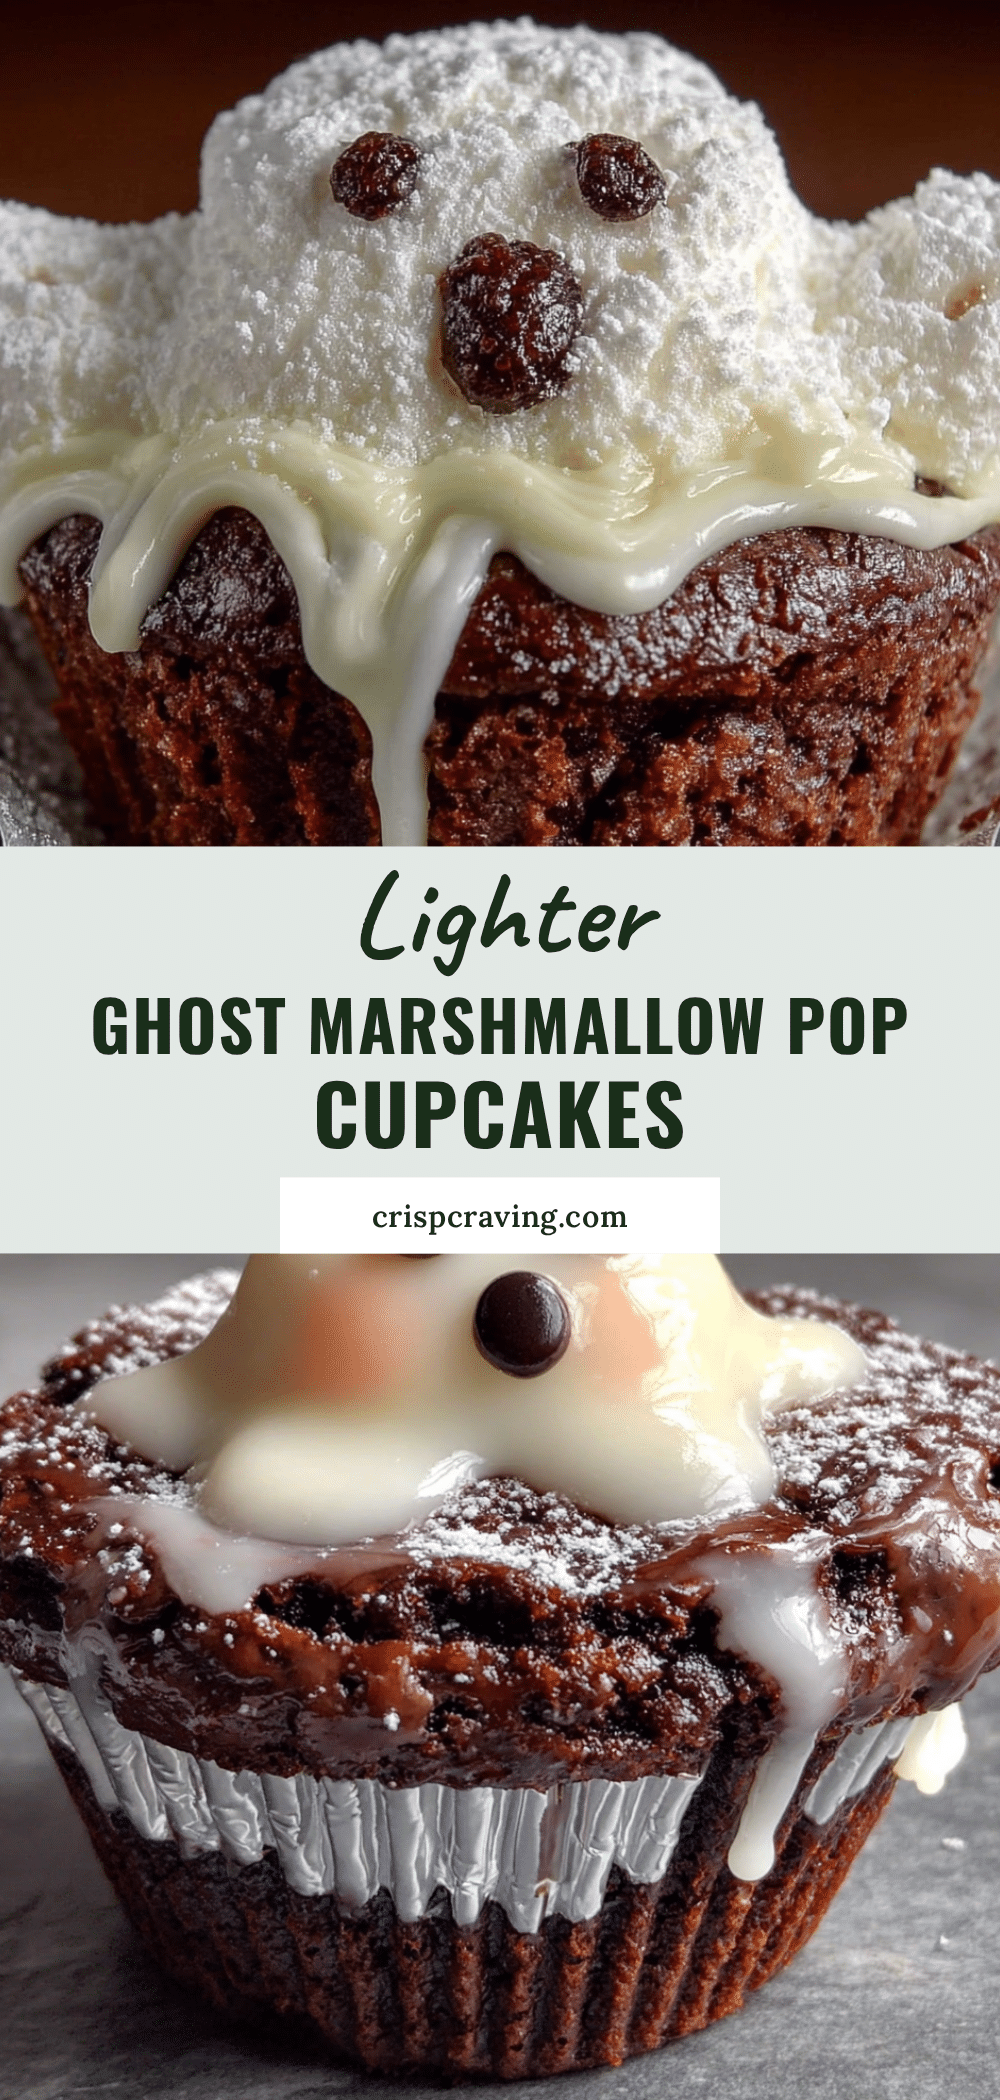
Lighter Ghost Marshmallow Pop Cupcakes
These Lighter Ghost Marshmallow Pop Cupcakes capture childhood Halloween magic without the sugar crash. They come together in about twenty minutes and feature a lighter cake base made with Greek yogurt and applesauce, topped with a creamy cream cheese frosting and an adorable marshmallow ghost pop.
- Prep Time: 20 minutes
- Cook Time: 12-14 minutes
- Total Time: 32-34 minutes
- Yield: 12 cupcakes 1x
- Category: Dessert
- Cuisine: American
Ingredients
- 1 ½ cups (180g) all-purpose flour
- ¾ cup (150g) granulated sugar
- 1 ½ teaspoons baking powder
- ½ teaspoon baking soda
- ¼ teaspoon salt
- ¼ cup (56g) unsalted butter, softened
- ½ cup (120g) plain Greek yogurt
- ¼ cup (60g) unsweetened applesauce
- 2 large eggs, room temperature
- 2 teaspoons vanilla extract
- ½ cup (120ml) milk (any kind)
- 12 large marshmallows
- 12 lollipop sticks
- 1 cup (170g) white melting wafers
- Black gel food coloring or black decorating icing
- Orange and black sprinkles (optional)
- 4 oz (113g) light cream cheese, softened
- 1 cup (120g) powdered sugar, sifted
- 1 teaspoon vanilla extract
- 1–2 tablespoons milk
Instructions
- Preheat your oven to 350°F (175°C). Line your muffin tin with 12 cupcake liners.
- In a large bowl, whisk together the flour, sugar, baking powder, baking soda, and salt. Add the softened butter and use an electric mixer on low speed to cut it into the dry ingredients until it looks like coarse sand, about 30 seconds.
- In a separate bowl, whisk together the Greek yogurt, applesauce, eggs, vanilla extract, and milk. Pour this mixture into the dry ingredients and mix on low speed until just combined. The batter will be thick and slightly lumpy. Fold a few times with a spatula to ensure the bottom is incorporated.
- Divide the batter evenly among the 12 liners, filling each about ⅔ full.
- Bake for 12-14 minutes. The tops should spring back when lightly touched, and a toothpick inserted into the center should come out clean or with a few moist crumbs. Let cool in the pan for 5 minutes, then transfer to a wire rack to cool completely.
- While the cupcakes are cooling, line a baking sheet with wax paper. Insert a lollipop stick into each marshmallow, pushing about halfway through. Melt the white wafers in a microwave-safe bowl in 20-second intervals, stirring between each, until smooth. Dip each marshmallow into the melted coating, letting the excess drip off. Place on the wax paper to set, about 10 minutes.
- Once the white coating is set, use the black gel food coloring or decorating icing to draw two eyes and a mouth on each ghost.
- In a medium bowl, beat the softened cream cheese with an electric mixer until smooth. Add the powdered sugar and vanilla extract, and beat on low speed until combined. Add milk one tablespoon at a time until the frosting reaches a pipeable consistency.
- Spoon the frosting into a piping bag or zip-top bag. Pipe a swirl onto each cooled cupcake, creating a little well in the center to hold the marshmallow pop.
- Gently insert the stick of each marshmallow pop into the center of a frosted cupcake. Add orange and black sprinkles around the base if desired. Serve immediately or store as directed.
Notes
Don’t overmix the batter to keep cupcakes light and fluffy. Room temperature ingredients are important for proper incorporation. For the marshmallow pop coating, let it cool slightly before dipping to prevent marshmallows from melting. Make-ahead: Bake cupcakes up to 2 days ahead and store in an airtight container. Make marshmallow pops up to 1 day ahead but draw faces just before serving. Store assembled cupcakes in the refrigerator for up to 3 days. Freeze unfrosted cupcakes for up to 2 months.
Nutrition
- Serving Size: 1 cupcake
- Calories: 195
- Sugar: 18
- Sodium: 120
- Fat: 7
- Saturated Fat: 4
- Carbohydrates: 30
- Fiber: 1
- Protein: 4
Keywords: Halloween cupcakes, ghost cupcakes, marshmallow pop cupcakes, lighter cupcakes, easy Halloween recipe, 20-minute recipe, kid-friendly Halloween treats



