Love this? Save it for later!
Share the inspiration with your friends
It was 11:15 PM on a drizzly Wednesday in October, and I had a ridiculous, undeniable craving for something warm, spiced, and dunkable. The kind of craving that doesn’t care that you’re already in your pajamas. I wanted a pumpkin scone — the tall, flaky, glazed kind from that coffee shop — but I didn’t have heavy cream, and I wasn’t about to brave the rain for a pastry. What I did have was a can of pumpkin puree left over from a soup experiment, some cold butter, and a wild idea that maybe, just maybe, I could make them better at home.
Honestly, that first attempt was a mess. I used too much pumpkin, and the scones spread into sad, flat discs. But the flavor? That was something else. The maple glaze I’d thrown together on a whim — just powdered sugar, a splash of real maple syrup, and a pinch of salt — was the perfect, not-too-sweet finish. I spent the next three weekends tweaking the ratios, testing different flours, and burning my fingers on hot baking sheets. Maybe you’ve been there, obsessing over a recipe until it’s just right.
This version? It’s the one. The exterior is crisp and golden, the inside is tender and almost biscuit-like, and that maple glaze seeps into every crack and crevice. It’s the scone I wish that coffee shop made. And the best part? You don’t need any fancy equipment or a trip to a specialty store. Just a bowl, a baking sheet, and that same late-night stubbornness to make something good from what you’ve got.
Why You’ll Love This Recipe
Let me tell you why these pumpkin scones have become my official fall baking project. I’ve tested this recipe about eight times, and I’m not exaggerating. I’ve brought them to brunches, left them on neighbor’s doorsteps, and eaten more than my fair share straight from the cooling rack. They always get the same reaction — a surprised pause, then a “wait, these are actually better than the coffee shop ones.”
- Quick & Easy: From start to finish, you’re looking at about 35 minutes. That’s faster than a trip to the drive-through, and you get to eat them warm.
- Simple Ingredients: You probably have everything except the pumpkin and maple syrup. No buttermilk, no heavy cream, no weird stabilizers.
- Perfect for Fall Gatherings: These are the star of any Thanksgiving brunch, Friendsgiving spread, or cozy Sunday morning. They look impressive but take almost no effort.
- Crowd-Pleaser: I’ve watched kids and adults alike go back for thirds. The pumpkin flavor is there, but it’s not overpowering — it’s more of a warm, cozy backdrop.
- Unbelievably Delicious: The texture is what gets me every time. The outside has that slight crunch, but the inside is so soft and tender. And that glaze? It’s not just sweet — it has that deep, almost woodsy flavor from real maple syrup.
What makes these different from every other pumpkin scone recipe out there? It’s the technique. Instead of cutting cold butter into the flour, I grate frozen butter directly into the dry ingredients. It sounds weird, I know, but it creates these tiny, even pockets of butter that melt into steam pockets in the oven. The result is a scone that’s flaky, not dense. No hockey pucks here. This isn’t just another pumpkin scone — it’s the one you’ll actually want to make again and again.
What Ingredients You Will Need
This recipe uses simple, pantry-friendly ingredients that come together to create something truly special. The pumpkin adds moisture and a subtle earthiness, while the warm spices do all the heavy lifting for flavor. Here’s what you’ll need:
For the Scones
- 2 cups (250g) all-purpose flour — Spoon and level it; don’t scoop directly from the bag or you’ll pack in too much flour.
- 1/3 cup (65g) granulated sugar — Just enough sweetness without making them taste like cake.
- 1 tablespoon baking powder — This is what gives them their rise. Make sure it’s fresh.
- 1 teaspoon pumpkin pie spice — I use store-bought for convenience, but you can make your own with cinnamon, nutmeg, ginger, and cloves.
- 1/2 teaspoon ground cinnamon — For that extra warmth.
- 1/2 teaspoon salt — Don’t skip it; it balances the sweetness.
- 1/2 cup (113g) cold unsalted butter — Frozen is even better. I’ll explain why in a minute.
- 1/2 cup (120ml) pumpkin puree — Not pumpkin pie filling. Make sure it’s 100% pure pumpkin.
- 1/4 cup (60ml) cold milk — Whole milk works best, but 2% is fine too.
- 1 large egg — Cold from the fridge is okay.
- 1 teaspoon vanilla extract — Pure vanilla, not imitation, if you have it.
For the Maple Glaze
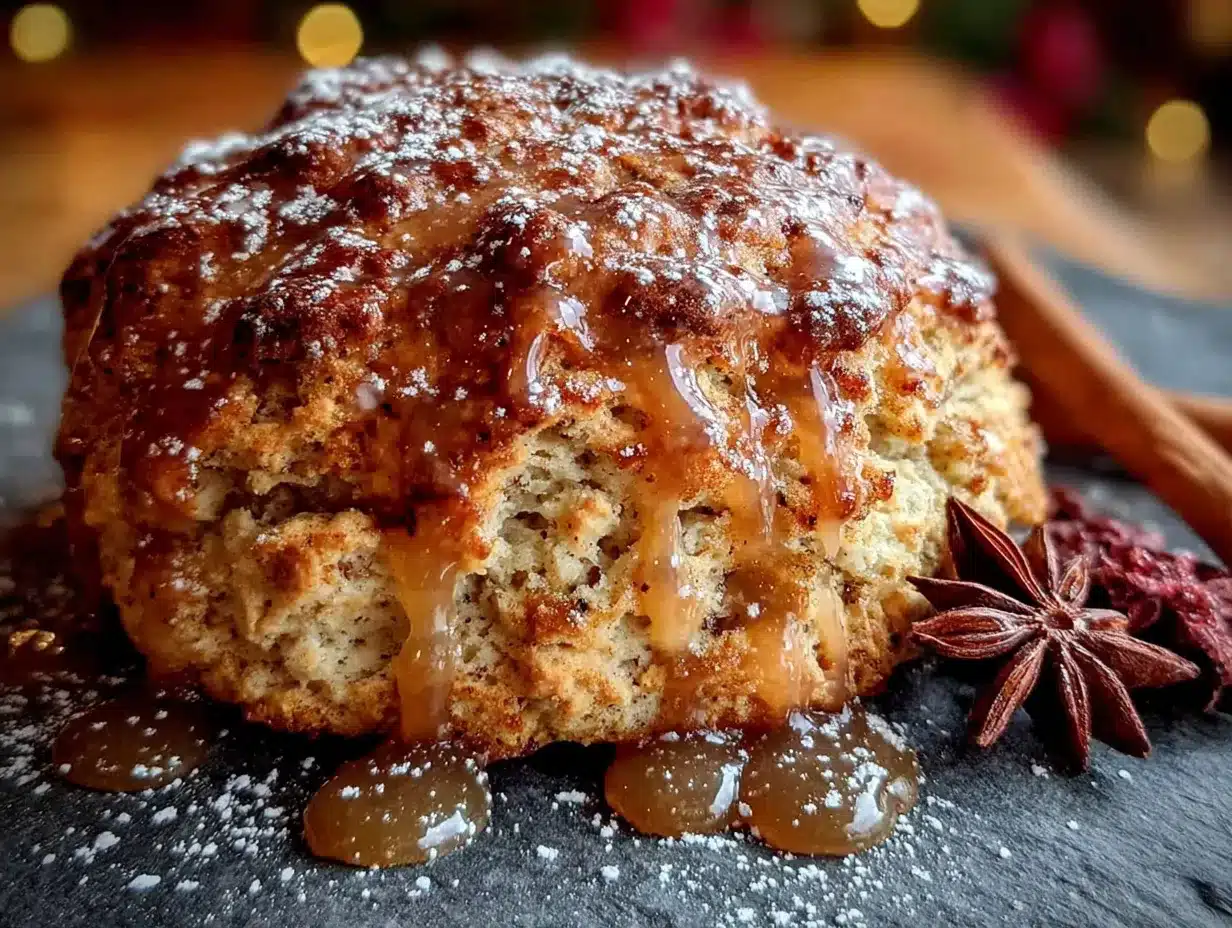
- 1 cup (120g) powdered sugar — Sifted to avoid lumps.
- 3 tablespoons real maple syrup — Not pancake syrup. The real stuff makes a difference here.
- 1-2 tablespoons milk — To thin the glaze to your preferred consistency.
- Pinch of salt — It cuts the sweetness and makes the maple flavor pop.
Equipment Needed
You don’t need a professional bakery setup for these scones. Here’s what I use every single time:
- Baking sheet — A standard half-sheet pan works perfectly. Line it with parchment paper for easy cleanup.
- Large mixing bowl — For the dry ingredients.
- Medium mixing bowl — For the wet ingredients.
- Box grater or food processor — If you’re grating frozen butter (my preferred method), a box grater is your best friend. A food processor with a pastry blade works too.
- Pastry cutter or two forks — If you’re cutting the butter in the traditional way.
- Bench scraper or sharp knife — For cutting the scone dough into triangles.
- Cooling rack — Essential for letting the glaze set without getting soggy bottoms.
- Whisk — For the glaze.
I’ve made these with a cheap baking sheet from the grocery store, and they turned out fine. The only thing I’d splurge on is a good box grater — the one I have is from IKEA and cost maybe $5. It’s lasted years. If you don’t have a food processor, don’t worry. The box grater method is actually easier and creates better texture.
Preparation Method
Alright, let’s make some scones. I’ll walk you through every step, including the little tricks I’ve learned from my many, many test batches.
- Preheat your oven to 400°F (200°C). Line your baking sheet with parchment paper. Do this first so the oven is hot and ready.
- Grate your frozen butter. This is my favorite trick. Take your cold butter (stick it in the freezer for 15-20 minutes if it wasn’t already frozen) and grate it on the large holes of a box grater. Toss the grated butter with a tablespoon of the flour from your measured amount to keep it from clumping. Pop it back in the freezer while you mix the dry ingredients.
- Whisk the dry ingredients together. In your large bowl, whisk together the flour, sugar, baking powder, pumpkin pie spice, cinnamon, and salt. Make sure there are no lumps, especially from the baking powder.
- Add the grated butter. Take the grated butter out of the freezer and add it to the flour mixture. Use your fingers or a fork to gently toss the butter pieces with the flour until they’re all coated. You want the butter to stay in distinct, small pieces — don’t work it in until it disappears.
- Mix the wet ingredients. In your medium bowl, whisk together the pumpkin puree, cold milk, egg, and vanilla extract. It should be a smooth, orange-ish mixture. Don’t worry if it looks a bit separated at first — just keep whisking.
- Combine wet and dry. Make a well in the center of the flour-butter mixture. Pour in the wet ingredients all at once. Use a rubber spatula or a fork to stir everything together. Stir just until the dough comes together. It will look shaggy and a bit dry in spots — that’s exactly what you want. Overmixing will make tough scones.
- Turn the dough out onto a lightly floured surface. Use your hands to gently bring the dough together into a rough ball. Don’t knead it; just press it together. If it’s too sticky, dust your hands with a little extra flour.
- Shape the dough. Pat the dough into a circle about 3/4-inch (2 cm) thick. Don’t roll it with a rolling pin — just use your hands. A bench scraper helps to shape the edges into a neat circle.
- Cut the scones. Use a sharp knife or bench scraper to cut the circle into 8 equal wedges, like you’re cutting a pizza. Don’t twist the knife; press straight down. Twisting seals the edges and prevents them from rising properly.
- Place on the baking sheet. Carefully transfer the scones to your prepared baking sheet, spacing them about 2 inches (5 cm) apart. They will spread a little, so give them room.
- Bake for 15-18 minutes. Bake until the scones are golden brown on the bottom and the edges look set. The tops should be lightly golden. A toothpick inserted into the center should come out clean or with a few moist crumbs.
- Cool completely. Transfer the scones to a cooling rack. Let them cool completely before glazing. If you glaze them while they’re warm, the glaze will melt into a puddle. That’s not the worst thing in the world, but you won’t get that pretty, drizzled look.
- Make the glaze. While the scones cool, whisk together the powdered sugar, maple syrup, and a pinch of salt. Add milk, 1 tablespoon at a time, until the glaze is thick but pourable. You want it to coat the back of a spoon.
- Glaze the scones. Once the scones are completely cool, drizzle the glaze over the top. I like to use a spoon and let it drip naturally down the sides. Let the glaze set for about 10 minutes before serving.
Cooking Tips & Techniques
I’ve made every mistake in the book with scones. Here’s what I’ve learned so you don’t have to repeat my errors:
- Cold butter is non-negotiable. Warm butter melts into the flour instead of creating steam pockets. If your kitchen is warm, pop your mixing bowl with the flour and butter in the fridge for 10 minutes before adding the wet ingredients.
- Don’t overwork the dough. I know it’s tempting to keep mixing until it looks smooth, but stop as soon as it comes together. Overworking develops gluten, which makes scones tough and chewy instead of tender and flaky.
- Use fresh baking powder. This is the most common reason for flat scones. If your baking powder is more than 6 months old, it might not have enough oomph. Test it by dropping a teaspoon into hot water — it should fizz vigorously.
- Chill the shaped scones. If you have time, pop the cut scones on the baking sheet into the fridge for 15-20 minutes before baking. This firms up the butter again, which leads to taller, flakier scones. I do this when I’m making them for company.
- Don’t twist the cutter. Whether you’re using a knife or a biscuit cutter, press straight down. Twisting seals the edges and prevents the scones from rising evenly.
- Glaze with confidence. If you want a thicker glaze, use less milk. For a thinner, more drizzly glaze, add a little more milk. I like mine thick enough to hold its shape but thin enough to drip a little.
Variations & Adaptations
One of the best things about this recipe is how adaptable it is. Here are some variations I’ve tried and loved:
- Gluten-Free Version: Substitute the all-purpose flour with a 1:1 gluten-free baking flour blend. I’ve had good luck with the King Arthur brand. Add 1/4 teaspoon of xanthan gum if your blend doesn’t already include it. The texture will be slightly more delicate, so handle the dough gently.
- Vegan Version: Use a flax egg (1 tablespoon ground flaxseed mixed with 3 tablespoons water, let sit for 5 minutes) instead of the egg, and use cold coconut oil or vegan butter instead of regular butter. Almond milk or oat milk works perfectly in place of dairy milk. The scones will be a bit less flaky but still delicious.
- Add-Ins: Fold in 1/2 cup of dried cranberries, chopped pecans, or chocolate chips before shaping the dough. I made a batch with white chocolate chips and dried cranberries last Thanksgiving, and they disappeared in minutes.
- Spice It Up: If you like things spicy, add 1/4 teaspoon of ground ginger or a pinch of cayenne pepper to the dry ingredients. It gives the scones a subtle warmth that pairs beautifully with the maple glaze.
- Savory Twist: Skip the sugar and pumpkin pie spice. Add 1 cup of shredded cheddar cheese, 1/4 cup of chopped fresh sage, and a pinch of black pepper. Omit the maple glaze and brush the tops with melted butter before baking. These are incredible with soup.
Serving & Storage Suggestions
These scones are best served slightly warm, but they’re still fantastic at room temperature. Here’s how to make the most of them:
- Serving Temperature: If you’ve glazed them, serve at room temperature so the glaze stays set. If you’re serving them plain, warm them in a 300°F (150°C) oven for 5 minutes before serving.
- Presentation: Arrange them on a wooden board or a pretty plate. A dusting of extra powdered sugar or a sprinkle of cinnamon on top makes them look extra special.
- Pairings: These are perfect with a hot cup of coffee, a chai latte, or a mug of spiced apple cider. For a brunch spread, serve them alongside scrambled eggs and fresh fruit.
- Storage: Store leftover scones in an airtight container at room temperature for up to 3 days. Do not refrigerate them — the fridge dries them out.
- Freezing: You can freeze the unbaked scones. Cut them into wedges, place them on a baking sheet, and freeze until solid. Transfer to a freezer bag. Bake from frozen, adding 2-3 minutes to the baking time. You can also freeze baked, unglazed scones for up to 2 months. Thaw at room temperature, then warm and glaze before serving.
- Reheating: The best way to reheat a scone is in a toaster oven or regular oven at 300°F (150°C) for 5-7 minutes. The microwave works in a pinch, but it makes the scone soft and a bit rubbery.
Nutritional Information & Benefits
While these are definitely a treat, there are a few bright spots in the nutritional profile. The pumpkin puree is packed with vitamin A and fiber, and real maple syrup contains antioxidants and minerals like zinc and manganese. Here’s the estimated breakdown per scone (with glaze):
- Calories: Approximately 320
- Fat: 14g
- Carbohydrates: 46g
- Protein: 4g
- Fiber: 2g
- Sugar: 24g
Dietary Considerations: This recipe contains gluten, dairy, and eggs. For a gluten-free option, see the variations section. For a vegan option, use the substitutions listed above. The scones are nut-free as written, but be sure to check your pumpkin pie spice blend if you have nut allergies.
I’m not a nutritionist, and I don’t pretend to be one. I believe in balance — these scones are a wonderful occasional treat, especially when made with real, wholesome ingredients. They’re not health food, but they’re made with love, and that counts for something, right?
Conclusion
These Perfect Pumpkin Scones with Maple Glaze have become my go-to fall recipe for a reason. They’re forgiving, adaptable, and genuinely delicious. Whether you’re a seasoned baker or someone who’s never made a scone in your life, I promise you can make these. The grated butter trick alone is worth trying — it’s a game-changer for texture.
I’d love to hear how they turn out for you. Did you add cranberries? Did you go heavy on the maple glaze? Did you make them at 11 PM on a rainy Wednesday like I did? Drop a comment below and let me know. And if you share a photo on Pinterest, tag me — I want to see your beautiful, glazed creations!
Happy baking, friend. Your kitchen is about to smell incredible.
Frequently Asked Questions
Can I use pumpkin pie filling instead of pumpkin puree?
No, please don’t. Pumpkin pie filling is pre-sweetened and spiced, which will throw off the sugar and spice balance in this recipe. Stick with 100% pure pumpkin puree. Libby’s is a reliable brand, but store brands work just as well.
Why did my scones turn out dry?
The most common culprit is overmixing the dough. When you overmix, you develop too much gluten, which makes the scones tough and dry. Another possibility is that you used too much flour. Make sure you’re spooning and leveling your flour, not scooping it directly from the bag.
Can I make the dough ahead of time?
Absolutely. You can prepare the dough, cut it into wedges, and refrigerate them on the baking sheet for up to 24 hours. Just cover them tightly with plastic wrap. Bake them straight from the fridge, adding an extra minute or two to the baking time.
My glaze turned out too thin. How do I fix it?
If your glaze is too thin, simply whisk in a little more powdered sugar, 1 tablespoon at a time, until it reaches the consistency you want. If it’s too thick, add milk, 1 teaspoon at a time. The perfect glaze should coat the back of a spoon and drizzle slowly off it.
Can I double this recipe?
Yes, this recipe doubles beautifully. Just make sure you have a large enough bowl to mix everything. You’ll need to bake them in two batches or use two baking sheets, rotating them halfway through baking for even results.
Pin This Recipe!
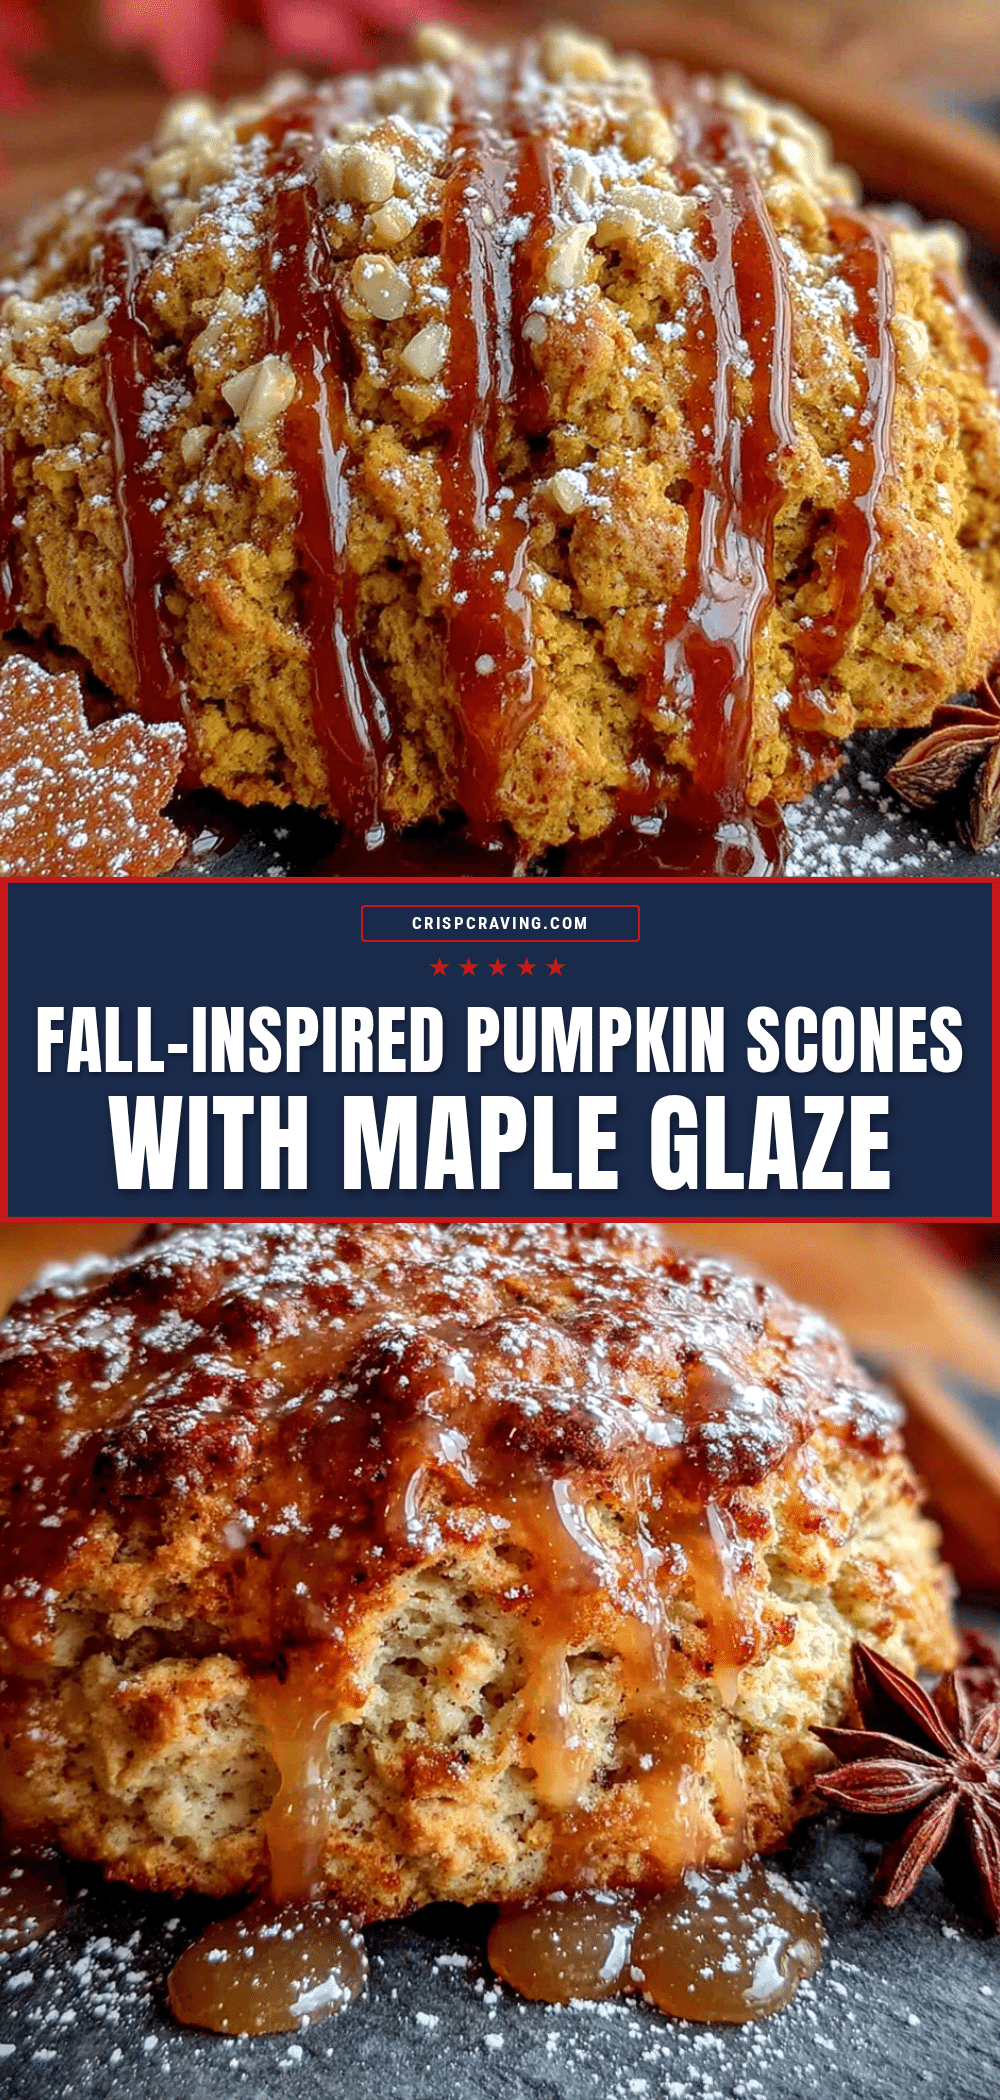
Perfect Pumpkin Scones with Maple Glaze: Easy Homemade Recipe
These tender, flaky pumpkin scones are topped with a rich maple glaze and come together in just 35 minutes. Made with simple ingredients and a clever grated butter technique, they’re even better than coffee shop versions.
- Prep Time: 15 minutes
- Cook Time: 18 minutes
- Total Time: 35 minutes
- Yield: 8 servings 1x
- Category: Dessert
- Cuisine: American
Ingredients
- 2 cups (250g) all-purpose flour
- 1/3 cup (65g) granulated sugar
- 1 tablespoon baking powder
- 1 teaspoon pumpkin pie spice
- 1/2 teaspoon ground cinnamon
- 1/2 teaspoon salt
- 1/2 cup (113g) cold unsalted butter, frozen and grated
- 1/2 cup (120ml) pumpkin puree
- 1/4 cup (60ml) cold milk
- 1 large egg
- 1 teaspoon vanilla extract
- 1 cup (120g) powdered sugar, sifted
- 3 tablespoons real maple syrup
- 1–2 tablespoons milk
- Pinch of salt
Instructions
- Preheat your oven to 400°F (200°C). Line your baking sheet with parchment paper.
- Grate your frozen butter on the large holes of a box grater. Toss the grated butter with a tablespoon of the flour from your measured amount to keep it from clumping. Pop it back in the freezer while you mix the dry ingredients.
- In your large bowl, whisk together the flour, sugar, baking powder, pumpkin pie spice, cinnamon, and salt.
- Take the grated butter out of the freezer and add it to the flour mixture. Use your fingers or a fork to gently toss the butter pieces with the flour until they’re all coated.
- In your medium bowl, whisk together the pumpkin puree, cold milk, egg, and vanilla extract until smooth.
- Make a well in the center of the flour-butter mixture. Pour in the wet ingredients all at once. Use a rubber spatula or a fork to stir everything together just until the dough comes together. It will look shaggy and a bit dry in spots.
- Turn the dough out onto a lightly floured surface. Use your hands to gently bring the dough together into a rough ball. Don’t knead it.
- Pat the dough into a circle about 3/4-inch (2 cm) thick. Use your hands, not a rolling pin.
- Use a sharp knife or bench scraper to cut the circle into 8 equal wedges. Press straight down without twisting.
- Carefully transfer the scones to your prepared baking sheet, spacing them about 2 inches (5 cm) apart.
- Bake for 15-18 minutes until golden brown on the bottom and edges are set. A toothpick inserted into the center should come out clean or with a few moist crumbs.
- Transfer the scones to a cooling rack and let them cool completely before glazing.
- While the scones cool, whisk together the powdered sugar, maple syrup, and a pinch of salt. Add milk, 1 tablespoon at a time, until the glaze is thick but pourable.
- Once the scones are completely cool, drizzle the glaze over the top. Let the glaze set for about 10 minutes before serving.
Notes
Cold butter is non-negotiable for flaky scones. Don’t overwork the dough. Use fresh baking powder. For taller scones, chill the shaped scones for 15-20 minutes before baking. Don’t twist the cutter when cutting. Glaze only when completely cool.
Nutrition
- Serving Size: 1 scone
- Calories: 320
- Sugar: 24
- Sodium: 320
- Fat: 14
- Saturated Fat: 8
- Carbohydrates: 46
- Fiber: 2
- Protein: 4
Keywords: pumpkin scones, maple glaze, fall baking, easy scone recipe, homemade scones, pumpkin recipes