Love this? Save it for later!
Share the inspiration with your friends
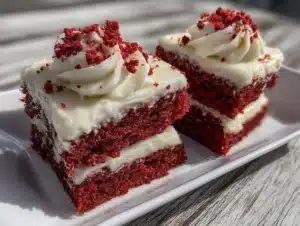
The summer I turned thirty, I found myself standing in the middle of a bustling neighborhood block party when the quietest person on my street—Mr. Jenkins, the local accountant—started talking about his secret weapon for patriotic celebrations: a Perfect Red Velvet Flag Sheet Cake with Cream Cheese Frosting. Honestly, I wasn’t expecting baking advice from someone who always seemed buried in spreadsheets, but there I was, balancing a plate and listening as he described every step with surprising passion. He pulled out a slightly cracked, vintage recipe card from his wallet, the ink faded but the instructions clear, and let me tell you, the story behind that cake was as rich as the layers themselves.
You know that feeling when a simple dessert can turn an ordinary gathering into a memory? This cake wasn’t just about the striking red velvet color or the creamy frosting—it was about the little flag design that made everyone pause and smile. Mr. Jenkins admitted he learned the technique from his grandmother, who baked it for every Fourth of July without fail. Somehow, the process felt like sharing a secret handshake, and I ended up making that cake for my own summer cookout the very next week.
Let me tell you, the first time I tried to frost the flag design, I made a mess—smudged the stripes, ran out of frosting, and nearly gave up. But the warmth spreading through the kitchen as I fixed those mistakes made it worth every crumb. Maybe you’ve been there too, trying to make something special and realizing perfection is about the joy in the attempt. That’s why this Perfect Red Velvet Flag Sheet Cake with Cream Cheese Frosting sticks with me. It’s not just a dessert; it’s a slice of unexpected connection and celebration you can bring to your table.
Why You’ll Love This Recipe
From my experience testing this Perfect Red Velvet Flag Sheet Cake with Cream Cheese Frosting multiple times (and yes, a few frosting disasters along the way), I can confidently say it’s a winner for so many reasons:
- Quick & Easy: Comes together in under 1 hour, perfect for last-minute holiday gatherings or spontaneous weekend treats.
- Simple Ingredients: No need for exotic items—most are pantry staples like cocoa powder, buttermilk, and cream cheese.
- Perfect for Celebrations: Whether it’s Independence Day, Memorial Day, or just a fun family get-together, the flag design adds a festive touch.
- Crowd-Pleaser: Kids and adults alike rave about the tender crumb and smooth cream cheese frosting that isn’t overly sweet.
- Unbelievably Delicious: The balance of mild cocoa with that tangy frosting creates a comforting, almost velvety flavor that’s hard to beat.
What makes this recipe stand out is the layering technique for the flag—the precision in piping the stars and stripes creates a stunning visual without needing fancy tools or skills. Plus, the cream cheese frosting recipe here is my go-to for its silky texture and perfect consistency, thanks to a little trick of adding just the right amount of powdered sugar and vanilla. Honestly, it’s the kind of cake that makes you close your eyes after the first bite and smile.
This isn’t just red velvet cake you find on every holiday table; it’s a thoughtfully crafted version designed to impress and satisfy without stress. Whether you’re the host trying to wow guests or just craving a cozy slice with your afternoon coffee, this recipe has your back.
What Ingredients You Will Need
This Perfect Red Velvet Flag Sheet Cake uses straightforward, wholesome ingredients to deliver classic flavor and that iconic red hue, along with a cream cheese frosting that’s smooth and tangy. Most of these are pantry staples—nothing tricky or rare—and you can easily swap a few based on availability or dietary needs.
- For the Cake Batter:
- All-purpose flour, 2 ½ cups (310g) – I recommend King Arthur for consistent texture
- Granulated sugar, 2 cups (400g)
- Cocoa powder, 2 tablespoons (unsweetened, natural preference)
- Baking soda, 1 teaspoon
- Salt, ½ teaspoon
- Buttermilk, 1 ½ cups (360ml), room temperature (adds moisture and tender crumb)
- Vegetable oil, 1 cup (240ml)
- Large eggs, 2, room temperature
- Distilled white vinegar, 1 tablespoon (reacts with baking soda for lift)
- Vanilla extract, 2 teaspoons (pure is best for flavor depth)
- Red food coloring gel, 2 tablespoons (use gel for vibrant color without thinning batter)
- For the Cream Cheese Frosting:
- Cream cheese, 16 oz (450g), softened – I prefer Philadelphia brand for creaminess
- Unsalted butter, ½ cup (115g), softened (adds richness)
- Powdered sugar, 4 cups (480g), sifted (for smooth texture)
- Vanilla extract, 2 teaspoons
- Pinch of salt (balances sweetness)
- For Decoration:
- Blue food coloring gel, 1 teaspoon (for flag stars background)
- White frosting or additional cream cheese frosting (for stars and stripes)
If you need a gluten-free option, swapping all-purpose flour with a 1-to-1 gluten-free baking flour works well, though texture might be slightly different. For dairy-free, try coconut cream cheese and vegan butter alternatives, but the flavor will shift a bit. In summer, I sometimes add fresh strawberries sliced thinly as a side, which pairs nicely with the cream cheese frosting tang.
Equipment Needed
- 9×13 inch (23×33 cm) rectangular baking pan – standard size for sheet cakes; if you don’t have this, two 8×8 inch pans can work but adjust baking time
- Mixing bowls – one large for dry ingredients, one medium for wet
- Electric mixer or stand mixer – I’ve tried hand mixing, but the electric mixer makes the frosting silky smooth
- Rubber spatula – essential for folding batter gently and scraping bowls
- Measuring cups and spoons – precise measurements matter here, especially for baking soda and vinegar
- Cooling rack – to let cake cool evenly without sogginess
- Piping bags and small round tips – for the flag’s stripes and stars; if you don’t have these, a zip-top bag with a small snip in the corner works just fine
- Offset spatula or butter knife – for spreading frosting evenly
For budget-friendly options, simple silicone spatulas and basic metal baking pans work perfectly. I’ve learned the hard way that nonstick pans help prevent the delicate cake from sticking, so a light grease and parchment paper lining is another tip if your pan isn’t nonstick. Keeping your cream cheese and butter at room temperature before mixing is crucial for easy blending and good frosting texture.
Preparation Method

- Preheat your oven to 350°F (175°C). Grease your 9×13 inch pan lightly and line the bottom with parchment paper for easy removal. This pre-baking setup is key to preventing sticking and tearing.
- Mix the dry ingredients: In a large bowl, sift together 2 ½ cups (310g) all-purpose flour, 2 cups (400g) sugar, 2 tablespoons cocoa powder, 1 teaspoon baking soda, and ½ teaspoon salt. Sifting helps avoid lumps and ensures an even crumb.
- Combine wet ingredients: In a separate bowl, whisk 1 ½ cups (360ml) buttermilk, 1 cup (240ml) vegetable oil, 2 large eggs, 1 tablespoon vinegar, 2 teaspoons vanilla extract, and 2 tablespoons red food coloring gel until uniform. The red gel concentrates color without thinning your batter like liquid dye might.
- Mix wet into dry: Slowly pour the wet mixture into the dry bowl while stirring gently with a rubber spatula. Fold carefully until just combined—overmixing can make the cake dense. The batter should be smooth and vibrant red.
- Pour batter into pan: Spread evenly with your spatula, smoothing the top. Tap the pan gently on the counter to release any air bubbles.
- Bake for 35-40 minutes, or until a toothpick inserted near the center comes out clean. Ovens vary, so start checking at 33 minutes. The cake should spring back lightly when touched.
- Cool completely: Remove the cake from oven, place on a cooling rack, and let cool fully before frosting. This prevents melting and sliding of the cream cheese frosting.
- Prepare the cream cheese frosting: Beat 16 oz (450g) softened cream cheese with ½ cup (115g) unsalted softened butter until smooth and creamy using an electric mixer. Gradually add 4 cups (480g) sifted powdered sugar, then add 2 teaspoons vanilla extract and a pinch of salt. Beat until fluffy and spreadable.
- Divide the frosting: Scoop out about ⅓ of the frosting into a small bowl, tint this portion with blue food coloring gel until you reach a rich navy color. Keep the rest white for the stripes and stars.
- Frost the cake: Spread an even layer of the white cream cheese frosting across the cooled cake using an offset spatula.
- Create the flag design: Using a piping bag fitted with a small round tip, pipe vertical red stripes alternating with white (frosting left white for stripes). For the blue square in the upper left corner, spread the blue frosting carefully with a small spatula or the back of a spoon.
- Pipe the stars: With a separate piping bag filled with white frosting and a star tip, pipe small stars over the blue square. If you don’t have a star tip, tiny dots work just as well and look adorable.
- Chill briefly: Place the cake in the fridge for 20-30 minutes to set the frosting before slicing and serving. This helps keep the flag design crisp.
Pro tip: If your frosting feels too soft for piping, pop it in the fridge for 10 minutes to firm up. Also, don’t rush the flag design—take your time and remember that a homemade touch always wins hearts.
Cooking Tips & Techniques
When making this Perfect Red Velvet Flag Sheet Cake, there are a few pointers I’ve picked up that help avoid common pitfalls:
- Room temperature ingredients: Eggs, buttermilk, cream cheese, and butter all perform best when not cold. Cold ingredients can cause the batter or frosting to curdle or become lumpy.
- Choosing the right cocoa powder: Natural unsweetened cocoa powder reacts well with vinegar and baking soda, giving that classic red velvet tang and color. Dutch-processed cocoa won’t react the same way.
- Measuring flour properly: Spoon and level your flour instead of scooping directly from the bag. Too much flour leads to a dry cake.
- Food coloring gel vs liquid: Gel colors give vibrant hues without thinning the batter or frosting. It’s worth having a small tube on hand.
- Frosting consistency: Beat frosting long enough to be fluffy but not runny. If it’s too soft, refrigerate briefly before piping.
- Flag design patience: I’ve found piping the stripes first, then carefully filling in the blue square, works best. Use a small offset spatula for neat edges.
- Multitasking tip: While the cake bakes, prepare your frosting to save time. Just keep it covered so it doesn’t dry out.
My first attempt at the flag design was a bit of a mess—frosting smears and uneven stripes—but I learned that using smaller, controlled piping bursts and chilling the frosting slightly made all the difference. Remember, the charm is in the homemade look, so don’t stress the tiny imperfections.
Variations & Adaptations
Feeling creative? This classic red velvet flag sheet cake recipe is a great canvas for tweaks and personal touches:
- Diet-friendly: Swap all-purpose flour for almond or coconut flour for a low-carb option; reduce sugar slightly to balance sweetness with nutty flours.
- Flavor twists: Add a teaspoon of espresso powder to the batter to deepen the cocoa flavor without making it taste like coffee.
- Seasonal variation: For winter holidays, swap the flag design for festive snowflake or holly patterns using colored frosting.
- Frosting adaptations: Use a dairy-free cream cheese and vegan butter to make this vegan-friendly. Coconut yogurt can add tang if you like a twist.
- Alternative decorating: Instead of piping stars, use edible white star sprinkles on the blue frosting for a quick and charming effect.
Personally, I once tried a version with a raspberry swirl folded into the batter, which added a lovely fruity surprise while keeping the iconic red color. It was a hit at a summer picnic and felt a bit fancy without any extra fuss.
Serving & Storage Suggestions
This Perfect Red Velvet Flag Sheet Cake is best served chilled or at room temperature, allowing the cream cheese frosting to soften just enough for a melt-in-your-mouth texture. I like to slice it into generous squares and serve with a tall glass of milk or a cup of rich coffee.
For a patriotic barbecue or picnic, pairing the cake with simple sides like fresh fruit salad or vanilla ice cream makes the dessert stand out without overpowering it. If you want to bring a bit of extra festivity, red and white striped straws or napkins complement the theme beautifully.
Store leftover cake covered tightly in the refrigerator for up to 4 days. The flavors meld beautifully overnight, though the cake might firm up slightly. To reheat, let slices sit at room temperature for 15-20 minutes before eating or warm gently in a microwave for 10-15 seconds—just enough to soften the frosting without melting it.
Nutritional Information & Benefits
This red velvet cake, while certainly a treat, uses simple ingredients that offer some nutritional benefits. The cream cheese provides calcium and protein, while buttermilk adds probiotics and vitamin B12. Using vegetable oil offers a neutral fat without the heaviness of butter in the batter.
Per serving (approximate):
| Nutrient | Amount |
|---|---|
| Calories | 320 kcal |
| Fat | 18g |
| Saturated Fat | 7g |
| Carbohydrates | 38g |
| Sugar | 28g |
| Protein | 4g |
| Fiber | 1g |
Note: This recipe contains gluten, dairy, and eggs—common allergens. For gluten-free or dairy-free adaptations, see earlier substitution tips. I find that enjoying a slice in moderation fits perfectly into a balanced lifestyle—sometimes comfort food is just what you need to recharge.
Conclusion
If you’re after a show-stopping dessert that’s as fun to make as it is to eat, this Perfect Red Velvet Flag Sheet Cake with Cream Cheese Frosting should be your new go-to. It captures the spirit of celebration in every bite and lets you flex your creative muscles without overwhelming your schedule or pantry.
Don’t hesitate to tweak the colors, flavors, or decorations to suit your personal style or occasion. This cake has a special way of bringing people together—whether you’re serving neighbors, family, or coworkers. Honestly, it’s become a tradition for me to bake this cake every summer, and each time it feels like a fresh, happy surprise.
I’d love to hear how your flag cake turns out or any special twists you try! Leave a comment with your experience or share your photos—let’s keep the baking conversation going. Happy baking and here’s to many joyful slices ahead!
FAQs
Can I make this red velvet flag cake ahead of time?
Yes, you can bake the cake a day ahead and keep it tightly covered in the refrigerator. Frost and decorate on the day you plan to serve for best texture and appearance.
What if I don’t have buttermilk?
Simply mix 1 ½ cups (360ml) milk with 1 ½ tablespoons vinegar or lemon juice, let it sit for 5 minutes to curdle, then use as a buttermilk substitute.
How do I prevent the cake from sticking to the pan?
Grease the pan well and line the bottom with parchment paper. Let the cake cool completely before removing it from the pan to avoid breaking.
Can I use liquid food coloring instead of gel?
Gel coloring is preferred because it adds vibrant color without thinning the batter or frosting, but you can use liquid if that’s all you have—just use less to avoid affecting texture.
Is it possible to freeze this cake?
Yes, you can freeze the unfrosted cake tightly wrapped for up to 3 months. Thaw in the refrigerator overnight before frosting and decorating.
Pin This Recipe!
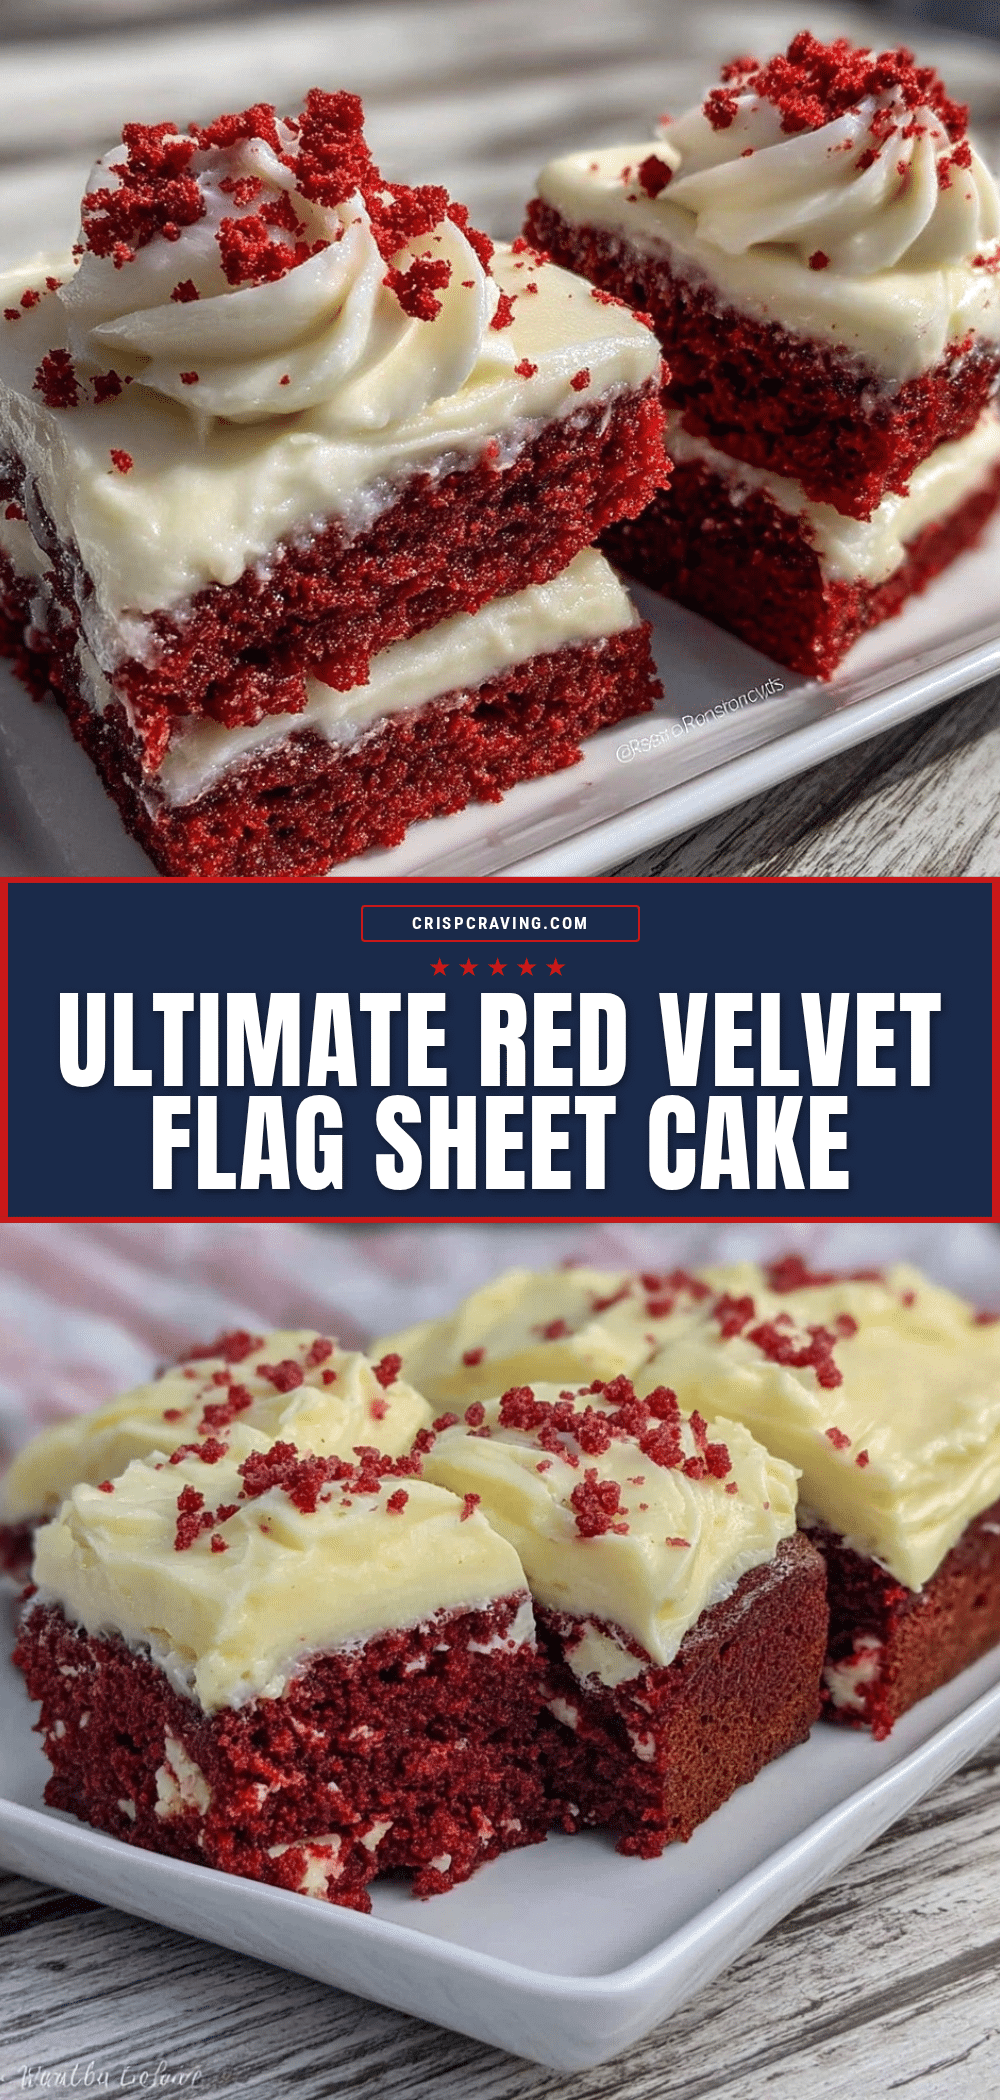
Perfect Red Velvet Flag Sheet Cake with Easy Homemade Cream Cheese Frosting

A festive and delicious red velvet sheet cake decorated with a patriotic flag design using smooth cream cheese frosting. Perfect for celebrations and easy to make with simple pantry ingredients.
- Prep Time: 20 minutes
- Cook Time: 35-40 minutes
- Total Time: 55-60 minutes
- Yield: 12 servings 1x
- Category: Dessert
- Cuisine: American
Ingredients
- 2 ½ cups (310g) all-purpose flour
- 2 cups (400g) granulated sugar
- 2 tablespoons unsweetened cocoa powder
- 1 teaspoon baking soda
- ½ teaspoon salt
- 1 ½ cups (360ml) buttermilk, room temperature
- 1 cup (240ml) vegetable oil
- 2 large eggs, room temperature
- 1 tablespoon distilled white vinegar
- 2 teaspoons vanilla extract
- 2 tablespoons red food coloring gel
- 16 oz (450g) cream cheese, softened
- ½ cup (115g) unsalted butter, softened
- 4 cups (480g) powdered sugar, sifted
- 2 teaspoons vanilla extract (for frosting)
- Pinch of salt (for frosting)
- 1 teaspoon blue food coloring gel (for decoration)
- White frosting or additional cream cheese frosting (for stars and stripes)
Instructions
- Preheat oven to 350°F (175°C). Grease a 9×13 inch pan lightly and line the bottom with parchment paper.
- In a large bowl, sift together flour, sugar, cocoa powder, baking soda, and salt.
- In a separate bowl, whisk together buttermilk, vegetable oil, eggs, vinegar, vanilla extract, and red food coloring gel until uniform.
- Slowly pour the wet mixture into the dry ingredients while stirring gently with a rubber spatula. Fold until just combined.
- Pour batter into the prepared pan and smooth the top. Tap the pan gently to release air bubbles.
- Bake for 35-40 minutes or until a toothpick inserted near the center comes out clean. Start checking at 33 minutes.
- Remove cake from oven and cool completely on a cooling rack before frosting.
- Beat cream cheese and butter until smooth and creamy using an electric mixer. Gradually add powdered sugar, vanilla extract, and salt. Beat until fluffy and spreadable.
- Scoop out about ⅓ of the frosting and tint with blue food coloring gel until a rich navy color is achieved. Keep the rest white.
- Spread an even layer of white frosting over the cooled cake using an offset spatula.
- Pipe vertical red stripes alternating with white stripes using the white frosting. Spread the blue frosting in the upper left corner to form the flag’s blue square.
- Pipe small white stars over the blue square using a piping bag with a star tip or create tiny dots if no star tip is available.
- Chill the cake in the refrigerator for 20-30 minutes to set the frosting before slicing and serving.
Notes
Use gel food coloring for vibrant color without thinning batter or frosting. Keep cream cheese and butter at room temperature for smooth frosting. Chill frosting briefly if too soft for piping. Line pan with parchment paper to prevent sticking. For gluten-free, substitute flour with 1-to-1 gluten-free baking flour. For dairy-free, use coconut cream cheese and vegan butter alternatives.
Nutrition
- Serving Size: 1 slice (approx. 1/1
- Calories: 320
- Sugar: 28
- Fat: 18
- Saturated Fat: 7
- Carbohydrates: 38
- Fiber: 1
- Protein: 4
Keywords: red velvet cake, flag cake, cream cheese frosting, patriotic dessert, sheet cake, easy red velvet, Fourth of July cake