Love this? Save it for later!
Share the inspiration with your friends
The PTA bake sale was in twelve hours and I’d completely forgotten. Not just a little forgot, either—the kind where you’re scrolling through your phone at 10 PM and suddenly sit bolt upright in bed. Everyone else would be bringing those Pinterest-perfect sugar cookies with royal icing and those creepy-crawly cake pops that take three days to assemble. I had a box of cocoa powder, some vinegar (don’t ask why that was the thing I noticed), and a vague memory of a velvet cake recipe my grandmother used to make. Honestly, I was this close to just buying a bag of store-bought cookies and calling it a night.
But then I remembered the black food coloring I’d bought on a whim for a failed galaxy cake experiment last summer. And the cream cheese in the fridge. And suddenly, I had a plan—a slightly desperate, probably messy plan, but a plan nonetheless. I threw together a batch of these quick black velvet Halloween cupcakes with orange frosting at midnight, using a method that’s faster than traditional velvet cakes (no fussy buttermilk substitutes, I promise). I figured they’d be fine. Edible, at least. Maybe the kids would eat them for the color alone.
The next morning, I walked into that school gym with my tray of cupcakes, feeling like I was bringing a pop quiz answer I’d scribbled in the car. And then something weird happened. The first mom tried one. Then she grabbed another. Then the bake sale coordinator came over and asked for the recipe. By the end of the day, my tray was empty and I had three separate people ask if I catered. I mean, let me tell you—I was as shocked as anyone. The black velvet cake was moist, the orange cream cheese frosting was tangy and sweet, and somehow, the whole thing looked like it belonged in a bakery window. Maybe you’ve been there, where the thing you threw together in a panic ends up being the thing everyone remembers. That’s this recipe. It’s the underdog that wins.
Why You’ll Love This Recipe
These quick black velvet Halloween cupcakes with orange frosting aren’t just another holiday dessert. They’re the kind of recipe that makes you look like a hero with almost no effort. I’ve tested this method about six times now (yes, even after that first bake sale win), and I can tell you—it works every single time.
- Quick & Easy: From start to finish, these cupcakes are ready in under 45 minutes. No complicated steps, no waiting for butter to soften, no stress. Perfect for those “I need a treat for tomorrow” moments.
- Simple Ingredients: You probably have most of these in your pantry right now. Cocoa powder, flour, sugar, vinegar—it’s all standard stuff. The black food coloring is the only “special” ingredient, and you can find it at any grocery store or online.
- Perfect for Halloween: The dramatic black cake with bright orange frosting is a showstopper at any Halloween party, trunk-or-treat event, or school celebration. Kids love the color, adults love the flavor.
- Crowd-Pleaser: I’ve brought these to three different events now, and they disappear every time. The velvet cake is tender and rich, and the cream cheese frosting is the perfect balance of sweet and tangy.
- Unbelievably Delicious: Here’s the thing about black velvet cake—it’s not just about the color. The cocoa flavor is subtle but present, and the texture is incredibly soft. It’s comfort food with a spooky twist.
What makes these different from other Halloween cupcakes? Most recipes either taste like boxed mix or require hours of decorating. These taste homemade—really homemade—with a from-scratch cake that’s actually faster than a box mix. The vinegar and baking soda reaction creates a tender crumb without needing buttermilk, and the black food coloring gives you that dramatic Halloween look without any weird aftertaste. It’s the kind of recipe that makes you close your eyes after the first bite, even if you’re standing in a school gymnasium surrounded by screaming children.
What Ingredients You Will Need
This recipe uses simple, everyday ingredients to create something that feels special. The magic is in the combination—the vinegar reacts with the baking soda to create lift, while the cocoa adds just enough depth to make the cake feel rich without being heavy.
For the Black Velvet Cupcakes
- All-purpose flour — 1 ½ cups (180g). Regular flour works perfectly here. No need for cake flour.
- Granulated sugar — 1 cup (200g). Adds sweetness and helps with structure.
- Unsweetened cocoa powder — ¼ cup (20g). Use natural cocoa powder, not Dutch-processed. I prefer Hershey’s for everyday baking.
- Baking soda — 1 teaspoon. This reacts with the vinegar to create the lift.
- Salt — ½ teaspoon. Balances the sweetness.
- Vegetable oil — ½ cup (120ml). Keeps the cupcakes moist. You can also use canola or melted coconut oil.
- White vinegar — 1 tablespoon. Don’t skip this! It reacts with the baking soda for a tender crumb.
- Vanilla extract — 1 teaspoon. Pure vanilla is best, but imitation works in a pinch.
- Water — 1 cup (240ml), room temperature. Hot water will activate the cocoa too early.
- Black gel food coloring — 1 to 2 tablespoons. I recommend AmeriColor or Wilton brand. Liquid food coloring won’t give you the same deep black color.
For the Orange Cream Cheese Frosting
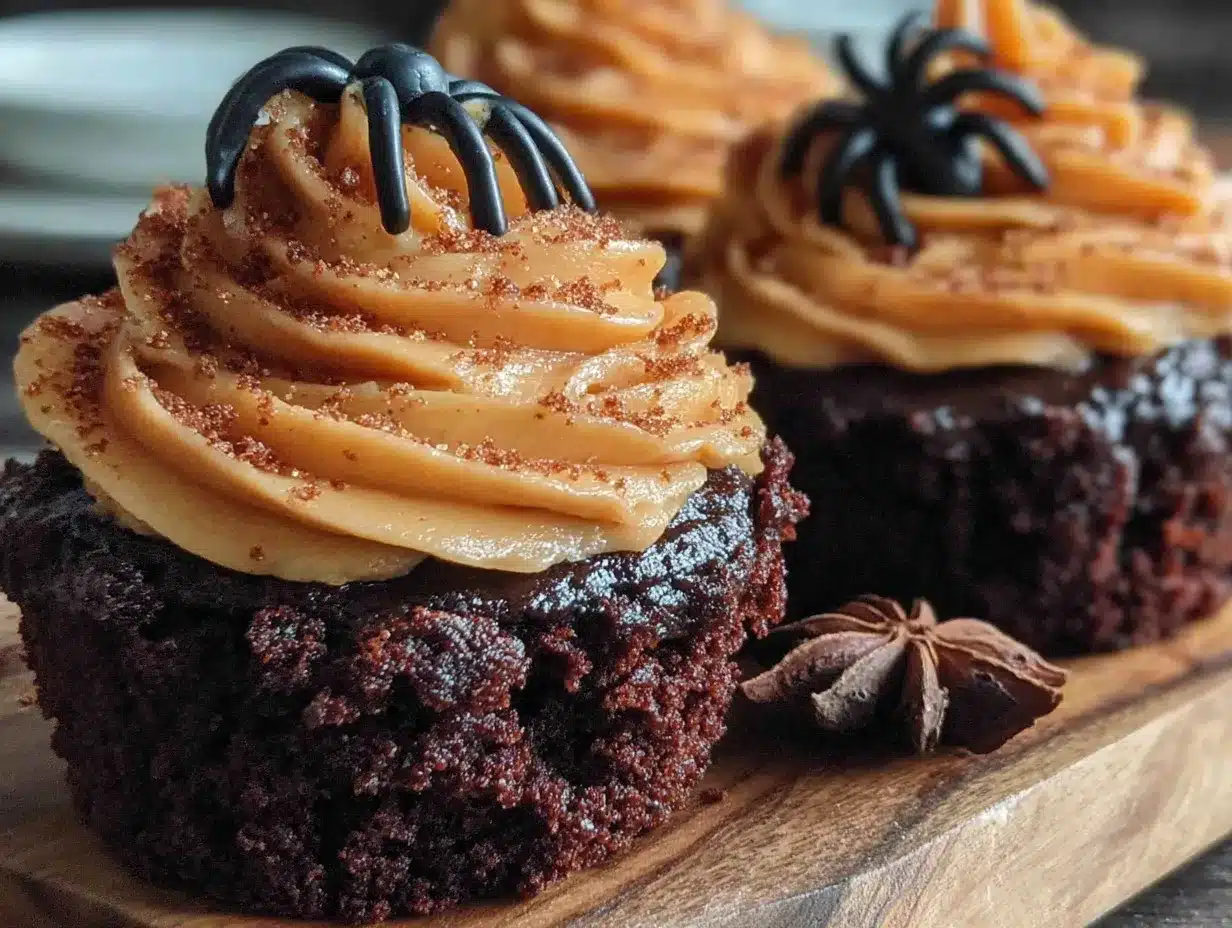
- Cream cheese — 8 oz (226g), softened. Full-fat cream cheese gives the best texture and flavor.
- Unsalted butter — ½ cup (113g), softened. Use good quality butter like Kerrygold or Land O’Lakes.
- Powdered sugar — 3 to 4 cups (360-480g), sifted. Adjust based on desired consistency.
- Vanilla extract — 1 teaspoon.
- Orange gel food coloring — a few drops. Use gel, not liquid, for vibrant color without thinning the frosting.
- Orange zest — optional, from 1 orange. Adds a fresh citrus note that pairs beautifully with the cream cheese.
For Decoration (Optional)
- Halloween sprinkles — ghosts, pumpkins, or bats. I found a great mix at Target last year.
- Mini candy eyeballs — for a fun, spooky touch.
Ingredient Tip: For the blackest cupcakes, let the batter sit for 5 minutes after adding the food coloring. The color deepens as it sits. If you’re short on time, just mix and bake—they’ll still be a dramatic dark gray that looks black once frosted.
Equipment Needed
You don’t need a professional bakery setup for these quick black velvet Halloween cupcakes with orange frosting. Here’s what you’ll actually use:
- Muffin tin — standard 12-cup size. I’ve had my Wilton one for years and it still works perfectly.
- Cupcake liners — black or orange paper liners add to the Halloween theme. If you only have white, that’s fine too.
- Mixing bowls — two medium bowls. One for dry ingredients, one for wet.
- Whisk — for mixing the dry ingredients. A fork works in a pinch.
- Electric mixer — hand mixer or stand mixer for the frosting. You can do it by hand, but your arm will get tired.
- Rubber spatula — for scraping the bowl and folding ingredients.
- Measuring cups and spoons — accurate measurements matter for baking.
- Cooling rack — lets the cupcakes cool evenly so the frosting doesn’t melt.
- Piping bag with star tip — for that bakery-style swirl. A zip-top bag with the corner snipped off works too.
Budget Tip: If you don’t have a piping bag, just spread the frosting with a knife. It won’t look as fancy, but it’ll taste exactly the same. I’ve done both, and honestly, the knife-spread version has its own charming, homemade look.
Preparation Method
Let’s get these spooky treats made. The whole process takes about 35-40 minutes, and most of that is baking time. Here’s exactly how I do it:
Step 1: Preheat and Prep
Preheat your oven to 350°F (175°C). Line your muffin tin with cupcake liners. If you’re using black liners, you can barely see the cake through them—which is kind of fun. Set the tin aside.
Step 2: Mix the Dry Ingredients
In a medium bowl, whisk together the flour, sugar, cocoa powder, baking soda, and salt. Make sure there are no lumps in the cocoa. I usually sift the cocoa powder if it looks clumpy. This takes about 30 seconds.
Step 3: Mix the Wet Ingredients
In a separate bowl, combine the vegetable oil, vinegar, vanilla extract, and water. Stir them together with a fork. Don’t worry if they don’t look fully combined—they’ll come together when you add them to the dry ingredients.
Step 4: Combine and Color
Pour the wet ingredients into the dry ingredients. Stir gently with a spatula until just combined. A few small lumps are fine—overmixing will make the cupcakes tough. Now add the black gel food coloring. Start with 1 tablespoon and stir. The batter will look gray at first. Add more coloring until you reach a deep black color. I usually use about 1½ tablespoons. Let the batter sit for 5 minutes—the color will deepen as it rests.
Sensory Cue: The batter should be thin and smooth, like a thick milkshake. It will smell faintly of vinegar, but don’t worry—that bakes off completely.
Step 5: Fill and Bake
Divide the batter evenly among the 12 cupcake liners. Fill each about ⅔ full. I use a cookie scoop for this—it’s less messy. Bake for 18-22 minutes, or until a toothpick inserted in the center comes out clean. The tops should spring back when lightly touched. My oven runs hot, so I check at 18 minutes.
Warning: Don’t open the oven door for the first 15 minutes of baking. The cupcakes need that steady heat to rise properly.
Step 6: Cool Completely
Let the cupcakes cool in the pan for 5 minutes, then transfer them to a wire rack. They need to be completely cool before you frost them—warm cupcakes will melt the cream cheese frosting into a puddle. This usually takes about 30 minutes. If you’re in a hurry, pop them in the fridge for 15 minutes.
Step 7: Make the Orange Frosting
While the cupcakes cool, make the frosting. Beat the softened cream cheese and butter together until smooth and fluffy—about 2 minutes with an electric mixer. Add the vanilla extract and beat again. Gradually add the powdered sugar, 1 cup at a time, mixing on low speed until incorporated. Once all the sugar is added, beat on medium-high for 2 minutes until light and fluffy. Add a few drops of orange gel food coloring and beat until the color is even. If you’re using orange zest, fold it in at the end.
Troubleshooting Tip: If your frosting looks curdled, your cream cheese or butter was too cold. Let it sit at room temperature for 10 minutes, then beat again. If it’s too thin, add more powdered sugar, ¼ cup at a time.
Step 8: Frost and Decorate
Transfer the frosting to a piping bag fitted with a star tip. Pipe a swirl onto each cooled cupcake. Start from the outside and work your way in, then lift straight up. Add Halloween sprinkles or candy eyeballs immediately, before the frosting sets. If you don’t have a piping bag, just spread the frosting with a knife and swirl it with the back of a spoon.
Cooking Tips & Techniques
I’ve made these quick black velvet Halloween cupcakes with orange frosting more times than I can count, and I’ve learned a few things the hard way. Here’s what I wish someone had told me:
Don’t overmix the batter. I know it’s tempting to keep stirring until it’s perfectly smooth, but that develops the gluten and makes the cupcakes tough. Stop mixing as soon as the flour disappears. A few lumps are your friend.
Use gel food coloring, not liquid. Liquid food coloring will thin out your batter and frosting, and it takes a whole bottle to get a decent color. Gel coloring is concentrated—a little goes a long way. I learned this after a disastrous batch of gray, watery frosting.
Room temperature ingredients matter. For the frosting, your cream cheese and butter need to be at room temperature. Cold ingredients don’t cream together properly and leave you with lumpy frosting. Take them out of the fridge 30 minutes before you start. I once tried to microwave cold cream cheese to speed things up—don’t do it. It melts unevenly and ruins the texture.
Let the batter rest. That 5-minute rest after adding the food coloring isn’t just for color development. It also allows the baking soda and vinegar to start reacting, which gives you a better rise. I skipped this step once and the cupcakes were flatter and denser.
Multitask strategically. While the cupcakes are baking, clean up your mixing bowls and measure out your frosting ingredients. While they’re cooling, make the frosting. This way, the whole process flows smoothly without any waiting around.
Variations & Adaptations
One of the best things about these quick black velvet Halloween cupcakes with orange frosting is how adaptable they are. Here are some variations I’ve tried and loved:
Gluten-Free Version
Substitute the all-purpose flour with a 1:1 gluten-free baking flour blend. I’ve used Bob’s Red Mill and King Arthur Measure for Measure with great results. The texture is slightly more crumbly, but the flavor is identical. Add an extra tablespoon of milk or water to the batter if it seems too thick.
Dairy-Free Version
Use a dairy-free cream cheese alternative like Kite Hill or Tofutti for the frosting. For the cupcakes, the recipe is naturally dairy-free since it uses oil and water instead of butter and milk. I made this version for a friend with a dairy allergy and she said it was the best cupcake she’d had in years.
Red Velvet Twist
If you want to make these for a non-Halloween occasion, just swap the black food coloring for red. You’ll get classic red velvet cupcakes with orange frosting—perfect for fall or a birthday party. The recipe works exactly the same way.
Chocolate Orange Variation
Add 1 teaspoon of orange extract to the cupcake batter along with the vanilla. The chocolate-orange flavor combination is incredible. I tried this on a whim and now it’s my favorite version.
Mini Cupcakes
Use a mini muffin tin and bake for 10-12 minutes instead of 18-22. This yields about 36 mini cupcakes. They’re perfect for Halloween parties where people want to try multiple treats. I brought these to a neighborhood gathering last year and they were gone in 15 minutes.
Serving & Storage Suggestions
These quick black velvet Halloween cupcakes with orange frosting are best served at room temperature. The cake is tender and moist, and the frosting is creamy but firm. If you’ve refrigerated them, let them sit on the counter for 20 minutes before serving.
Presentation Ideas: Arrange the cupcakes on a black or orange platter for maximum Halloween effect. Add some fake spider webs or plastic spiders around the base for a spooky touch. I once served them on a cake stand with battery-operated tea lights around the edge—it looked amazing.
Complementary Dishes: These cupcakes pair beautifully with a glass of cold milk or a hot cup of coffee. For a Halloween party spread, serve them alongside other spooky treats like ghost-shaped cookies or pumpkin spice popcorn.
Storage Instructions: Store unfrosted cupcakes in an airtight container at room temperature for up to 3 days. Frosted cupcakes should be stored in the refrigerator, where they’ll keep for up to 5 days. The frosting will firm up in the fridge, which actually makes the cupcakes easier to transport.
Freezer Tips: You can freeze the unfrosted cupcakes for up to 3 months. Wrap each one individually in plastic wrap, then place them in a freezer bag. Thaw at room temperature before frosting. The frosting can also be frozen in an airtight container for up to 2 months—just thaw it in the fridge overnight and re-whip before using.
Flavor Development: Honestly, these cupcakes taste even better the next day. The flavors meld together and the cake becomes even more moist. I sometimes make them a day ahead on purpose.
Nutritional Information & Benefits
Let’s be real—these are cupcakes, not health food. But here’s the breakdown per cupcake (based on 12 servings with frosting):
- Calories: Approximately 380-420 per cupcake
- Fat: 22g (mostly from cream cheese and butter)
- Carbohydrates: 48g
- Protein: 4g
- Sugar: 35g
Health Benefits of Key Ingredients: The cocoa powder in these cupcakes is actually a good source of antioxidants (flavonoids) that can support heart health. The cream cheese provides some calcium and protein. And the orange zest in the frosting adds a tiny bit of vitamin C. Not that you’re eating these for the health benefits, but it’s nice to know they’re not completely empty calories.
Dietary Considerations: This recipe contains dairy (cream cheese, butter) and gluten (wheat flour). It does not contain eggs. For egg-free diets, this is a great option. For dairy-free or gluten-free diets, see the variations section above.
Allergen Note: Always check your food coloring labels—some brands may contain allergens. The gel food coloring I use is free of common allergens, but brands vary.
Conclusion
These quick black velvet Halloween cupcakes with orange frosting are proof that you don’t need hours of planning or a kitchen full of fancy equipment to make something memorable. They came out of a moment of pure panic, and now they’re the recipe I turn to every October. The black cake is dramatic without being gimmicky, the orange frosting is bright and cheerful, and the whole thing comes together in under an hour.
I love that this recipe gives you permission to be imperfect. Maybe your frosting swirl isn’t picture-perfect. Maybe your sprinkles are a little lopsided. That’s okay—it’s homemade, and that’s the whole point. These cupcakes have won bake sales, delighted party guests, and made my kids’ Halloween a little more special. I hope they do the same for you.
If you make these, I’d love to hear how they turned out. Drop a comment below and tell me about your Halloween plans, or share a photo of your cupcakes. And if you come up with a fun variation, definitely share that too. Happy Halloween, and happy baking!
Frequently Asked Questions
Can I make these cupcakes without black food coloring?
Technically, yes. Without the black coloring, you’ll have a dark chocolate cupcake that’s more brown than black. It’ll still taste great, but it won’t have that dramatic Halloween look. If you want a darker color without artificial coloring, try adding a teaspoon of black cocoa powder (like Oreo crumbs) to the dry ingredients.
Why did my cupcakes turn out gray instead of black?
This usually happens when you don’t use enough food coloring or when you use liquid coloring instead of gel. Gel food coloring is much more concentrated. Also, letting the batter rest for 5 minutes before baking helps the color develop. If your cupcakes are gray, don’t worry—once they’re frosted, no one will notice the difference.
Can I use a different type of frosting?
Absolutely. A classic buttercream frosting would work great, and you can color it orange the same way. Chocolate buttercream would also be delicious, though it won’t give you that orange Halloween look. For a lighter option, try a whipped cream frosting stabilized with a bit of cream cheese.
How do I get my frosting to be a bright orange color?
Use orange gel food coloring, and add it drop by drop until you reach the desired shade. For a deeper orange, mix a tiny drop of red coloring in with the orange. If you want a natural alternative, you can use carrot juice or turmeric, but that will affect the flavor and texture of the frosting.
Can I make these cupcakes ahead of time for a party?
Yes! You can bake the cupcakes up to 3 days in advance and store them unfrosted in an airtight container. Frost them the day of your event for the best presentation. The frosting can be made up to 2 days ahead and stored in the fridge—just let it come to room temperature and re-whip before using.
Pin This Recipe!
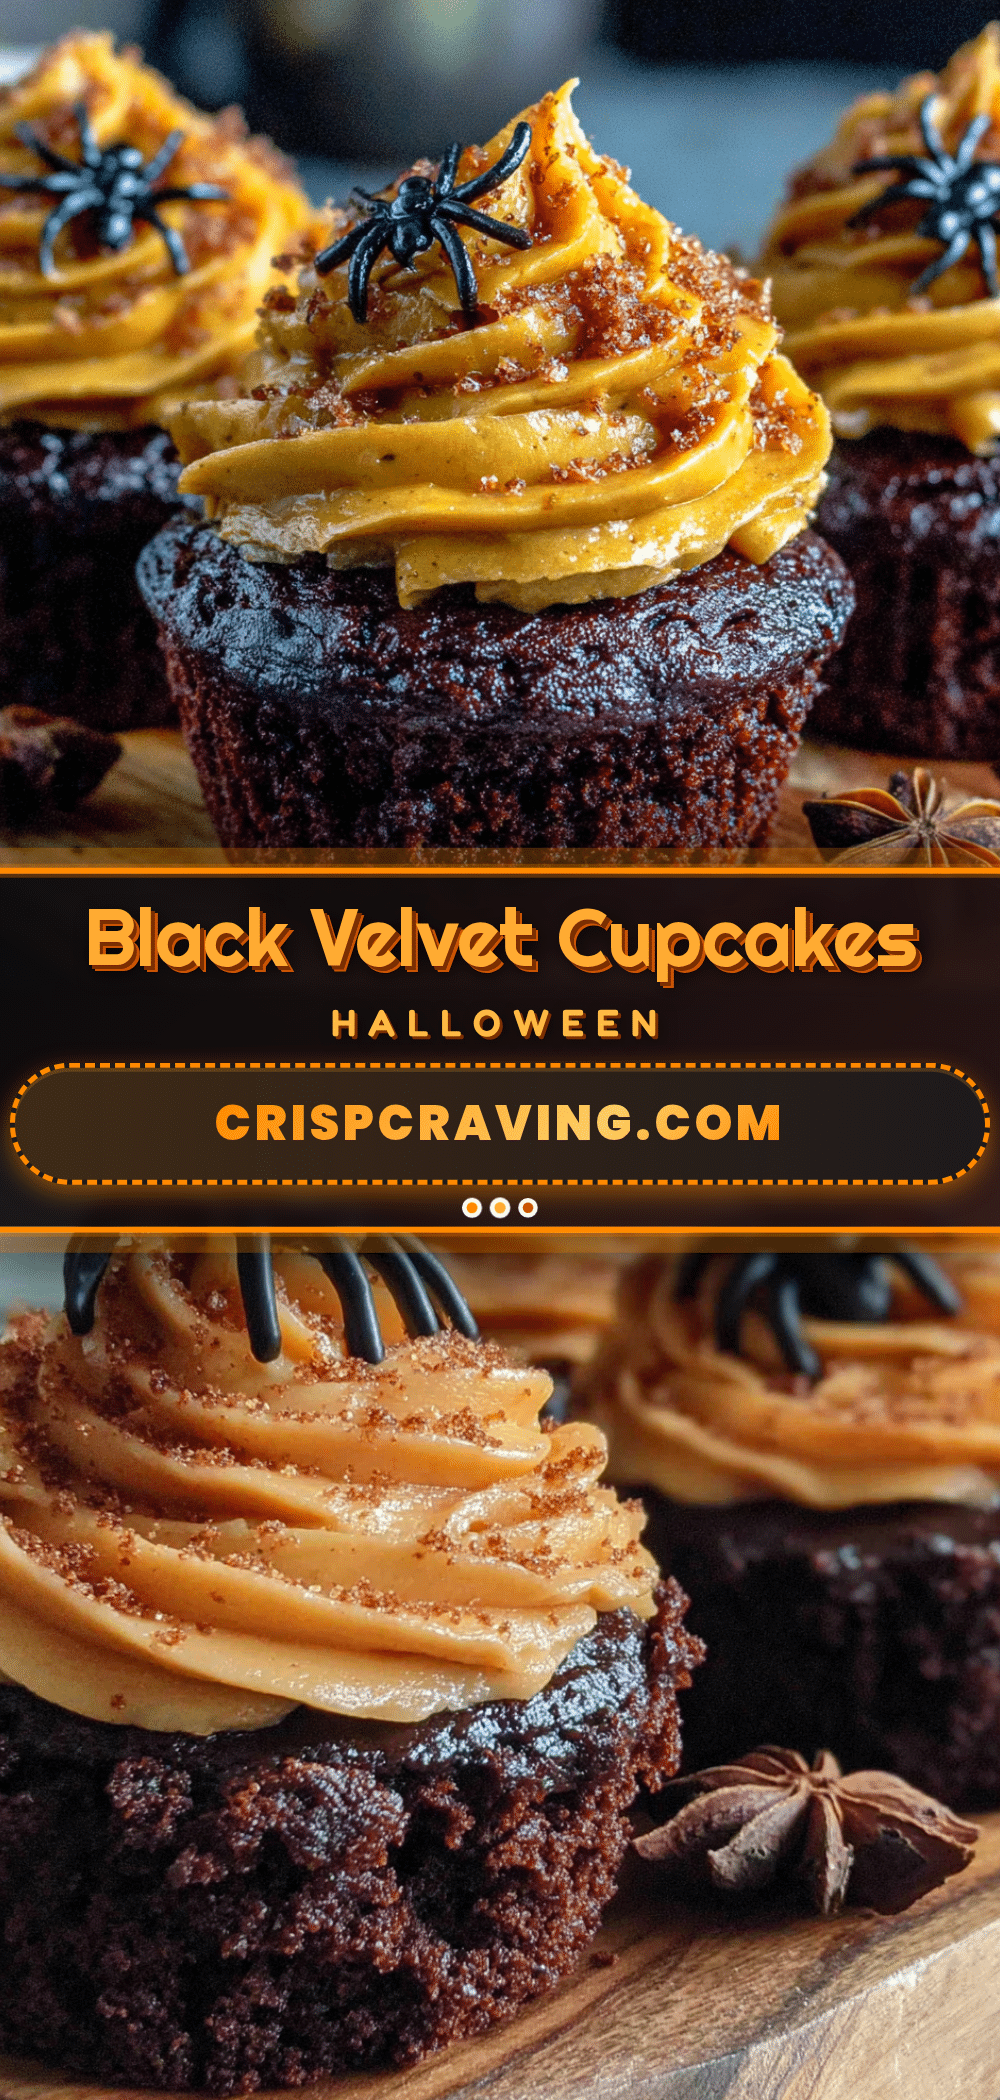
Quick Black Velvet Halloween Cupcakes with Orange Frosting
These quick black velvet Halloween cupcakes with orange frosting are a showstopper at any Halloween party. The black cake is tender and rich, and the orange cream cheese frosting is the perfect balance of sweet and tangy.
- Prep Time: 15 minutes
- Cook Time: 20 minutes
- Total Time: 35 minutes
- Yield: 12 cupcakes 1x
- Category: Dessert
- Cuisine: American
Ingredients
- 1 ½ cups (180g) all-purpose flour
- 1 cup (200g) granulated sugar
- ¼ cup (20g) unsweetened cocoa powder
- 1 teaspoon baking soda
- ½ teaspoon salt
- ½ cup (120ml) vegetable oil
- 1 tablespoon white vinegar
- 1 teaspoon vanilla extract
- 1 cup (240ml) water, room temperature
- 1 to 2 tablespoons black gel food coloring
- 8 oz (226g) cream cheese, softened
- ½ cup (113g) unsalted butter, softened
- 3 to 4 cups (360-480g) powdered sugar, sifted
- 1 teaspoon vanilla extract
- a few drops orange gel food coloring
- optional: orange zest from 1 orange
- optional: Halloween sprinkles
- optional: mini candy eyeballs
Instructions
- Preheat your oven to 350°F (175°C). Line a 12-cup muffin tin with cupcake liners.
- In a medium bowl, whisk together the flour, sugar, cocoa powder, baking soda, and salt.
- In a separate bowl, combine the vegetable oil, vinegar, vanilla extract, and water. Stir with a fork.
- Pour the wet ingredients into the dry ingredients. Stir gently with a spatula until just combined. Add black gel food coloring (start with 1 tablespoon) and stir until the batter is deep black. Let the batter sit for 5 minutes.
- Divide the batter evenly among the 12 cupcake liners, filling each about ⅔ full. Bake for 18-22 minutes, or until a toothpick inserted in the center comes out clean. Let cool in the pan for 5 minutes, then transfer to a wire rack to cool completely.
- While the cupcakes cool, make the frosting: Beat the softened cream cheese and butter together until smooth and fluffy (about 2 minutes). Add vanilla extract and beat again. Gradually add powdered sugar, 1 cup at a time, mixing on low speed. Once all sugar is added, beat on medium-high for 2 minutes. Add a few drops of orange gel food coloring and beat until even. Fold in orange zest if using.
- Transfer frosting to a piping bag fitted with a star tip. Pipe a swirl onto each cooled cupcake. Add Halloween sprinkles or candy eyeballs immediately.
- Serve at room temperature. Store frosted cupcakes in the refrigerator for up to 5 days.
Notes
For the blackest cupcakes, let the batter sit for 5 minutes after adding the food coloring. The color deepens as it sits. If you’re short on time, just mix and bake—they’ll still be a dramatic dark gray that looks black once frosted. Don’t overmix the batter; a few lumps are fine. Use gel food coloring, not liquid, for best results. Room temperature ingredients are important for the frosting.
Nutrition
- Serving Size: 1 cupcake
- Calories: 400
- Sugar: 35
- Sodium: 280
- Fat: 22
- Saturated Fat: 10
- Carbohydrates: 48
- Fiber: 1
- Protein: 4
Keywords: Halloween cupcakes, black velvet cupcakes, orange frosting, cream cheese frosting, quick dessert, Halloween dessert



