Love this? Save it for later!
Share the inspiration with your friends
I’m not supposed to admit this, but I used to think Halloween baking was just for people with way more patience than me. You know, the ones who can pipe perfect ghosts and carve intricate designs into cookies without losing their minds. That was never my kitchen scene. But last October, my niece handed me a crumpled drawing of a mummy made out of what looked like a flattened crescent roll, and she asked with total seriousness if we could make it together. I mean, how do you say no to that? So I grabbed a box of pie crust from the fridge, a jar of pizza sauce, and told myself we’d figure it out. Three burnt attempts, one cheese explosion, and a lot of laughter later, we had something that actually looked like a mummy—and it tasted incredible. Honestly, that messy afternoon turned into a whole new tradition. These Spooky Mummy Hand Pies for Halloween are the direct result of that kitchen disaster, and I’ve been perfecting them ever since. Maybe you’ve been there too—wanting to make something fun for the holiday but dreading the cleanup and complexity. These little pies are the answer. They’re simple enough for a Tuesday night, but spooky enough to steal the show at any Halloween party.
Why You’ll Love This Recipe
Let me tell you why these little guys have become my most-requested Halloween recipe. They check every box you could want for a holiday treat, and they don’t require a culinary degree to pull off.
- Quick & Easy: These come together in under 40 minutes. Seriously. From fridge to table, you’re looking at about 35 minutes total. Perfect for those last-minute Halloween cravings or when the kids suddenly announce they need treats for school tomorrow.
- Simple Ingredients: No fancy grocery trips needed. You probably already have pie crust (or puff pastry), your favorite filling, and a little egg wash in your kitchen right now. I mean, that’s the beauty of it.
- Perfect for Halloween Parties: These are great for potlucks, classroom treats, or just a cozy night in watching scary movies. They travel well and look way more impressive than the effort required.
- Crowd-Pleaser: Kids absolutely lose it over the mummy design, and adults appreciate that they’re not overly sweet. I’ve watched grown men grab three at a party.
- Unbelievably Delicious: The flaky, buttery crust wrapped around a warm, savory or sweet filling is next-level comfort food. The texture combo is pure magic.
What makes this recipe different from the rest is the technique. Instead of struggling with intricate dough cutters, I use a simple strip-cutting method that mimics mummy bandages perfectly. It’s not just another hand pie recipe—it’s my best version, tested through multiple Halloween seasons and countless filling experiments. This recipe isn’t just good. It’s the kind that makes you close your eyes after the first bite. It’s comfort food reimagined for the spooky season—faster, easier, but with the same soul-soothing satisfaction. Perfect for impressing guests without stress, or turning a simple October evening into something memorable.
What Ingredients You Will Need
This recipe uses simple, store-bought ingredients to deliver maximum flavor and that perfect mummy look without the fuss. Here’s what you’ll need to grab:
- 2 sheets of refrigerated pie crust (I prefer Pillsbury for consistency, but any brand works—or homemade if you’re feeling ambitious)
- 1/2 cup of your favorite filling (pizza sauce and mozzarella for savory, or Nutella and marshmallow for sweet—both are amazing)
- 1 large egg, beaten (for the egg wash that gives them that golden, glossy finish)
- Candy eyes (the small round ones, about 12-16 pieces depending on how many pies you make)
- Flour, for dusting your work surface
For the savory version (my personal go-to):
- 1/4 cup pizza sauce (look for a thicker sauce so it doesn’t make the crust soggy)
- 1/3 cup shredded mozzarella cheese (low-moisture works best)
- 1/4 teaspoon garlic powder (optional, but I never skip it)
- 1/4 teaspoon dried oregano
For the sweet version (perfect for dessert):
- 1/4 cup Nutella or chocolate hazelnut spread
- 1/4 cup mini marshmallows (they get all gooey inside—trust me on this)
- 1 tablespoon powdered sugar, for dusting after baking
Ingredient selection tips: When choosing pie crust, look for the refrigerated rolled sheets rather than the pre-formed pie shells. The sheets roll out thinner and cut more cleanly for the mummy strips. For the candy eyes, I recommend Wilton brand—they hold up well in the oven and don’t melt into a mess. If you’re using a homemade pie dough, make sure it’s chilled thoroughly before rolling. Warm dough will stick to your counter and make the strip-cutting a nightmare. Honestly, I’ve been there, and it’s not pretty.
Substitution guidance: Use gluten-free pie crust for a celiac-friendly option. Swap the pizza sauce with pesto for an herby twist, or use almond butter and banana slices for a healthier sweet version. Dairy-free cheese melts beautifully if you need to keep it vegan-friendly.
Equipment Needed
You don’t need a fancy kitchen to pull these off. Here’s what I use every time:
- Rolling pin (a wine bottle works in a pinch—I’ve done it)
- Pizza cutter or sharp knife (for cutting those perfect mummy strips)
- Baking sheet (lined with parchment paper for easy cleanup)
- Pastry brush (for the egg wash—a clean paintbrush works too, just saying)
- Small bowl (for beating the egg)
- Cooling rack (so the bottoms don’t get soggy)
- Spatula (for moving the delicate pies onto the baking sheet)
Personal experience: I used to use a butter knife for cutting the strips, and let me tell you, a pizza cutter is a game-changer. It glides through the dough without dragging or tearing. If you’re using a knife, make sure it’s very sharp and dip it in flour between cuts. Also, don’t skip the parchment paper. I tried using a greased baking sheet once, and the pies stuck so badly I had to scrape them off with a spatula and re-roll the whole batch. Learn from my mistakes, friends.
Preparation Method

Alright, let’s get these spooky little guys made. Follow these steps carefully, and you’ll have a batch of mummy hand pies that’ll impress everyone.
- Preheat your oven to 400°F (200°C). Line a baking sheet with parchment paper and set it aside. This is one of those steps you don’t want to skip—trust me, cold dough hitting a hot pan is a recipe for disaster.
- Roll out your pie crusts. Lightly dust your work surface with flour. Unroll both pie crust sheets and gently roll them out just slightly thinner—about 1/8 inch thick. Don’t go too thin, or they’ll tear when you wrap them. I learned that the hard way after my first batch looked like mummy roadkill.
- Cut the base shapes. Using a 4-inch round cookie cutter or a glass, cut out circles from the rolled dough. You should get about 6 circles per sheet, so 12 total. Gather the scraps, re-roll, and cut more if needed. I usually end up with 14-16 circles from two sheets.
- Add the filling. Place half of the circles on the prepared baking sheet, spacing them about 2 inches apart. Spoon about 1 tablespoon of your chosen filling into the center of each circle. If you’re making savory pies, add a pinch of cheese on top. For sweet pies, add a mini marshmallow on top of the Nutella.
- Cut the mummy strips. Take the remaining dough circles and cut them into thin strips—about 1/4 inch wide. A pizza cutter works best for this. You want them long enough to wrap around the filling. If they break, just press them back together—the egg wash will seal everything.
- Wrap the mummies. Carefully lay the strips over the filling, crossing them in a crisscross pattern like bandages. Leave a small gap near the top for the eyes. Press the ends of the strips onto the bottom dough circle to seal. Don’t worry if it looks messy—mummies are supposed to look a little rough.
- Apply the egg wash. In a small bowl, beat the egg with 1 tablespoon of water. Gently brush the egg wash over the exposed dough strips. This gives them that beautiful golden color when baked. Don’t brush the candy eyes—they’ll slide off.
- Add the eyes. Press two candy eyes into the gap you left near the top of each mummy. Gently push them into the dough so they stay put during baking. If they fall off, just re-press them after the pies come out of the oven.
- Bake. Place the baking sheet in the preheated oven and bake for 12-15 minutes, or until the crust is golden brown and the filling is bubbly. Keep an eye on them—ovens vary, and you don’t want burnt mummies.
- Cool. Remove from the oven and let the pies cool on the baking sheet for 5 minutes, then transfer them to a cooling rack. The filling will be extremely hot, so resist the urge to bite into one immediately. I may have burned my tongue once. Or twice.
Cooking Tips & Techniques
Here are the little secrets I’ve picked up after making these more times than I care to count. These tips will save you from the mistakes I’ve already made.
Don’t overfill. I know it’s tempting to pile on the filling, but less is more here. Too much filling will cause the pies to burst open during baking, and you’ll end up with a sticky mess on your baking sheet. One tablespoon is the sweet spot.
Chill the dough if it gets too soft. If your kitchen is warm and the dough starts feeling sticky or tearing easily, pop the cut circles into the fridge for 10 minutes. Cold dough is much easier to work with, and it holds its shape better in the oven. I learned this after a particularly humid October afternoon when my dough turned into a sticky disaster.
Seal the edges well. Use a fork to crimp the edges of the bottom circle before adding the strips. This creates a better seal and prevents filling from leaking out. I didn’t do this my first time, and I ended up with pizza sauce all over my baking sheet. It was a sad cleanup.
Work in batches. Don’t try to assemble all the pies at once if you’re new to this. Assemble 4-5 at a time, bake them, then move on to the next batch. This keeps the dough cold and prevents it from getting overworked. Plus, you get to enjoy the first batch while making the second. Win-win.
The candy eye trick. If you’re worried about the eyes melting or sliding off, you can also add them after baking. Just press them onto the warm egg wash—they’ll stick perfectly. I do this when I’m making a big batch for a party and don’t want to risk any casualties.
Multitasking strategy: While the first batch is baking, I cut the strips for the next batch. This keeps the workflow smooth and cuts down on total time. You’ll feel like a real kitchen pro.
Variations & Adaptations
One of the best things about this recipe is how flexible it is. Here are some variations I’ve tried and loved.
Savory Breakfast Mummies: Fill the pies with scrambled eggs, crumbled sausage, and a pinch of cheddar cheese. Bake as directed, and you’ve got a Halloween morning breakfast that’ll make the kids actually excited to eat before school. I made these for a Halloween sleepover, and they disappeared in minutes.
Vegan-Friendly Version: Use a vegan pie crust (most store-bought brands are accidentally vegan), fill with mashed sweet potatoes and black beans for a savory option, or use vegan chocolate spread for sweet. Skip the egg wash and brush with a mixture of maple syrup and plant-based milk for the same golden finish. The candy eyes are usually vegan, but double-check the package.
Spicy Sausage Mummies: Cook spicy Italian sausage, crumble it, and mix with a little marinara sauce and mozzarella. The heat pairs beautifully with the flaky crust. I made these for a Halloween party last year, and they were the first thing to disappear from the snack table.
Apple Cinnamon Mummies: For a fall-flavored sweet version, fill the pies with apple pie filling and a sprinkle of cinnamon sugar. Omit the candy eyes and dust with powdered sugar after baking for a “ghostly” look. These are perfect for a Halloween dessert that feels more like autumn comfort.
Gluten-Free Adaptation: Use a gluten-free pie crust blend. I’ve had good luck with the Wholly Gluten Free brand. Just be gentle when rolling and cutting—gluten-free dough is more fragile. The flavor is still fantastic.
Serving & Storage Suggestions
These little mummies are best served warm, straight from the oven. The contrast between the flaky crust and the warm, gooey filling is pure magic. I like to arrange them on a platter lined with black or orange napkins for that Halloween vibe. If you’re serving them at a party, set them out on a cooling rack so the bottoms stay crisp.
Complementary dishes: Serve savory mummy pies alongside a bowl of warm marinara sauce for dipping. For sweet pies, a glass of cold milk or a hot cup of apple cider is the perfect pairing. I also love serving them with a side of fresh fruit to balance out the richness.
Storage instructions: Store leftover pies in an airtight container in the refrigerator for up to 3 days. The crust will soften slightly, but they’re still delicious. To reheat, pop them in a 350°F oven for 5-7 minutes, or until warmed through. Avoid the microwave—it makes the crust soggy and sad. I learned this after reheating a batch for lunch and ending up with a mushy mess.
Freezer instructions: You can freeze the unbaked pies for up to 2 months. Assemble them completely, place them on a baking sheet, and freeze until solid. Then transfer them to a freezer bag. When you’re ready to bake, add 5-7 minutes to the baking time—no need to thaw. This is my go-to trick for Halloween parties. I make a double batch, freeze half, and have spooky treats ready whenever I need them.
Flavor development: The flavors actually meld together beautifully after a day in the fridge. The filling gets more intense, and the crust softens just slightly. Some people prefer them the next day. I’m not one of those people, but it’s worth noting.
Nutritional Information & Benefits
These hand pies are a treat, so I’m not going to pretend they’re health food. But here’s a rough breakdown if you’re keeping track.
Per savory pie (using pizza sauce and mozzarella): Approximately 180 calories, 9g fat, 20g carbohydrates, 4g protein, 1g fiber, 3g sugar. These numbers will vary based on your specific ingredients and filling.
Health benefits of key ingredients: Pie crust provides energy from carbohydrates, and the mozzarella offers a good dose of calcium and protein. If you use whole wheat pie crust, you’ll get a bit more fiber. The tomato sauce in the savory version provides lycopene, an antioxidant linked to heart health. For the sweet version, dark chocolate (if you use a high-cocoa Nutella alternative) offers some antioxidants and magnesium.
Dietary considerations: This recipe contains gluten, dairy, and eggs. For a gluten-free version, use a gluten-free pie crust. For dairy-free, use vegan cheese or skip the cheese entirely. The sweet version with Nutella is naturally dairy-free if you use a dairy-free pie crust. Always check your ingredient labels for hidden allergens.
My personal wellness perspective: I believe in balance. These pies are a fun, occasional treat that brings joy to a holiday celebration. I pair them with a big salad or a bowl of vegetable soup for dinner, and nobody feels deprived. Life’s too short to skip the mummy pies, you know?
Conclusion
These Spooky Mummy Hand Pies for Halloween have become a staple in my kitchen for one simple reason: they’re fun, delicious, and surprisingly easy to make. Whether you’re hosting a Halloween party, looking for a classroom treat, or just want to make a cozy October evening special, these little guys deliver. I love that they’re customizable—you can make them savory, sweet, or anything in between. And honestly, watching someone’s face light up when they see those little candy eyes peeking out from the flaky crust is worth every minute in the kitchen.
I’d love to hear how yours turn out. Did you try a different filling? Did the kids help you wrap the mummies? Drop a comment below and let me know. And if you’re looking for more Halloween inspiration, check out my crispy garlic chicken recipe for a savory main dish that pairs perfectly with these pies. Don’t forget to share this recipe with your friends—because everyone deserves a little spooky fun in their kitchen. Happy Halloween, friends. Go make some mummies.
Frequently Asked Questions
Can I use puff pastry instead of pie crust?
Absolutely! Puff pastry works beautifully and gives the pies an even flakier, more buttery texture. Just make sure to roll it out slightly thinner than usual, and bake at the same temperature. The baking time might be a minute or two longer, so keep an eye on them.
How do I keep the candy eyes from melting?
Press them gently into the dough before baking, or add them immediately after baking while the egg wash is still warm and sticky. If you’re worried about melting, the post-bake method is foolproof. I’ve used both methods, and both work great.
Can I make these ahead of time for a party?
Yes! Assemble the pies completely, place them on a baking sheet, and refrigerate for up to 24 hours before baking. You can also freeze them unbaked for up to 2 months. Just add a few extra minutes to the baking time if baking from frozen.
What’s the best filling for kids?
In my experience, kids love the pizza sauce and cheese version best. It’s familiar, savory, and the mummy design makes it feel like a fun snack rather than a meal. For sweet options, Nutella and marshmallow is a huge hit, but be warned—it gets very hot inside.
Can I use homemade pie dough?
Absolutely! Homemade pie dough works wonderfully. Just make sure it’s well-chilled before rolling and cutting. I recommend adding an extra tablespoon of cold water to the dough to keep it pliable enough for the thin strips. My grandmother’s recipe uses half butter and half shortening for the perfect flaky texture.
Pin This Recipe!
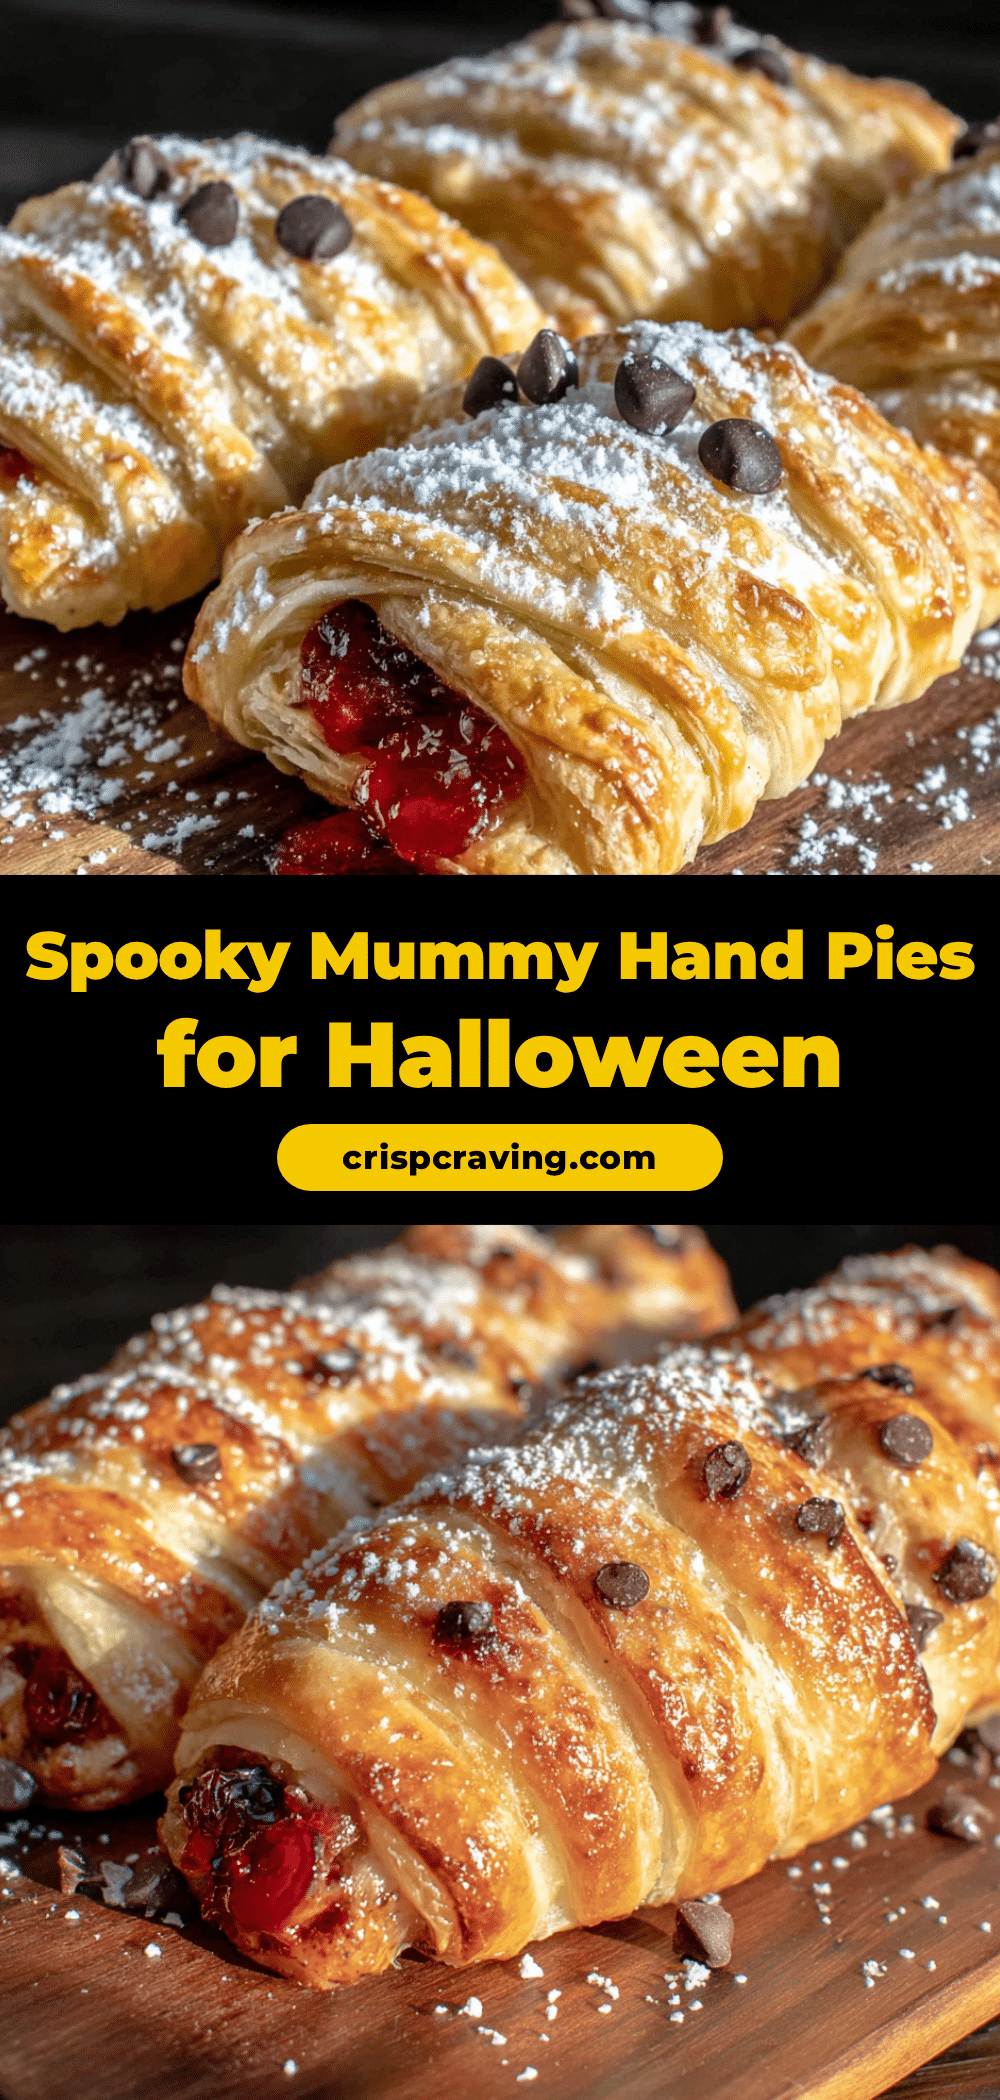
Spooky Mummy Hand Pies: Easy Halloween Recipe

These Spooky Mummy Hand Pies are a fun and easy Halloween treat made with pie crust, your choice of savory or sweet filling, and candy eyes. They come together in under 40 minutes and are perfect for parties or a cozy night in.
- Prep Time: 20 minutes
- Cook Time: 15 minutes
- Total Time: 35 minutes
- Yield: 12-16 servings 1x
- Category: Appetizer
- Cuisine: American
Ingredients
- 2 sheets refrigerated pie crust (e.g., Pillsbury)
- 1/2 cup filling of choice (pizza sauce and mozzarella for savory, or Nutella and marshmallow for sweet)
- 1 large egg, beaten (for egg wash)
- Candy eyes (small round, about 12-16 pieces)
- Flour, for dusting
- For savory version: 1/4 cup pizza sauce, 1/3 cup shredded mozzarella cheese, 1/4 teaspoon garlic powder (optional), 1/4 teaspoon dried oregano
- For sweet version: 1/4 cup Nutella or chocolate hazelnut spread, 1/4 cup mini marshmallows, 1 tablespoon powdered sugar (for dusting)
Instructions
- Preheat oven to 400°F (200°C). Line a baking sheet with parchment paper.
- Lightly dust work surface with flour. Unroll pie crust sheets and roll out slightly thinner to about 1/8 inch thick.
- Using a 4-inch round cookie cutter or glass, cut out circles from the dough. You should get about 12-16 circles total.
- Place half of the circles on the prepared baking sheet, spacing them about 2 inches apart. Spoon about 1 tablespoon of filling into the center of each circle. For savory, add a pinch of cheese; for sweet, add a mini marshmallow.
- Take the remaining dough circles and cut them into thin strips, about 1/4 inch wide, using a pizza cutter or sharp knife.
- Carefully lay the strips over the filling in a crisscross pattern like bandages, leaving a small gap near the top for the eyes. Press the ends onto the bottom dough circle to seal.
- In a small bowl, beat the egg with 1 tablespoon of water. Gently brush the egg wash over the exposed dough strips, avoiding the candy eyes.
- Press two candy eyes into the gap near the top of each mummy, gently pushing them into the dough.
- Bake for 12-15 minutes, or until the crust is golden brown and the filling is bubbly.
- Remove from oven and let cool on the baking sheet for 5 minutes, then transfer to a cooling rack. Filling will be very hot.
Notes
Don’t overfill the pies—1 tablespoon is the sweet spot. If dough gets too soft, chill the cut circles for 10 minutes. Seal edges with a fork to prevent leaking. Candy eyes can be added after baking if you’re worried about melting. For best results, work in batches to keep dough cold.
Nutrition
- Serving Size: 1 pie
- Calories: 180
- Sugar: 3
- Sodium: 250
- Fat: 9
- Saturated Fat: 3
- Carbohydrates: 20
- Fiber: 1
- Protein: 4
Keywords: Halloween, mummy hand pies, easy Halloween recipe, savory hand pies, sweet hand pies, pie crust recipe, spooky treats



