Love this? Save it for later!
Share the inspiration with your friends
My neighbor Karen wasn’t trying to impress anyone. I’d stopped by to borrow a ladder—ours had mysteriously vanished into the garage abyss—and the smell of chocolate hit me before I even got to her front door. Rich, warm, the kind of smell that makes you forget why you came. She opened the door holding a piping bag like it was no big deal, flour on her cheek, and said, “Oh, these are just for the kids’ school party.” Just. I mean, I’ve seen school party treats. Store-bought cookies, sad little bags of pretzels. These were spiderweb cupcakes, and they looked like something from a bakery window. She shrugged and handed me one. That first bite—moist, deeply chocolatey, with that perfect crumb—honestly stopped me mid-sentence. I stood there, ladder forgotten, chocolate on my lip, asking for the recipe. She laughed and said it was nothing. But let me tell you, it was everything. And now, every Halloween, I make these, and I think about Karen and her flour-dusted cheek and the way she made something spooky and spectacular feel like no big deal.
Why You’ll Love These Spooky Spiderweb Cupcakes
Let me tell you why these spiderweb cupcakes have become my go-to Halloween treat. I’ve tested this recipe more times than I care to admit, tweaking the cake for moisture, perfecting the frosting, figuring out the best way to get those webs looking clean and creepy. Here’s what makes them special:
- Quick & Easy: From start to finish, you’re looking at about 45 minutes. Perfect for last-minute Halloween parties or when you realize the school bake sale is tomorrow.
- Simple Ingredients: No weird gelatin, no specialty candy. You probably have everything in your pantry right now. I mean it—check your cabinets.
- Perfect for Halloween: These are the star of any costume party, classroom celebration, or spooky movie night. Kids go wild for them, and adults pretend they’re too old for spiderwebs, then eat three.
- Crowd-Pleaser: I’ve brought these to three Halloween parties now, and they disappear every single time. Every. Single. Time.
- Unbelievably Delicious: The cake is so moist it practically melts, and the frosting is that perfect balance of sweet and creamy. The spiderweb design is just the cherry on top—or the spider on the web, I guess.
What makes this version different from the rest? It’s the technique. I use a simple buttercream that pipes like a dream, and I’ve figured out the exact consistency you need for those webs to come out clean instead of a goopy mess. No fancy tools, no stress—just really good cupcakes that happen to look terrifyingly cute.
This is the kind of recipe that makes you close your eyes after the first bite. It’s Halloween fun without the fuss, and honestly, that’s the best kind of treat.
What Ingredients You Will Need
This recipe uses simple, everyday ingredients to create something that looks like it came from a haunted bakery. Here’s what you’ll need, broken down by component so you don’t miss a thing.
For the Chocolate Cupcakes
- 1 ½ cups all-purpose flour (spooned and leveled—don’t scoop straight from the bag, you’ll pack it too tight)
- 1 cup granulated sugar
- ½ cup unsweetened cocoa powder (I prefer Hershey’s Special Dark for a richer flavor, but any good cocoa works)
- 1 teaspoon baking soda
- ½ teaspoon baking powder
- ½ teaspoon salt
- 1 cup buttermilk (room temperature—this makes the cake incredibly tender)
- ½ cup vegetable oil (keeps the cake moist for days)
- 2 large eggs (room temperature)
- 1 teaspoon vanilla extract
- ½ cup hot water (this is the secret to that deep, fudgy texture)
For the Vanilla Buttercream Frosting
- 1 cup unsalted butter (softened—let it sit out for at least an hour)
- 3 ½ cups powdered sugar (sifted if you want it extra smooth)
- 2 teaspoons vanilla extract
- 2-3 tablespoons heavy cream (or milk, in a pinch)
- ¼ teaspoon salt
For the Spiderweb Design
- ½ cup black gel food coloring (the gel kind, not liquid—liquid will mess up your frosting consistency)
- Optional: Candy spiders for decoration (I found some at Target in the Halloween section)
A quick note on the cocoa: if you’re using natural cocoa powder (which most of us have), this recipe is perfect. If you only have Dutch-processed, that works too—just skip the baking soda and use 1 ½ teaspoons baking powder instead. I learned that the hard way after a batch that refused to rise.
For the black frosting, don’t try to use regular food coloring. You’ll use half the bottle and end up with gray. Trust me on this—black gel coloring is worth the extra dollar.
Equipment Needed
You don’t need a professional bakery setup for these spiderweb cupcakes. Here’s what you’ll actually use:
- Standard 12-cup muffin tin (or two, if you’re doubling the batch)
- Paper cupcake liners (black or orange ones make the webs pop, but any color works)
- Two mixing bowls (one large, one medium)
- Whisk and rubber spatula
- Electric hand mixer or stand mixer (for the frosting—you can do it by hand, but your arm will hate you)
- Piping bag with a round tip (I use a Wilton #12, but a zip-top bag with the corner snipped works in a pinch)
- Toothpick or skewer (for dragging the webs)
- Cooling rack
I’ve made these with nothing but a whisk and a plastic bag for piping, and they came out great. Don’t let fancy equipment stop you. That said, a good piping bag makes the web design way easier. I bought a set of reusable ones on Amazon for like eight bucks, and they’ve lasted years.
Preparation Method
Alright, let’s get our hands dirty. Or chocolaty. Same thing, really.
- Preheat and prep: Preheat your oven to 350°F (175°C). Line your muffin tin with cupcake liners. This makes 12 standard cupcakes, so don’t crowd them.
- Mix dry ingredients: In a large bowl, whisk together the flour, sugar, cocoa powder, baking soda, baking powder, and salt. Make sure there are no lumps—cocoa powder is sneaky that way. I usually sift it just to be safe.
- Combine wet ingredients: In a separate bowl, whisk together the buttermilk, oil, eggs, and vanilla until smooth. It should look like a thin, glossy chocolate milk. That’s good.
- Bring it together: Pour the wet ingredients into the dry ones and mix until just combined. Don’t overmix! A few streaks of flour are fine. Then slowly pour in the hot water and stir gently. The batter will be very thin—that’s exactly what you want. It makes the cake super moist.
- Fill and bake: Divide the batter evenly among the 12 liners, filling each about ⅔ full. Bake for 18-22 minutes, until a toothpick inserted in the center comes out with just a few moist crumbs. Let them cool in the pan for 5 minutes, then transfer to a cooling rack. And I mean completely cool—if you frost them warm, you’ll have a melty mess. Trust me, I’ve done it.
- Make the frosting: While the cupcakes cool, beat the softened butter with an electric mixer until creamy, about 2 minutes. Add the powdered sugar one cup at a time, mixing on low so you don’t wear it. Add the vanilla, salt, and 2 tablespoons of cream. Beat on medium-high for 3-4 minutes until light and fluffy. If it’s too thick, add the last tablespoon of cream. You want it pipeable but not runny.
- Divide and color: Scoop out about ⅓ of the frosting into a small bowl and tint it black with the gel coloring. Start with a tiny amount—you can always add more. Leave the rest white. You’ll use both colors for the webs.
- Frost the cupcakes: Using an offset spatula or a piping bag with a round tip, spread a smooth layer of white frosting on each cooled cupcake. You want a nice flat surface for the web design.
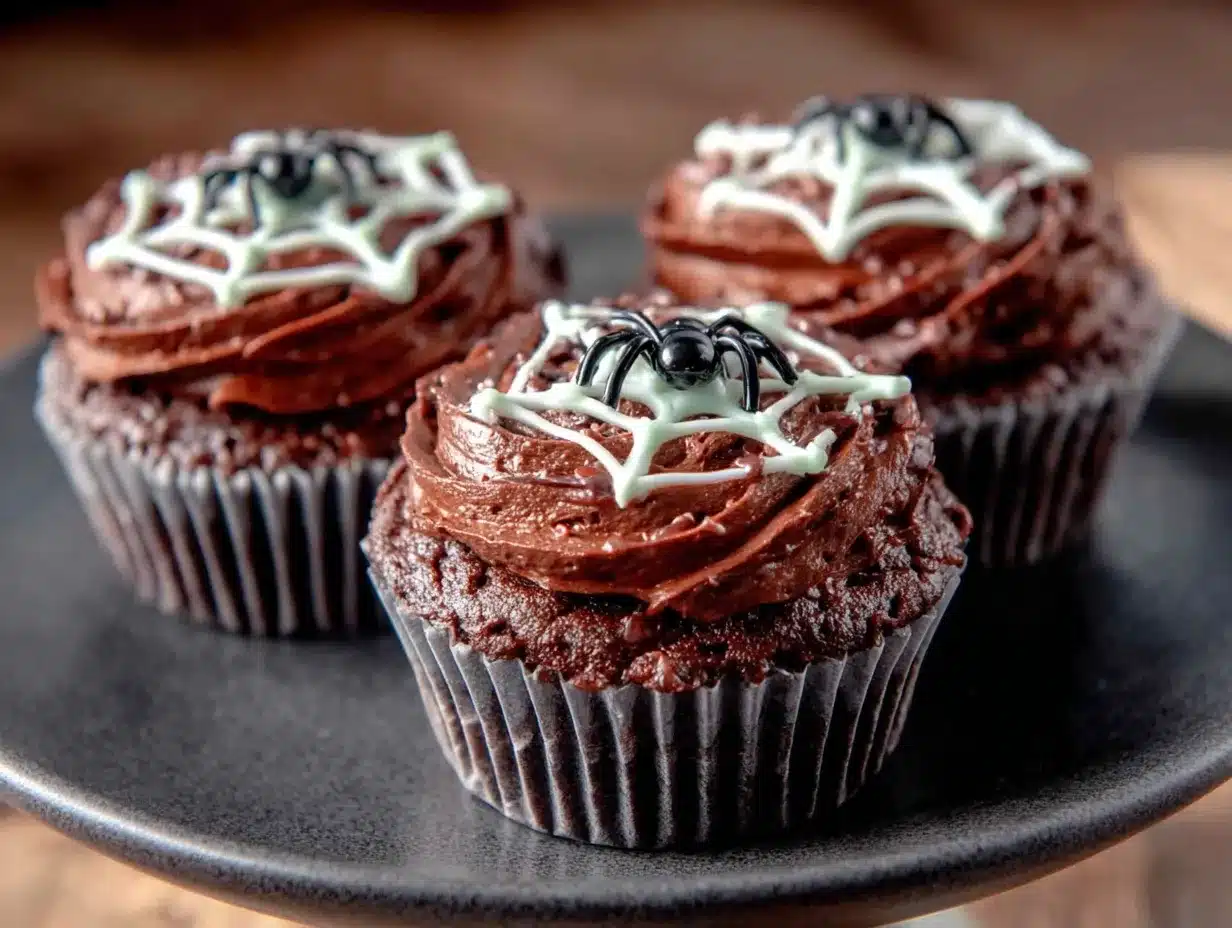
- Create the spiderwebs: This is the fun part. Fill a piping bag fitted with a small round tip with the black frosting. Starting from the center of each cupcake, pipe a spiral outward to the edge. Then, using a toothpick or skewer, drag lines from the center outward through the spiral—like drawing spokes on a wheel. You’ll see the web pattern appear instantly. Wipe the toothpick clean between each drag for clean lines.
- Add spiders (optional): Place a candy spider on each web, or pipe a tiny spider shape using leftover black frosting. I like the candy ones because they’re less work, but piped spiders look impressive.
Let the frosting set for about 15 minutes before serving. The webs will hold their shape better.
Cooking Tips & Techniques
I’ve made these spiderweb cupcakes more times than I can count, and I’ve made every mistake in the book. Here’s what I’ve learned so you don’t have to.
The hot water trick: Don’t skip the hot water in the batter. It seems weird, I know, but it blooms the cocoa powder and creates that ultra-moist, fudgy texture. Cold water won’t do the same thing. I once used tap water that was barely warm, and the cake was noticeably less tender.
Room temperature ingredients matter: I used to think this was food blogger nonsense, but it’s real. Cold eggs and cold buttermilk can seize the batter and make the cake dense. Let everything sit out for 30 minutes before you start. Your cupcakes will thank you.
The web technique: The key to perfect spiderwebs is the consistency of your black frosting. If it’s too thick, the lines will be chunky. Too thin, and they’ll blur into the white frosting. Aim for a texture that’s like thick toothpaste. If you’re unsure, test a line on the back of a spoon first.
Don’t overmix the batter: I know I said this, but it’s worth repeating. Overmixing develops gluten, which makes cupcakes tough. Mix until the flour disappears, then stop. A few lumps are fine—they’ll bake out.
Cool completely: I ruined an entire batch of these by frosting them while they were still warm. The frosting melted into a sad, greasy puddle. Set a timer if you have to. Patience is a virtue, especially with buttercream.
Multitasking tip: While the cupcakes are baking, make your frosting. While they’re cooling, prepare your piping bags. This saves about 15 minutes of standing around waiting.
Variations & Adaptations
One of the best things about this recipe is how flexible it is. Here are some ways to make it your own.
Gluten-Free Version: Swap the all-purpose flour for a 1:1 gluten-free baking blend. I’ve used Bob’s Red Mill with great results. Just add an extra tablespoon of buttermilk to compensate for the drier flour.
Dairy-Free Adaptation: Use almond milk mixed with a teaspoon of vinegar instead of buttermilk, and swap the butter for vegan butter sticks (not the spreadable kind). Coconut cream works beautifully in place of heavy cream for the frosting.
Spooky Color Twist: Instead of black and white, try orange and black for a more Halloween vibe. Or go full ghost mode with white frosting and gray webs. I did a neon green version once for a monster-themed party, and the kids lost their minds.
Extra Chocolatey: Add ½ cup of mini chocolate chips to the batter before baking. They sink to the bottom and create a fudgy layer that’s absolutely divine.
Pumpkin Spice Version: Swap ½ cup of the buttermilk for pumpkin puree and add 1 teaspoon of pumpkin pie spice to the dry ingredients. It’s fall in cupcake form.
Mini Cupcakes: Use a mini muffin tin and bake for 10-12 minutes. You’ll get about 36 mini spiderweb cupcakes—perfect for classroom parties or snack-sized treats.
I tried a matcha green tea version once, and honestly, it was weird. Stick with chocolate for the classic Halloween vibe. Some things are perfect as they are.
Serving & Storage Suggestions
These spiderweb cupcakes are best served at room temperature, about an hour after you’ve decorated them. The frosting sets up nicely, and the cake is at its most tender. If you’re serving them at a party, arrange them on a black platter or a cake stand for maximum spooky effect. I like to scatter a few candy spiders around the base for extra drama.
Pairing ideas: These go beautifully with a cold glass of milk, a hot apple cider, or (for the adults) a pumpkin spice latte. If you’re doing a Halloween dessert table, serve them alongside caramel apples or popcorn balls for a classic spread.
Storage: Store leftover cupcakes in an airtight container at room temperature for up to 3 days. The cake stays moist, though the web design might soften slightly. If you need to stack them, use a layer of wax paper between each row so the webs don’t smudge.
Freezer instructions: You can freeze the unfrosted cupcakes for up to 3 months. Wrap each one tightly in plastic wrap, then place in a freezer bag. When you’re ready to decorate, thaw them at room temperature for an hour, then frost and web as usual. I’ve done this for Halloween parties when I wanted to prep ahead, and it works like a charm.
Reheating tip: If the cupcakes have been refrigerated (not recommended, but sometimes necessary), let them sit out for 30 minutes before serving. A quick 10-second zap in the microwave can revive the cake’s moisture, but skip it if you’ve already added the webs—the frosting will melt.
The flavors actually deepen after a day. The chocolate becomes more pronounced, and the frosting firms up to a perfect texture. So if you can, make these a day ahead. Your future self will thank you.
Nutritional Information & Benefits
Let’s be real—these are a treat, not a health food. But here’s what you’re working with per cupcake (based on 12 servings):
| Nutrient | Amount per Cupcake |
|---|---|
| Calories | 385 |
| Total Fat | 22g |
| Saturated Fat | 11g |
| Carbohydrates | 45g |
| Sugar | 32g |
| Protein | 4g |
| Fiber | 2g |
Health highlights: The cocoa powder is actually rich in antioxidants—specifically flavonoids, which can support heart health. The buttermilk adds calcium and probiotics, and the eggs provide a solid dose of protein. I mean, it’s still a cupcake, but it’s a cupcake with some redeeming qualities.
Dietary considerations: This recipe contains gluten, dairy, and eggs. For a gluten-free version, see the variations section. For dairy-free, use the substitutions listed above. It’s not low-carb or keto-friendly, but it is 100% worth the splurge on Halloween.
Allergen note: If you’re serving these at a party, label them clearly. The candy spiders might contain soy or other allergens depending on the brand.
My personal take? Halloween comes once a year. Enjoy the cupcake. Balance it out with a vegetable-heavy dinner and a walk around the block. Life is about moderation, not deprivation.
Conclusion
These spooky spiderweb cupcakes are everything I want in a Halloween treat: impressive enough to wow a crowd, simple enough to make on a Tuesday night, and delicious enough that you’ll fight your kids for the last one. The moist chocolate cake, the creamy buttercream, the satisfying drag of the toothpick that creates those perfect webs—it’s a ritual I look forward to every October.
I love that this recipe came from a casual moment with a neighbor who didn’t think she was doing anything special. That’s the best kind of recipe, honestly. The ones that come from real kitchens, real people, real life. And now it’s yours to make your own.
So grab your piping bag, put on a spooky playlist, and get baking. I’d love to hear how yours turn out. Did you add spiders? Try a different color combo? Swap in pumpkin spice? Drop a comment below and share your Halloween creations. And if you loved these, share the recipe with a friend—because good treats are meant to be passed around.
Happy Halloween, and happy baking!
Frequently Asked Questions
Can I use a boxed cake mix for these spiderweb cupcakes?
Absolutely. If you’re short on time, use your favorite chocolate cake mix and follow the package directions. The spiderweb design works exactly the same way. Just make sure the cupcakes are completely cool before you frost them.
How far in advance can I make these cupcakes?
You can bake the cupcakes up to 3 days ahead and store them in an airtight container. Make the frosting and decorate them the day you plan to serve them for the best-looking webs. The frosting can be made a day ahead and stored in the fridge—just let it come to room temperature and re-whip it before using.
Why did my spiderwebs turn into a blurry mess?
This usually happens for one of two reasons: your black frosting was too thin, or you dragged the toothpick too slowly. Make sure your black frosting is thick like toothpaste, and drag the toothpick in one quick, confident motion. Wipe it clean between each line.
Can I use cream cheese frosting instead of buttercream?
You can, but cream cheese frosting is softer and won’t hold the web pattern as cleanly. If you prefer the tangy flavor, use a sturdier cream cheese recipe with extra powdered sugar, and chill the frosted cupcakes for 20 minutes before piping the webs.
How do I get the black frosting really black without using a ton of coloring?
Start with a dark chocolate base. Use a cocoa-based frosting or add a tablespoon of black cocoa powder to your buttercream. The darker your base, the less gel coloring you need. Then add the black gel a tiny bit at a time—it deepens as it sits.
Pin This Recipe!
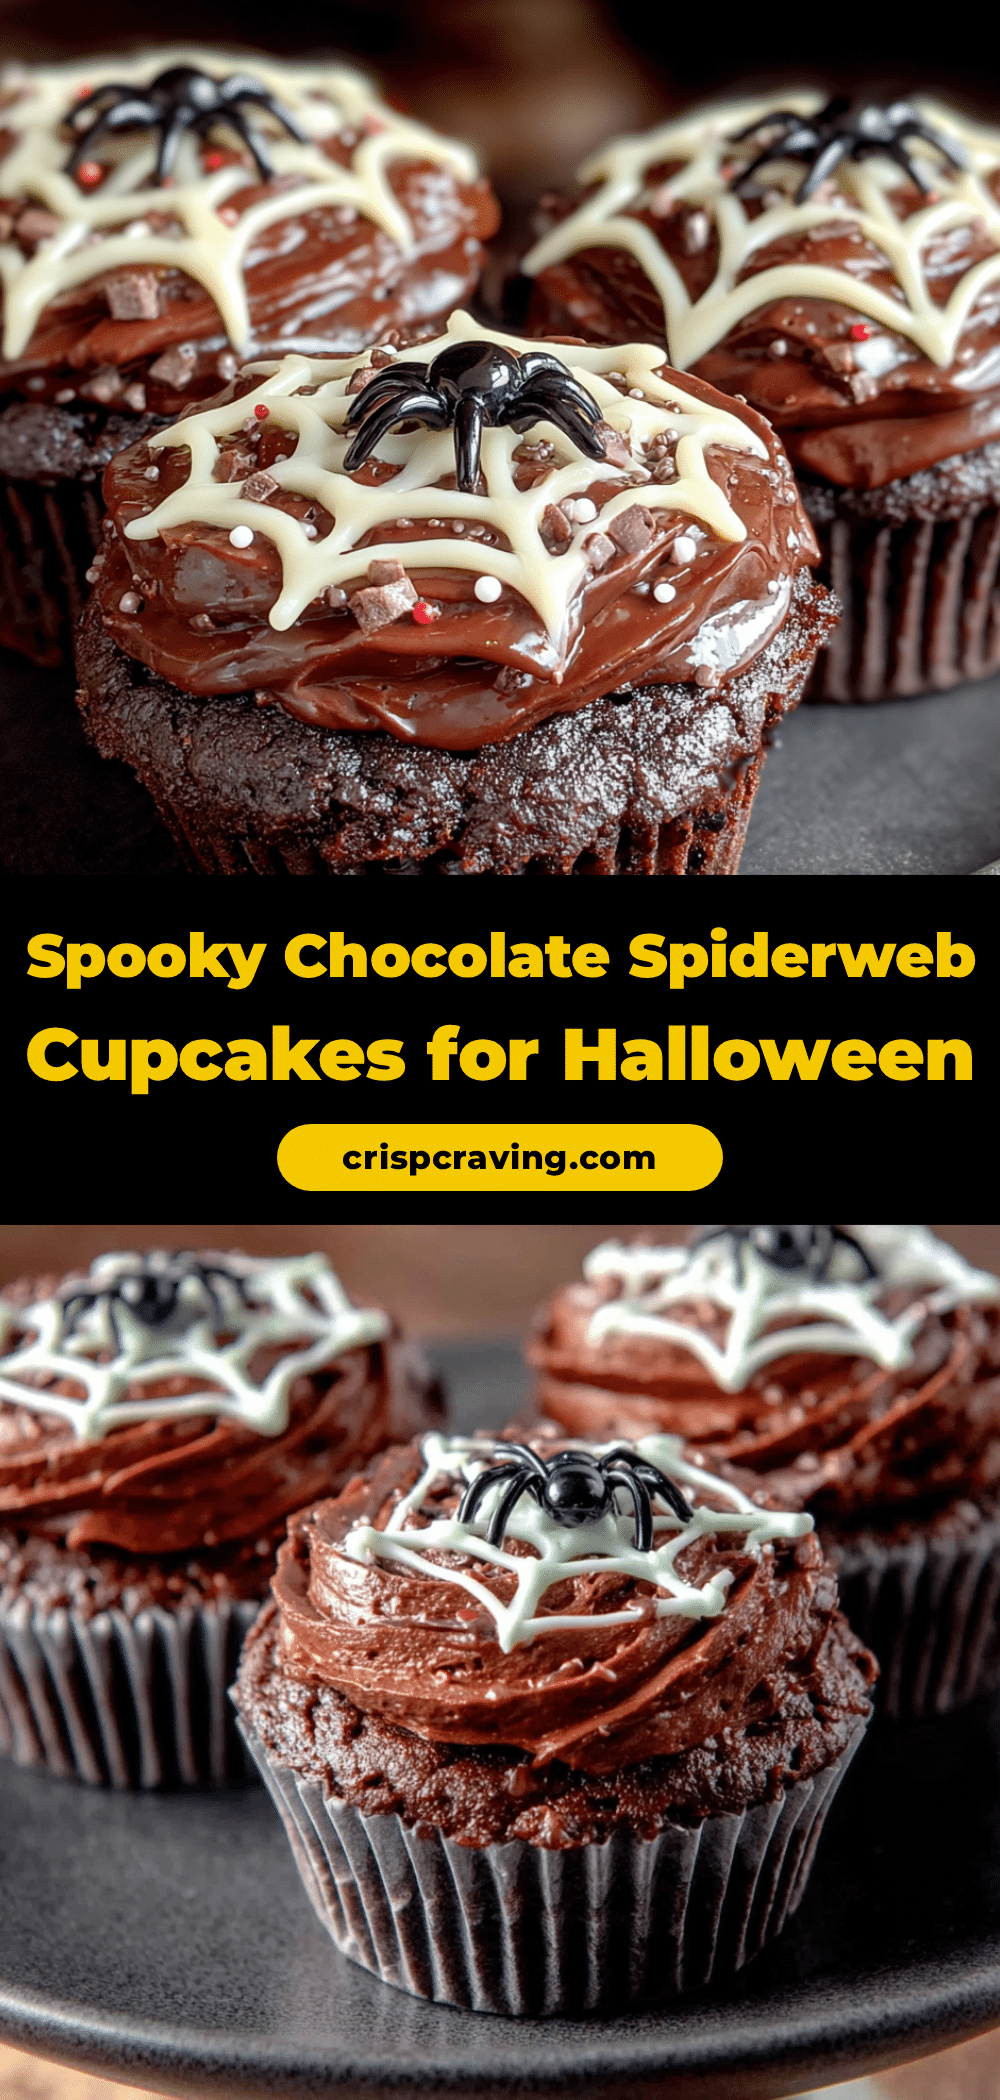
Spooky Spiderweb Cupcakes: Easy Halloween Treat
These spooky spiderweb cupcakes are moist, deeply chocolatey, and topped with a creamy vanilla buttercream and a striking spiderweb design. They’re quick, easy, and perfect for Halloween parties, school events, or spooky movie nights.
- Prep Time: 15 minutes
- Cook Time: 20 minutes
- Total Time: 45 minutes
- Yield: 12 cupcakes 1x
- Category: Dessert
- Cuisine: American
Ingredients
- 1 ½ cups all-purpose flour (spooned and leveled)
- 1 cup granulated sugar
- ½ cup unsweetened cocoa powder (preferably Hershey’s Special Dark)
- 1 teaspoon baking soda
- ½ teaspoon baking powder
- ½ teaspoon salt
- 1 cup buttermilk (room temperature)
- ½ cup vegetable oil
- 2 large eggs (room temperature)
- 1 teaspoon vanilla extract
- ½ cup hot water
- 1 cup unsalted butter (softened)
- 3 ½ cups powdered sugar (sifted if desired)
- 2 teaspoons vanilla extract
- 2–3 tablespoons heavy cream (or milk)
- ¼ teaspoon salt
- ½ cup black gel food coloring
- Optional: candy spiders for decoration
Instructions
- Preheat oven to 350°F (175°C). Line a 12-cup muffin tin with paper liners.
- In a large bowl, whisk together flour, sugar, cocoa powder, baking soda, baking powder, and salt until no lumps remain.
- In a separate bowl, whisk together buttermilk, oil, eggs, and vanilla until smooth.
- Pour wet ingredients into dry ingredients and mix until just combined. Do not overmix. Slowly pour in hot water and stir gently until batter is thin and smooth.
- Divide batter evenly among the 12 liners, filling each about ⅔ full. Bake for 18-22 minutes, until a toothpick inserted in the center comes out with a few moist crumbs. Cool in pan for 5 minutes, then transfer to a wire rack to cool completely.
- While cupcakes cool, make the frosting: Beat softened butter with an electric mixer until creamy, about 2 minutes. Add powdered sugar one cup at a time, mixing on low. Add vanilla, salt, and 2 tablespoons of cream. Beat on medium-high for 3-4 minutes until light and fluffy. Add remaining cream if needed for pipeable consistency.
- Scoop out about ⅓ of the frosting into a small bowl and tint it black with gel food coloring. Leave the rest white.
- Frost each cooled cupcake with a smooth layer of white frosting using an offset spatula or piping bag with a round tip.
- Fill a piping bag fitted with a small round tip with black frosting. Starting from the center of each cupcake, pipe a spiral outward to the edge. Then, using a toothpick or skewer, drag lines from the center outward through the spiral to create a web pattern. Wipe toothpick clean between each drag.
- Optional: Place a candy spider on each web or pipe a tiny spider shape using leftover black frosting. Let frosting set for about 15 minutes before serving.
Notes
For the black frosting, use black gel food coloring, not liquid, to avoid thinning the frosting. The hot water in the batter blooms the cocoa and creates a moist texture. Ensure all ingredients are at room temperature for best results. Cool cupcakes completely before frosting to prevent melting.
Nutrition
- Serving Size: 1 cupcake
- Calories: 385
- Sugar: 32
- Fat: 22
- Saturated Fat: 11
- Carbohydrates: 45
- Fiber: 2
- Protein: 4
Keywords: Halloween cupcakes, spiderweb cupcakes, chocolate cupcakes, buttercream frosting, easy Halloween treat, spooky dessert



