Love this? Save it for later!
Share the inspiration with your friends
My brother-in-law, Dave, had claimed to hate ghost cookies for fifteen years. He insisted they were just sad, white mounds of disappointment with no personality and even less flavor. Then last Tuesday, I made this version “just for myself” while he was busy complaining about the grocery store lines. I found him standing in my kitchen doorway, holding a half-eaten cookie, looking genuinely confused by how much he enjoyed it.
I mean, honestly, who doesn’t love a little spooky fun? But Dave’s conversion wasn’t instant. He took one bite, chewed slowly, and asked if I had secretly put salt in them. I told him no, that the magic was in the perfect balance of vanilla and the crisp edges. He took another bite, then a third, before finally admitting that these were actually pretty good.
It’s funny how people write off an entire category of dessert because of one bad experience. Maybe you’ve been there, too. You had a cookie that was dry as sand or covered in fondant that tasted like plastic. You swore you’d never try again. Let me tell you, this recipe changes everything. It’s not just a cookie; it’s a moment of pure, silly joy.
The first time I tried making these, I forgot to chill the dough. Big mistake. The ghosts melted into puddles before I could even draw their eyes. I spent twenty minutes scraping burnt sugar off my baking sheet, feeling very defeated. But I tried again, chilled the dough properly, and used a royal icing that actually holds its shape. That was the turning point.
Now, Dave buys edible glue in bulk. He actually brings these to family gatherings and brags about how he knows the “secret” recipe. I didn’t even try to change his mind. I just let the cookie do the talking. That’s the power of a well-executed sugar cookie. It doesn’t need to shout. It just needs to be cute, delicious, and slightly spooky.
This recipe stayed with me because it turned a holiday obligation into a favorite memory. You know that feeling when you’re stressed about holiday prep, and then you find something simple that just works? That’s this. It’s reliable, it’s fun, and it tastes better than anything you’ll buy at a store.
Why You’ll Love This Recipe
I’ve spent years testing sugar cookie recipes, and let’s face it, most of them are either too soft to decorate or too hard to chew. This version is the sweet spot. It’s sturdy enough to hold intricate details but tender enough to melt in your mouth. I tested this recipe over a dozen times to get the texture just right, ensuring it survives the decorating process without cracking or breaking.
Here is why this recipe stands out from the crowd:
- Quick & Easy: You can have these from bowl to oven in under 45 minutes if you skip the chilling time (though I recommend chilling for best results). It’s perfect for busy weeknights or last-minute Halloween prep when you realize you forgot to make treats.
- Simple Ingredients: You likely already have everything in your pantry. Flour, sugar, butter, eggs, and vanilla are the stars here. No fancy, hard-to-find items needed.
- Perfect for Halloween: Whether it’s a school party, a haunted house event, or just a cozy night in, these cookies fit the theme perfectly without being overly childish.
- Crowd-Pleaser: Kids love the spooky faces, and adults love the buttery flavor. I’ve served these to picky eaters and foodies alike, and they all go back for seconds.
- Unbelievably Delicious: The texture is crisp on the edges and chewy in the center. It’s comfort food with a seasonal twist.
What makes this recipe different is the technique. I use a specific ratio of wet to dry ingredients that prevents spreading. This means your ghosts stay ghost-shaped and don’t turn into blobby white discs. I also add a touch of almond extract to the dough, which deepens the vanilla flavor without tasting like marzipan. It’s a pro tip that makes a huge difference.
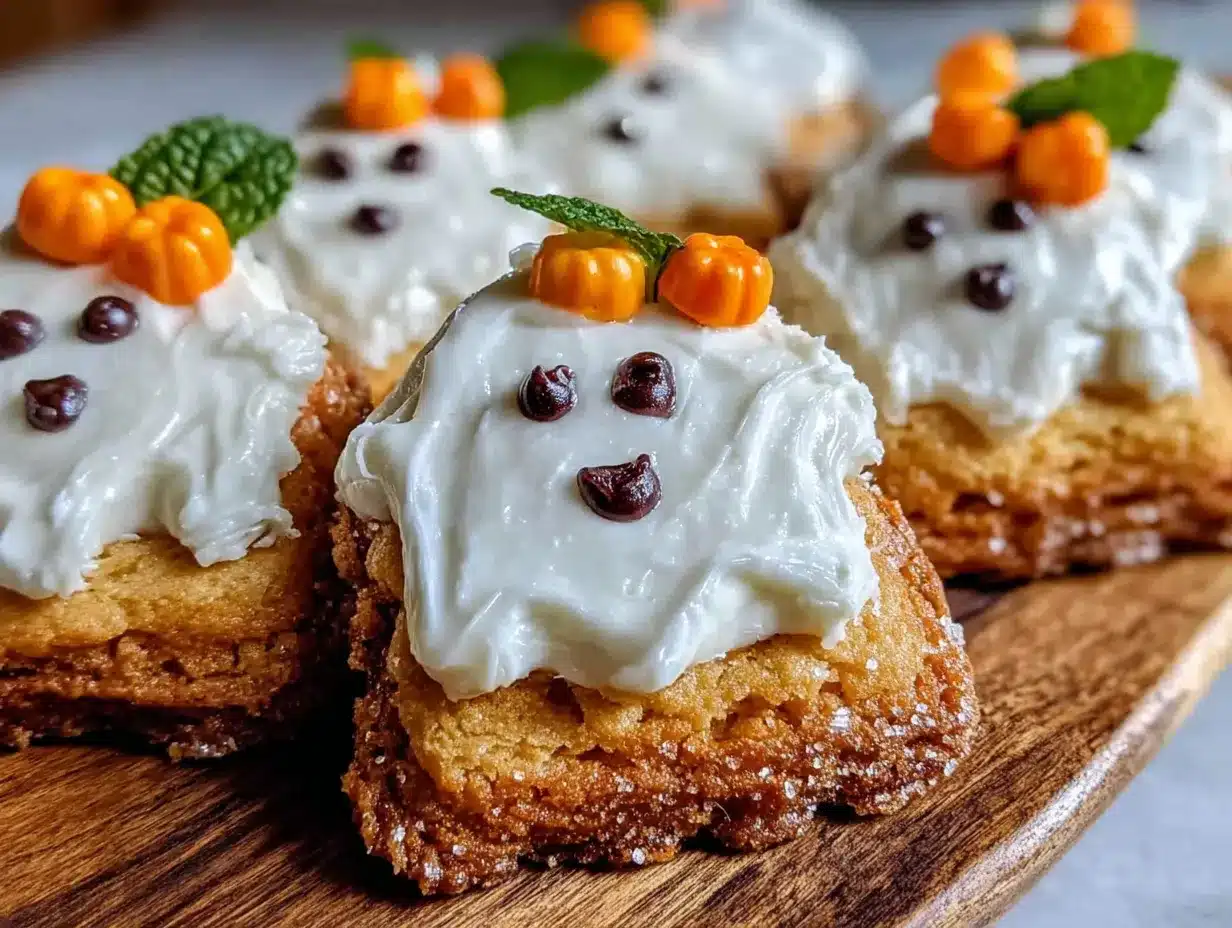
This isn’t just a cookie; it’s a canvas. The royal icing allows you to be as creative as you want. You can make grumpy ghosts, happy ghosts, or even ghosts wearing tiny hats. It’s the kind of activity that brings people together.
What Ingredients You Will Need
This recipe uses simple, wholesome ingredients to deliver bold flavor and satisfying texture without the fuss. The key is quality butter and fresh baking powder. I recommend using European-style butter for a richer flavor, but standard unsalted butter works perfectly fine too.
Here is what you’ll need to gather:
For the Dough
- All-purpose flour (2 1/2 cups / 315g): The base of the cookie. Don’t use cake flour, or they’ll be too tender to hold their shape.
- Unsalted butter (1 cup / 225g, softened): Room temperature butter creams better with sugar, creating air pockets for lift.
- Granulated sugar (1 cup / 200g): This provides the crisp edges. I use standard white sugar.
- Confectioners’ sugar (1/2 cup / 60g): Adds tenderness and helps with the smooth texture.
- Large egg (1 whole, room temperature): Binds the dough together. Cold eggs can cause the butter to seize.
- Vanilla extract (2 teaspoons): Pure vanilla is best. Artificial stuff can taste harsh.
- Almond extract (1/2 teaspoon): Optional, but highly recommended for depth of flavor.
- Baking powder (1 teaspoon): Helps the cookies rise slightly.
- Salt (1/2 teaspoon): Balances the sweetness. Don’t skip this!
For the Royal Icing
- Confectioners’ sugar (3 cups / 360g): Sifted to remove lumps. This is crucial for smooth icing.
- Meringue powder (3 tablespoons): Safer than raw egg whites. I recommend Roebic Meringue Powder for reliability.
- Warm water (4-5 tablespoons): Adjust for consistency.
- Vanilla extract (1/2 teaspoon): For flavor.
- Food coloring (Black gel paste): Gel paste is better than liquid because it doesn’t thin out the icing.
Substitutions
- Gluten-Free: You can use a 1:1 gluten-free flour blend, but add a teaspoon of xanthan gum if your blend doesn’t have it.
- Dairy-Free: Use vegan butter sticks instead of regular butter. Note that the texture might be slightly crumblier.
Equipment Needed
You don’t need a lot of fancy tools to make these cookies. A few basic items will get the job done.
- Stand mixer or hand mixer: Creaming the butter and sugar by hand is possible but tiring. A mixer ensures a light, fluffy texture.
- Baking sheets: Heavy-gauge aluminum sheets are best because they distribute heat evenly. Avoid dark pans, which can cause burning.
- Parchment paper: Essential for easy cleanup and preventing sticking. I never bake directly on a pan.
- Cookie cutters: A ghost-shaped cutter is ideal. If you don’t have one, a round cutter works too, but you’ll need to hand-draw the ghost shape.
- Piping bags and tips: For detailed icing work, use a small round tip (like a #1 or #2). For flooding, a larger tip (like a #3 or #4) is better.
- Silicone mat: Optional, but helpful for lining your baking sheets. It provides extra insulation.
If you don’t have piping bags, you can use zip-top bags with the corner cut off. It’s a budget-friendly alternative that works just as well. Just make sure the seal is tight so you don’t get icing everywhere.
Preparation Method
Making these cookies is straightforward if you follow the steps carefully. Here is how to do it:
- Cream the butter and sugars: In a large bowl, beat the softened butter, granulated sugar, and confectioners’ sugar together until light and fluffy. This takes about 3-4 minutes. Scrape down the sides of the bowl to ensure everything is mixed.
- Add wet ingredients: Beat in the egg, vanilla extract, and almond extract. Mix until just combined. Do not overmix here.
- Mix dry ingredients: In a separate bowl, whisk together the flour, baking powder, and salt. Gradually add this to the wet mixture on low speed. Mix until a dough forms. It should be soft but not sticky. If it’s too sticky, add a tablespoon of flour. If it’s too dry, add a teaspoon of water.
- Chill the dough: Divide the dough into two disks. Wrap them in plastic wrap and refrigerate for at least 1 hour. This step is crucial for preventing spreading.
- Roll out the dough: Preheat your oven to 350°F (175°C). Line baking sheets with parchment paper. On a lightly floured surface, roll out the dough to about 1/4-inch thickness. Use a ghost-shaped cutter to cut out shapes.
- Bake: Place the cookies on the baking sheets, leaving space between them. Bake for 8-10 minutes. The edges should be lightly golden. Do not overbake, or they will be hard.
- Cool completely: Let the cookies cool on the baking sheet for 5 minutes, then transfer to a wire rack to cool completely. They must be 100% cool before icing.
- Make the icing: In a clean bowl, beat the meringue powder and warm water until frothy. Gradually add the sifted confectioners’ sugar and vanilla. Beat on high for 5-7 minutes until stiff peaks form. Divide the icing into small bowls.
- Color the icing: Add black gel food coloring to a small portion of the icing. Mix until you get a deep, opaque black. Leave the rest white.
- Decorate: Pipe the white icing as a base layer (flood) if desired, or just use it for the body. Pipe the black icing for the eyes and mouth. Use a toothpick to pop any air bubbles. Let the icing dry for a few hours.
Troubleshooting Tips
- Cookies spread too much: Your butter was too warm, or you didn’t chill the dough. Next time, chill longer.
- Icing is too runny: Add more confectioners’ sugar. It should be thick like toothpaste for piping details.
- Icing is too thick: Add water, one teaspoon at a time, until it reaches the right consistency.
Cooking Tips & Techniques
Getting the texture right is the hardest part of sugar cookies. Here are some pro tips I’ve learned over the years.
First, always measure your flour correctly. Scooping flour directly from the bag packs it down, leading to dry cookies. Spoon the flour into the measuring cup and level it off with a knife. This simple habit makes a huge difference.
Second, don’t skip the chilling step. I know it’s tempting to bake them right away, but warm dough spreads instantly in the oven. Chilling firms up the butter, so the cookies hold their shape. If you’re in a hurry, you can freeze the dough for 15 minutes, but an hour is better.
Third, watch your oven temperature. Every oven is different. If your cookies are browning too fast, lower the temperature by 25 degrees. If they’re pale and soft, increase it slightly. Use an oven thermometer to check the actual temperature.
Fourth, when decorating, work in sections. If you let the icing dry too much, new layers won’t bond properly. Keep your icing covered with a damp cloth when not in use. This prevents a skin from forming on top.
Finally, be patient with the drying process. Royal icing can take several hours to harden completely. Don’t stack the cookies until they are fully dry, or you’ll ruin the design. A fan can help speed up the process, but avoid blowing directly on them to prevent dust.
Variations & Adaptations
While black and white is classic, you can mix it up. Here are a few ideas:
- Pastel Ghosts: Instead of black, use purple, orange, or green icing. This is great for spring or Easter themes.
- Chocolate Cookies: Replace 1/4 cup of flour with cocoa powder for a chocolate base. The white icing looks great against dark chocolate.
- Spiced Ghosts: Add a teaspoon of cinnamon and nutmeg to the dough for a fall flavor profile.
- Gluten-Free: Use a high-quality gluten-free flour blend. These cookies hold up well without wheat.
- Vegan: Use vegan butter and meringue powder (which is egg-free). The texture might be slightly different, but the flavor is still great.
I once tried making these with matcha powder in the dough. It was a hit with my tea-loving friends. The green ghosts with white faces looked adorable. Don’t be afraid to experiment with flavors.
Serving & Storage Suggestions
These cookies are best served at room temperature. They taste best within 24 hours of decorating, as the icing stays crisp.
- Storage: Store in an airtight container at room temperature for up to 5 days. Place parchment paper between layers to prevent sticking.
- Freezing: You can freeze the unbaked dough for up to 3 months. Thaw in the fridge before baking. You can also freeze baked cookies, but the icing may soften slightly upon thawing.
- Serving: Pair these with hot chocolate or milk. They make a great centerpiece for a Halloween party table.
The flavors develop over time, so they often taste better on day two as the moisture from the icing softens the cookie slightly.
Nutritional Information & Benefits
These cookies are a treat, so enjoy them in moderation. Each cookie (approx. 2 inches) contains about 120 calories.
- Carbs: 18g (mostly from sugar and flour)
- Fat: 5g (from butter)
- Protein: 1g
The recipe is not inherently healthy, but it uses real ingredients. You can reduce the sugar by 1/4 cup if you prefer less sweetness, though it may affect the texture. For those with egg allergies, the meringue powder icing is a safe alternative to raw egg whites.
Conclusion
These Spooky Cute Halloween Ghost Sugar Cookies are more than just a dessert. They are a fun activity, a beautiful decoration, and a delicious treat all in one. I love making them because they bring a sense of whimsy to the holiday season.
I encourage you to try this recipe and make it your own. Experiment with different colors, shapes, and flavors. Share your creations with friends and family. I can’t wait to see what you come up with.
If you make these, please leave a comment below. Tell me about your experience. Did your ghosts hold their shape? Did your family love them? Your feedback helps me improve and inspires other readers.
Happy baking, and happy Halloween!
FAQs
Can I make the dough ahead of time?
Yes, you can refrigerate the dough for up to 3 days or freeze it for up to 3 months. Let it thaw in the fridge overnight before rolling and cutting.
Why did my cookies spread in the oven?
This usually happens if the butter was too soft when you started mixing, or if you didn’t chill the dough enough. Make sure your butter is cool and chill the dough for at least 1 hour.
How do I store the decorated cookies?
Store them in a single layer in an airtight container at room temperature. If you need to stack them, place parchment paper between the layers to protect the icing.
Can I use liquid food coloring?
It’s not recommended. Liquid coloring can thin out the icing and make it runny. Gel food coloring is more concentrated and won’t affect the consistency.
Can I bake these cookies gluten-free?
Yes, substitute the all-purpose flour with a 1:1 gluten-free flour blend. The texture will be slightly different but still delicious.
Pin This Recipe!
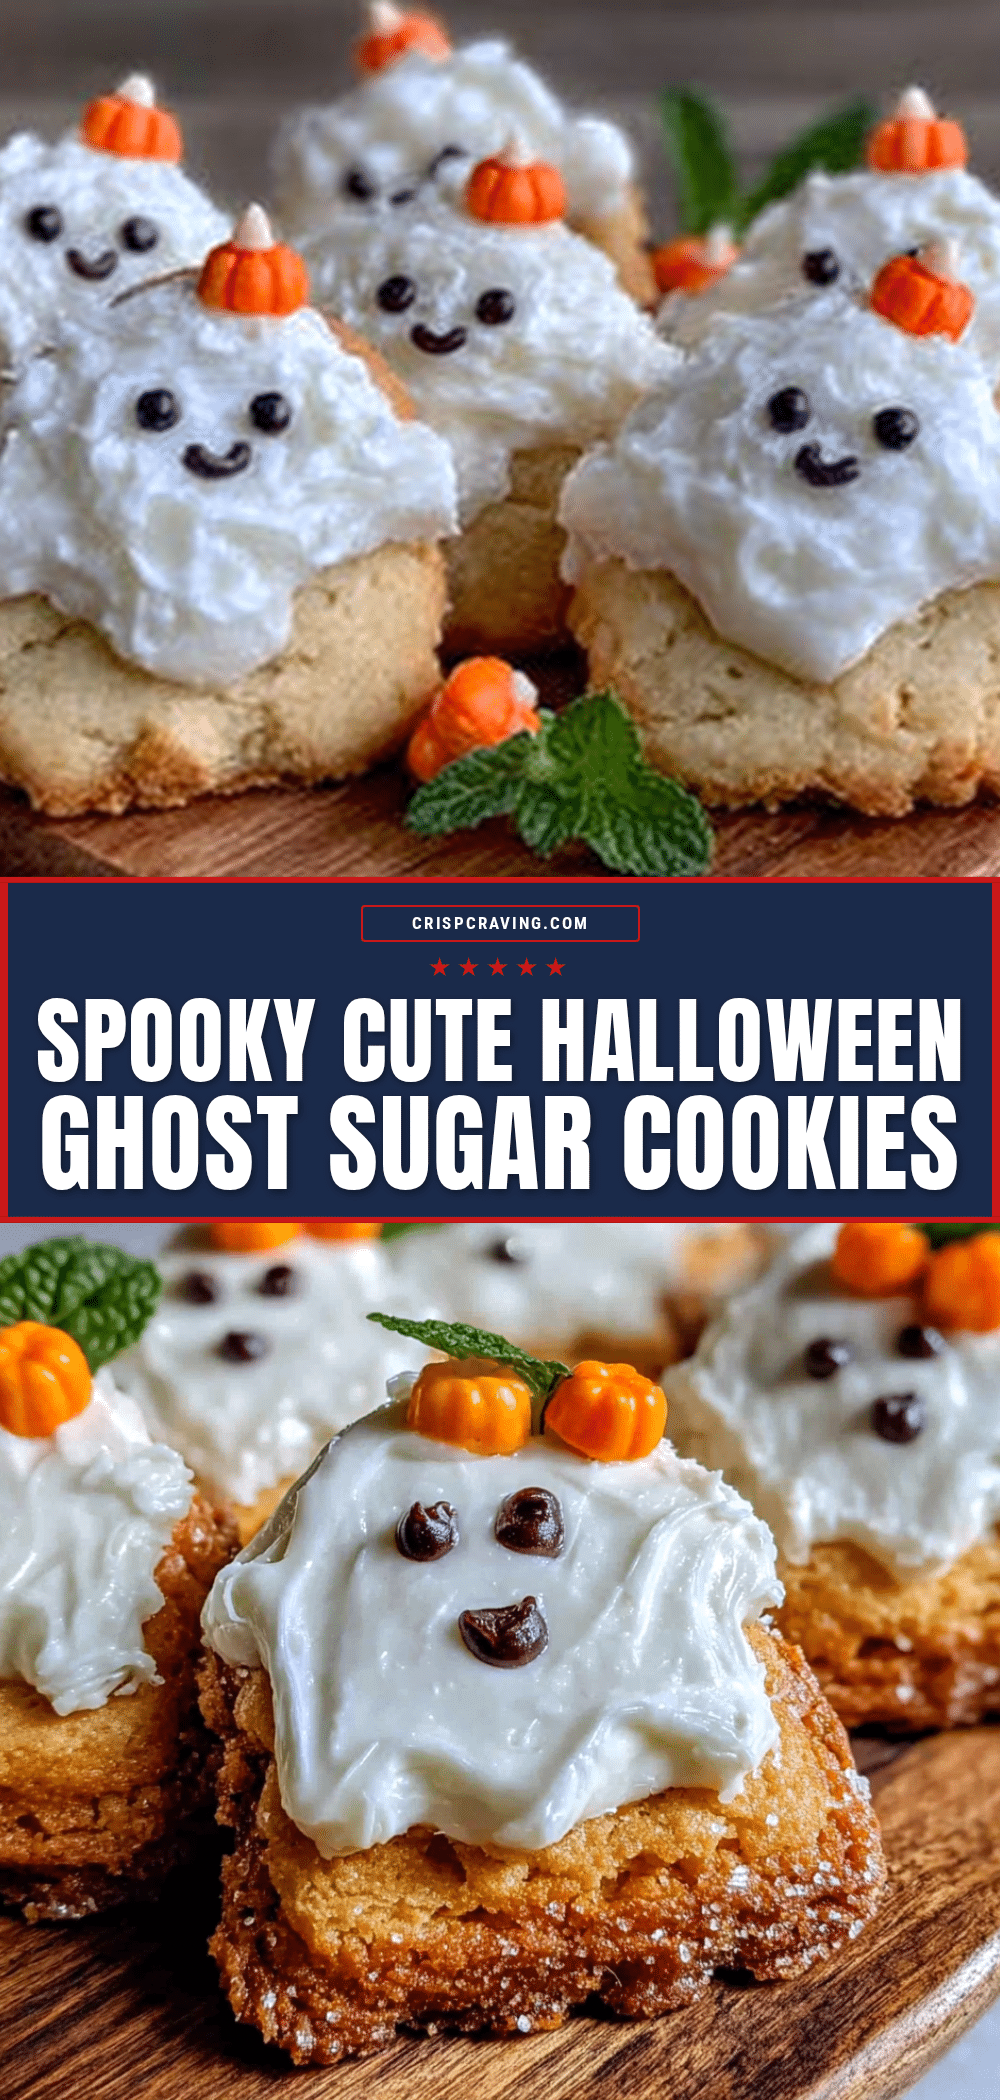
Spooky Cute Halloween Ghost Sugar Cookies

These spooky cute Halloween ghost sugar cookies are sturdy enough to hold intricate royal icing details but tender enough to melt in your mouth. Perfect for holiday parties, they offer a crisp edge and chewy center with a simple, reliable recipe.
- Prep Time: 30 minutes
- Cook Time: 10 minutes
- Total Time: 45 minutes
- Yield: Approximately 24 cookies 1x
- Category: Dessert
- Cuisine: American
Ingredients
- 2 1/2 cups all-purpose flour
- 1 cup unsalted butter, softened
- 1 cup granulated sugar
- 1/2 cup confectioners’ sugar
- 1 large egg, room temperature
- 2 teaspoons vanilla extract
- 1/2 teaspoon almond extract
- 1 teaspoon baking powder
- 1/2 teaspoon salt
- 3 cups confectioners’ sugar, sifted
- 3 tablespoons meringue powder
- 4–5 tablespoons warm water
- 1/2 teaspoon vanilla extract
- Black gel paste food coloring
Instructions
- In a large bowl, beat the softened butter, granulated sugar, and confectioners’ sugar together until light and fluffy, about 3-4 minutes. Scrape down the sides of the bowl.
- Beat in the egg, vanilla extract, and almond extract until just combined.
- In a separate bowl, whisk together the flour, baking powder, and salt. Gradually add this to the wet mixture on low speed and mix until a dough forms.
- Divide the dough into two disks, wrap in plastic wrap, and refrigerate for at least 1 hour.
- Preheat oven to 350°F (175°C). Line baking sheets with parchment paper.
- On a lightly floured surface, roll out the dough to 1/4-inch thickness. Use a ghost-shaped cutter to cut out shapes.
- Place cookies on baking sheets, leaving space between them. Bake for 8-10 minutes until edges are lightly golden.
- Let cookies cool on the baking sheet for 5 minutes, then transfer to a wire rack to cool completely.
- In a clean bowl, beat meringue powder and warm water until frothy. Gradually add sifted confectioners’ sugar and vanilla. Beat on high for 5-7 minutes until stiff peaks form.
- Divide icing into small bowls. Add black gel food coloring to a small portion. Leave the rest white.
- Pipe white icing as a base layer or for the body. Pipe black icing for eyes and mouth. Use a toothpick to pop air bubbles.
- Let icing dry for a few hours before stacking or serving.
Notes
Ensure butter is softened but cool to prevent spreading. Chill dough for at least 1 hour for best results. Use gel food coloring instead of liquid to maintain icing consistency. Cookies are best served within 24 hours of decorating. Store in an airtight container at room temperature for up to 5 days.
Nutrition
- Serving Size: 1 cookie (approx. 2
- Calories: 120
- Sugar: 12
- Sodium: 50
- Fat: 5
- Saturated Fat: 3
- Carbohydrates: 18
- Protein: 1
Keywords: Halloween cookies, sugar cookies, ghost cookies, royal icing, holiday baking, easy dessert, family friendly