Love this? Save it for later!
Share the inspiration with your friends
My neighbor, a retired art teacher named Mrs. Gable, watched me wrestling a jumbo bag of baby carrots out of my grocery cart last October. She didn’t say anything at first. Then she leaned over and whispered, “You’re doing it wrong, honey. Vegetables need a little drama.” She pulled a wrinkled photo from her purse—a vegetable platter shaped like a skeleton that her own kids had begged for decades ago. I laughed, but I also snapped a picture. That conversation, standing there in the produce aisle, changed how I think about feeding vegetables to my family.
Honestly, I was just tired of the same old veggie platter. You know the one—a sad circle of ranch dip surrounded by limp celery and those baby carrots that never get eaten. My kids would pick at it, maybe grab a single pepper strip, and then run off for candy. But this Halloween veggie tray skeleton? It was a game-changer from the first try. I mean, the kids were actually fighting over who got to eat the broccoli “bones.” Let me tell you, that never happens at my table.
The idea is simple: you arrange fresh vegetables into the shape of a skeleton on a large platter. It’s spooky, it’s fun, and it makes eating healthy feel like a Halloween party trick. The first time I made it, my daughter asked if we could have it for her birthday instead of cake. (We didn’t, but the fact that she asked says everything.) This recipe isn’t about fancy ingredients or complicated techniques. It’s about taking ordinary veggies and turning them into something that makes kids stop, stare, and actually take a bite.
Maybe you’ve been there—standing in the kitchen, wondering how to get your kids to eat vegetables without a fight. This platter is the answer. It’s the kind of recipe that works because it meets kids where they are: they want fun, they want a story, and they want something that feels special. And honestly, it works for adults too. I’ve caught myself sneaking a pepper “rib” more than once.
Why You’ll Love This Recipe
This Halloween veggie tray skeleton isn’t just another veggie platter. It’s a centerpiece, a conversation starter, and a sneaky way to get your family to eat their vegetables—all at the same time. Here’s why it’s worth every minute of prep time:
- Kid-Approved Fun: My kids actually cheer when they see this on the table. The skeleton shape makes vegetables feel like a game, not a chore. I’ve tested it on picky eaters, and it’s never failed to get at least a curious nibble.
- Budget-Friendly Ingredients: You don’t need anything fancy. Carrots, celery, bell peppers, broccoli, and a tub of ranch dip. That’s it. No expensive specialty items, no trips to a fancy grocery store. Your wallet will thank you.
- Quick Assembly: Once the veggies are prepped, you can assemble the skeleton in under 10 minutes. It’s perfect for busy Halloween nights when you’re juggling costumes and candy.
- Customizable for Picky Eaters: Don’t like broccoli? Swap it for cucumber slices. Not a fan of peppers? Use cherry tomatoes. The skeleton structure is flexible—you can adapt it to whatever your family actually eats.
- Leftovers Reheat Well: Okay, so you won’t reheat raw veggies. But the leftover cut vegetables are perfect for lunchboxes the next day. No waste, no guilt.
What makes this recipe different from every other veggie platter out there? It’s the presentation. I’ve tried the standard “rainbow” platters and the boring circles of dip. Nothing grabs attention like a skeleton. The shape creates a natural “wow” factor that makes kids forget they’re eating vegetables. Plus, the dip acts like a glue for the bones, so everything stays in place. It’s not just a platter—it’s an experience.
This recipe is comfort food reimagined. It’s healthier than a bowl of candy, faster than a full meal, and it has the same soul-soothing satisfaction of sharing something special with your family. Perfect for impressing Halloween party guests without stress, or turning a simple snack into something memorable.
What Ingredients You Will Need
This recipe uses simple, wholesome ingredients to create a spooky skeleton that’s as delicious as it is fun. Most of these are pantry staples or easy to find at any grocery store. Here’s what you’ll need:
For the Skeleton Body
- Baby carrots (1 large bag, about 16 oz) – These form the skeleton’s ribs and spine. Look for ones that are relatively straight and similar in size for the best look.
- Celery stalks (4-5 large stalks) – These become the arms and legs. Choose thick, crisp stalks that are easy to cut into bone shapes.
- Broccoli florets (about 2 cups) – These make the perfect skull shape. Pick florets that are roughly the same size for a symmetrical head.
- Red or orange bell pepper (1 large) – This becomes the skeleton’s heart or a decorative element. A red pepper adds a pop of color that looks like a glowing organ.
- Yellow bell pepper (1 large) – Use this for the hands and feet, cut into small bone shapes.
- Cucumber (1 large) – Sliced into rounds for the skeleton’s joints (shoulders, elbows, knees).
- Cherry tomatoes (1 cup) – These can be used as extra decoration or as “blood” drops around the platter. Optional, but adds a fun touch.
For the Dip & Assembly
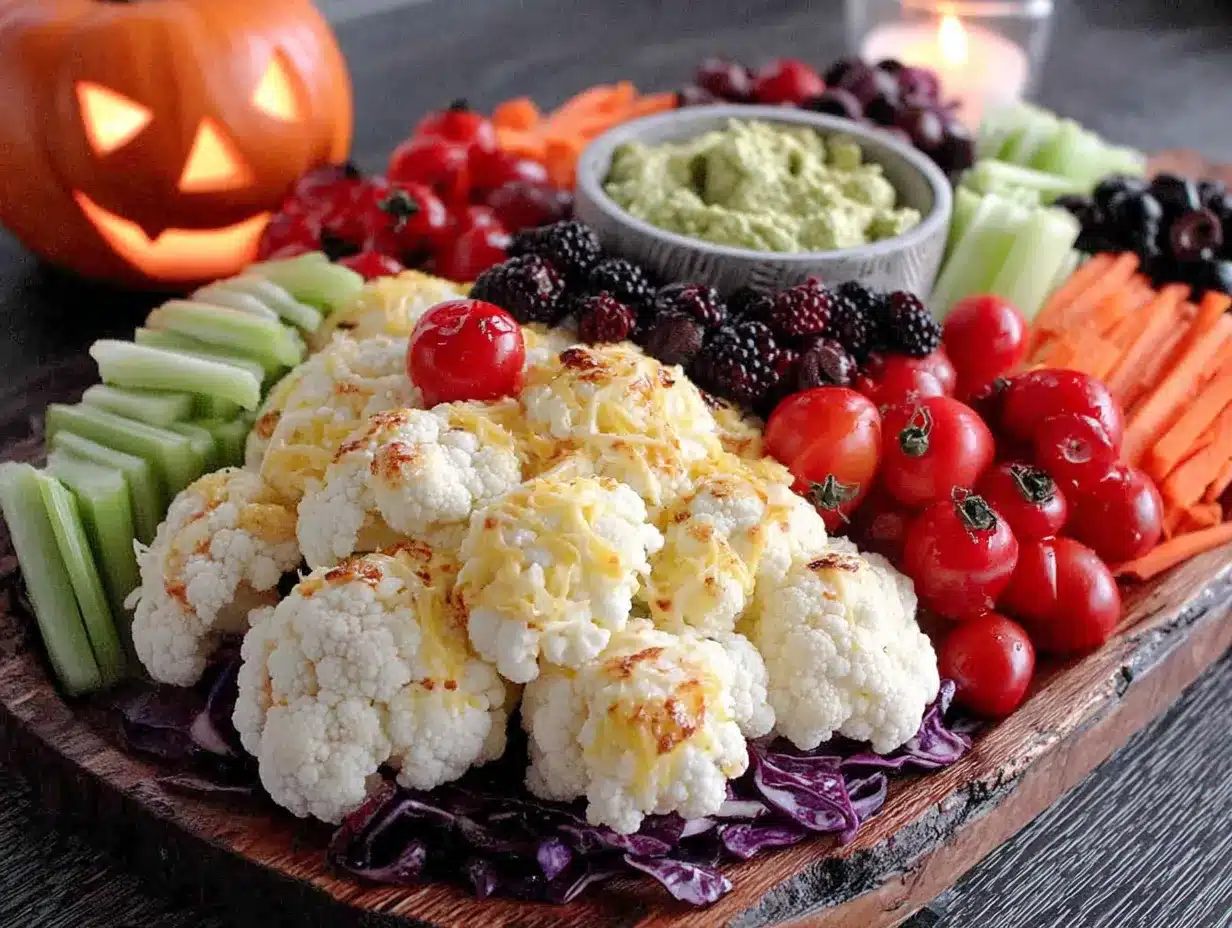
- Ranch dressing (1 cup, or use your favorite dip) – This acts as the “glue” to hold the skeleton together. I recommend Hidden Valley for classic flavor, but any thick dip works.
- Hummus (optional, 1/2 cup) – For a healthier twist, use hummus as the dip. My kids actually prefer the ranch, but I’ve had success with roasted red pepper hummus.
- Black olives (1 small can, sliced) – These become the skeleton’s eyes and mouth. They add a spooky, salty bite.
Ingredient Selection Tips
When shopping for this Halloween veggie tray skeleton, look for vegetables that are firm and fresh. Wilted celery or soft carrots won’t hold their shape well. For the broccoli, choose florets that are tight and dark green—they’ll look more like a skull. If you’re using a dip other than ranch, make sure it’s thick enough to act as a glue. Thin dressings won’t hold the vegetables in place.
Substitution Guidance
If your family doesn’t like broccoli, use a large cauliflower head cut into a skull shape. For a dairy-free option, swap the ranch for a vegan dip or guacamole. You can also use green bell peppers instead of yellow for the hands and feet—just keep in mind the color will be different. The beauty of this recipe is its flexibility. Use what your kids actually eat.
Equipment Needed
You don’t need fancy kitchen gadgets to make this Halloween veggie tray skeleton. Here’s what I use:
- Large serving platter or baking sheet (at least 16×12 inches) – A white platter makes the skeleton pop. I use a rimmed baking sheet lined with parchment paper for easy cleanup.
- Sharp chef’s knife – For cutting celery, peppers, and cucumbers into bone shapes. A dull knife will crush the vegetables.
- Cutting board – Preferably a large one to give you room to work.
- Small bowls (2-3) – For holding the dip and olives.
- Toothpicks (optional) – For attaching smaller pieces if needed. I rarely use them, but they’re good for securing the eyes.
- Vegetable peeler – If you want to make carrot curls or decorative strips. Totally optional, but adds a nice touch.
I’ve made this platter using just a butter knife and a dinner plate when I was camping once. It wasn’t as pretty, but the kids still loved it. The key is having a flat surface and some way to cut the veggies. Don’t overthink the equipment—use what you have.
If you’re buying a new platter, look for one with a slight rim to catch any dip drips. I found mine at a thrift store for three dollars. It’s white with a blue border, and it makes every veggie platter look fancy.
Preparation Method
Here’s how to build your Halloween veggie tray skeleton step by step. Take your time with the prep—the assembly goes fast once everything is cut.
- Wash and dry all vegetables (5 minutes). This is crucial—wet veggies won’t hold the dip glue. Pat everything dry with paper towels. I learned this the hard way when my first skeleton slid apart because the carrots were still damp.
- Prepare the skull (5 minutes). Take about 1 cup of broccoli florets and arrange them on the platter in a rough oval shape to form the head. Leave a small space in the center for the face. Use two black olive slices for the eyes and a few more for a creepy smile. Press them gently into the broccoli.
- Create the spine (3 minutes). Below the skull, lay baby carrots in a straight line down the center of the platter. These are the vertebrae. Leave about 1/2 inch of space between each carrot to look like individual bones. I use 8-10 carrots for the spine.
- Build the ribcage (5 minutes). On each side of the spine, place baby carrots at slight angles pointing outward and downward. These are the ribs. Use 4-5 carrots per side. They should curve slightly away from the spine, like a real ribcage. Dip the bottom of each carrot in ranch to help them stick to the platter.
- Form the arms (5 minutes). Cut celery stalks into 3-inch pieces. Place two pieces on each side of the upper body to form the upper arms. Then add two more pieces angled slightly outward for the forearms. For the hands, cut yellow bell pepper into small bone shapes (like little finger bones) and arrange them at the ends.
- Make the legs (5 minutes). Use more celery stalks, cut into 4-inch pieces. Place two pieces below the ribcage for the upper legs. Then angle two more pieces outward for the lower legs. For the feet, use cucumber slices or more bell pepper shapes. I like to use cucumber rounds for the knees and bell pepper strips for the feet bones.
- Add the joints (3 minutes). Place cucumber slices at the shoulders, elbows, wrists, hips, knees, and ankles. These give the skeleton a more realistic look and help hide any gaps. Dip each slice in ranch to keep them in place.
- Decorate with the heart and details (3 minutes). Cut a red bell pepper into a heart shape and place it in the center of the ribcage. Add cherry tomatoes around the platter for a spooky “blood” effect. Use extra black olives for any missing details.
- Fill the dip bowls (2 minutes). Pour ranch dressing into a small bowl and place it at the top of the platter near the skull, or in the center of the ribcage. I like to put the dip where the stomach would be—it’s a fun visual joke.
- Final adjustments (2 minutes). Step back and look at your skeleton. Adjust any vegetables that are out of place. Press down on the pieces to make sure they’re secure. Add more dip glue if anything feels loose.
The whole process takes about 30 minutes of prep and 10 minutes of assembly. The first time I made it, I spent an hour fussing over the rib placement. Now I just eyeball it, and it always looks great. Remember, skeletons aren’t supposed to be perfect—they’re supposed to be a little creepy. Imperfections add character.
Cooking Tips & Techniques
After making this Halloween veggie tray skeleton about a dozen times, I’ve learned a few tricks that make the process smoother. Here are my best tips:
Use dip as glue. This is the most important tip. A small dab of ranch on the bottom of each vegetable piece will keep everything in place. Without it, the vegetables will slide around when you move the platter. I learned this after my first skeleton collapsed when I carried it to the table.
Cut vegetables the night before. Halloween night is chaotic. Save time by washing and cutting all your vegetables the day before. Store them in separate bags in the fridge. Then assembly takes just 10 minutes before the party. Just don’t cut the broccoli too far in advance—it can get limp after 24 hours.
Choose straight carrots for the spine. Dig through the bag to find the straightest baby carrots for the spine and ribs. Curved ones are fine for other parts, but the spine looks best with uniform pieces. I keep a few extra carrots on hand in case some break.
Don’t overcrowd the platter. Leave some empty space around the skeleton. It makes the shape more visible and gives kids room to grab vegetables without knocking everything over. A crowded platter looks messy, not spooky.
Make it a family activity. My kids love helping with this. They arrange the broccoli skull and place the olive eyes. It keeps them busy while I handle the knife work. Plus, they’re more likely to eat vegetables they helped arrange.
One mistake I made early on was using too much dip. I thought it would hold better, but it just made everything slippery. A pea-sized dab per piece is plenty. Also, don’t press the vegetables down too hard—they’ll crack. Gentle pressure is all you need.
Variations & Adaptations
This Halloween veggie tray skeleton is endlessly adaptable. Here are some variations I’ve tried and loved:
Dairy-Free Version
Swap the ranch dressing for a dairy-free ranch or hummus. I’ve used roasted red pepper hummus as the “glue” and it works perfectly. The kids didn’t even notice the difference. You can also use guacamole, but it browns quickly, so assemble just before serving.
Low-Carb Skeleton
Replace the carrots with cucumber sticks and the broccoli with cauliflower florets. Use bell pepper strips for the spine and ribs. This version is lower in carbs and still looks great. I made this for a friend on a keto diet, and she loved it.
Spooky Color Theme
Use purple cauliflower for the skull, orange bell peppers for the ribs, and black olives for everything else. This creates a more Halloween-themed color palette. I tried this last year, and it looked amazing—like a skeleton from another planet.
Dip Variations
Instead of ranch, try a spinach artichoke dip, a spicy sriracha mayo, or a classic French onion dip. For a healthier option, use Greek yogurt mixed with ranch seasoning. My personal favorite is a smoked paprika hummus—it adds a subtle smoky flavor that pairs well with the vegetables.
Mini Skeletons for Lunchboxes
Use a small plate or a bento box to create individual skeletons. This is perfect for school Halloween parties or lunchbox surprises. My daughter’s teacher asked for the recipe after seeing one in her lunch.
Serving & Storage Suggestions
This Halloween veggie tray skeleton is best served cold or at room temperature. I recommend assembling it no more than 2 hours before serving to keep the vegetables crisp. If you’re making it for a party, prep everything in advance and assemble just before guests arrive.
For presentation, place the platter on a black or orange tablecloth to make the skeleton pop. Add some fake spiderwebs or plastic spiders around the edges for extra Halloween flair. I like to put the dip bowl in the center of the ribcage—it looks like the skeleton’s stomach and makes kids laugh.
Storage: Leftover vegetables can be stored in an airtight container in the fridge for up to 3 days. The dip should be stored separately. Don’t try to save the assembled skeleton—it won’t hold together after being moved. Just break it apart and store the components.
Reheating: You won’t reheat raw vegetables, but if you’re using any cooked components (like roasted peppers), let them cool completely before assembling. The flavors actually develop nicely overnight, so the vegetables taste even better the next day in a lunchbox or salad.
One thing I’ve noticed is that the skeleton looks best right after assembly. After an hour, the vegetables start to wilt slightly, and the dip can get a little watery. If you’re serving it at a party, keep the dip in a separate bowl and add it to the platter just before serving. This keeps everything looking fresh.
Nutritional Information & Benefits
This Halloween veggie tray skeleton is packed with nutrients. Here’s an approximate breakdown per serving (about 1 cup of vegetables with 2 tablespoons of dip):
- Calories: 120-150
- Protein: 3-4 grams
- Carbohydrates: 15-20 grams
- Fiber: 4-5 grams
- Fat: 6-8 grams (mostly from dip)
- Vitamin A: 120% DV (from carrots)
- Vitamin C: 80% DV (from bell peppers and broccoli)
- Potassium: 10% DV
The health benefits are significant. Carrots are rich in beta-carotene, which supports eye health. Broccoli is packed with fiber and vitamin C, which boosts the immune system—perfect for cold and flu season. Celery is low in calories and high in water content, making it hydrating. Bell peppers provide more vitamin C than oranges, and they add a beautiful pop of color.
This recipe is naturally gluten-free, dairy-free (if you choose the right dip), and vegetarian. It’s also low in sodium if you use a low-sodium dip. The only potential allergen is dairy in the ranch dressing, but that’s easy to swap. I love that I can serve this to a crowd with different dietary needs without worrying.
From a wellness perspective, this recipe helps me feel good about Halloween. Instead of loading up on candy, my family gets a healthy snack that still feels like a treat. It’s a small way to balance out the sugar rush without being the “fun police” parent.
Conclusion
This Halloween veggie tray skeleton has become a tradition in our house. Every October, my kids ask when we’re making “the skeleton platter,” and I love that they’re excited about vegetables. It’s not just a recipe—it’s a way to make healthy eating fun, to create a moment of connection around the table, and to prove that vegetables can be the star of the show.
I encourage you to make this your own. Use your family’s favorite vegetables, experiment with different dips, and let the kids help with the assembly. The skeleton doesn’t have to be perfect—it just has to be fun. And honestly, the imperfect ones are often the most memorable. My first attempt looked like a ghost that had melted in the sun, but my kids still talk about it.
If you try this recipe, I’d love to hear about it. Leave a comment below and tell me how your skeleton turned out. Did your kids love it? Did you add any creative twists? Share your photos on social media and tag me—I want to see your spooky creations. Here’s to a Halloween that’s healthy, happy, and full of vegetables!
Frequently Asked Questions
Can I make this Halloween veggie tray skeleton ahead of time?
Yes, but with a caveat. You can prep all the vegetables up to 24 hours in advance and store them in separate bags in the fridge. Assemble the skeleton no more than 2 hours before serving to keep the vegetables crisp. The dip can be made ahead and stored in the fridge.
What if my kids don’t like broccoli?
Swap the broccoli for cauliflower florets, a large cucumber cut into a skull shape, or even a hollowed-out bell pepper. The skull is the most important part visually, so use whatever vegetable your kids will actually eat. I’ve used a large tomato before—it worked, but it was messy.
How do I keep the skeleton from falling apart?
Use a small dab of ranch dressing or hummus as glue on the bottom of each vegetable piece. Press gently to secure. If you’re transporting the platter, assemble it at the destination. The skeleton is sturdy enough to hold together, but it won’t survive a bumpy car ride.
Can I use frozen vegetables?
I don’t recommend it. Frozen vegetables release water as they thaw, which makes the dip watery and causes the skeleton to slide apart. Fresh vegetables are essential for this recipe. If you’re in a pinch, thaw frozen vegetables completely and pat them very dry before using.
How many people does this skeleton feed?
This recipe serves about 8-10 people as a snack or appetizer. If you’re serving it as a side dish for a meal, it serves 6-8. Double the recipe for a large party—just use a bigger platter or make two skeletons. I’ve made a “skeleton family” with a large skeleton and two small ones for big gatherings.
Pin This Recipe!
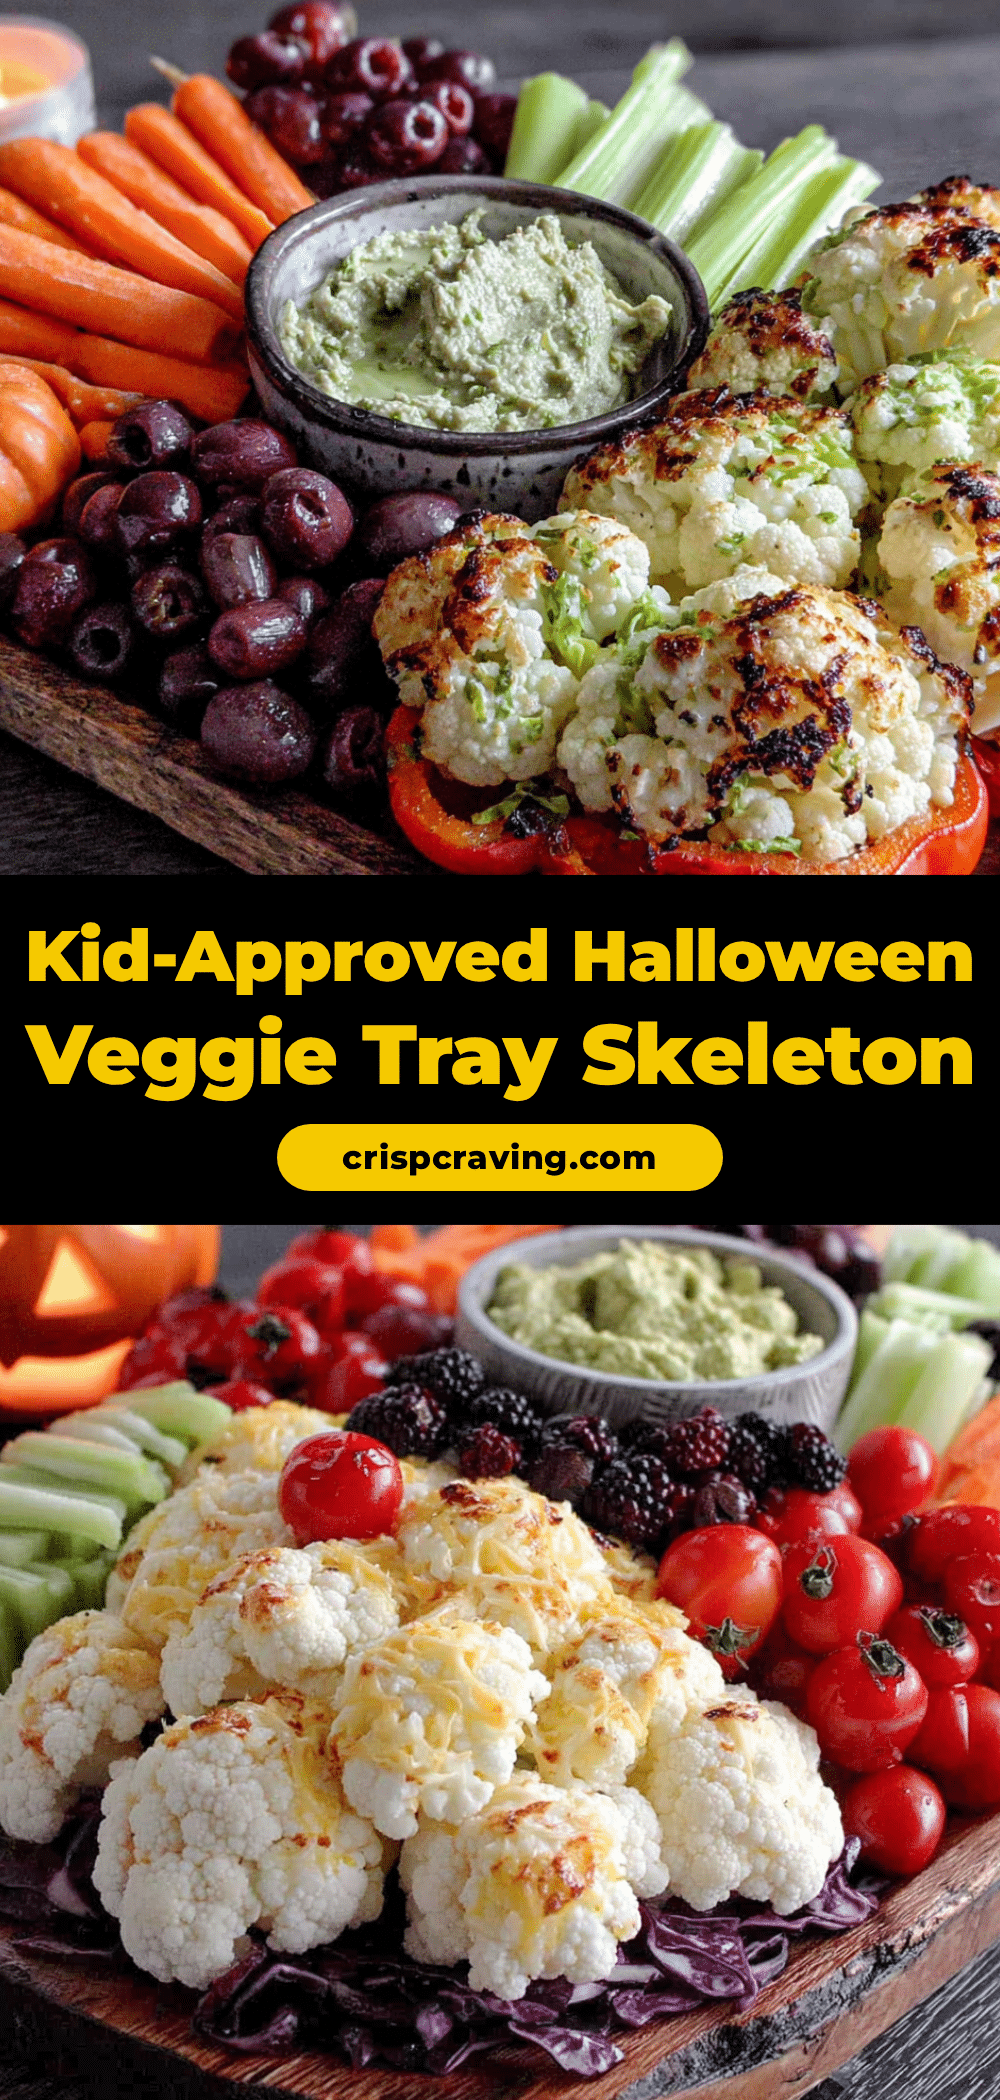
Best Halloween Veggie Tray Skeleton: Easy Kid-Approved Recipe

Turn ordinary vegetables into a spooky skeleton centerpiece that makes kids actually excited to eat their veggies. This fun, budget-friendly platter is perfect for Halloween parties and family gatherings.
- Prep Time: 30 minutes
- Cook Time: 0 minutes
- Total Time: 40 minutes
- Yield: 8-10 servings 1x
- Category: Appetizer
- Cuisine: American
Ingredients
- 1 large bag (16 oz) baby carrots
- 4–5 large celery stalks
- 2 cups broccoli florets
- 1 large red or orange bell pepper
- 1 large yellow bell pepper
- 1 large cucumber
- 1 cup cherry tomatoes (optional)
- 1 cup ranch dressing (or your favorite dip)
- 1/2 cup hummus (optional, for healthier twist)
- 1 small can sliced black olives
Instructions
- Wash and dry all vegetables thoroughly. Pat dry with paper towels to ensure the dip glue holds.
- Prepare the skull: Arrange about 1 cup of broccoli florets in a rough oval shape on the platter. Leave a small space in the center for the face. Use two black olive slices for eyes and a few more for a creepy smile, pressing gently into the broccoli.
- Create the spine: Below the skull, lay 8-10 baby carrots in a straight line down the center of the platter, leaving about 1/2 inch between each carrot to look like vertebrae.
- Build the ribcage: On each side of the spine, place 4-5 baby carrots at slight angles pointing outward and downward. Dip the bottom of each carrot in ranch to help them stick.
- Form the arms: Cut celery stalks into 3-inch pieces. Place two pieces on each side of the upper body for upper arms, then two more pieces angled outward for forearms. Cut yellow bell pepper into small bone shapes for hands and arrange at the ends.
- Make the legs: Cut celery stalks into 4-inch pieces. Place two pieces below the ribcage for upper legs, then angle two more pieces outward for lower legs. Use cucumber slices or bell pepper shapes for feet.
- Add the joints: Place cucumber slices at shoulders, elbows, wrists, hips, knees, and ankles. Dip each slice in ranch to keep them in place.
- Decorate: Cut red bell pepper into a heart shape and place in the center of the ribcage. Add cherry tomatoes around the platter for a spooky effect. Use extra black olives for any missing details.
- Fill dip bowls: Pour ranch dressing into a small bowl and place it at the top of the platter near the skull or in the center of the ribcage.
- Final adjustments: Step back and adjust any vegetables that are out of place. Press down gently to secure pieces. Add more dip glue if anything feels loose.
Notes
Use dip as glue to hold vegetables in place. Cut vegetables the night before to save time on Halloween. Choose straight carrots for the spine. Don’t overcrowd the platter. Make it a family activity. Use a pea-sized dab of dip per piece. Don’t press vegetables down too hard. Assemble no more than 2 hours before serving for best crispness.
Nutrition
- Serving Size: 1 cup vegetables wit
- Calories: 120150
- Sugar: 57
- Sodium: 300400
- Fat: 68
- Saturated Fat: 12
- Carbohydrates: 1520
- Fiber: 45
- Protein: 34
Keywords: Halloween veggie tray, skeleton platter, kid-friendly vegetables, spooky snack, healthy Halloween recipe, vegetable skeleton, party appetizer