Love this? Save it for later!
Share the inspiration with your friends
Marta wasn’t trying to impress anyone. I’d stopped by to drop off her son’s forgotten lunchbox — the Tuesday before Halloween, I remember because my own kids were already bouncing off the walls — and the smell of chocolate hit me before I even got through the front door. It was that deep, warm, just-baked kind of smell that makes you forget why you came in the first place. She was standing at the kitchen counter in her regular jeans and a flour-dusted sweatshirt, piping something onto a tray of cupcakes while her toddler sat on the floor chewing on a whisk. Honestly, I half-expected her to be dressed up or doing something elaborate. But nope. Just regular Tuesday chaos with a side of pure magic.
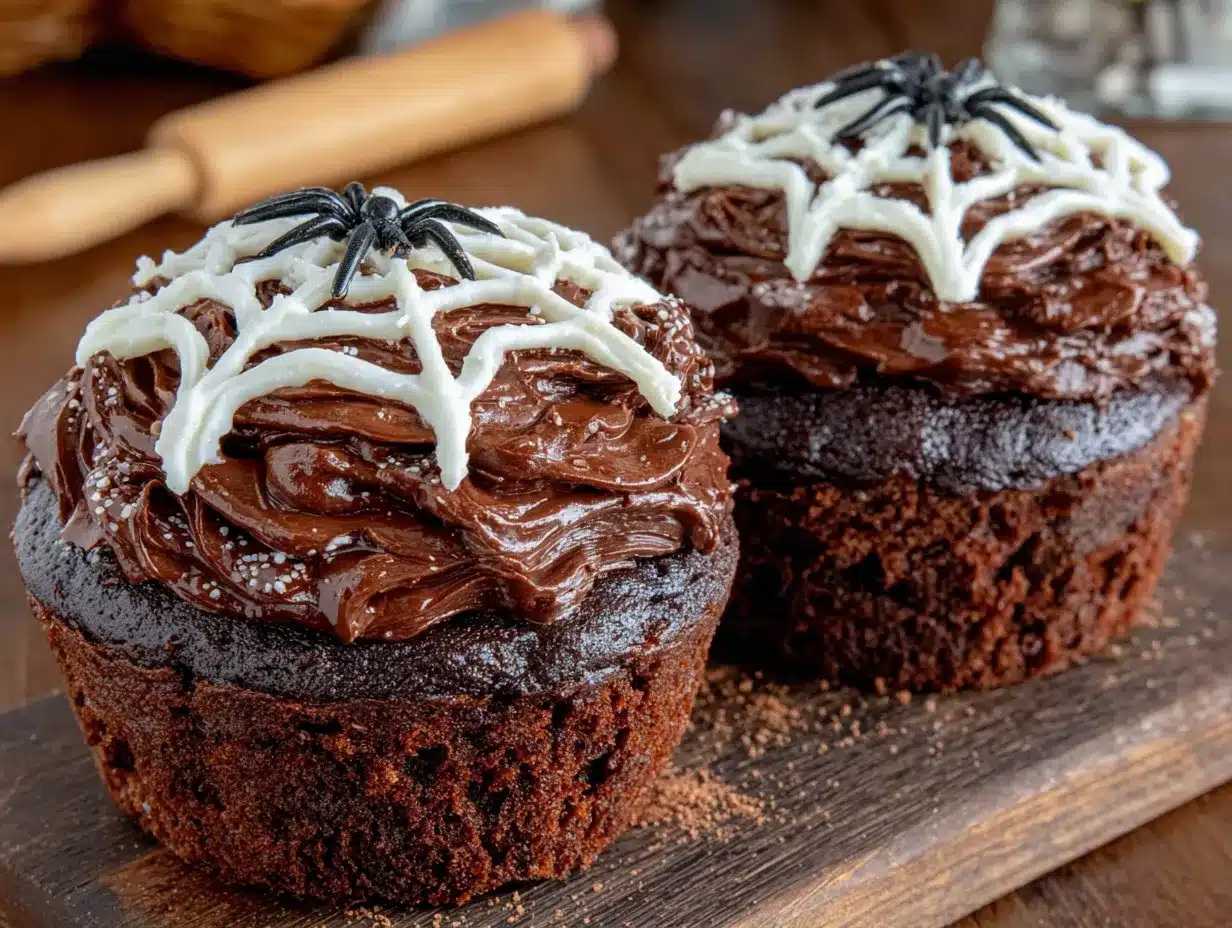
“It’s nothing,” she said when I asked, waving her hand like she was shooing a fly. But I couldn’t stop staring at those cupcakes. They had these delicate white lines swirling across dark chocolate frosting, like a spider had gotten artistic with a pastry bag. And the kids — her three and my two, who’d all migrated to the kitchen like little magnets — were already grabbing them off the tray. No fussing. No “I don’t like that.” Just happy, chocolate-smeared faces. Maybe you’ve been there, watching someone do something simple and realizing it’s actually kind of brilliant. That was my moment.
I asked her how she made the web pattern, and she shrugged. “A zip-top bag and a toothpick. It’s not rocket science.” But that’s exactly why it stuck with me. No fancy tools, no stress, no Pinterest-perfect expectations. Just a mom making something fun for her kids on a random Tuesday. And now, every Halloween (and honestly, plenty of random Tuesdays since), I make these Chocolate Spider Web Cupcakes. They’re the kind of recipe that makes you feel like a superhero in the kitchen — even when you’re just wearing sweatpants.
Why You’ll Love This Recipe
Let me tell you why these Chocolate Spider Web Cupcakes have become our family’s go-to Halloween treat. First off, they’re ridiculously easy. We’re talking about a boxed cake mix and canned frosting situation — no shame in that game. You can have these from start to finish in under an hour, which is basically a miracle when you’re juggling school pickups and costume emergencies. And the best part? You probably already have everything you need in your kitchen right now.
- Quick & Easy: Comes together in about 45 minutes, start to finish. Perfect for last-minute class parties or when the kids announce they need treats tomorrow morning.
- Simple Ingredients: No fancy grocery store runs. You’ll use basic pantry staples plus a few decorating items you can grab anywhere.
- Perfect for Halloween: These are the star of any Halloween party, school celebration, or spooky movie night. Kids go absolutely wild for them.
- Crowd-Pleaser: I’ve never met a kid who didn’t love these. Adults too, honestly. Chocolate and fun decorations? It’s a win-win.
- Unbelievably Delicious: The combination of rich chocolate cake and creamy frosting, plus that little bit of magic from the spider web design — it’s next-level comfort food.
What makes these different from any other Halloween cupcake? It’s the technique. That spider web design looks like something from a bakery, but it’s actually the simplest trick in the book. A zip-top bag, a toothpick, and a little patience — that’s all you need. I’ve tried other methods over the years, but this one gives you the cleanest, most impressive results every single time. And honestly, it’s the kind of recipe that makes you close your eyes after the first bite. It’s comfort food reimagined for Halloween — fun, festive, and full of chocolatey goodness.
What Ingredients You Will Need
This recipe uses simple, everyday ingredients to create something that looks like it came from a fancy bakery. Here’s what you’ll need to gather:
For the Cupcakes
- 1 box chocolate cake mix (I prefer Duncan Hines or Betty Crocker for consistent results)
- 3 large eggs, room temperature (helps the cake rise evenly)
- 1/2 cup vegetable oil (or melted coconut oil for a subtle flavor twist)
- 1 cup water (or substitute strong brewed coffee for a deeper chocolate flavor)
For the Frosting
- 1 can (16 ounces) chocolate frosting (store-bought is fine, or use my homemade recipe below)
- 1/2 cup unsalted butter, softened (if making homemade frosting)
- 1/3 cup unsweetened cocoa powder (I recommend Hershey’s or Ghirardelli)
- 2 cups powdered sugar
- 1 teaspoon vanilla extract
- 2-3 tablespoons milk, as needed
For the Spider Web Decoration
- 1/2 cup white frosting (store-bought or homemade)
- 1-2 tablespoons powdered sugar (to thicken, if needed)
- Black licorice strings or black gel frosting (for spiders, optional)
- Small candy eyes (available at craft stores or online)
For the frosting, I’ve found that store-bought works perfectly fine for this recipe, especially when you’re short on time. But if you want that extra-special touch, homemade frosting is worth the extra few minutes. Just cream the butter, add cocoa powder and vanilla, then gradually mix in powdered sugar and milk until it’s smooth and spreadable. The key is to get it thick enough to hold the spider web pattern without being too stiff.
One thing I’ve learned the hard way — make sure your white frosting for the webs is thick enough. If it’s too runny, the lines will bleed into the chocolate frosting and you’ll end up with a muddy mess. Add a little extra powdered sugar if needed until it holds its shape when piped. Trust me on this one.
Equipment Needed
You don’t need a professional bakery setup for these. Here’s what you’ll actually use:
- Standard 12-cup muffin tin (I’ve used both metal and silicone — metal gives more even browning)
- Paper cupcake liners (Halloween-themed ones make it extra festive)
- Large mixing bowl and whisk or electric mixer
- Wire cooling rack (absolutely essential for even cooling)
- Small zip-top plastic bag (for piping the white frosting)
- Toothpicks (for creating the web pattern)
- Offset spatula or butter knife for frosting
If you don’t have a piping bag, don’t worry — a zip-top bag with a tiny corner snipped off works perfectly. I actually prefer it because there’s less cleanup. And if you’re missing a cooling rack, you can use a clean kitchen towel laid flat, but the rack really does help the cupcakes cool faster and more evenly.
Preparation Method
Let’s get to the fun part. Here’s how to make these Chocolate Spider Web Cupcakes step by step:
- Preheat your oven to 350°F (175°C). Line your muffin tin with paper liners. This is one of those steps you don’t want to skip — I’ve forgotten before and ended up with cupcakes stuck to the pan. Not fun.
- Make the cupcake batter. In a large bowl, combine the chocolate cake mix, eggs, oil, and water. Mix according to package directions — usually about 2 minutes with an electric mixer on medium speed. The batter should be smooth and slightly thick. If you’re using coffee instead of water, it’ll look a bit darker, which is perfect.
- Fill the cupcake liners. Use a cookie scoop or large spoon to fill each liner about 2/3 full. Don’t overfill — they’ll rise and spill over. I usually get about 18-20 cupcakes from one box mix.
- Bake for 18-22 minutes. The cupcakes are done when a toothpick inserted in the center comes out clean or with a few moist crumbs. My oven runs hot, so I start checking at 18 minutes. Let them cool in the pan for 5 minutes, then transfer to a wire rack to cool completely. This is crucial — warm frosting will melt your spider webs into a sad, gooey mess.
- Make the chocolate frosting. While the cupcakes cool, prepare your frosting. If using store-bought, just give it a good stir to loosen it up. For homemade, beat the softened butter until creamy, then add cocoa powder and vanilla. Gradually beat in powdered sugar and milk until smooth and spreadable. The frosting should be thick enough to hold a peak but soft enough to spread easily.
- Frost the cupcakes. Once the cupcakes are completely cool, spread a generous layer of chocolate frosting on each one. An offset spatula works great, but a butter knife does the job too. Try to get the surface as smooth as possible — it makes the spider web pattern look cleaner.
- Prepare the white frosting for piping. Spoon the white frosting into a small zip-top bag. If it seems too runny, add a tablespoon of powdered sugar and mix well. Snip off a tiny corner of the bag — start small, you can always cut more off later.
- Create the spider web pattern. Starting from the center of each cupcake, pipe a spiral of white frosting outward. Don’t worry about perfection — the toothpick will do the magic. Then, while the white frosting is still wet, use a toothpick to drag lines from the center outward, like spokes on a wheel. Then, drag lines from the outer edge inward between each spoke. This creates the classic web pattern.
- Add the spiders (optional but fun). If you’re making spiders, cut black licorice strings into small pieces for legs and place a candy eye or two in the center. Or simply use black gel frosting to draw tiny spiders on some of the webs.
- Let the frosting set. Allow the decorated cupcakes to sit at room temperature for about 15-20 minutes so the frosting firms up slightly. This makes them easier to transport without smudging.
A quick tip from personal experience — don’t press too hard when dragging the toothpick. Gentle, even strokes give you the cleanest web lines. And if you mess up? No worries. Just smooth the chocolate frosting back over and try again. I’ve done that more times than I’d like to admit.
Cooking Tips & Techniques
Over the years, I’ve made these Chocolate Spider Web Cupcakes more times than I can count, and I’ve picked up a few tricks along the way. Here are the ones that make the biggest difference:
Don’t rush the cooling process. I know it’s tempting to start frosting while they’re still warm, but trust me — warm cupcakes turn frosting into a melty disaster. Let them cool completely on a wire rack. If you’re in a hurry, pop them in the fridge for 15 minutes after they’ve cooled to room temperature.
Practice the web pattern on a plate first. Before you try it on your actual cupcakes, pipe a spiral of white frosting onto a clean plate and practice dragging the toothpick through it. It takes about 30 seconds and saves you from ruining a batch of cupcakes. I learned this after my first attempt looked more like a tangled fishing net than a spider web.
Keep the white frosting thick. This is the number one mistake I see people make. If your white frosting is too thin, it’ll bleed into the chocolate and you’ll lose that crisp contrast. Add powdered sugar a tablespoon at a time until it holds its shape when piped. It should be similar to toothpaste consistency.
Use a light hand with the toothpick. You want to drag through the white frosting, not scrape it off completely. Gentle, even pressure gives you those beautiful, delicate web lines. Practice makes perfect here.
Work in batches. Don’t try to do all 18-20 cupcakes at once. Pipe the spiral and drag the lines on 3-4 cupcakes at a time, then move on. The white frosting sets quickly, and you want it to be wet when you drag the toothpick through.
Variations & Adaptations
One of the best things about this recipe is how easy it is to customize. Here are some variations I’ve tried and loved:
Gluten-Free Version: Use a gluten-free chocolate cake mix and check that your frostings are gluten-free. Most store-bought frostings are, but always read the label. The decorating technique stays exactly the same.
Dairy-Free Option: Swap the butter in homemade frosting for a plant-based alternative, and use dairy-free milk. Most store-bought chocolate frostings are dairy-free, but again, check the label. The white frosting can be made with shortening instead of butter for a dairy-free version.
Flavor Twists: Try using a devil’s food cake mix for an even richer chocolate flavor. Or swap the chocolate frosting for cream cheese frosting for a tangy contrast. I made a batch with mint chocolate frosting last year, and the kids went crazy for them.
Spider Variations: Instead of licorice spiders, use chocolate chips with mini pretzel stick legs, or just draw spiders with black gel frosting. My youngest prefers the drawn-on spiders because they’re “less scary.”
Colorful Webs: Use colored frosting instead of white for the webs. Orange and purple are perfect for Halloween, or try green for a monster theme. Just make sure the colored frosting is thick enough to hold the pattern.
Serving & Storage Suggestions
These Chocolate Spider Web Cupcakes are best served at room temperature, which lets the frosting soften slightly and the cake stay tender. If you’ve made them ahead, take them out of the fridge about 30 minutes before serving.
For storage, place the cupcakes in an airtight container at room temperature for up to 2 days. If you need to keep them longer, refrigerate them for up to 5 days. Just be aware that the white frosting might get a little soft in the fridge, so let them come to room temperature before serving.
You can also freeze the unfrosted cupcakes for up to 3 months. Wrap each one tightly in plastic wrap, then place them in a freezer bag. When you’re ready to decorate, thaw them at room temperature, then frost and decorate as usual. The spider web pattern doesn’t freeze well, so always add that after thawing.
These cupcakes pair beautifully with a glass of cold milk, a warm cup of hot chocolate, or a scoop of vanilla ice cream for an extra-indulgent treat. For a Halloween party, serve them alongside other spooky treats like ghost-shaped cookies or pumpkin-shaped Rice Krispie treats.
Nutritional Information & Benefits
Let’s be honest — these are a treat, not a health food. But here’s what you’re looking at per cupcake (based on 18 servings):
| Nutrient | Amount |
|---|---|
| Calories | 280-320 |
| Total Fat | 14g |
| Saturated Fat | 5g |
| Carbohydrates | 38g |
| Sugar | 26g |
| Protein | 3g |
Now, the good news — dark chocolate does contain antioxidants and a little bit of iron. And the eggs provide protein. But honestly, these are about joy and celebration, not daily nutrition. I always tell my kids that Halloween is a time for treats, and these cupcakes are part of the fun. If you’re looking to lighten them up, you can use a sugar-free cake mix and frosting, but I think the full-sugar version tastes better for special occasions.
Potential allergens include wheat (gluten), dairy, eggs, and soy (check your specific brands). For allergy-friendly versions, see the variations section above.
Conclusion
These Chocolate Spider Web Cupcakes have become a Halloween tradition in our house, and I hope they become one in yours too. They’re proof that you don’t need fancy equipment or hours of free time to create something that looks and tastes amazing. Just a box mix, some frosting, a zip-top bag, and a toothpick — that’s all it takes to make something magical.
I love this recipe because it’s forgiving. You can mess up the web pattern and try again. You can forget to add the spiders and they’re still adorable. You can use whatever cake mix you have on hand and it’ll work. It’s the kind of recipe that makes you feel like a kitchen pro, even on your most chaotic days.
So go ahead — grab that box mix, call the kids into the kitchen, and make some spider webs together. I promise you’ll end up with chocolate-smeared faces, sticky fingers, and a whole lot of happy memories. And when you do, come back and tell me about it in the comments. I’d love to hear how your spider webs turned out!
Frequently Asked Questions
Can I make these cupcakes ahead of time?
Absolutely! You can bake the cupcakes up to 2 days ahead and store them unfrosted in an airtight container. Frost and decorate them the day you plan to serve them for the best results.
Can I use a different cake flavor?
Of course! Vanilla, yellow, or even red velvet cake mix works great. Just adjust the frosting flavor to complement your cake choice. Chocolate on chocolate is classic, but vanilla cake with chocolate frosting is also delicious.
How do I get the spider web pattern to look perfect?
Practice on a plate first, and make sure your white frosting is thick enough. Use gentle, even pressure when dragging the toothpick. And remember — it doesn’t have to be perfect to be beautiful. Imperfect webs have their own charm!
Can I use homemade cake batter instead of a mix?
Yes, absolutely! Use your favorite chocolate cupcake recipe. Just make sure the cupcakes are completely cool before frosting. The decorating technique works the same way regardless of the cake base.
How long do these cupcakes last?
Stored in an airtight container at room temperature, they’ll stay fresh for about 2 days. In the refrigerator, they’ll last up to 5 days. The spider web pattern might soften slightly in the fridge, so let them come to room temperature before serving.
Pin This Recipe!
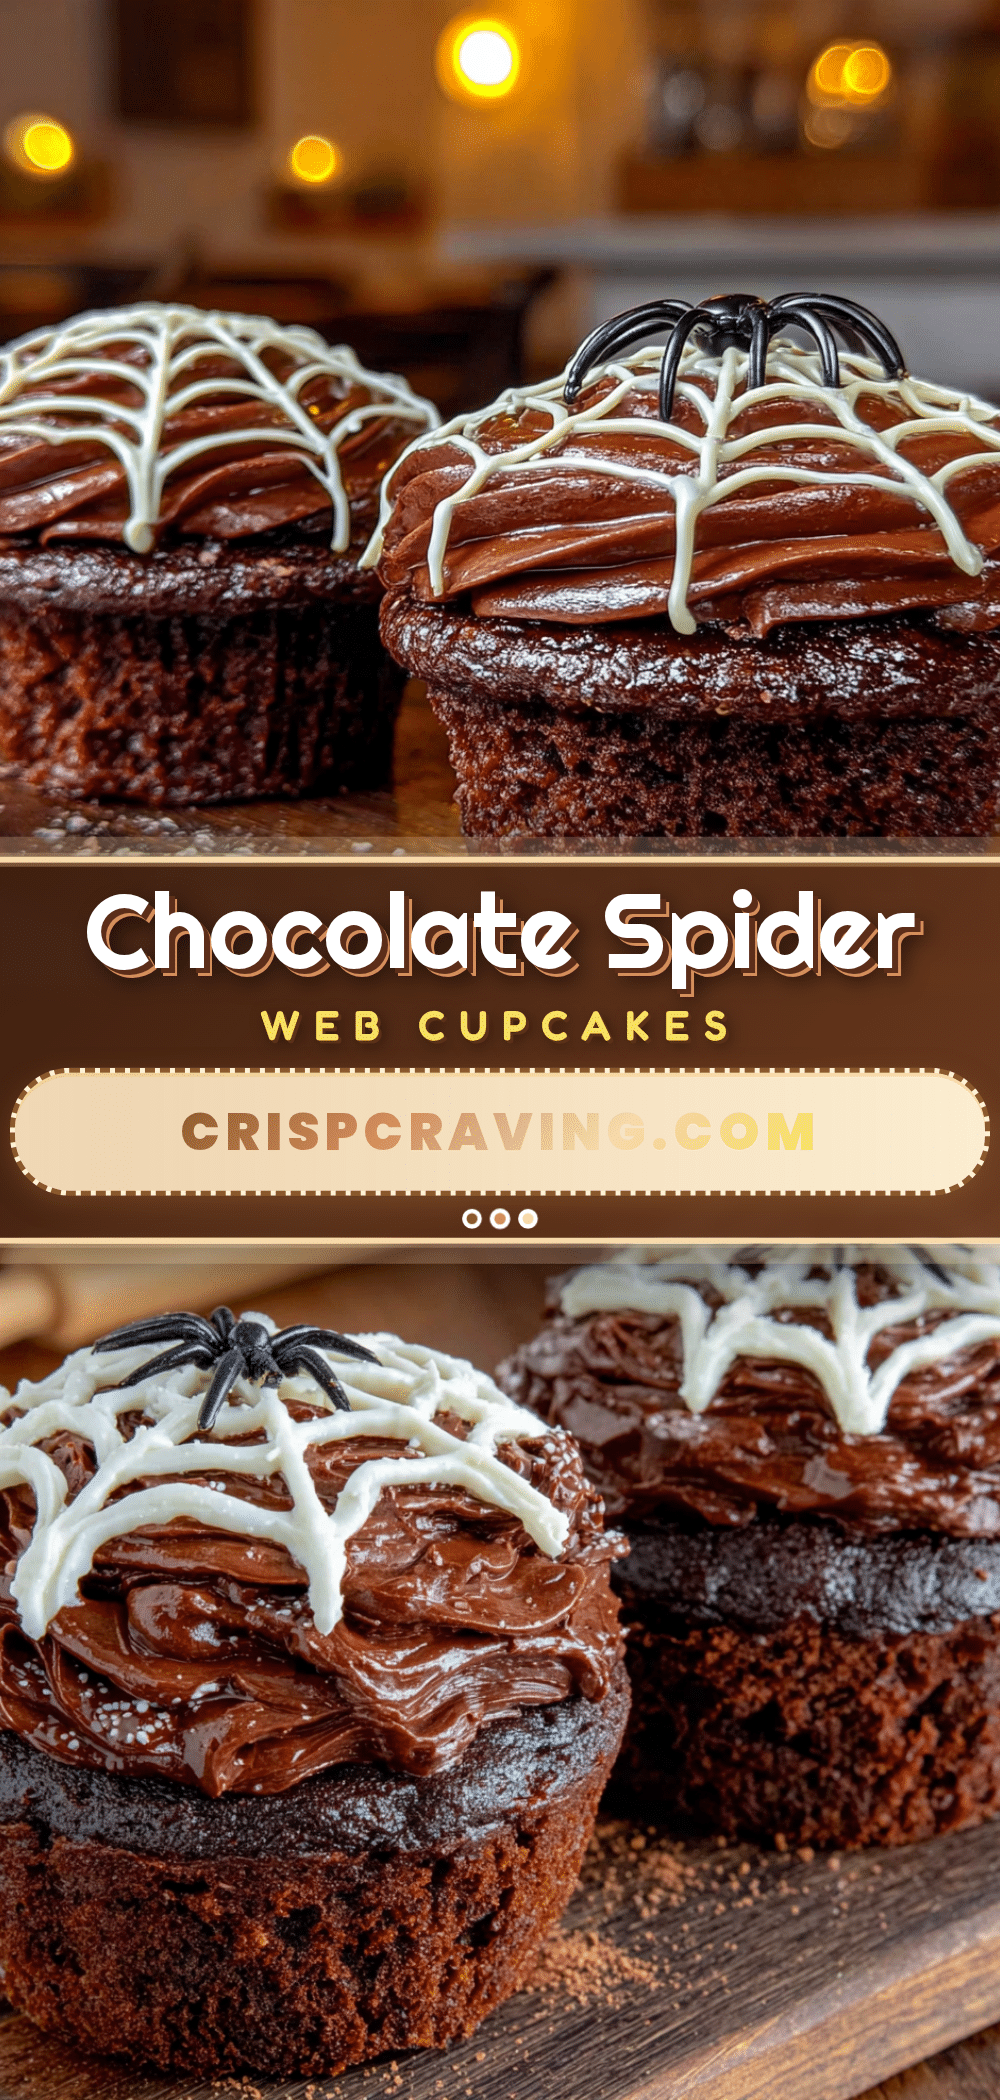
Chocolate Spider Web Cupcakes: Easy Halloween Recipe
These Chocolate Spider Web Cupcakes are a quick and easy Halloween treat made with a boxed cake mix and canned frosting. With a simple spider web design using a zip-top bag and toothpick, they’re perfect for last-minute class parties or spooky movie nights.
- Prep Time: 15 minutes
- Cook Time: 20 minutes
- Total Time: 45 minutes
- Yield: 18-20 servings 1x
- Category: Dessert
- Cuisine: American
Ingredients
- 1 box chocolate cake mix (Duncan Hines or Betty Crocker recommended)
- 3 large eggs, room temperature
- 1/2 cup vegetable oil (or melted coconut oil)
- 1 cup water (or strong brewed coffee for deeper flavor)
- 1 can (16 ounces) chocolate frosting (store-bought)
- 1/2 cup unsalted butter, softened (if making homemade frosting)
- 1/3 cup unsweetened cocoa powder (Hershey’s or Ghirardelli recommended)
- 2 cups powdered sugar
- 1 teaspoon vanilla extract
- 2–3 tablespoons milk, as needed
- 1/2 cup white frosting (store-bought or homemade)
- 1–2 tablespoons powdered sugar (to thicken white frosting, if needed)
- Black licorice strings or black gel frosting (for spiders, optional)
- Small candy eyes (optional)
Instructions
- Preheat your oven to 350°F (175°C). Line your muffin tin with paper liners.
- In a large bowl, combine the chocolate cake mix, eggs, oil, and water. Mix according to package directions (about 2 minutes with an electric mixer on medium speed) until smooth and slightly thick.
- Fill each cupcake liner about 2/3 full using a cookie scoop or large spoon. You should get about 18-20 cupcakes.
- Bake for 18-22 minutes, until a toothpick inserted in the center comes out clean or with a few moist crumbs. Let cool in the pan for 5 minutes, then transfer to a wire rack to cool completely.
- While cupcakes cool, prepare the chocolate frosting. If using store-bought, stir to loosen. For homemade, beat softened butter until creamy, add cocoa powder and vanilla, then gradually beat in powdered sugar and milk until smooth and spreadable.
- Once cupcakes are completely cool, spread a generous layer of chocolate frosting on each one, smoothing the surface as much as possible.
- Spoon white frosting into a small zip-top bag. If too runny, add 1 tablespoon powdered sugar and mix. Snip off a tiny corner of the bag.
- Starting from the center of each cupcake, pipe a spiral of white frosting outward. While still wet, use a toothpick to drag lines from the center outward (like spokes on a wheel), then drag lines from the outer edge inward between each spoke to create the web pattern.
- Optional: Add spiders using black licorice strings for legs and candy eyes, or draw spiders with black gel frosting.
- Let decorated cupcakes sit at room temperature for 15-20 minutes to allow frosting to firm up slightly before serving or transporting.
Notes
Don’t rush the cooling process—warm cupcakes will melt the frosting. Practice the web pattern on a plate first. Keep white frosting thick (toothpaste consistency) to prevent bleeding. Use a light hand with the toothpick for clean lines. Work in batches of 3-4 cupcakes at a time as the white frosting sets quickly.
Nutrition
- Serving Size: 1 cupcake
- Calories: 300
- Sugar: 26
- Sodium: 220
- Fat: 14
- Saturated Fat: 5
- Carbohydrates: 38
- Fiber: 1
- Protein: 3
Keywords: Halloween cupcakes, spider web cupcakes, chocolate cupcakes, easy Halloween dessert, kid-friendly Halloween treat



