Love this? Save it for later!
Share the inspiration with your friends
My niece asked why I couldn’t just use a store-bought taco seasoning packet for the dip. I started to explain why that wouldn’t work — then stopped. She was seven, and honestly, she had a point. I was overcomplicating something that was supposed to be fun. The power of her simple logic hit me right there in my messy kitchen, surrounded by half-opened spice jars and a very confused looking Halloween skeleton decoration.
I mean, let me tell you, I pride myself on making everything from scratch. It’s a badge of honor, you know? But watching her dump that seasoning packet into the bowl with complete confidence made me realize something important. Sometimes the best recipes aren’t the ones that show off your culinary prowess. They’re the ones that make people smile. This Easy Black Bean Mummy Taco Dip is exactly that kind of recipe. It came together on a random Tuesday afternoon when I was supposed to be testing something far more complicated for a holiday party.
The whole thing took maybe fifteen minutes. Fifteen minutes to create something that looked like it came straight out of a Halloween magazine. My niece decorated the top with sliced black olives for eyes, and we both laughed so hard when the “mummy” turned out looking more like a confused ghost. Honestly, that’s the thing about this dip. It doesn’t have to be perfect. It just has to be fun and delicious. And trust me, it delivers on both fronts. Maybe you’ve been there too — spending way too much time on something that could be simple. This recipe is my apology to my past self for all those overcomplicated party dishes.
Why You’ll Love This Recipe
As a food blogger who has tested literally dozens of Halloween appetizers over the years, I can tell you this one stands out for all the right reasons. It is not just another themed snack. It is genuinely good food that happens to look adorable. Here is why this dip deserves a spot at your Halloween table:
- Quick & Easy: We are talking fifteen minutes from start to finish. No complicated techniques, no waiting around. Perfect for those evenings when you realize the party starts in an hour and you have nothing prepared.
- Simple Ingredients: Everything on this list is probably already in your pantry or fridge. No hunting down obscure ingredients at specialty stores. I mean it — I checked my own pantry before writing this, and I had every single item.
- Perfect for Halloween Parties: The mummy design is a guaranteed conversation starter. Kids love it, adults love it, and everyone wants to know how you made it look so cute without spending hours in the kitchen.
- Crowd-Pleaser: This dip disappears fast. I have brought it to three different gatherings now, and every single time, someone asked for the recipe before the chips ran out.
- Unbelievably Delicious: The combination of creamy refried beans, zesty taco seasoning, and melted cheese is pure comfort food magic. The texture is smooth, the flavor is bold, and every bite makes you want another one.
What makes this recipe different from every other taco dip out there? It is the mummy design, sure, but it is also the balance of flavors. I spent three versions tweaking the seasoning ratio until it hit that perfect spot between mild and zesty. Not too spicy for the kids, but flavorful enough for the adults. Plus, the black beans add a heartiness that makes this dip feel like a real dish, not just an afterthought snack.
What Ingredients You Will Need
This recipe uses simple, wholesome ingredients that come together to create something genuinely special. No fancy grocery trips required — you likely already have most of these in your kitchen right now.
- For the Dip Base:
- 1 can (15 oz) refried black beans — I prefer the Rosarita brand for its smooth texture, but any brand works fine
- 8 oz cream cheese, softened — let it sit out for 20 minutes before starting (makes blending so much easier)
- 1/2 cup sour cream — full fat gives the best texture, but Greek yogurt works in a pinch
- 1 packet taco seasoning — I know, I know, I used to judge myself for this too. But honestly? It works perfectly here (use the McCormick mild variety for a kid-friendly version)
- 1 cup shredded Mexican blend cheese — divided into 3/4 cup for the dip and 1/4 cup for the mummy “bandages”
- For the Mummy Design:
- 1 can (2.25 oz) sliced black olives — these become the mummy’s eyes (look for the pre-sliced ones to save time)
- 1/4 cup shredded mozzarella cheese — the stretchy kind works best for wrapping around the mummy
- Optional: 1 small carrot, cut into thin strips — for extra mummy bandage details (I tried this once and it looked surprisingly good)
- For Serving:
- Tortilla chips — the sturdy restaurant-style ones hold up best to the dip’s thickness
- Fresh cilantro for garnish — optional, but it adds a nice pop of green against the orange and white
- Hot sauce on the side — for those who want extra heat (my brother-in-law pours this on everything)
One thing I learned the hard way — do not skip softening the cream cheese. I tried rushing through this once with cold cream cheese, and the dip came out lumpy. Not the end of the world, but definitely not as smooth as it should be. Also, if you are using a different brand of refried beans, check the consistency. Some are thicker than others, and you might need to add a splash of water or extra sour cream to get the right texture.
Equipment Needed
You do not need a professional kitchen to pull this off. Here is what you will need:
- Large mixing bowl — any size works, but a medium bowl makes mixing easier without splashing
- Hand mixer or stand mixer — a hand mixer is perfect here, but a wooden spoon and some elbow grease work too (I have done both)
- Spatula — for scraping every last bit of dip into the serving dish (waste not, want not)
- Serving platter or pie dish — a round dish works best for the mummy shape, but any oven-safe dish will do
- Small knife — for arranging the olive eyes and any decorative touches
- Measuring cups and spoons — though honestly, I eyeball most of these measurements now
- Cheese grater — if you are shredding your own cheese (pre-shredded works fine, but fresh grated melts smoother)
If you do not have a hand mixer, do not panic. I made this recipe for the first time using just a fork and a lot of determination. The texture was slightly chunkier, but it still tasted amazing. Sometimes the best cooking happens when you work with what you have.
Preparation Method
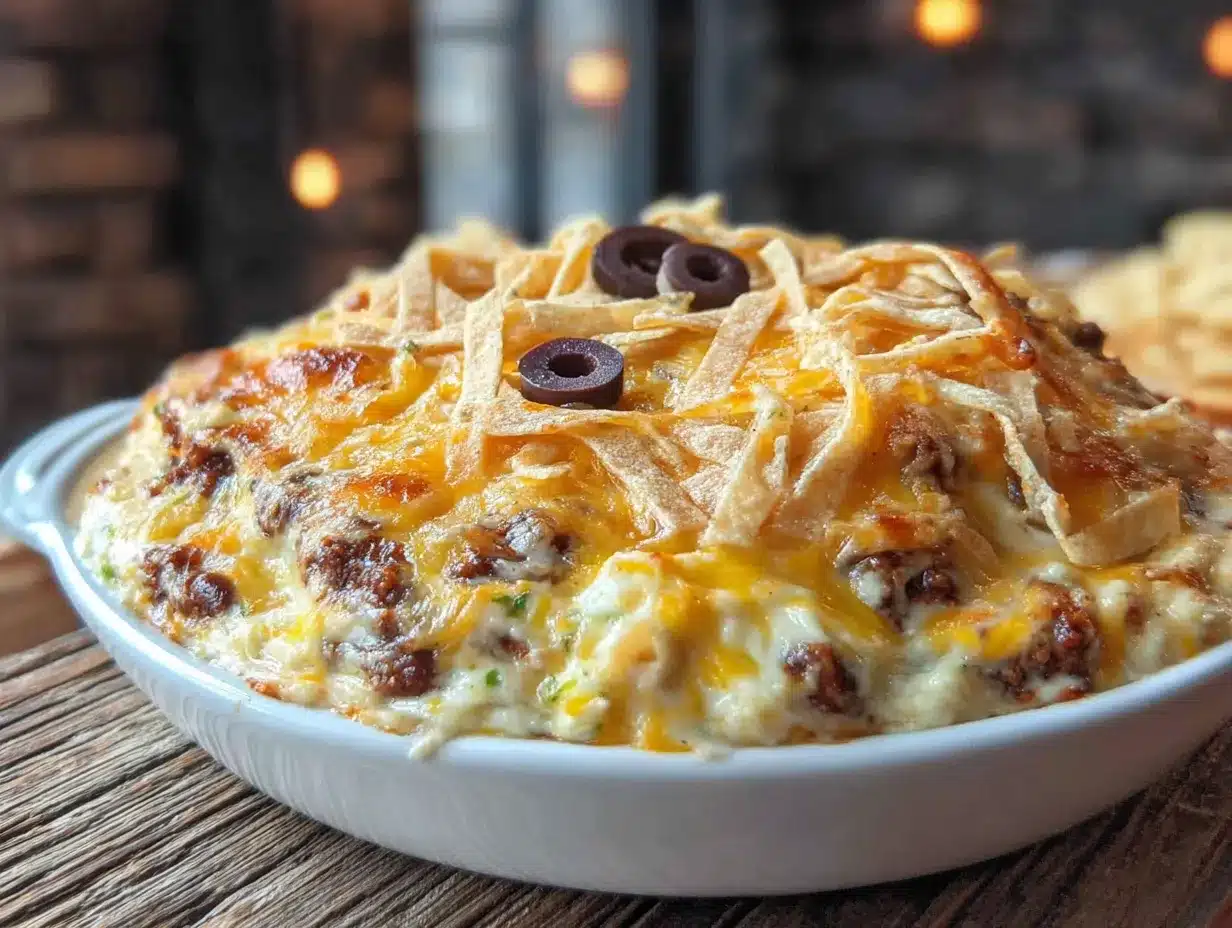
This entire process takes about fifteen minutes. I timed myself the last three times I made it just to be sure. Here is exactly how to do it:
- Preheat your oven to 350°F (175°C). While it is heating up, take your cream cheese out of the fridge and let it sit on the counter. This is the most important step. Cold cream cheese will not blend smoothly, and you will end up with lumps. Trust me on this one.
- In a large mixing bowl, combine the softened cream cheese, sour cream, and taco seasoning. Beat with a hand mixer on medium speed until the mixture is completely smooth and creamy. This usually takes about two minutes. Scrape down the sides of the bowl with a spatula halfway through. The mixture should look pale orange and smell incredibly good at this point.
- Add the refried black beans to the bowl. Mix on low speed until the beans are fully incorporated into the cream cheese mixture. Do not overmix here — you want the beans to be well distributed, but you do not want to beat all the air out of the dip. The texture should be thick but spreadable, kind of like a very chunky hummus.
- Fold in 3/4 cup of the shredded Mexican blend cheese. Use a spatula for this step. Gently fold the cheese into the dip until it is evenly distributed. The remaining 1/4 cup will go on top later. I like to save a little extra cheese for the edges of the mummy bandages too.
- Transfer the dip to your serving dish. Use the spatula to spread it into an even layer. If you are using a round dish, shape the dip into a slight mound in the center. This will give your mummy a nice rounded shape. Do not worry about making it perfect — the mummy design actually looks better when it is a little uneven.
- Bake the dip for 10 minutes. Place it in the preheated oven and let it cook until the cheese is melted and the edges are bubbly. You will know it is ready when you see small bubbles forming around the perimeter of the dish. The center should be hot all the way through.
- Remove from the oven and let it cool for 2 minutes. This is crucial. If you try to decorate the mummy while the dip is piping hot, the cheese will slide right off. I learned this the hard way and ended up with a very sad-looking mummy with no bandages.
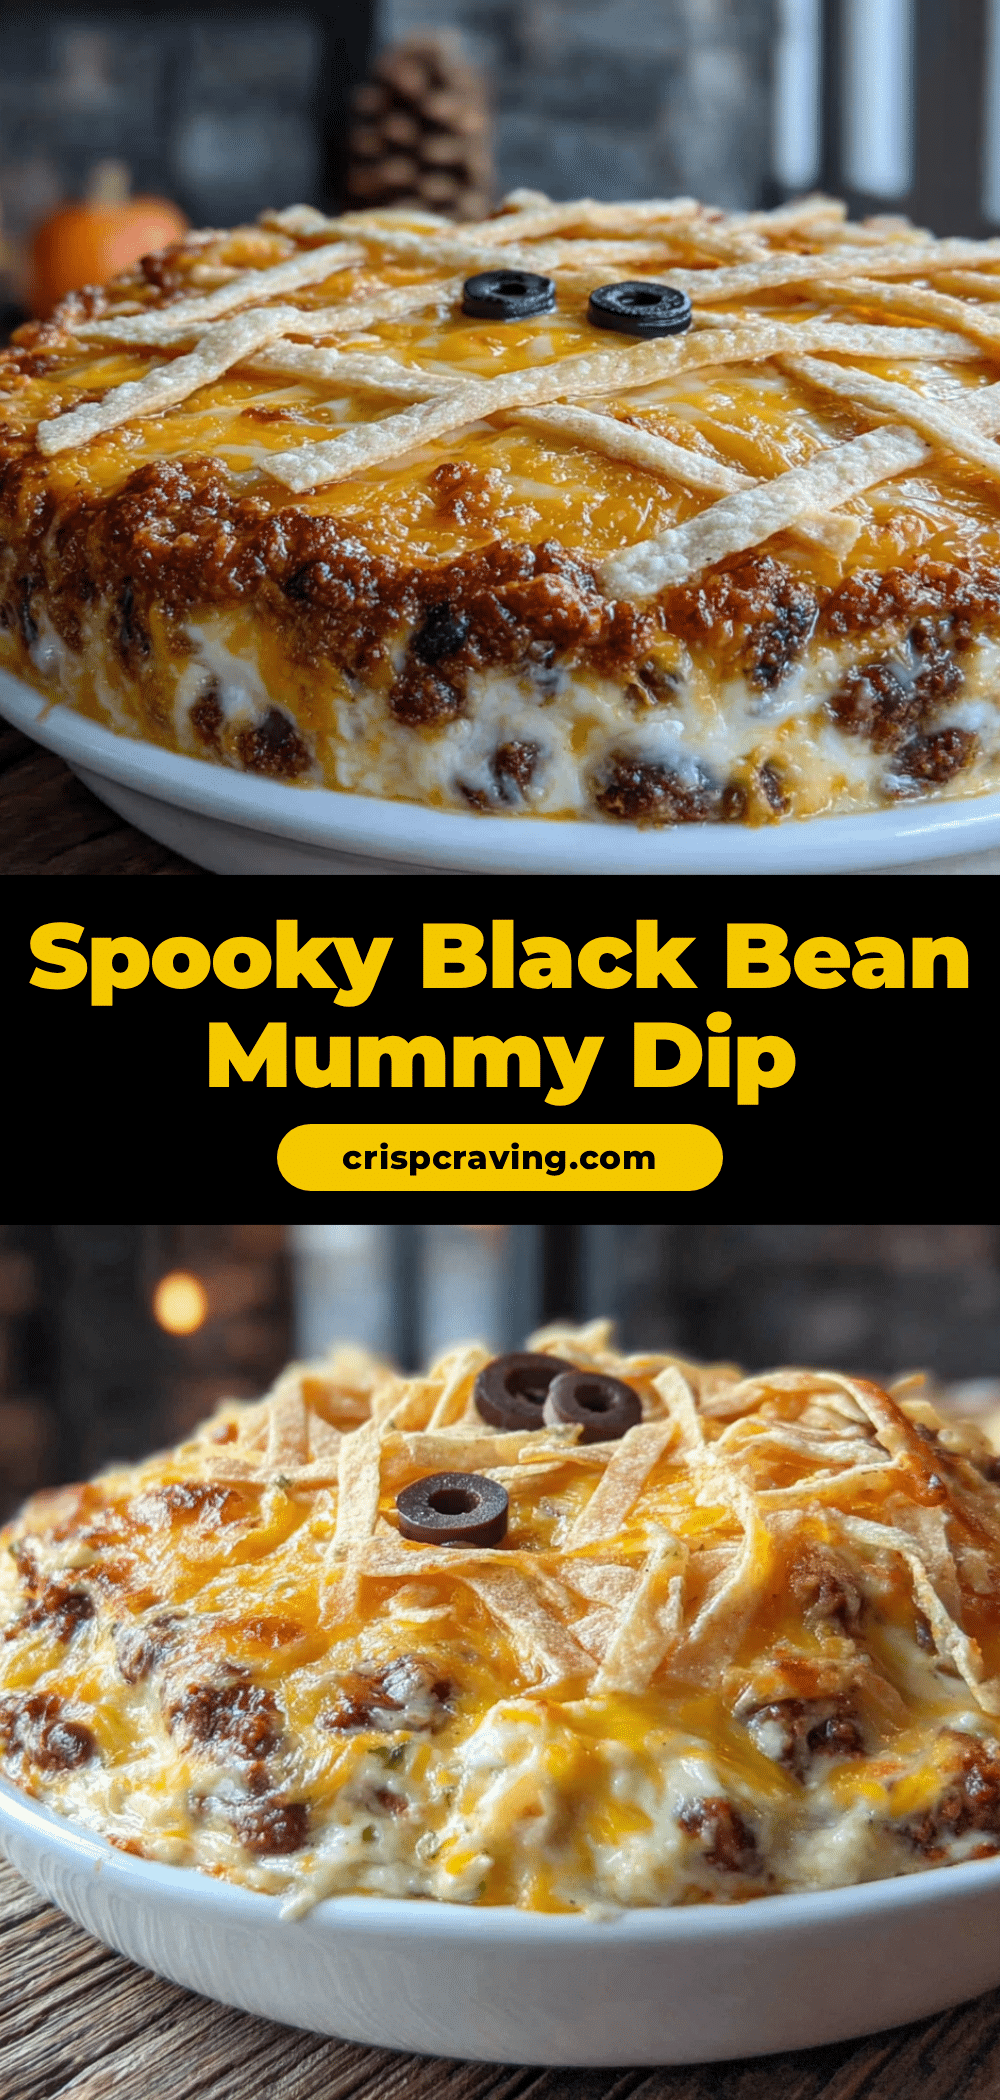
- Create the mummy design. Start by placing two sliced black olives in the upper third of the dip for the eyes. Space them about two inches apart. Then, using the remaining 1/4 cup of shredded Mexican blend cheese and the mozzarella, create horizontal strips across the dip to look like mummy bandages. Start from the top and work your way down, leaving the eyes exposed. The cheese strips do not need to be perfectly straight — slightly crooked bandages look more authentic.
- Optional: Add extra details. If you want to get creative, use thin carrot strips as additional bandage pieces. You can also place a small dollop of sour cream near the bottom of the mummy to look like a bandage that came loose. My niece added a tiny piece of cilantro on top of the mummy’s head, and it looked like a little sprig of hair.
- Serve immediately with tortilla chips. Place the chips around the edges of the dip dish, or let guests serve themselves. The dip stays warm for about 20 minutes, so if you are serving it at a party, try to time the baking so it comes out right when guests arrive.
Cooking Tips & Techniques
After making this dip more times than I care to count, I have picked up a few tricks that make the process smoother and the results better. Here are the ones that matter most:
Do not overbake the dip. Ten minutes is usually perfect, but ovens vary. You want the cheese melted and the dip hot, but you do not want it to dry out. If you see the edges starting to brown or pull away from the dish, it has been in too long. The dip should still look moist and creamy when you pull it out.
Let the cream cheese soften properly. I know I keep saying this, but it really matters. Cold cream cheese creates lumps that no amount of mixing will fix. If you forgot to take it out ahead of time, cut it into small cubes and let them sit for 10 minutes. It is not perfect, but it helps.
Use room temperature sour cream too. This is a tip I picked up from a baking blog years ago, and it applies here as well. Cold sour cream can cause the mixture to seize up, making it harder to spread. Leave it out with the cream cheese for the same amount of time.
Arrange the mummy bandages strategically. Start with a few long strips across the middle, then fill in the gaps with shorter pieces. The goal is to create a wrapped look without completely covering the dip. You want people to see the orange color peeking through in places. It makes the mummy look more three-dimensional.
Make the olive eyes stand out. Press them gently into the dip so they stay in place. If you just set them on top, they will slide off when someone reaches for a chip. A gentle push is all it takes.
Variations & Adaptations
One of the best things about this recipe is how adaptable it is. Here are some variations I have tried and loved:
Vegetarian Version: This recipe is already vegetarian, but if you want to make it vegan, use dairy-free cream cheese and sour cream, and swap the shredded cheese for a vegan alternative. The texture will be slightly different, but the flavor still works. I tested this with Kite Hill brand cream cheese, and it turned out surprisingly well.
Spicy Mummy Dip: Add 1/4 cup of diced jalapeños to the dip base, or mix in 1 teaspoon of cayenne pepper with the taco seasoning. You can also use hot taco seasoning instead of mild. My brother-in-law requests this version every time he comes over, and it definitely has more kick.
Chicken Taco Mummy Dip: Stir in 1 cup of shredded cooked chicken to the dip before baking. This turns it from a side dish into a full meal. I used leftover rotisserie chicken the first time I tried this, and it was fantastic. Just make sure the chicken is finely shredded so it mixes evenly.
Gluten-Free Option: This recipe is naturally gluten-free as long as you use a gluten-free taco seasoning packet. Some brands contain wheat flour as a filler, so check the label. The Siete brand makes a great gluten-free option that I have used many times.
Slow Cooker Method: If you are bringing this to a party, you can keep it warm in a slow cooker. Prepare the dip as directed, but instead of baking, transfer it to a small slow cooker and cook on low for 1-2 hours. Add the mummy decorations right before serving. The dip stays warm and creamy for hours this way.
Serving & Storage Suggestions
This dip is best served warm, right after it comes out of the oven. The cheese is perfectly melted, the mummy design is fresh, and everyone gets to see the full effect before it gets devoured. Here is how to make the most of it:
Serving Temperature: Serve the dip warm, but not piping hot. Let it cool for those two minutes I mentioned earlier. If it is too hot, the chips will break when you try to scoop. Warm dip also allows the flavors to meld together better.
Complementary Dishes: This dip pairs wonderfully with other Halloween-themed snacks. I like to serve it alongside a bowl of pumpkin-shaped tortilla chips (they sell them seasonally at most grocery stores) and a platter of veggie sticks for dipping. A side of guacamole or salsa also works well if you are feeding a crowd.
Beverage Pairings: For the adults, a cold Mexican beer or a margarita complements the taco flavors perfectly. For the kids, apple cider or a Halloween-themed punch is a fun choice. I personally love this dip with a glass of sparkling water with lime — it cuts through the richness nicely.
Storage Instructions: If you have leftovers (which honestly, is rare), store them in an airtight container in the refrigerator for up to three days. The dip will solidify as it cools, but it reheats beautifully. To reheat, microwave individual portions for 30-45 seconds, or reheat the whole dish in a 350°F oven for about 10 minutes.
Freezing: I do not recommend freezing this dip. The cream cheese and sour cream base can become grainy when thawed, and the texture just is not the same. Make it fresh for the best results.
Flavor Development: Interestingly, the flavors actually deepen overnight. If you make the dip a day ahead (without baking), the taco seasoning has more time to infuse into the cream cheese. Just assemble it, cover it, and refrigerate. Bake it right before serving. The mummy design should be added after baking, though.
Nutritional Information & Benefits
While this dip is definitely a treat, it does have some redeeming nutritional qualities. Here is a rough breakdown per serving (based on 8 servings):
- Calories: Approximately 280 per serving
- Protein: 10 grams
- Fat: 18 grams
- Carbohydrates: 20 grams
- Fiber: 5 grams
- Sugar: 3 grams
The black beans are the real star here from a health perspective. They are packed with fiber and plant-based protein, which helps keep you full longer. They also contain antioxidants and important minerals like iron and magnesium. The cream cheese and sour cream add calcium, though they also bring the fat content up. If you are watching your intake, you can use reduced-fat versions of both without sacrificing too much flavor.
This recipe is naturally gluten-free and vegetarian. It contains dairy, so it is not suitable for vegans or those with dairy allergies. If you are serving it at a party, I recommend putting a small label next to it listing the main ingredients, just in case someone has dietary restrictions.
Conclusion
This Easy Black Bean Mummy Taco Dip has become my go-to Halloween recipe for good reason. It is quick, it is fun, and it genuinely tastes amazing. Every time I make it, I think back to that afternoon with my niece, and I smile. She taught me that sometimes the simplest approach is the best one. You do not need to impress anyone with complicated techniques or obscure ingredients. You just need good food, a little creativity, and the willingness to have fun with it.
I hope you give this recipe a try. Customize it however you like — make it spicier, add chicken, or go wild with the mummy decorations. The beauty of this dip is that it is forgiving. Even if your mummy turns out a little lopsided or the bandages shift around, it will still taste incredible. And honestly, that is what matters most.
If you make this dip, I would love to hear about it. Drop a comment below and tell me how your mummy turned out. Did you add any creative touches? Did your kids help decorate it? Share your photos and stories — I read every single comment, and they genuinely make my day. Happy Halloween, and happy dipping!
Frequently Asked Questions
Can I make this dip ahead of time?
Yes, you can assemble the dip without baking it up to 24 hours in advance. Cover it tightly and store it in the refrigerator. When you are ready to serve, bake it as directed and add the mummy decorations after it comes out of the oven.
What if I cannot find refried black beans?
Regular refried pinto beans work just as well. The color will be slightly different, but the taste is nearly identical. You can also mash a can of whole black beans with a fork if that is all you have on hand.
How do I keep the mummy design from falling apart?
Let the dip cool for at least two minutes before decorating. Press the olive eyes gently into the dip, and arrange the cheese strips carefully. If the dip is too hot, everything will slide around. Patience is key here.
Can I use homemade taco seasoning instead of a packet?
Absolutely. Mix together 1 tablespoon chili powder, 1 teaspoon cumin, 1 teaspoon paprika, 1/2 teaspoon garlic powder, 1/2 teaspoon onion powder, 1/2 teaspoon oregano, and a pinch of salt. This makes about the same amount as one packet.
What other shapes can I make besides a mummy?
The same dip base works for any Halloween design. Try shaping it into a pumpkin by adding orange food coloring and using a pretzel stick for the stem. Or make a spider by arranging black olive halves for the body and chow mein noodles for the legs. The possibilities are endless.
Pin This Recipe!
Easy Black Bean Mummy Taco Dip
A quick and fun Halloween appetizer that combines creamy refried black beans, zesty taco seasoning, and melted cheese in a cute mummy design. Ready in just 15 minutes, this crowd-pleasing dip is perfect for parties and guaranteed to make everyone smile.
- Prep Time: 5 minutes
- Cook Time: 10 minutes
- Total Time: 15 minutes
- Yield: 8 servings 1x
- Category: Appetizer
- Cuisine: Mexican-American
Ingredients
- 1 can (15 oz) refried black beans (Rosarita brand preferred)
- 8 oz cream cheese, softened
- 1/2 cup sour cream (full fat preferred)
- 1 packet taco seasoning (McCormick mild variety recommended)
- 1 cup shredded Mexican blend cheese, divided (3/4 cup for dip, 1/4 cup for bandages)
- 1 can (2.25 oz) sliced black olives
- 1/4 cup shredded mozzarella cheese
- Optional: 1 small carrot, cut into thin strips
- Tortilla chips (restaurant-style for serving)
- Fresh cilantro for garnish (optional)
- Hot sauce on the side (optional)
Instructions
- Preheat oven to 350°F (175°C). Let cream cheese sit at room temperature to soften.
- In a large mixing bowl, combine softened cream cheese, sour cream, and taco seasoning. Beat with a hand mixer on medium speed until smooth and creamy, about 2 minutes. Scrape down sides of bowl halfway through.
- Add refried black beans to the bowl. Mix on low speed until fully incorporated. Do not overmix; texture should be thick but spreadable.
- Fold in 3/4 cup shredded Mexican blend cheese using a spatula until evenly distributed.
- Transfer dip to a serving dish (round dish preferred). Spread into an even layer, slightly mounded in the center.
- Bake for 10 minutes until cheese is melted and edges are bubbly.
- Remove from oven and let cool for 2 minutes before decorating.
- Place two sliced black olives in the upper third of the dip for eyes, spaced about 2 inches apart.
- Use remaining 1/4 cup Mexican blend cheese and mozzarella to create horizontal strips across the dip like mummy bandages, leaving eyes exposed. Strips can be slightly crooked for authenticity.
- Optional: Add thin carrot strips as extra bandage details or a small dollop of sour cream for a loose bandage look.
- Serve immediately with tortilla chips.
Notes
Do not skip softening the cream cheese to avoid lumps. Let dip cool for 2 minutes before decorating to prevent cheese from sliding off. For a make-ahead option, assemble without baking up to 24 hours in advance, refrigerate, then bake before serving. Add mummy decorations after baking. Not recommended for freezing.
Nutrition
- Serving Size: 1 serving (approxima
- Calories: 280
- Sugar: 3
- Sodium: 620
- Fat: 18
- Saturated Fat: 10
- Carbohydrates: 20
- Fiber: 5
- Protein: 10
Keywords: Halloween, taco dip, black bean, mummy, easy appetizer, party food, 15-minute recipe, kid-friendly



