Love this? Save it for later!
Share the inspiration with your friends
There used to be a tiny, dimly lit wine bar tucked behind a vintage bookstore in my old neighborhood that made the most incredible cheese boards I have ever eaten. When they closed—literally overnight, with a handwritten note taped to the door—I felt a genuine pang of loss. I mean, I actually mourned that place. After a dozen tries—some embarrassingly bad, some just okay—I finally cracked their code. It wasn’t about fancy imported cheeses or obscure cured meats. It was about balance, texture, and that little unexpected sweet surprise that made you go back for just one more bite.
So when Halloween rolled around last year and I was tasked with bringing something to a friend’s costume party, my mind immediately went back to that bar. But this time, I wanted a board that screamed October 31st. I wanted something spooky, fun, and undeniably delicious. And honestly, I wanted to use all that leftover candy corn I had stashed in the pantry. You know that feeling when you buy a bag of candy corn “for the kids” and then realize you have no kids and an entire bag of candy corn? Yeah, that was me.
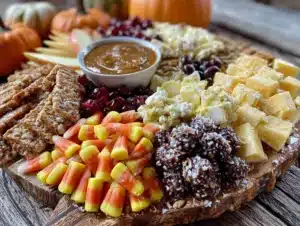
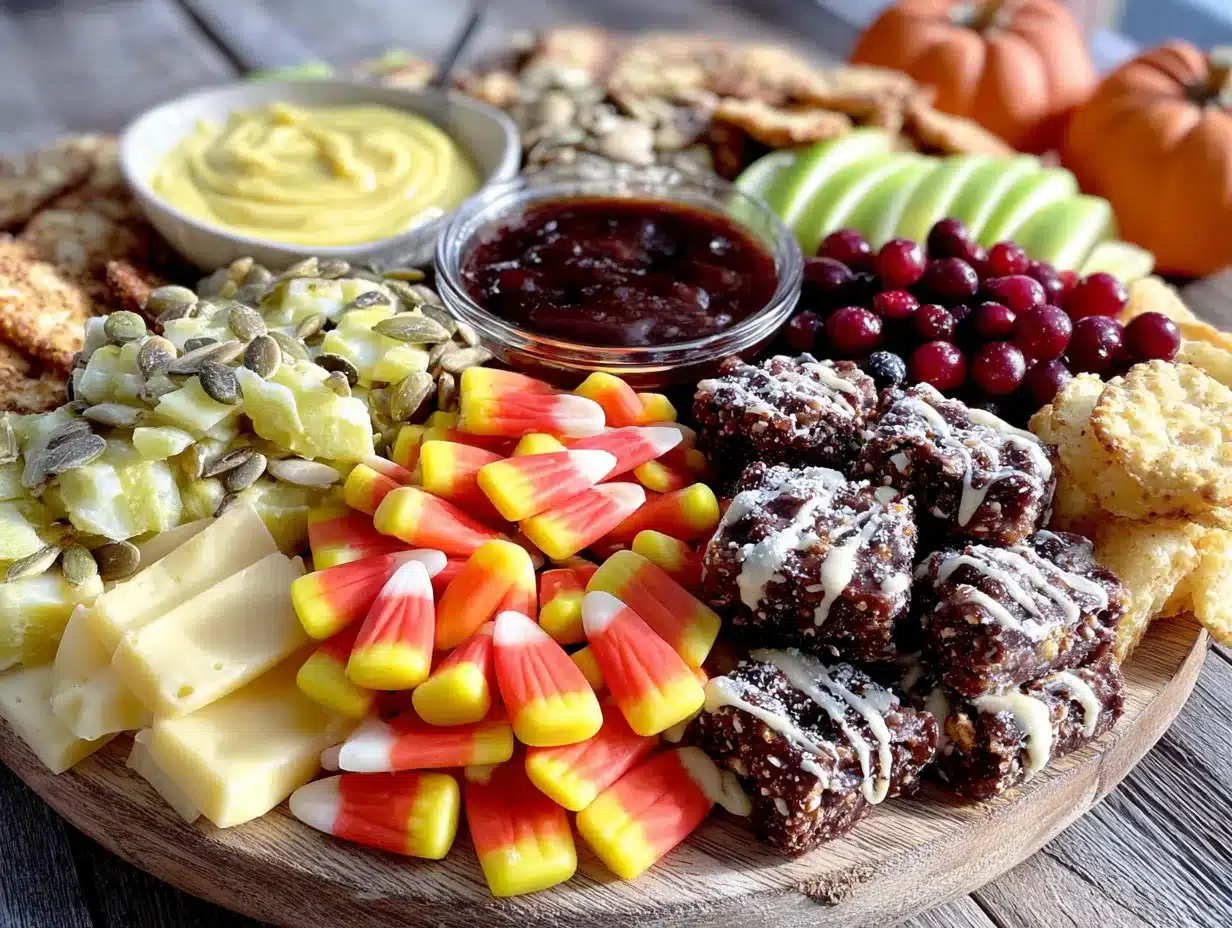
This Easy Halloween Charcuterie Board with Candy Corn is the result of that happy accident. It’s got the salty-sweet thing down to a science, with creamy cheeses, crunchy pretzels, juicy grapes, and those little striped triangles of pure nostalgia. It’s the kind of board that gets people talking—not just because it looks amazing (which it does), but because every single combination works. I brought it to that party, and honestly, it was the first thing to disappear. Even the people who claimed they “didn’t like candy corn” were caught sneaking pieces off the board.
Why You’ll Love This Recipe
Let me tell you why this board is going to be your new Halloween MVP. I’ve tested this combination at three different gatherings now—a spooky movie night, a pumpkin carving party, and a full-blown costume bash—and it crushed it every single time. Here’s what makes it special:
- Quick & Easy: Comes together in under 20 minutes, perfect for last-minute Halloween plans or when you’re busy wrestling with a costume zipper.
- Simple Ingredients: No fancy grocery trips needed; you likely already have most of these items in your kitchen right now.
- Perfect for Parties: Great for Halloween gatherings, trunk-or-treat events, or just a fun Friday night at home with the family.
- Crowd-Pleaser: Always gets rave reviews from kids and adults alike—even the picky eaters find something to love.
- Unbelievably Delicious: The texture and flavor combo is next-level comfort food. Salty pretzels, creamy brie, sharp cheddar, and that sweet, waxy candy corn create magic together.
What makes this recipe different from the rest? It’s the way I’ve balanced the sweet and savory elements. Most Halloween boards go overboard on the candy or lean too heavy on the cheese. This one hits that perfect middle ground. I’ve also added a trick with the presentation—arranging the candy corn in a way that mimics falling autumn leaves—that makes the whole board look like a piece of edible art. It’s not just another charcuterie board; it’s your best version of Halloween snacking.
This board is the kind that makes you close your eyes after the first bite. It’s comfort food reimagined—healthier, faster, but with the same soul-soothing satisfaction. Perfect for impressing guests without stress, or turning a simple night in into something memorable.
What Ingredients You Will Need
This recipe uses simple, wholesome ingredients to deliver bold flavor and satisfying texture without the fuss. You’ll be surprised how easily these everyday items come together to create something truly special. Here’s what you need:
For the Cheese Selection
- Brie cheese, 8 ounces (a soft, creamy wheel that spreads like a dream)
- Aged sharp cheddar, 6 ounces, sliced into thin triangles (I recommend Cabot or Tillamook for best texture)
- Goat cheese log, 4 ounces, sliced into rounds (adds a tangy contrast to the sweet elements)
- Gouda, 4 ounces, cubed (smoked gouda adds an extra layer of depth)
For the Meats
- Salami, 6 ounces, thinly sliced (genoa salami works beautifully)
- Prosciutto, 4 ounces, torn into ribbons (look for pre-sliced to save time)
- Pepperoni, 3 ounces (adds a nice spicy kick and fits the Halloween color scheme)
For the Sweet Elements
- Candy corn, 1 cup (the star of the show—use the classic Brach’s brand for that perfect texture)
- Chocolate-covered pretzels, 1 cup (the salty-sweet combo is unbeatable)
- Dark chocolate squares, 4 ounces (70% cacao works best to balance the sweetness)
- Dried cranberries, 1/2 cup (adds a chewy tartness that cuts through the richness)
For the Crunch and Fresh Elements
- Pretzel sticks, 1 cup (use gluten-free pretzels if needed)
- Green grapes, 1 cup, washed and dried (they look like little eyeballs—perfect for Halloween!)
- Apple slices, 1 apple, thinly sliced and tossed in lemon juice to prevent browning
- Pumpkin seeds, 1/4 cup, roasted and salted (adds a seasonal crunch)
For Garnish and Dippers
- Fresh rosemary sprigs, 2-3 sprigs (for decoration and a subtle herbal note)
- Dried figs, 4-5, halved (optional, but adds a lovely autumn touch)
- Honey, for drizzling over the brie (a game-changer, honestly)
- Crackers, assorted, about 20-30 (use a mix of water crackers and buttery rounds)
For ingredient selection, look for a brie that feels slightly soft to the touch—that means it’s perfectly ripe. If you can find it, a Halloween-themed cheese like a black wax cheddar adds a fun visual element. For the candy corn, I recommend Brach’s because their texture holds up better than store brands. If you’re feeling adventurous, try the autumn mix with the little pumpkins—they add variety in color and flavor.
Equipment Needed
You don’t need much to pull this board together, which is honestly my favorite part. Here’s what you’ll want on hand:
- A large wooden board or serving platter, at least 16 inches long (a slate board or marble slab works beautifully too—I found mine at a thrift store for eight bucks)
- Small bowls, 2-3, for holding loose items like candy corn and pumpkin seeds (ramekins work perfectly)
- Cheese knives, at least 2 (one for soft cheese, one for hard cheese—keeps things from getting messy)
- Small spreaders, for the brie and goat cheese
- Parchment paper, optional, for easy cleanup (I always use it because I hate scrubbing boards)
- Toothpicks or small skewers, for easy grabbing (cocktail picks with Halloween themes are fun)
- A sharp knife and cutting board, for prepping apples and cheese
If you don’t have a large board, don’t stress. A baking sheet lined with parchment paper works just as well. I’ve used a clean cutting board in a pinch, and it looked great. The key is having enough surface area to spread everything out so it doesn’t look cramped. For budget-friendly options, check dollar stores for small bowls and platters—you’d be surprised what you can find.
Preparation Method
Alright, let’s build this board. Trust me, it’s easier than you think. I’ve broken it down into simple steps so you can follow along without any stress. Take your time and enjoy the process—this is the fun part.
- Start with your board or platter. If you’re using a wooden board, give it a quick wipe with a damp cloth. Place your small bowls on the board first—these will hold the candy corn, chocolate-covered pretzels, and pumpkin seeds. Position them in a triangle pattern to create visual balance. I like to put the candy corn bowl right in the center because it’s the star of the show.
- Add your cheeses next. Place the brie wheel on the left side of the board, slightly off-center. Score the top of the brie in a crisscross pattern and drizzle with a little honey—this looks gorgeous and tastes incredible. Arrange the sharp cheddar triangles in a fan pattern near the brie. Place the goat cheese rounds on the right side, and scatter the gouda cubes in between. Remember to leave space between each cheese so guests can easily cut pieces without bumping into each other.
- Layer in the meats. Fold the salami slices into quarters and arrange them in a small cluster near the center. Drape the prosciutto ribbons in loose piles around the salami—don’t be too neat about it, the casual look is more inviting. Scatter the pepperoni slices near the edge of the board. The red tones of the meats will contrast beautifully with the yellow and orange of the candy corn later.
- Add the fruit and fresh elements. Place the green grapes in small clusters around the board—they look like little alien eyeballs and add a pop of green that breaks up all the warm colors. Arrange the apple slices in a fan pattern near the top of the board. Tuck the dried figs in between the cheese clusters. These fresh elements add moisture and brightness that balances the richness of the cheese and meats.
- Fill in with the crunchy items. Pour the chocolate-covered pretzels into one of your small bowls. Arrange the pretzel sticks in little bundles around the board—you can even stack a few like tiny logs for a rustic look. Place the crackers in small stacks or fan them out in groups. Don’t scatter them everywhere; keep them clustered so guests know where to find them.
- Add the candy corn last. This is the moment everyone’s been waiting for. Pour the candy corn into its designated bowl, but also scatter a handful directly on the board around the edges. This creates that “falling leaves” effect and makes the board look intentionally festive. Sprinkle a few pieces near the cheese and meat clusters for surprise pops of sweetness. The orange, yellow, and white stripes will tie the whole board together visually.
- Finish with garnishes. Tuck the fresh rosemary sprigs between the cheese and meat clusters—they add a beautiful green contrast and a subtle herbal aroma. Drizzle a little extra honey over the brie if you’re feeling fancy. Add a few extra chocolate squares in empty spaces. Step back and look at your board from a distance—fill in any bare spots with extra crackers or pretzels until it looks full and abundant.
- Serve immediately or refrigerate. If you’re making this ahead, cover the board loosely with plastic wrap and refrigerate for up to 2 hours. Take it out 20 minutes before serving to let the cheeses come to room temperature—this is crucial for flavor. The candy corn can go on right before serving so it stays fresh and doesn’t get sticky from the cold.
A quick note: if your brie is too firm to spread, let it sit at room temperature for 30 minutes before assembling. I learned this the hard way when I tried to slice a cold brie and it crumbled everywhere. Also, if you’re using a slate board, put a layer of parchment paper underneath to prevent any metallic taste from transferring to the cheese.
Cooking Tips & Techniques
Over the years, I’ve made enough charcuterie boards to fill a small museum. Here are the tips I’ve picked up along the way—some from success, some from spectacular failure.
Balance is everything. The key to a great board is variety in texture and flavor. You want something creamy (brie), something sharp (cheddar), something tangy (goat cheese), something salty (prosciutto), something sweet (candy corn), and something crunchy (pretzels). If you’re missing one of these elements, the board feels flat. I once made a board without any crunchy element and it was a total flop—everyone kept asking for crackers.
Don’t overcrowd the board. I know it’s tempting to pile everything on, but leaving a little negative space actually makes the board look more intentional and inviting. Aim for about 80% coverage. If things are touching too much, the cheese can get sticky and the crackers can get soft. Give each component a little breathing room.
Use the candy corn strategically. Candy corn is the star here, but it’s also very sweet. Don’t overwhelm the board with it. I like to use about one cup total, with half in a bowl and half scattered. This way, guests can grab a piece when they want a sweet bite, but it’s not overpowering everything else. The chocolate-covered pretzels provide a more balanced sweet-salty option for people who aren’t candy corn fans.
Temperature matters more than you think. Cheese should be served at room temperature for the best flavor and texture. Take your cheese out of the fridge 30-45 minutes before you start assembling. Cold cheese tastes like nothing. I learned this when I served a board at a party and everyone politely picked at the crackers while the cheese sat untouched. Warm it up, and suddenly it’s the first thing to disappear.
Prep everything before you start arranging. Slice all your cheese, wash your grapes, arrange your meats. Having everything ready to go makes the assembly process smooth and stress-free. Nothing kills the vibe like stopping mid-board to wash grapes. Trust me on this one.
Variations & Adaptations
One of the best things about this board is how easy it is to customize. Here are some variations I’ve tried and loved:
Dietary Adaptations: For a vegetarian version, skip the meats and double up on the cheese and fruit. Add some marinated artichoke hearts and roasted red peppers for savory depth. For a gluten-free option, use gluten-free pretzels and crackers—they’re widely available now and taste just as good. For a dairy-free version, use vegan cheese alternatives (I like Miyoko’s brand for their creamy texture) and skip the brie. The candy corn is naturally dairy-free, so that’s a win.
Seasonal Swaps: In the fall, add roasted pumpkin seeds and dried apple chips. In the winter, swap the grapes for pomegranate seeds and add some candied ginger. In the spring, use fresh strawberries and edible flowers. The candy corn is the constant, but the rest of the board can change with the seasons. I made a summer version with watermelon cubes and it was a hit.
Flavor Twists: Add a spicy element like jalapeño cheddar or chili-infused honey for a kick. Try a smoky gouda instead of regular gouda for deeper flavor. Add some dark chocolate-covered almonds for extra crunch. For a truly indulgent version, add a small bowl of caramel dip for the apple slices. One time I added bacon jam to the board and it was gone in five minutes.
Method Variations: If you’re short on time, buy pre-sliced cheese and pre-washed fruit. If you’re feeling fancy, make your own candied nuts to add to the board. For a kid-friendly version, skip the strong cheeses and use mild cheddar and colby jack. Add some gummy worms for a spooky touch—kids love them.
Serving & Storage Suggestions
This board is best served at room temperature, so take it out of the fridge about 20 minutes before your guests arrive. The cheese will be softer, the meats will be more flavorful, and the candy corn will have that perfect chewy texture. If you’re serving outdoors on a cool fall evening, keep the board in a sheltered spot away from direct wind.
For presentation, I like to place the board in the center of the table with small plates and napkins on either side. Provide toothpicks or small skewers for easy grabbing—it keeps hands clean and makes the whole experience more elegant. You can also add small tags or flags labeling the different cheeses if you’re feeling extra fancy.
As for complementary dishes, this board pairs beautifully with a crisp apple cider or a pumpkin spice latte. For an adult gathering, a dry riesling or a light pinot noir works wonderfully. If you’re serving this as part of a larger spread, it goes great with a bowl of chili or a simple butternut squash soup.
Storage: If you have leftovers (which is rare, but possible), separate the components and store them individually. Cheese should be wrapped in wax paper and stored in the fridge. Meats should be in an airtight container. The candy corn can go back in its original bag. Don’t store the board assembled—the crackers will get soft and the fruit will make everything soggy. Leftovers will keep for 3-4 days in the fridge.
Reheating: There’s no real reheating needed here, but if your cheese has gotten cold, let it sit at room temperature for 15 minutes before serving again. The candy corn will firm up in the fridge but will soften again at room temperature. If the apple slices have browned, just slice a fresh apple—it’s worth it.
One thing I love about this board is that the flavors actually develop over time. The cheese and fruit mingle together, and the candy corn absorbs a little of the savory flavors. If you’re making this for a party, assembling it an hour ahead actually improves the taste.
Nutritional Information & Benefits
While this is definitely an indulgent treat, there are some surprising nutritional benefits hidden in this board. Here’s a rough breakdown per serving (about 1/8 of the board):
- Calories: Approximately 380-420 calories per serving
- Protein: 15-18 grams (from cheese and meats)
- Fat: 22-26 grams (mostly from cheese, which provides healthy fats)
- Carbohydrates: 30-35 grams (from fruit, crackers, and candy corn)
- Fiber: 3-4 grams (from apples, grapes, and pumpkin seeds)
- Sugar: 18-22 grams (natural from fruit plus added from candy corn)
The cheese provides calcium and protein, which helps keep you full. The pumpkin seeds are a great source of magnesium and zinc. The grapes and apples offer antioxidants and vitamin C. Even the candy corn, while certainly a treat, is made from simple ingredients like sugar, corn syrup, and honey—it’s not as processed as some other candies.
For dietary considerations, this board can be made gluten-free with simple swaps. It’s naturally low-carb if you skip the crackers and pretzels. The main allergens are dairy (cheese) and gluten (crackers and pretzels). If you’re serving a crowd with allergies, label the components clearly or set out a small separate board with safe options.
My personal take? This board is about balance. It’s a treat for Halloween, not an everyday meal. Enjoy it, share it with people you love, and don’t stress about the numbers. Life is too short to count calories at a costume party.
Conclusion
This Easy Halloween Charcuterie Board with Candy Corn is more than just a snack—it’s a conversation starter, a centerpiece, and a little piece of edible nostalgia all rolled into one. It brings people together around the table, gets them talking about their favorite candies, and creates those little moments of shared joy that make Halloween so special.
I love this recipe because it proves that entertaining doesn’t have to be complicated. With just a few simple ingredients and a little creativity, you can create something that looks like it took hours of effort. And honestly, the look on people’s faces when they see that candy corn scattered across the board is priceless. It’s unexpected, it’s fun, and it’s absolutely delicious.
So go ahead and make this board for your next Halloween gathering. Customize it with your favorite cheeses, swap in your go-to snacks, and make it your own. I’d love to hear how it turns out—drop a comment below and tell me what variations you tried. Did you add gummy worms? Swap the brie for camembert? Use pumpkin-shaped crackers? I want to know all about it. Share this recipe with your fellow Halloween lovers, and let’s make this the spookiest, tastiest season yet.
Happy haunting, and happy snacking!
Frequently Asked Questions
Can I make this board ahead of time?
Yes! You can assemble the board up to 2 hours ahead and keep it covered in the fridge. Just add the candy corn and any delicate garnishes right before serving so they stay fresh and crisp.
What if I don’t like candy corn?
No problem! Swap it out for candy pumpkins, chocolate spiders, or even gummy worms. The board is flexible—use whatever Halloween candy you love most.
How much do I need per person for a party?
For a party where this is one of several snacks, plan on about 2-3 ounces of cheese and 2 ounces of meat per person. For a main event board, double those amounts. The candy corn goes a long way—a cup is plenty for 8-10 people.
Can I use pre-shredded cheese?
You can, but I don’t recommend it. Pre-shredded cheese has anti-caking agents that affect the texture and flavor. Slicing your own cheese takes just a few minutes and tastes so much better.
How do I keep the apple slices from turning brown?
Toss them in a little lemon juice or lime juice right after slicing. You can also use a citrus-based fruit protector like Fruit-Fresh. They’ll stay bright and fresh for hours.
Pin This Recipe!
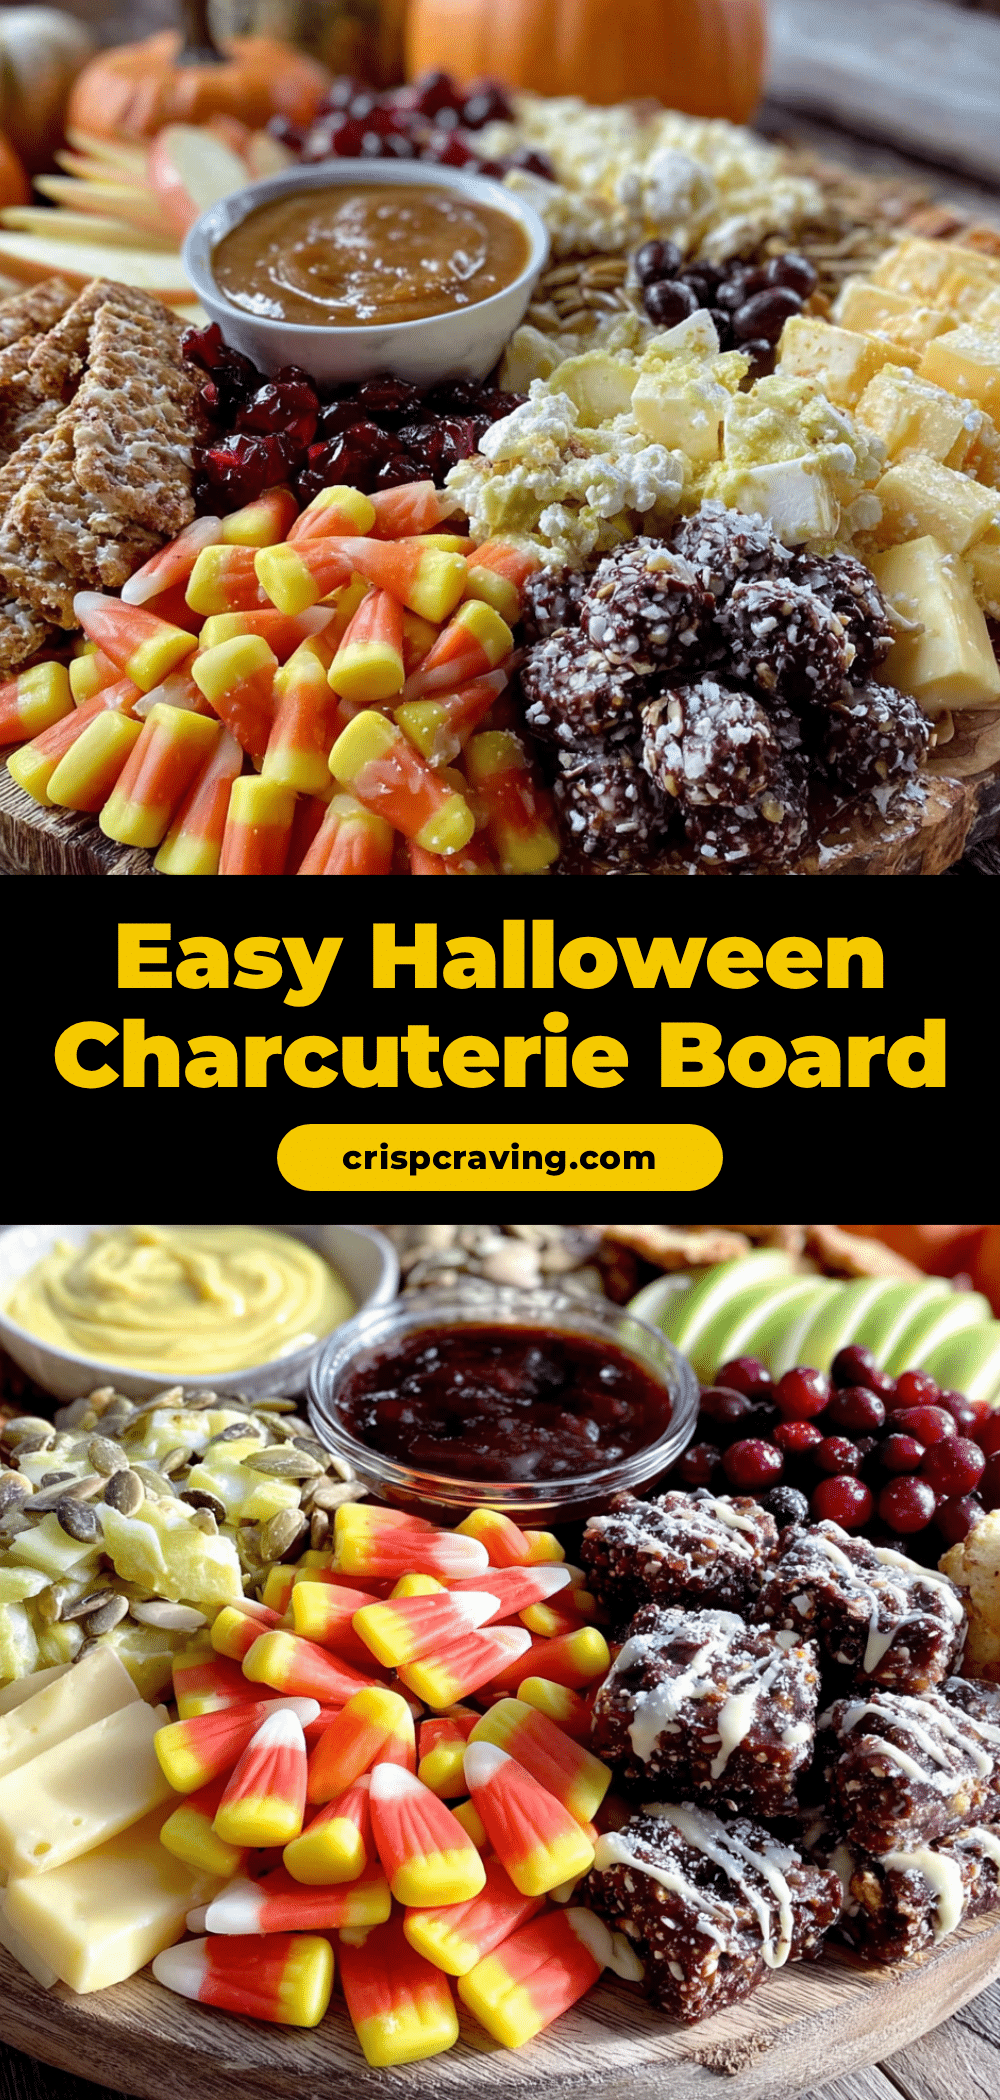
Easy Halloween Charcuterie Board with Candy Corn
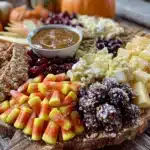
A fun and festive Halloween charcuterie board featuring creamy cheeses, salty meats, crunchy pretzels, and sweet candy corn. Perfect for parties and guaranteed to be a crowd-pleaser.
- Prep Time: 20 minutes
- Cook Time: 0 minutes
- Total Time: 20 minutes
- Yield: 8 servings
- Category: Appetizer
- Cuisine: American
Ingredients
- Brie cheese, 8 ounces
- Aged sharp cheddar, 6 ounces, sliced into thin triangles
- Goat cheese log, 4 ounces, sliced into rounds
- Gouda, 4 ounces, cubed
- Salami, 6 ounces, thinly sliced
- Prosciutto, 4 ounces, torn into ribbons
- Pepperoni, 3 ounces
- Candy corn, 1 cup
- Chocolate-covered pretzels, 1 cup
- Dark chocolate squares, 4 ounces
- Dried cranberries, 1/2 cup
- Pretzel sticks, 1 cup
- Green grapes, 1 cup, washed and dried
- Apple slices, 1 apple, thinly sliced and tossed in lemon juice
- Pumpkin seeds, 1/4 cup, roasted and salted
- Fresh rosemary sprigs, 2-3 sprigs
- Dried figs, 4-5, halved
- Honey, for drizzling
- Assorted crackers, about 20-30
Instructions
- Start with your board or platter. Place small bowls in a triangle pattern to hold candy corn, chocolate-covered pretzels, and pumpkin seeds.
- Add cheeses: place brie on the left, score the top and drizzle with honey. Arrange cheddar triangles in a fan pattern near brie. Place goat cheese rounds on the right, scatter gouda cubes in between.
- Layer in meats: fold salami into quarters and cluster near center. Drape prosciutto ribbons in loose piles. Scatter pepperoni near the edge.
- Add fruit and fresh elements: place green grapes in small clusters, arrange apple slices in a fan pattern, tuck dried figs between cheese clusters.
- Fill in with crunchy items: pour chocolate-covered pretzels into a bowl, arrange pretzel sticks in bundles, place crackers in small stacks.
- Add candy corn last: pour into its bowl and scatter a handful directly on the board around the edges for a ‘falling leaves’ effect.
- Finish with garnishes: tuck rosemary sprigs between cheese and meat clusters, drizzle extra honey over brie, add extra chocolate squares in empty spaces.
- Serve immediately or refrigerate for up to 2 hours. Remove from fridge 20 minutes before serving to let cheeses come to room temperature.
Notes
For best flavor, let cheese sit at room temperature for 30-45 minutes before assembling. If brie is too firm, let it warm up. Use a slate board with parchment paper underneath to avoid metallic taste. Prep all ingredients before arranging for smooth assembly.
Nutrition
- Serving Size: 1/8 of board
- Calories: 380420
- Sugar: 1822
- Sodium: 600800
- Fat: 2226
- Saturated Fat: 1215
- Carbohydrates: 3035
- Fiber: 34
- Protein: 1518
Keywords: Halloween charcuterie board, candy corn, easy appetizer, party snack, cheese board, Halloween recipe