Love this? Save it for later!
Share the inspiration with your friends
This was supposed to be a proper chocolate mousse. I had the good chocolate out, the expensive vanilla, and I was feeling pretty smug about making something fancy for a grown-up dinner party. Then my four-year-old decided to “help” by dumping an entire box of instant chocolate pudding mix into my carefully measured saucepan. I stood there, staring at the powdery mess, while he proudly announced he’d made it “better.” The dinner party was in three hours, and I was already running late. Honestly, I wanted to cry.
But you know what? I didn’t have time to start over. So I just kept going, adding the milk, whisking like crazy, and pretending this was the plan all along. When I tasted it, I was shocked. It was actually… good. Creamy, rich, and way easier than my original plan. I threw it into some clear cups, crushed up some chocolate cookies I had in the pantry, and shoved them in the fridge. I figured I’d deal with the disaster later.
The kids found them first. They went absolutely nuts. “Dirt cups! Dirt cups!” they screamed, grabbing them before I could even explain. That’s when the idea hit me—gummy worms. A quick trip to the corner store later, and we had a full-blown Halloween dessert that was way more fun than any fancy mousse ever could be. The grown-ups ate them too, by the way. Maybe you’ve been there, trying to make something impressive and ending up with something way better by accident. That’s exactly how these easy Halloween dirt cups were born, and I’ve never looked back.
Why You’ll Love This Recipe
Let me tell you, after years of testing and tweaking, these dirt cups have become my go-to for every Halloween party, classroom celebration, and last-minute dessert emergency. They are the kind of recipe that makes you look like a rockstar with almost zero effort.
- Quick & Easy: Comes together in under 15 minutes of active time. Seriously, you can make these while the kids are still arguing over costumes. The hardest part is crushing the cookies, and even that is fun.
- Simple Ingredients: No fancy grocery trips needed. You probably have chocolate pudding mix, milk, and some sort of chocolate cookie in your pantry right now. The gummy worms are the only “special” ingredient, and you can find them anywhere.
- Perfect for Halloween: These are the ultimate Halloween dessert for kids. They look like dirt, they have worms in them, and they taste amazing. What more could a kid want? They are also great for classroom parties, potlucks, or just a fun weekend treat.
- Crowd-Pleaser: I have never, and I mean never, seen a kid turn down a dirt cup. Adults love them too, mostly because they bring back childhood memories. They disappear faster than candy at a parade.
- Unbelievably Delicious: The combination of creamy chocolate pudding, crunchy cookie “dirt,” and chewy gummy worms is pure magic. It is comfort food at its finest, and it somehow tastes even better the next day.
What makes this recipe different from the rest? It is the texture. I spent a long time figuring out the perfect pudding-to-cookie ratio so it isn’t too soggy or too dry. Plus, I use a little trick with the pudding that makes it extra creamy without being too thick. This isn’t just another version—it is the one that gets requested every single year.
This recipe isnt just good—it is the kind that makes you close your eyes after the first bite. It is Halloween fun reimagined—faster, easier, but with the same soul-soothing satisfaction. Perfect for impressing little guests without stress, or turning a simple evening into something memorable.
What Ingredients You Will Need
This recipe uses simple, everyday ingredients to deliver big flavor and fun. You likely have most of these in your kitchen already, which makes it perfect for those “I need a dessert now” moments.
- For the Chocolate Pudding:
- 1 (3.9 oz) box instant chocolate pudding mix (I prefer Jell-O brand for the smoothest texture, but store brands work fine)
- 2 cups cold whole milk (adds richness; 2% works too, but avoid skim for the creamiest result)
- 1/2 cup heavy cream, whipped to soft peaks (optional but highly recommended for a lighter, mousse-like texture)
- For the Dirt:
- 1 (14.3 oz) package chocolate sandwich cookies, like Oreos (you need about 20-24 cookies, regular not double-stuff)
- 2 tablespoons unsalted butter, melted (helps the crumbs clump slightly, giving a more realistic “dirt” texture)
- For the Decoration:
- 1 cup gummy worms (I like the sour ones for extra tang, but any kind works. Trolli or Black Forest are my go-to brands)
- Optional: 1/2 cup chocolate pudding for “mud” layer on top
- Optional: Green-tinted shredded coconut for “grass” or small candy pumpkins for a festive touch
Let me talk a little about the cookies. You want the regular chocolate sandwich cookies, not the double-stuff. The cream filling is part of what makes the “dirt” so good, and with double-stuff, you get too much cream and not enough cookie crunch. Trust me on this one. I learned the hard way when I made a batch that was more like frosting than dirt.
For the gummy worms, get the ones that are a bit thicker. The thin ones tend to get lost in the pudding, and you want them to poke out of the “dirt” for that classic Halloween look. If you are making these for a school party, check the labels for any allergen warnings. Some gummy worms contain wheat or gelatin, so there are vegan-friendly options available if needed.
If you want to make this gluten-free, use gluten-free chocolate sandwich cookies and a gluten-free pudding mix. Most instant pudding mixes are gluten-free, but always double-check the label. For a dairy-free version, swap the milk for almond milk or oat milk, and use a dairy-free butter substitute. The texture will be slightly different, but still delicious.
Equipment Needed
You don’t need anything fancy for this recipe, which is part of the beauty. Here is what you will need:
- Mixing bowls: One medium bowl for the pudding, one small bowl for the whipped cream (if using), and one for crushing the cookies.
- Whisk or electric mixer: A whisk works fine for the pudding, but an electric mixer makes the whipped cream much easier. I have used both, and honestly, a hand whisk gives you a better arm workout.
- Food processor or rolling pin: For crushing the cookies into fine crumbs. A food processor is faster, but a rolling pin and a zip-top bag work just as well. My kids love smashing the cookies with a rolling pin—it is their favorite part.
- Clear cups or glasses: 6 to 8 small cups, depending on size. I use 6-ounce clear plastic cups for parties, but small mason jars or even juice glasses work great. The clear cups are key for showing off the layers.
- Spatula: For scraping every last bit of pudding into the cups. Waste not, want not.
- Measuring cups and spoons: Standard set for accurate measurements.
If you don’t have a food processor, don’t worry. Just put the cookies in a sturdy zip-top bag, seal it, and let the kids go to town with a rolling pin. It is a great way to get them involved, and it burns off some of that pre-Halloween energy. I have even used a heavy-bottomed skillet in a pinch.
Preparation Method
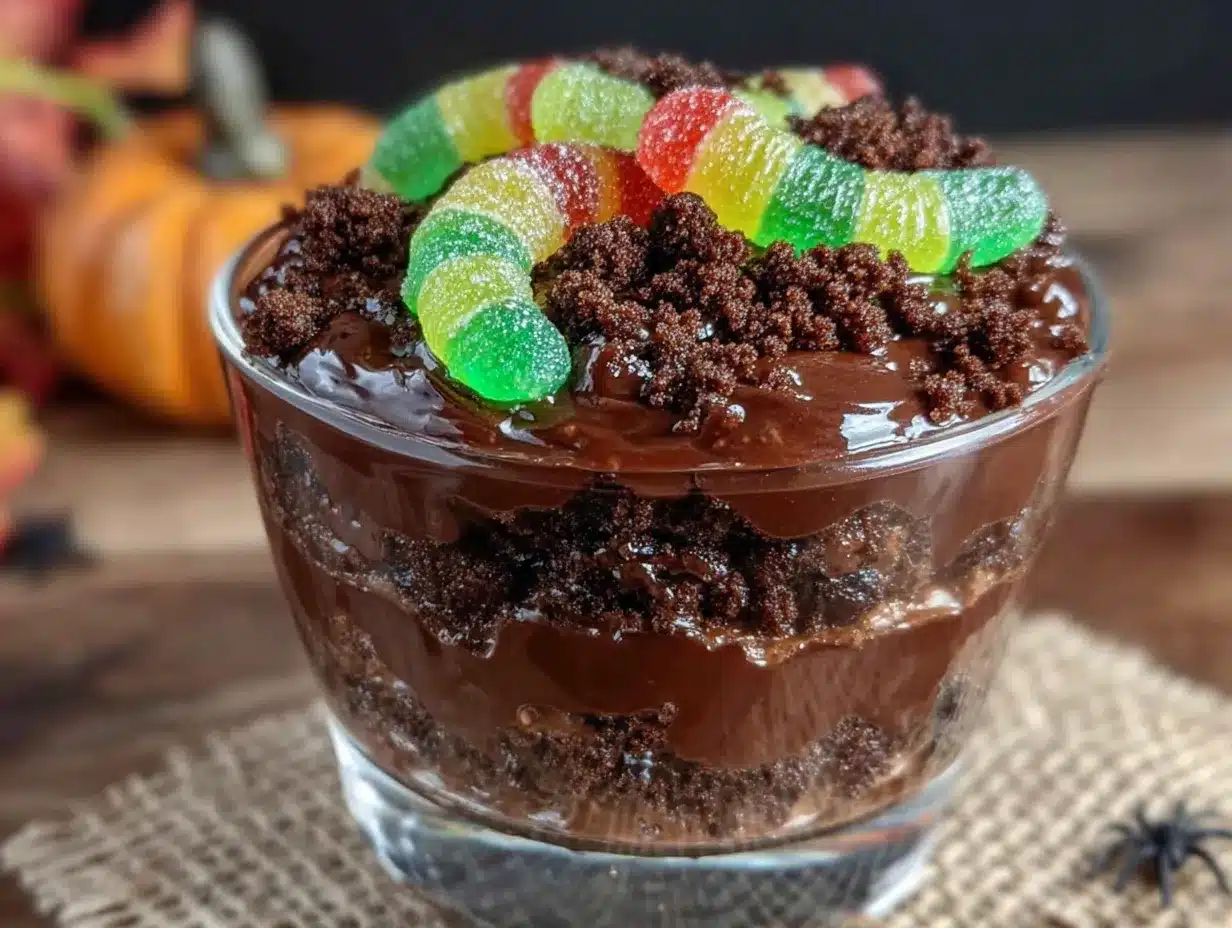
Follow these steps, and you will have perfect dirt cups every time. Take your time, and don’t rush the chilling step—it makes all the difference.
-
Make the chocolate pudding: In a medium mixing bowl, whisk together the instant chocolate pudding mix and 2 cups of cold whole milk. Whisk vigorously for about 2 minutes, until the mixture starts to thicken. You will feel it getting heavier as you whisk. If you are using an electric mixer, use low speed to avoid splashing. Let it sit for 5 minutes to set completely. The pudding should be thick and creamy, not runny.
-
Whip the cream (optional but recommended): In a separate small bowl, pour 1/2 cup of heavy cream. Using a hand mixer or a whisk, whip the cream until soft peaks form. This means when you lift the whisk, the cream holds a soft shape that flops over slightly. Fold the whipped cream gently into the set pudding using a spatula. This step makes the pudding lighter and fluffier, almost like a mousse. It is not strictly necessary, but it takes the dessert from good to amazing.
-
Crush the cookies: Place 20 to 24 chocolate sandwich cookies into a food processor. Pulse until you have fine crumbs. If using a zip-top bag, put the cookies in the bag, seal it, and crush them with a rolling pin until no large pieces remain. You want a mix of fine crumbs and slightly larger bits for texture. Pour the melted butter over the crumbs and stir with a fork until evenly moistened. This helps the “dirt” hold together slightly, making it look more realistic.
-
Layer the cups: Take your clear cups and start with a layer of cookie crumbs at the bottom. Use about 2 tablespoons per cup, pressing down gently with the back of a spoon. This creates a solid base. Next, spoon or pipe the chocolate pudding mixture on top, filling the cup about halfway. Use a piping bag or a zip-top bag with the corner snipped off for cleaner layers, but a spoon works fine too. Tap the cup gently on the counter to settle the pudding.
-
Add the worms: Before adding the final layer, poke a few gummy worms into the pudding so they stick out slightly. You can also place them on the side of the cup so they are visible through the clear plastic. This is the fun part, and kids love helping with this step. Use 2 to 3 worms per cup, reserving some for the top.
-
Top with dirt: Add another layer of cookie crumbs on top, covering the pudding completely. You want a thick, even layer that looks like real dirt. Use about 3 tablespoons per cup. Press down lightly so it sticks to the pudding. If you want a “mud” layer, add a thin layer of extra pudding on top of the crumbs, then sprinkle a few more crumbs over that.
-
Decorate and chill: Place one or two more gummy worms on top, poking them out of the “dirt” as if they are crawling out. You can also add a few extra crumbs around them for a messy, realistic look. Cover the cups with plastic wrap or lids and refrigerate for at least 2 hours, or overnight. This step is crucial—the cookies need time to soften slightly, and the pudding needs to fully set. The longer they chill, the better they taste.
Pro tip: If you are short on time, you can serve them immediately, but the texture won’t be as good. The cookies will be crunchy rather than soft, and the pudding will be looser. For the best results, plan ahead and make them the night before.
Cooking Tips & Techniques
I have made these dirt cups more times than I can count, and I have learned a few things along the way. Here are my best tips to ensure success every time.
Don’t overmix the pudding. When you whisk the pudding mix with milk, stop as soon as it starts to thicken. Overmixing can make it gummy or cause it to break down later. I learned this the hard way when I made a batch that turned into soup after an hour in the fridge. Just whisk until combined and let it set on its own.
Use cold milk straight from the fridge. Warm milk will not set the pudding properly. I keep a carton of milk in the fridge just for baking and dessert making. If you forget to chill it, put the bowl in the freezer for 10 minutes before you start.
Crush the cookies unevenly. You don’t want all fine powder. A mix of fine crumbs and small chunks gives the “dirt” a more realistic texture. Think of real garden soil—it has different sized particles. I pulse my food processor in short bursts and check the texture frequently.
Chill the cups thoroughly. This is the most important step. The pudding needs time to set, and the cookies need time to soften. If you serve them too early, the layers will slide around and the texture will be off. I always make these at least 4 hours ahead, and preferably the day before.
Watch out for soggy worms. If you add the gummy worms too early, they will absorb moisture from the pudding and become soft and slimy. To avoid this, add the worms just before serving, or poke them only into the top layer of “dirt” rather than deep into the pudding. I learned this when I made a batch for a party and the worms looked like sad, deflated noodles.
Double the recipe for a crowd. These disappear fast, so if you are serving a large group, make at least two batches. I usually triple it for Halloween parties, and there are never leftovers.
Variations & Adaptations
One of the best things about this recipe is how easy it is to adapt. Here are some variations I have tried and loved.
Pumpkin Dirt Cups: For a fall twist, swap the chocolate pudding for pumpkin pudding. Use one box of instant vanilla pudding mix, 1 cup of cold milk, and 1 cup of canned pumpkin puree. Add 1 teaspoon of pumpkin pie spice and mix well. The pumpkin flavor pairs beautifully with the chocolate cookie “dirt.”
Vegan Dirt Cups: Use a vegan chocolate pudding mix (most instant mixes are accidentally vegan, but check the label) and swap the milk for unsweetened almond or oat milk. Use vegan butter for the crumbs and vegan gummy worms (many brands are gelatin-free). The texture is slightly different, but still delicious.
Peanut Butter Dirt Cups: Add 1/4 cup of creamy peanut butter to the pudding mixture before folding in the whipped cream. The peanut butter adds a rich, nutty flavor that kids and adults both love. Just make sure no one has a peanut allergy before serving.
Low-Sugar Version: Use sugar-free instant pudding mix and unsweetened almond milk. For the “dirt,” use sugar-free chocolate cookies or grind up some low-sugar chocolate cereal. The gummy worms will still have sugar, but you can find sugar-free ones at some specialty stores.
Spider Dirt Cups: Instead of gummy worms, use gummy spiders or add candy eyeballs to the top for a different Halloween look. You can also use black licorice strings for spider legs. My kids loved this version, though it was a bit more work.
Serving & Storage Suggestions
These dirt cups are best served cold, straight from the fridge. The contrast between the cool, creamy pudding and the slightly softened cookie “dirt” is what makes them so addictive. I like to serve them in clear cups so everyone can see the layers, and I always add a few extra gummy worms on top for dramatic effect.
For a Halloween party, arrange the cups on a platter with some fake spider webs and plastic spiders around them. You can also label them with little signs that say “Worm Farm” or “Dirt Pudding.” Kids get a kick out of that. If you are serving them at a classroom party, keep them covered until just before serving to prevent any little fingers from poking the worms.
These pair wonderfully with other Halloween treats. I often serve them alongside my spider web cupcakes for a full dessert spread. The cupcakes are easy to make and look fantastic together with the dirt cups. For a savory option, try serving them after a bowl of creamy pumpkin soup—the warm soup and cold dessert are a perfect match.
Storage: Leftover dirt cups can be stored in the refrigerator, covered, for up to 3 days. The texture will change slightly as the cookies continue to soften, but many people prefer them this way. I actually think they taste better on day two. Do not freeze them, as the pudding will become watery and the texture will be ruined.
Reheating: These are meant to be served cold, so no reheating is needed. If you have leftover cookie crumbs, store them in an airtight container at room temperature for up to a week. They are great for sprinkling on ice cream or yogurt.
Nutritional Information & Benefits
Let’s be honest—these are a treat, not a health food. But here is the estimated nutritional breakdown per serving (based on 6 servings, using whole milk and heavy cream):
| Nutrient | Amount Per Serving |
|---|---|
| Calories | 420 |
| Total Fat | 22g |
| Saturated Fat | 12g |
| Cholesterol | 45mg |
| Sodium | 380mg |
| Total Carbohydrates | 54g |
| Dietary Fiber | 2g |
| Sugars | 38g |
| Protein | 6g |
While these aren’t exactly a health food, they do have some redeeming qualities. The milk and cream provide calcium and protein, and the cocoa in the cookies and pudding contains antioxidants. Plus, the gummy worms are a good source of… well, fun. Everything in moderation, right?
For a slightly healthier version, you can use low-fat milk and skip the whipped cream. This reduces the calories and fat significantly. You can also use sugar-free pudding and cookies to cut down on sugar. But honestly, for a Halloween treat, I say go all out. It is one day a year, and the memories you make with your kids are worth every calorie.
FAQs
Can I make these dirt cups ahead of time?
Absolutely! In fact, they are better when made ahead. Prepare them the night before and refrigerate for at least 4 hours, or up to 24 hours. The flavors meld together beautifully, and the texture becomes perfectly creamy. Just add the gummy worms on top right before serving to keep them from getting soggy.
Can I use homemade chocolate pudding instead of instant?
Yes, you can. Homemade pudding will work, but it needs to be completely cooled and thickened before layering. Instant pudding is much easier and gives a consistent result every time. If you use homemade, make sure it is very thick, or the layers will run together.
What can I use instead of Oreos for the dirt?
Any chocolate sandwich cookie will work. Store brands are usually cheaper and taste just as good. You can also use chocolate wafer cookies, graham crackers, or even chocolate cereal like Cocoa Pebbles. Just crush them into fine crumbs. For a gluten-free option, use gluten-free chocolate sandwich cookies.
How do I keep the gummy worms from getting soggy?
Add the gummy worms just before serving, or only poke them into the top layer of cookie crumbs rather than deep into the pudding. If you are making them ahead, place the worms on the surface and press them lightly into the crumbs. This keeps them from absorbing too much moisture.
Can I freeze dirt cups?
I do not recommend freezing them. The pudding will separate and become watery when thawed, and the cookies will turn into a mushy mess. These are best enjoyed fresh or within a few days of making them. If you have leftovers, just keep them in the fridge.
Conclusion
These easy Halloween dirt cups are proof that sometimes the best recipes come from the biggest disasters. What started as a ruined batch of chocolate mousse turned into a family tradition that my kids look forward to every single year. They are simple, fun, and absolutely delicious—everything a Halloween dessert should be.
I hope you give these a try, whether for a Halloween party, a classroom celebration, or just a fun weekend treat with your kids. Don’t be afraid to make them your own—add extra worms, swap the cookies, or try a different pudding flavor. The beauty of this recipe is that it is nearly impossible to mess up. And if you do mess up? Well, maybe you have just discovered a new favorite dessert.
I would love to hear how yours turn out! Leave a comment below and let me know if your kids loved them as much as mine do. Did you add any fun decorations? Did you try a different flavor? Share your photos on social media and tag me—I can’t wait to see your creepy, crawly creations. Happy Halloween, and happy cooking!
Pin This Recipe!
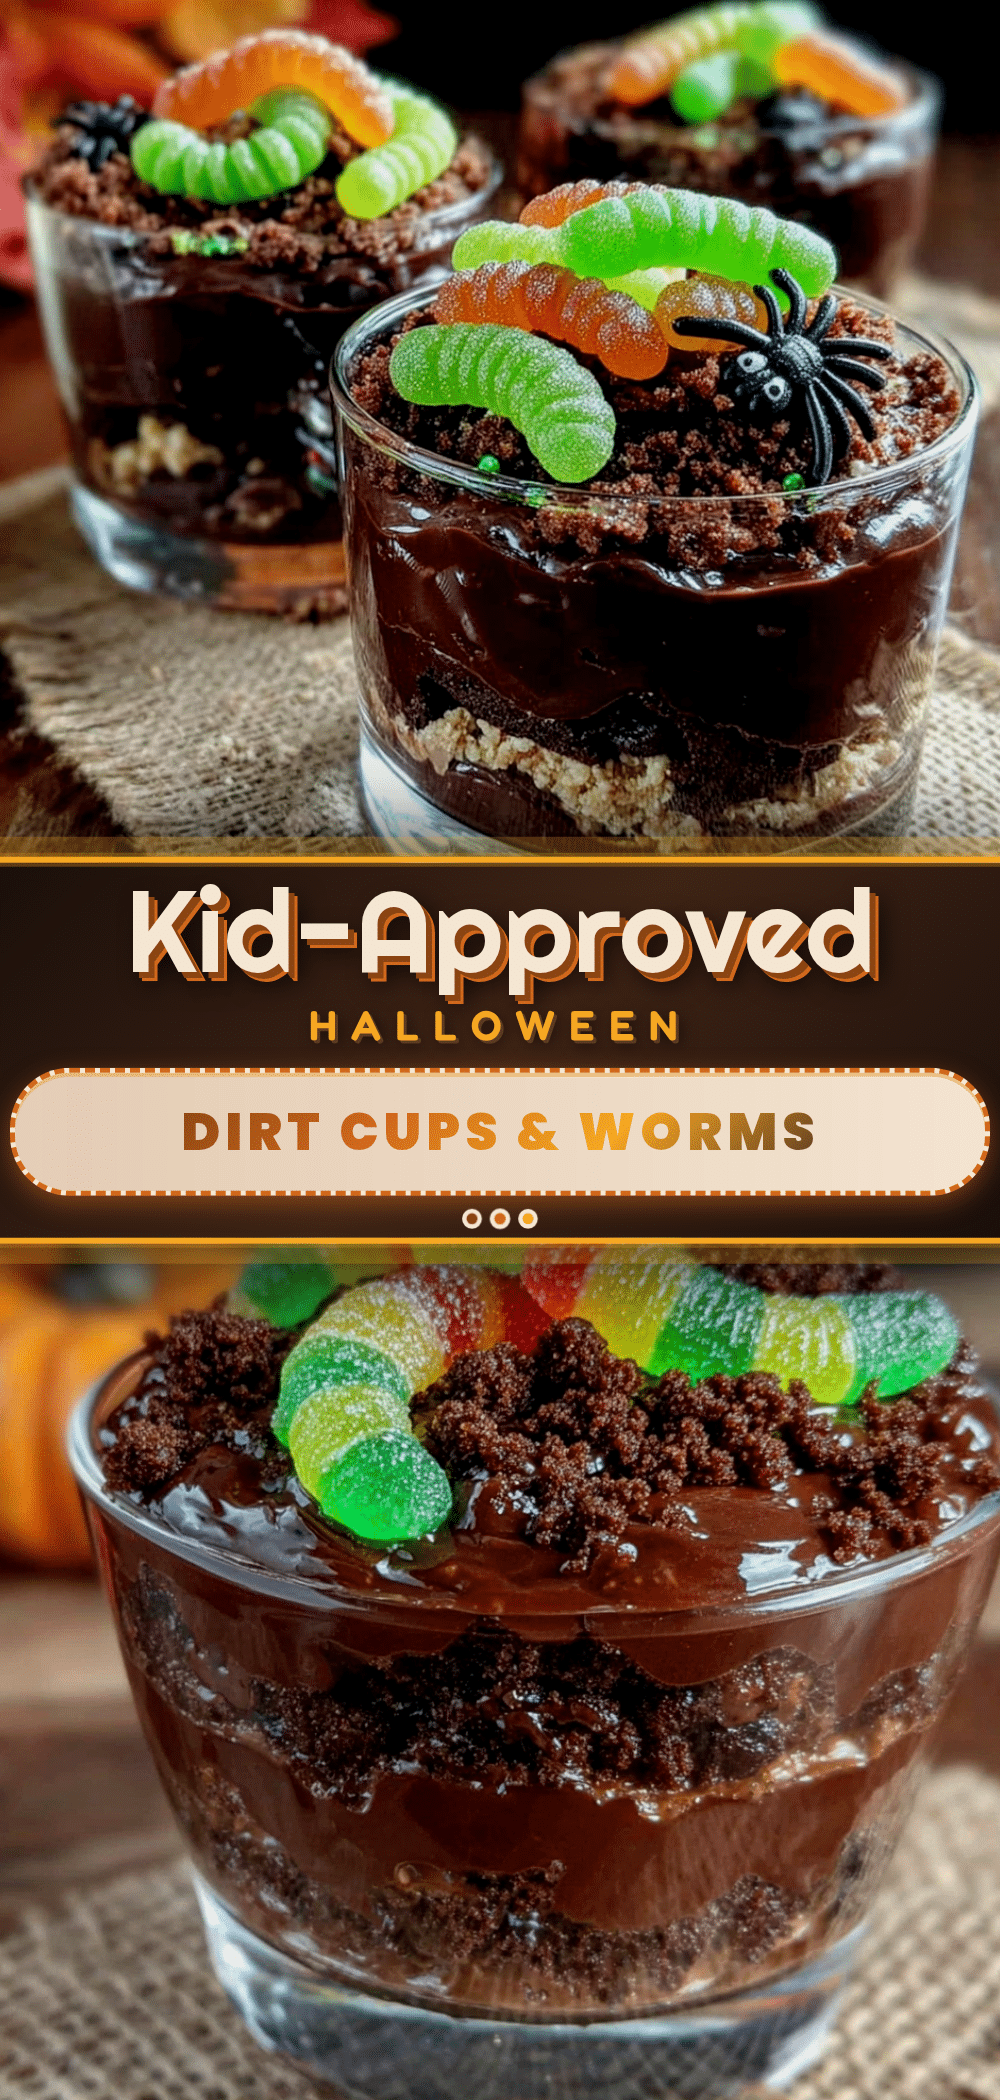
Easy Halloween Dirt Cups: Kid-Approved Gummy Worm Dessert
These easy Halloween dirt cups are a fun, kid-approved dessert featuring creamy chocolate pudding, crunchy cookie ‘dirt,’ and gummy worms. Perfect for Halloween parties, classroom celebrations, or a last-minute treat, they come together in under 15 minutes of active time.
- Prep Time: 15 minutes
- Cook Time: 0 minutes
- Total Time: 2 hours 15 minutes (includes chilling time)
- Yield: 6 servings 1x
- Category: Dessert
- Cuisine: American
Ingredients
- 1 (3.9 oz) box instant chocolate pudding mix (e.g., Jell-O brand)
- 2 cups cold whole milk
- 1/2 cup heavy cream (optional, for a lighter texture)
- 1 (14.3 oz) package chocolate sandwich cookies (e.g., Oreos, about 20–24 cookies, regular not double-stuff)
- 2 tablespoons unsalted butter, melted
- 1 cup gummy worms (e.g., Trolli or Black Forest)
- Optional: 1/2 cup chocolate pudding for ‘mud’ layer on top
- Optional: Green-tinted shredded coconut for ‘grass’ or small candy pumpkins for decoration
Instructions
- Make the chocolate pudding: In a medium mixing bowl, whisk together the instant chocolate pudding mix and 2 cups of cold whole milk. Whisk vigorously for about 2 minutes until the mixture starts to thicken. Let it sit for 5 minutes to set completely.
- Whip the cream (optional but recommended): In a separate small bowl, whip 1/2 cup of heavy cream until soft peaks form. Fold the whipped cream gently into the set pudding using a spatula.
- Crush the cookies: Place 20 to 24 chocolate sandwich cookies into a food processor and pulse until you have fine crumbs. Alternatively, place cookies in a zip-top bag and crush with a rolling pin. Pour the melted butter over the crumbs and stir with a fork until evenly moistened.
- Layer the cups: Take clear cups and start with a layer of cookie crumbs at the bottom (about 2 tablespoons per cup), pressing down gently. Spoon or pipe the chocolate pudding mixture on top, filling the cup about halfway.
- Add the worms: Before adding the final layer, poke a few gummy worms into the pudding so they stick out slightly. Use 2 to 3 worms per cup, reserving some for the top.
- Top with dirt: Add another layer of cookie crumbs on top (about 3 tablespoons per cup), covering the pudding completely. Press down lightly so it sticks. Optionally, add a thin layer of extra pudding on top of the crumbs, then sprinkle a few more crumbs over that.
- Decorate and chill: Place one or two more gummy worms on top, poking them out of the ‘dirt.’ Cover the cups with plastic wrap or lids and refrigerate for at least 2 hours, or overnight.
Notes
For best results, chill the cups for at least 4 hours or overnight. Add gummy worms just before serving to prevent them from getting soggy. Use regular chocolate sandwich cookies, not double-stuff, for the right texture. For a gluten-free version, use gluten-free cookies and pudding mix. For dairy-free, use almond or oat milk and dairy-free butter.
Nutrition
- Serving Size: 1 dirt cup
- Calories: 420
- Sugar: 38
- Sodium: 380
- Fat: 22
- Saturated Fat: 12
- Carbohydrates: 54
- Fiber: 2
- Protein: 6
Keywords: Halloween dirt cups, gummy worm dessert, chocolate pudding cups, easy Halloween dessert, kid-friendly dessert, no-bake dessert