Love this? Save it for later!
Share the inspiration with your friends
I was standing in the spice aisle at our local grocery store last October when a woman bumped her cart into mine. She apologized, laughed, and then pointed at the jar of dried elderberries in my hand. “Making syrup?” she asked. I nodded, and she smiled knowingly. “It’s the only thing that got my family through last December.” That brief, unexpected connection in aisle seven stopped me cold for a second. Because suddenly I was seven years old at my Aunt Rose’s kitchen table, watching her pour a deep purple syrup into a tiny spoon and telling me to open wide. She said it tasted like “sour candy that loves you back.” She wasn’t wrong.
My Aunt Rose wasn’t a fancy cook or a wellness guru. She was just a woman who kept a small garden and believed in fixing things with food before calling the doctor. She passed away a few years back, and I honestly didn’t think about her elderberry syrup for a long time. Then I had kids of my own, and the first winter my toddler brought home every bug from preschool, I found myself desperate. I tried store-bought syrups, but they were either too sweet or suspiciously thin. Nothing tasted like hers. Nothing felt like hers.
So I started experimenting. I called my mom, dug through old recipe cards, and even found a crumpled piece of paper with Aunt Rose’s handwriting in a box of Christmas decorations. The first batch I made was too watery. The second was too bitter. But the third? That third batch filled my kitchen with that same warm, spicy, slightly medicinal smell I remembered from her house. I almost cried, honestly. Maybe you’ve been there—trying to recreate a taste from your past and feeling like you’re reaching for something just out of your grasp.
This homemade elderberry syrup for cold season is that recipe. It’s the one I keep making every fall, the one my kids actually ask for, and the one I share with every tired parent I meet in the spice aisle. It’s not just a syrup. It’s a little jar of protection, memory, and love.
Why You’ll Love This Recipe
Let me tell you why this particular recipe has become my cold-season superhero. After testing about six different versions—some from blogs, some from cookbooks, one from a well-meaning neighbor who shall remain nameless—I landed on this exact combination. It’s the one that actually works, tastes good, and doesn’t require a chemistry degree to make.
- Quick & Easy: You can have a batch simmering on your stove in under 10 minutes of active prep. The total time is about an hour, but most of that is hands-off simmering while you fold laundry or chase a toddler.
- Simple Ingredients: Dried elderberries, raw honey, and a few kitchen spices. That’s it. No weird supplements, no expensive powders, no trip to a specialty health store.
- Perfect for Cold Season: I start making this in September and keep a jar in the fridge until March. It’s become our family’s first line of defense against the crud that circulates through schools and offices.
- Crowd-Pleaser: My kids call it “purple syrup” and ask for it on pancakes. My husband adds it to his tea. Even my skeptical mother-in-law admitted it “doesn’t taste like medicine.”
- Unbelievably Delicious: The combination of tart elderberries, warm cinnamon, and spicy ginger balanced by raw honey creates this complex, cozy flavor that somehow feels both comforting and healing.
What makes this recipe different from the dozens I tried? It’s the honey-to-water ratio and the simmering technique. Most recipes rush the process, but I found that a gentle, extended simmer extracts more of the beneficial compounds from the elderberries without destroying them. Plus, I add the honey off-heat to preserve its natural enzymes. This isn’t just another version—it’s the version that made me stop looking.
Honestly, this recipe is the kind that makes you close your eyes after the first spoonful. It’s comfort food reimagined as preventative medicine—healthier, faster, but with the same soul-soothing satisfaction. Perfect for impressing your immune system without stressing yourself out.
What Ingredients You Will Need
This recipe uses simple, wholesome ingredients to deliver bold immune support and cozy flavor without the fuss. Most of these are pantry staples or easily found online or at health food stores. Here’s what you need and why each one matters.
- 1 cup dried elderberries (also called Sambucus nigra): Look for organic, whole dried berries from a reputable brand like Starwest Botanicals or Mountain Rose Herbs. Avoid syrups or extracts—we want the whole berries here. They should smell slightly sweet and earthy, not musty.
- 4 cups filtered water: Tap water works in a pinch, but filtered water gives a cleaner flavor. Chlorine can interfere with the taste, and honestly, we’re trying to be healthy here.
- 1 cinnamon stick: Use a true Ceylon cinnamon stick if you can find it (it’s milder and sweeter), but Cassia works fine too. The cinnamon adds warmth and has its own anti-inflammatory properties.
- 1 tablespoon fresh ginger, sliced: Don’t use dried ginger here. Fresh ginger adds a gentle heat that cuts through the tartness of the berries. I leave the skin on because it’s easier and the nutrients are in the skin anyway.
- 1 teaspoon whole cloves: These little guys are potent, so don’t overdo it. They add a deep, almost floral spice note. You can leave them out if you’re not a clove fan, but I think they’re essential.
- 1 cup raw, unfiltered honey: This is non-negotiable. Raw honey contains natural enzymes and antibacterial properties that are destroyed by heat. Do not use pasteurized honey or agave. Local honey is ideal for seasonal allergy benefits too. I use a honey from a farm near my town.
- Optional: 1 tablespoon dried rose hips: I add these for extra vitamin C and a slightly floral undertone. They’re totally optional but lovely if you have them.
- Optional: 1 teaspoon turmeric powder: Adds an earthy note and anti-inflammatory boost. Be warned—it will stain everything yellow, so be careful with your pots and countertops.
For substitutions, you can replace honey with maple syrup for a vegan version, though the texture will be thinner and the flavor less complex. If you’re avoiding sugar altogether, this isn’t the recipe for you—the honey is both the sweetener and the preservative. You can also swap the cinnamon stick for 1 teaspoon of ground cinnamon, but the flavor won’t be as smooth.
Equipment Needed
You don’t need a fancy kitchen setup for this. I’ve made this recipe in a tiny apartment kitchen and in a full farmhouse kitchen, and it works the same both places. Here’s what you’ll need:
- Medium to large pot: A 4-quart pot works perfectly. I use my trusty enameled cast iron Dutch oven because it distributes heat evenly, but any stainless steel or non-reactive pot will do. Avoid aluminum, which can react with the acidic berries.
- Fine-mesh strainer or cheesecloth: You need something to strain out the berries and spices. I prefer a fine-mesh strainer lined with a double layer of cheesecloth for the clearest syrup. I’ve also used a nut milk bag in a pinch, which works great.
- Glass jars or bottles: Mason jars are my go-to. You’ll need about two 16-ounce jars or one 32-ounce jar. Make sure they’re sterilized—I run them through the dishwasher or boil them for 10 minutes.
- Wooden spoon or silicone spatula: For stirring. Nothing fancy.
- Funnel: A small funnel makes pouring into jars much less messy. Trust me on this one.
If you don’t have cheesecloth, a clean cotton kitchen towel or a coffee filter works as a substitute. I’ve even used a clean t-shirt in a camping situation—don’t judge me, it worked. For the jars, any glass container with a tight-fitting lid is fine. Just avoid plastic, as the hot syrup can leach chemicals.
Preparation Method
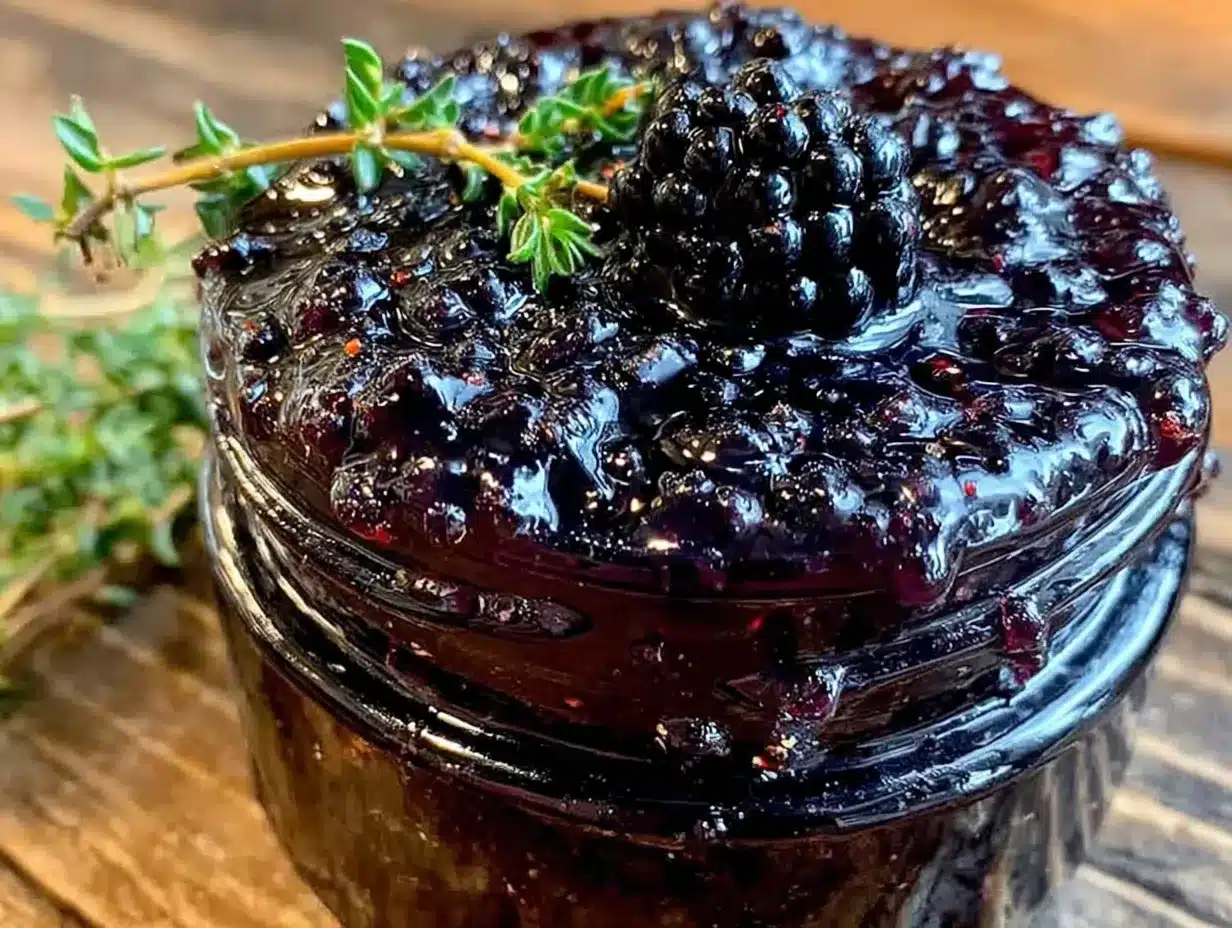
Alright, let’s make some syrup. This process is forgiving, so don’t stress. I’ve made this at least twenty times, and it always turns out well even when I’m distracted or multitasking.
- Rinse the dried elderberries quickly under cool water in a fine-mesh strainer. You’re just removing any dust or debris. Don’t soak them—they’ll start to rehydrate and you want them to release their goodness into the water, not down the drain.
- Combine the berries, water, cinnamon stick, sliced ginger, and cloves in your pot. If you’re using the optional rose hips or turmeric, add them now. Give everything a gentle stir.
- Bring the mixture to a boil over medium-high heat. Watch it carefully—it can foam up quickly. Once it reaches a rolling boil, immediately reduce the heat to low. You want a gentle simmer, not a violent boil.
- Simmer uncovered for 45-60 minutes. The liquid should reduce by about half. I set a timer for 45 minutes and then check it. The color should be a deep, almost black-purple, and the berries should look plump and wrinkled. The kitchen will smell amazing at this point—like autumn and comfort and health all mixed together.
- Remove the pot from heat and let it cool for about 10-15 minutes. This is important because you don’t want to burn yourself when straining, and you also don’t want to add honey to boiling liquid.
- Strain the mixture through your fine-mesh strainer lined with cheesecloth into a large bowl or measuring cup. Press down on the berries gently with the back of a spoon to extract all the liquid. I usually get about 2 to 2.5 cups of concentrated liquid. Don’t squeeze too hard or you’ll get cloudy syrup—a little cloudiness is fine, but you don’t want berry bits floating around.
- Discard the solids (or compost them—the berries are spent and not pleasant to eat at this point).
- Let the liquid cool to lukewarm—around 100-110°F. This is crucial. If it’s too hot, it will destroy the beneficial enzymes in the raw honey. If it’s too cold, the honey won’t incorporate smoothly. I test it by dipping a clean finger in—it should feel warm but not hot.
- Stir in the raw honey slowly, whisking gently until fully dissolved. The mixture will become glossy and smooth. Taste it at this point—it should be sweet with a pleasant tartness and warm spice notes. If it’s too tart for your liking, you can add a little more honey, but remember that the honey is also the preservative, so don’t skimp.
- Pour the syrup into your sterilized jars using the funnel. Leave about half an inch of headspace at the top. Wipe the rims clean, screw on the lids, and let them cool to room temperature before refrigerating.
Cooking Tips & Techniques
I’ve made plenty of mistakes with this recipe so you don’t have to. Here’s what I’ve learned the hard way.
Don’t boil the honey. This is the number one mistake. I ruined my first batch by adding honey while the liquid was still piping hot. The honey seized up, the syrup turned grainy, and I lost all those lovely raw enzymes. Let the liquid cool to lukewarm—warm to the touch but not hot.
Watch your simmer. A gentle simmer means tiny bubbles breaking the surface, not a full-on boil. If you boil it too hard, you’ll evaporate too much water and end up with a thick, overly concentrated syrup that’s more like molasses. If you simmer too gently, the syrup will be thin and watery. The sweet spot is that lazy, contented bubble.
Use whole spices, not ground. I tried ground cinnamon and ground ginger once because I was out of whole spices. Big mistake. The syrup turned cloudy, the texture was gritty, and straining was a nightmare. Whole spices infuse flavor beautifully and are easy to strain out. Stick with them.
Double the batch. Honestly, this syrup disappears fast in my house. I now make a double batch every time because the process is the same and I might as well have enough to last through February. It stores well for up to three months in the fridge, so go ahead and make extra.
Label your jars. I know this sounds silly, but I once grabbed a jar of elderberry syrup thinking it was homemade iced tea concentrate and took a big swig. It was not pleasant. Label clearly with the date so you know when it’s time to make more.
Variations & Adaptations
This recipe is flexible, so feel free to make it your own. Here are some variations I’ve tried and loved.
Vegan Version: Substitute the raw honey with maple syrup or agave nectar. The texture will be thinner and the flavor less complex, but it still works beautifully. Add an extra tablespoon of maple syrup for sweetness balance.
Extra Immune Boost: Add 1 tablespoon of dried echinacea root or 1 teaspoon of astragalus root to the simmering liquid. These herbs have their own immune-supporting properties and blend well with the elderberries. Strain them out with the other solids.
Spicy Version: Add an extra tablespoon of fresh ginger, a pinch of cayenne pepper, and a star anise pod. This version is amazing for when you feel a cold coming on and want something that really clears the sinuses.
Kid-Friendly Version: Reduce the ginger and cloves by half and add a strip of orange zest. My kids actually prefer this milder version, and it still packs the immune benefits. The orange adds a bright, fruity note that masks the medicinal taste.
Slow Cooker Method: Combine all ingredients except honey in a slow cooker and cook on low for 3-4 hours. Strain, cool, and add honey. This is great for busy days when you don’t want to watch the stove. The flavor is slightly deeper, I think.
Alcohol-Based Tincture Alternative: If you want a shelf-stable version that doesn’t need refrigeration, cover the elderberries with vodka or brandy instead of water and let it steep for 4-6 weeks. Strain and add honey to taste. This is a different product entirely, but it’s wonderful for travel or gifts.
Serving & Storage Suggestions
This syrup is versatile, so here’s how I use it in our household.
Daily Maintenance Dose: Adults take 1 tablespoon daily during cold season. Kids ages 1-6 take 1 teaspoon daily, and kids 7-12 take 1 tablespoon daily. I serve it straight from a spoon or mixed into a small glass of warm water.
At the First Sign of Sickness: Increase the dose to 1 tablespoon every 3-4 hours for adults, and 1 teaspoon every 3-4 hours for children. I also add it to hot tea with lemon and extra ginger for a soothing cold remedy.
Creative Uses: Drizzle it over pancakes, waffles, or oatmeal. Stir it into yogurt or smoothies. Use it as a glaze for roasted chicken or pork (trust me, it’s amazing). Mix it into sparkling water for a healthy soda alternative. My kids love “purple popsicles” made by freezing the syrup diluted with a little water.
Storage: This syrup must be refrigerated because of the raw honey and water content. It will keep for up to 3 months in a sealed glass jar in the fridge. Don’t freeze it—the texture changes and becomes grainy when thawed.
How to Tell If It’s Still Good: If you see mold, smell fermentation, or notice an off flavor, toss it. Properly made syrup should stay good for months, but if you’re unsure, err on the side of caution. I always make a fresh batch in September and another in January.
Nutritional Information & Benefits
This syrup isn’t just tasty—it’s genuinely good for you. Here’s the breakdown per 1 tablespoon serving:
- Calories: Approximately 45-50 calories
- Carbohydrates: 12-13 grams (mostly from honey)
- Sugar: 10-11 grams (natural, unrefined)
- Vitamin C: 2-4 mg (from elderberries and optional rose hips)
- Antioxidants: High levels of anthocyanins and flavonoids
The key benefits come from the elderberries themselves. They’re packed with antioxidants called anthocyanins that help reduce inflammation and support immune function. Studies suggest elderberry can shorten the duration of cold and flu symptoms when taken at the first sign of illness. The raw honey adds antibacterial properties and soothes sore throats. Cinnamon and ginger both have anti-inflammatory and antimicrobial effects. It’s like a cozy little immune army in a jar.
This recipe is naturally dairy-free, gluten-free, and nut-free. It contains honey, so it’s not suitable for infants under 1 year old. If you have diabetes or are watching your sugar intake, use this syrup in moderation and consult your healthcare provider.
Conclusion
This homemade elderberry syrup for cold season has become more than just a recipe in my kitchen. It’s a ritual. Every September, I pull out my pot, measure out the berries, and let that spicy, fruity smell fill my house. It reminds me of Aunt Rose, of that woman in the grocery store aisle, and of all the winters I’ve kept my family just a little bit healthier with a spoonful of purple magic.
I honestly can’t recommend making this enough. It’s simple, affordable, and genuinely effective. And the best part? You can tweak it to your heart’s content. Add more ginger if you like it spicy. Use local honey for allergy benefits. Make it with your kids and let them help stir. This recipe is yours now, and I hope it becomes as beloved in your home as it is in mine.
If you make this syrup, I’d love to hear about it. Drop a comment below and tell me how you use it, what variations you tried, or if your kids call it “purple syrup” too. Share this post with a friend who’s dreading cold season—they’ll thank you later. And until next time, stay healthy and keep cooking with love.
Frequently Asked Questions
Can I use fresh elderberries instead of dried?
Technically yes, but I don’t recommend it. Fresh elderberries must be cooked thoroughly because they contain a compound that can cause nausea when raw. Dried elderberries are safer, more concentrated, and available year-round. Stick with dried for this recipe.
How long does homemade elderberry syrup last?
Stored properly in a sealed glass jar in the refrigerator, this syrup lasts up to 3 months. I always label my jars with the date so I know when to make more. If you see any mold or smell something off, toss it immediately.
Can I give this syrup to my kids?
Yes, but with age-appropriate dosing. Children over 1 year can take 1 teaspoon daily for maintenance and 1 teaspoon every 3-4 hours at the first sign of illness. Do not give honey to infants under 1 year due to the risk of botulism. Always consult your pediatrician before starting any new supplement.
Can I make this without honey?
You can substitute maple syrup for a vegan version, but the texture will be thinner and the shelf life shorter. Honey acts as both sweetener and preservative, so honey-free versions need to be used within 2-3 weeks and must be kept very cold.
Do I really need to use raw honey?
Yes, for this recipe it matters. Raw honey contains natural enzymes and antibacterial properties that are destroyed by pasteurization. Plus, the flavor is more complex and floral. Regular supermarket honey is often pasteurized and blended, so it won’t give you the same benefits or taste.
Pin This Recipe!
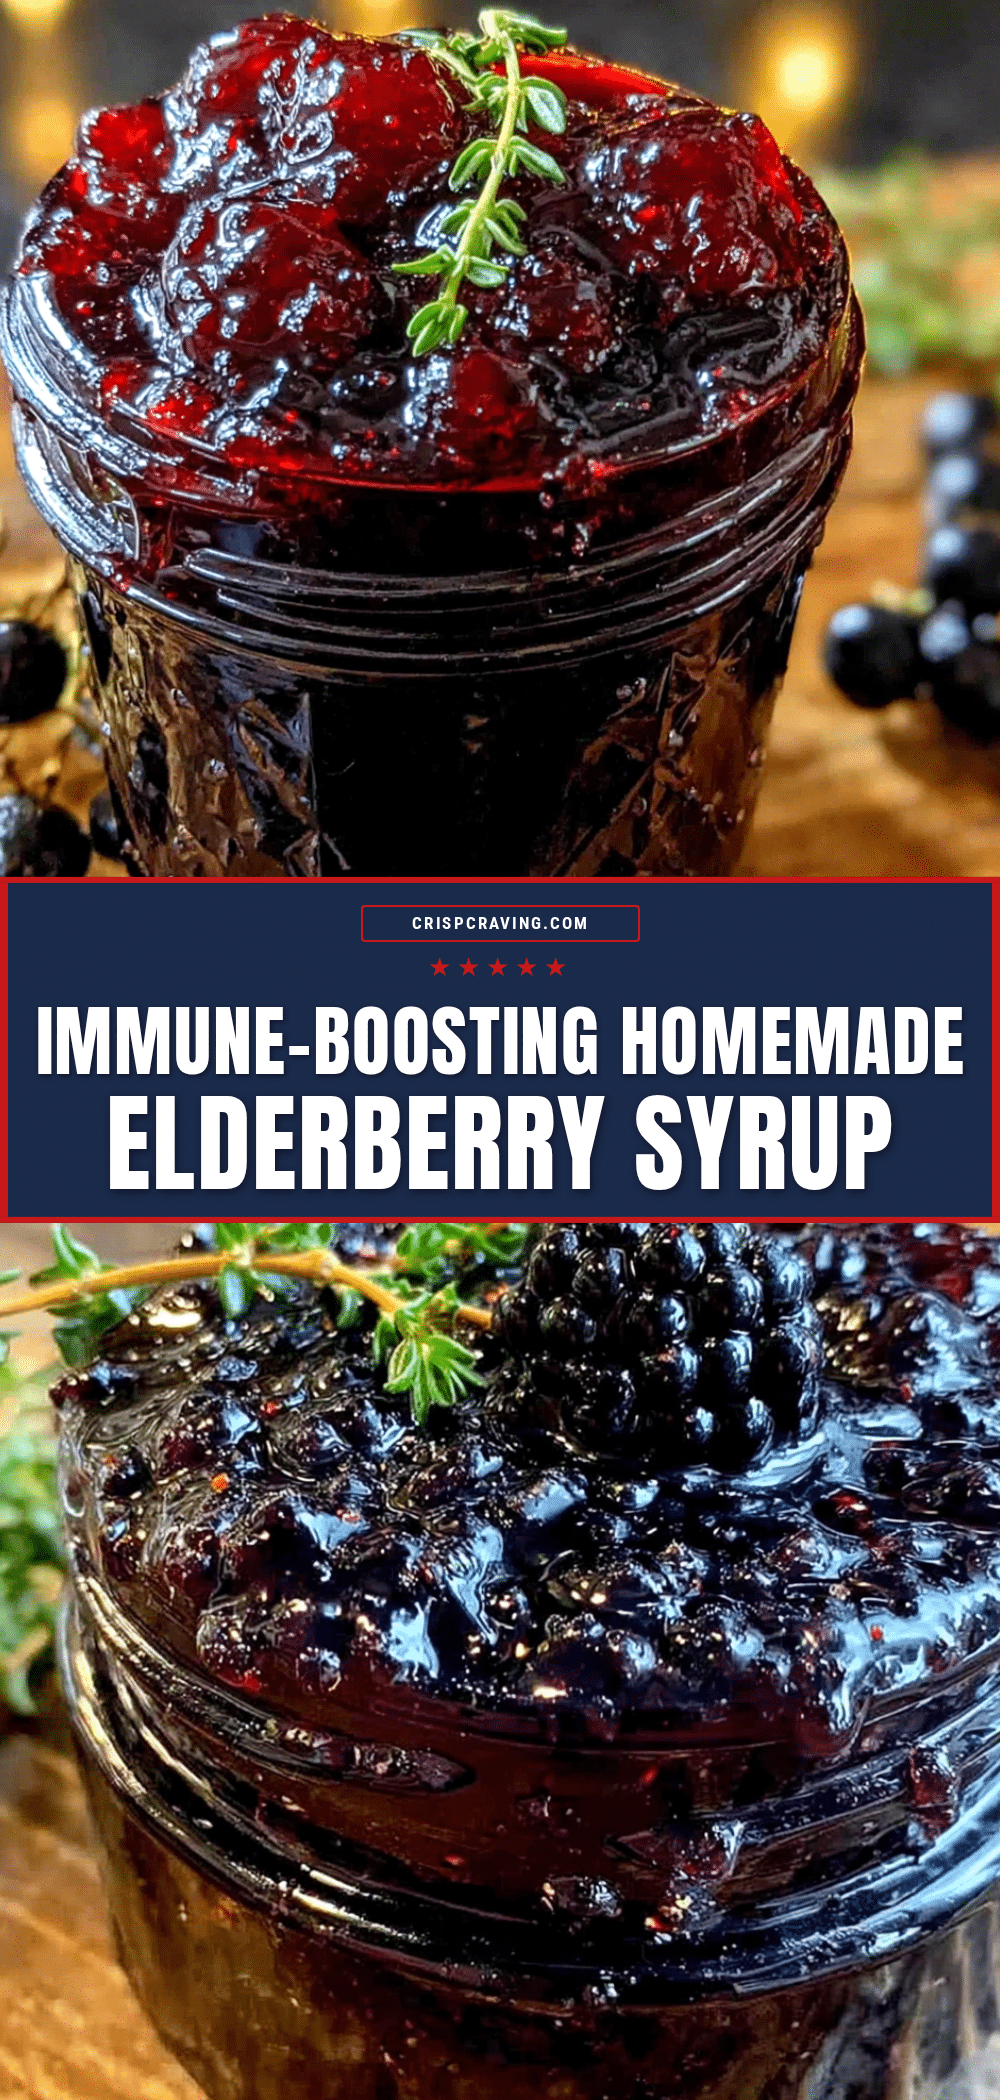
Homemade Elderberry Syrup: Best Immune Booster Recipe
This homemade elderberry syrup is a comforting, immune-boosting recipe made with dried elderberries, raw honey, and warm spices. It’s quick to prepare, delicious, and perfect for cold season.
- Prep Time: 10 minutes
- Cook Time: 45-60 minutes
- Total Time: 1 hour 10 minutes
- Yield: 2 cups (32 servings of 1 tablespoon each) 1x
- Category: Condiment
- Cuisine: American
Ingredients
- 1 cup dried elderberries
- 4 cups filtered water
- 1 cinnamon stick
- 1 tablespoon fresh ginger, sliced
- 1 teaspoon whole cloves
- 1 cup raw, unfiltered honey
- 1 tablespoon dried rose hips (optional)
- 1 teaspoon turmeric powder (optional)
Instructions
- Rinse the dried elderberries quickly under cool water in a fine-mesh strainer.
- Combine the berries, water, cinnamon stick, sliced ginger, and cloves in a pot. Add optional rose hips or turmeric if using.
- Bring the mixture to a boil over medium-high heat, then reduce heat to low and simmer uncovered for 45-60 minutes until liquid reduces by about half.
- Remove the pot from heat and let it cool for 10-15 minutes.
- Strain the mixture through a fine-mesh strainer lined with cheesecloth into a large bowl or measuring cup. Press gently on the berries to extract liquid.
- Discard the solids.
- Let the liquid cool to lukewarm (100-110°F).
- Stir in the raw honey slowly, whisking gently until fully dissolved.
- Pour the syrup into sterilized glass jars using a funnel, leaving about half an inch of headspace. Wipe rims, screw on lids, and let cool to room temperature before refrigerating.
Notes
Do not add honey to boiling liquid; let it cool to lukewarm first to preserve enzymes. Use whole spices, not ground, for best flavor and easy straining. Store in the refrigerator for up to 3 months. Not suitable for infants under 1 year due to honey.
Nutrition
- Serving Size: 1 tablespoon
- Calories: 4550
- Sugar: 1011
- Carbohydrates: 1213
Keywords: elderberry syrup, immune booster, homemade syrup, cold season remedy, elderberry recipe



