Love this? Save it for later!
Share the inspiration with your friends
My neighbor wasn’t trying to impress anyone. I’d stopped by to borrow a cup of sugar—cliché, I know—and the smell of peanut butter and chocolate hit me before I even made it past her welcome mat. She was standing in her kitchen, rolling these little balls between her palms like it was nothing, while her kids swarmed around her legs like hungry little sharks.
“Oh, these?” she said when I asked, barely looking up. “Just something I throw together when they’re starving after school.” She shrugged like it was no big deal. But I was already staring at the bowl of ingredients on her counter—no mixer, no oven, no fuss. Just a bowl, a spoon, and about ten minutes of her time.
I stood there watching her work, maybe a little too long. She caught me eyeing the finished ones on a plate and shoved one into my hand. “Try it.” That first bite—soft, chewy, with little pockets of chocolate and that satisfying peanut butter punch—honestly stopped me mid-sentence. I think I said something dumb like, “Wow.” She just laughed and handed me the recipe scribbled on a torn envelope.
That was three years ago, and I’ve been making these Quick No-Bake Protein Balls ever since. They’ve gotten me through frantic weekday afternoons, hangry kids, my own low-energy slumps, and even a few road trips. Maybe you’ve been there—standing in your kitchen at 3 PM wondering what on earth to feed everyone that isn’t chips or a granola bar full of sugar? These protein balls are the answer. And honestly? They’re so simple you’ll feel like you’re cheating.
Why You’ll Love This Recipe
Let me tell you why these Quick No-Bake Protein Balls have become my absolute go-to. I’ve tested this recipe about a dozen times—tweaking the sweetness, playing with different nut butters, even accidentally making them too dry once (we don’t talk about that batch). But this version? It’s the one that finally stuck.
- Quick & Easy: You can have these made in under 15 minutes. No oven, no baking sheet, no waiting around. Just mix, roll, and eat.
- Simple Ingredients: Everything you need is probably in your pantry right now. Oats, peanut butter, honey, chocolate chips—nothing fancy or hard to find.
- Perfect for After-School Snacks: These are literally designed for that chaotic 3 PM window when kids come home starving and dinner feels miles away.
- Crowd-Pleaser: I’ve brought these to playdates, school events, and even work meetings. Kids devour them. Adults ask for the recipe. It’s almost funny how universal the appeal is.
- Unbelievably Delicious: The texture is soft and chewy, not dry or crumbly. The chocolate chips melt slightly on your tongue. And the peanut butter? It coats everything in that salty-sweet magic.
What makes these different from other protein ball recipes is the ratio. I spent weeks getting it just right—enough oats for structure, enough peanut butter for richness, and just a touch of honey to tie it all together without making them sticky. They’re not too sweet, not too dense, and they actually keep you full. This isn’t just another version of a protein ball. It’s the one you’ll make again and again until you don’t need the recipe anymore.
What Ingredients You Will Need
This recipe uses simple, wholesome ingredients that come together to create something genuinely satisfying. Most of these are pantry staples, which is exactly what you want when you’re staring down a hungry kid at 3:15 PM.
- Rolled oats, 1 cup (use certified gluten-free if needed; old-fashioned oats work best, not the instant kind)
- Creamy peanut butter, ½ cup (I prefer natural peanut butter with just peanuts and salt—less sugar, better texture. But any creamy peanut butter works)
- Honey, ¼ cup (adds natural sweetness and helps bind everything together; maple syrup works too)
- Mini chocolate chips, ⅓ cup (semi-sweet or dark; mini chips distribute better than regular-sized ones)
- Ground flaxseed, 2 tablespoons (adds fiber and omega-3s; completely optional but I love the subtle nutty flavor)
- Vanilla extract, 1 teaspoon (pure vanilla extract if you have it, but imitation works fine here)
- Pinch of salt (only if your peanut butter is unsalted; skip if using salted peanut butter)
I recommend using Bob’s Red Mill rolled oats for consistent texture—they hold up well without getting mushy. For peanut butter, Justin’s classic peanut butter is my personal go-to because it’s perfectly salted and doesn’t separate as much as some other natural brands. And for chocolate chips, Enjoy Life mini chips are great if you need a dairy-free option.
A quick note on substitutions: If you’re avoiding peanuts, swap in almond butter or sunflower seed butter. Just know that sunflower butter can turn a weird green color when mixed with baking soda (not an issue here since we’re not baking, but something to keep in mind). For a nut-free version, try tahini or WowButter—both work beautifully. And if you’re watching your sugar intake, you can reduce the honey to 2 tablespoons and add an extra tablespoon of peanut butter to compensate for the moisture.
Equipment Needed
The beauty of these Quick No-Bake Protein Balls is that you don’t need much. Here’s what you’ll need:
- Large mixing bowl (any size will do, but bigger is better for mixing without spilling)
- Measuring cups and spoons (for accuracy—I’ve eyeballed it before and regretted it)
- Rubber spatula or wooden spoon (for mixing; a spatula makes scraping the sides easier)
- Baking sheet or plate (to hold the rolled balls while they set)
- Parchment paper (optional but helpful for easy cleanup)
- Small cookie scoop (optional—I use a 1-tablespoon scoop for uniform balls, but your hands work just fine)
If you don’t have a cookie scoop, just use a regular spoon to portion the mixture and roll it between your palms. I actually prefer hand-rolling because you can feel if the mixture is too dry or too sticky and adjust accordingly. The first time I made these, I used a scoop and ended up with uneven balls—some too big, some falling apart. Hand-rolling gave me more control, honestly.
For storage, an airtight container is your best friend. I use a glass meal prep container with a tight lid, but any container works. If you’re giving these as gifts, mason jars look adorable and keep them fresh.
Preparation Method
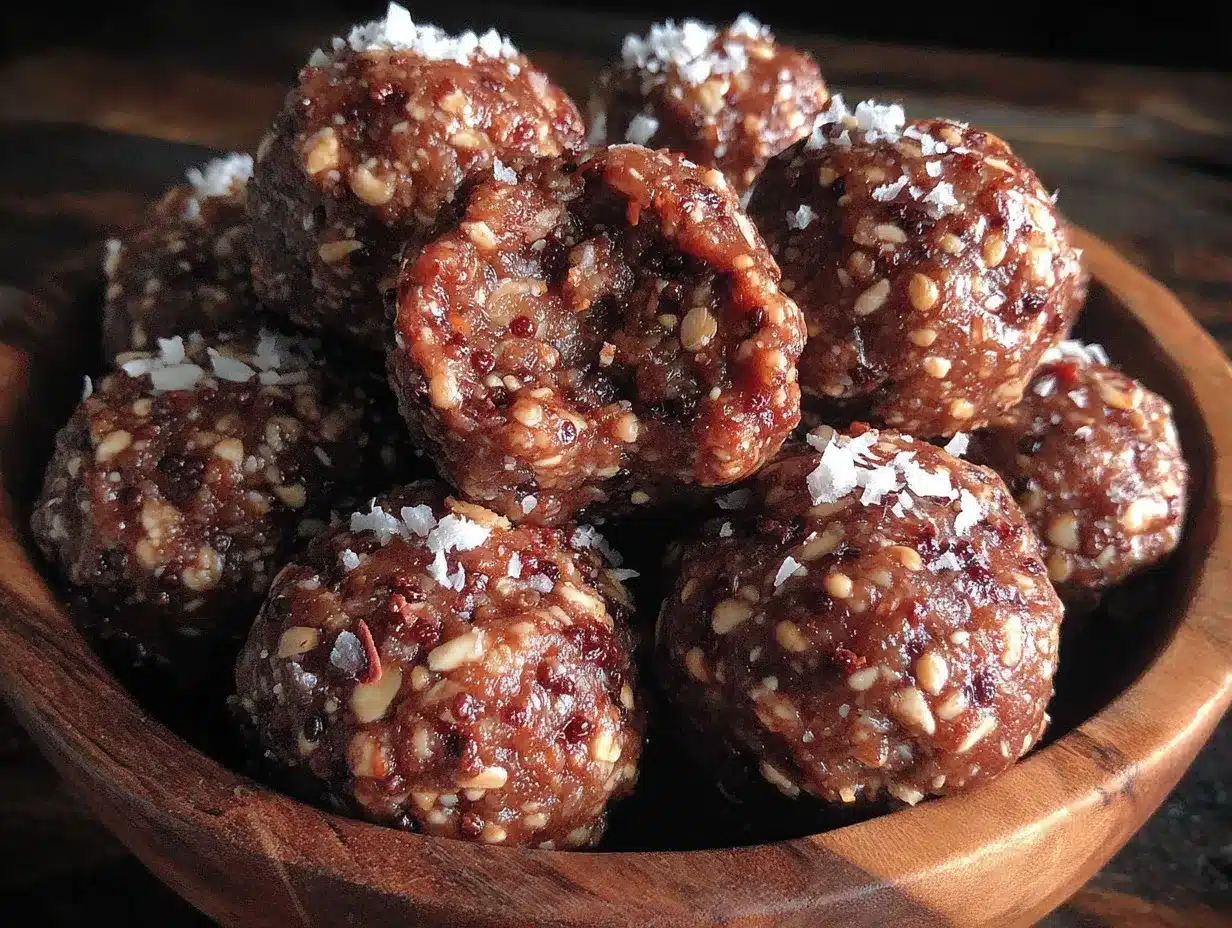
- Combine the dry ingredients. In a large mixing bowl, add 1 cup rolled oats, 2 tablespoons ground flaxseed (if using), and a pinch of salt. Give them a quick stir with your spatula to distribute everything evenly. Don’t skip this step—mixing the dry ingredients first prevents clumps later.
- Add the wet ingredients. Spoon in ½ cup creamy peanut butter, ¼ cup honey, and 1 teaspoon vanilla extract. Don’t dump them all in the same spot—spread them around a bit so they incorporate faster. I learned this the hard way after spending five minutes trying to break up a giant glob of peanut butter.
- Mix until combined. Stir everything together with your rubber spatula or wooden spoon. Use a folding motion—scrape the bottom, bring it over the top, turn the bowl, repeat. At first it’ll look dry and crumbly, and you’ll think you did something wrong. Keep going. After about a minute, the peanut butter and honey will start pulling everything together. The mixture should hold together when you squeeze a bit between your fingers. If it’s too dry, add another tablespoon of honey. If it’s too sticky, add a tablespoon of oats.
- Fold in the chocolate chips. Add ⅓ cup mini chocolate chips and fold them in gently. You want them evenly distributed without crushing them. This is where the rubber spatula really shines—it folds without breaking the chips. Take your time here; uneven chocolate distribution means some balls get all the good stuff and others get cheated.
- Chill the mixture (optional but recommended). Pop the bowl in the fridge for 15-20 minutes. This step isn’t strictly necessary, but it makes rolling the balls so much easier. The mixture firms up slightly, so it doesn’t stick to your hands as much. On hot summer days, I never skip this. On cooler days, I sometimes roll them right away and they turn out fine—just a little stickier.
- Roll into balls. Scoop out about 1 tablespoon of the mixture and roll it between your palms to form a smooth ball. Place each ball on a baking sheet lined with parchment paper. You should get about 16-18 balls, depending on how generous you are with your scoops. I usually end up with 16 because I can’t resist making them slightly bigger. The warmth of your hands helps the balls hold their shape, so don’t worry if they feel a little soft at first—they’ll firm up as they cool.
- Let them set. Place the baking sheet in the refrigerator for at least 30 minutes. This allows the balls to firm up completely. If you’re impatient like me, you can eat one right away—it’ll just be a little softer and more prone to falling apart. But trust me, the texture after they’ve chilled is worth the wait. They become chewy and satisfying, not crumbly.
- Transfer to storage. Once set, move the protein balls to an airtight container. Layer them with parchment paper if stacking to prevent sticking. They’ll keep in the fridge for up to two weeks—if they last that long. In my house, they’re usually gone within three days.
Cooking Tips & Techniques
After making these Quick No-Bake Protein Balls more times than I can count, I’ve picked up a few tricks that make a real difference.
Watch your peanut butter consistency. Natural peanut butter that’s been sitting in the fridge can be rock hard and impossible to mix. Let it come to room temperature first, or warm it in the microwave for 10-15 seconds. On the flip side, if your peanut butter is too runny (some natural brands separate badly), stir it thoroughly before measuring. I once used the oily top layer of a jar and ended up with protein balls that wouldn’t hold together. Total disaster.
Don’t overmix. I know it’s tempting to keep stirring until everything looks perfectly uniform, but overmixing can break down the oats and make the texture mushy. Mix just until everything comes together—you want to still see some oat texture. The first few times I made these, I stirred like I was trying to win a competition, and the balls turned out dense and pasty. Less is more here.
Use slightly damp hands for rolling. If the mixture sticks to your palms, lightly wet your hands with water. Not soaking wet—just a quick rinse and shake off the excess. The moisture creates a barrier that prevents sticking without adding extra liquid to the mixture. This trick saved me during a particularly humid summer when nothing wanted to cooperate.
Make them ahead for busy weeks. These protein balls actually taste better after a day in the fridge. The flavors meld together, the oats soften slightly, and the texture becomes perfectly chewy. I often double the batch on Sunday and we snack on them all week. They’re a lifesaver on Wednesday afternoons when everyone’s tired and cranky.
Test one before rolling all of them. Roll a single ball first and see if it holds together. If it falls apart, add a bit more honey or peanut butter to the mixture. If it’s too sticky, add more oats. It’s much easier to adjust the whole batch than to fix sixteen individual balls that won’t cooperate. Learned that one the hard way—I once had a tray of balls that slowly disintegrated into a sad pile of oat crumbs.
Variations & Adaptations
One of the best things about these Quick No-Bake Protein Balls is how customizable they are. Here are some variations I’ve tried and loved:
Chocolate Peanut Butter Dream: Add 1 tablespoon of cocoa powder to the dry ingredients for a chocolate version. Reduce the oats by 1 tablespoon to keep the texture right. The chocolate flavor pairs beautifully with the peanut butter, and my kids swear this version tastes like cookie dough.
Tropical Twist: Swap the chocolate chips for ¼ cup dried pineapple or mango, chopped small, and add 2 tablespoons of shredded coconut. Use almond butter instead of peanut butter for a different flavor profile. This version feels like summer in a bite, and it’s great for lunchboxes.
Seed-Based Nut-Free Version: Use sunflower seed butter instead of peanut butter, and swap the chocolate chips for raisins or dried cranberries. Add an extra tablespoon of honey since sunflower seed butter is less sweet. This is perfect for nut-free schools and still tastes amazing. Just note that sunflower seed butter can have a stronger flavor, so the dried fruit helps balance it out.
Protein-Powered: Add 1 scoop of vanilla or chocolate protein powder to the dry ingredients. You’ll need to increase the honey by 1-2 tablespoons to compensate for the dryness of the powder. I’ve used both whey and plant-based protein powders, and both work—just adjust the moisture accordingly. This version is great for post-workout snacks or for growing teenagers who need extra fuel.
Spiced Apple: Swap the chocolate chips for ¼ cup dried apple pieces (chopped small) and add ½ teaspoon cinnamon and a pinch of nutmeg. Use almond butter for a milder flavor. These taste like apple pie in protein ball form, and they’re especially good in the fall. I made these for a Halloween party once and they disappeared faster than the candy.
Serving & Storage Suggestions
These Quick No-Bake Protein Balls are best served cold or at room temperature. Straight from the fridge, they’re firm and chewy—perfect for grabbing on your way out the door. If you prefer a softer texture, let them sit on the counter for 5-10 minutes before eating. The chocolate chips soften slightly, and the overall texture becomes more tender.
For serving, I like to arrange them on a small plate or in a bowl for after-school snacks. Kids can grab a couple with a glass of milk, and they pair beautifully with apple slices or carrot sticks for a more substantial snack. For playdates or birthday parties, I’ve arranged them on a platter with fresh fruit and cheese cubes—they always stand out as the healthier option that nobody complains about.
Storage: Keep the protein balls in an airtight container in the refrigerator. They’ll stay fresh for up to two weeks, though I’ve kept them for three weeks without any issues (they just get a bit firmer). For longer storage, you can freeze them for up to three months. Place them in a single layer on a baking sheet, freeze until solid, then transfer to a freezer-safe bag or container. Thaw in the refrigerator overnight or at room temperature for about 30 minutes.
Reheating: You don’t really need to reheat these, but if you want a softer texture, pop one in the microwave for 5-8 seconds. Don’t go longer—they can get too soft and lose their shape. I’ve done this on cold winter mornings when I wanted something a little less chilly, and it works great.
One thing to note: the flavors actually develop over time. Day-old protein balls taste more cohesive, and by day three, the oats have softened perfectly and the chocolate chips have melded into the mixture. So don’t worry if they seem a little basic on day one—they get better.
Nutritional Information & Benefits
Here’s the approximate nutritional breakdown for one protein ball (based on 16 balls):
| Nutrient | Amount per ball |
|---|---|
| Calories | 110 |
| Protein | 4g |
| Carbohydrates | 12g |
| Fiber | 2g |
| Sugar | 7g |
| Fat | 6g |
| Saturated Fat | 1.5g |
| Sodium | 65mg |
These protein balls offer a good balance of protein, healthy fats, and complex carbohydrates. The oats provide sustained energy from fiber, while the peanut butter adds protein and heart-healthy monounsaturated fats. Flaxseed contributes omega-3 fatty acids and additional fiber, which supports digestive health. The honey offers natural sweetness with a lower glycemic impact than refined sugar, and the dark chocolate chips provide antioxidants in the form of flavonoids.
This recipe is naturally vegetarian and can be made gluten-free by using certified gluten-free oats. It’s also dairy-free if you choose dairy-free chocolate chips. The protein content makes it a satisfying snack that helps stabilize blood sugar levels, preventing that mid-afternoon energy crash. From a wellness perspective, I love that these feel like a treat but actually provide real nutritional value—no guilt, just goodness.
Conclusion
These Quick No-Bake Protein Balls have honestly become a staple in my kitchen for a reason. They’re fast, forgiving, and genuinely delicious—the kind of snack that makes you feel good about feeding your family. Whether you’re a busy parent trying to survive the after-school chaos, someone looking for a healthier snack option, or just a person who loves peanut butter and chocolate (aren’t we all?), this recipe delivers.
Don’t be afraid to make them your own. Swap in your favorite nut butter, experiment with mix-ins, adjust the sweetness to your taste. That’s the beauty of a no-bake recipe—it’s practically impossible to mess up, and every variation teaches you something new. I’ve made versions with dried cherries, white chocolate chips, even crushed pretzels for a salty crunch. Each one was delicious in its own way.
I’d love to hear how these turn out for you! Did you try a fun variation? Did your kids devour them in record time? Drop a comment below and share your experience. And if you’re looking for other quick snack ideas, you might enjoy my banana oatmeal muffins or these 5-minute avocado toast variations. Happy snacking, friends!
Frequently Asked Questions
Can I use quick oats instead of rolled oats?
Yes, you can! Quick oats will give the protein balls a softer, more uniform texture. They absorb moisture faster, so you might need slightly less honey. Start with the regular amount and adjust if the mixture seems too wet. I’ve used quick oats when I ran out of rolled oats, and the results were still delicious—just a different texture.
How long do these protein balls last at room temperature?
They’re best kept in the refrigerator, but they can sit at room temperature for up to 4-6 hours without issues. If you’re packing them for lunch or a road trip, use an ice pack to keep them cool. In warm weather, the chocolate chips can melt and the texture becomes softer, so refrigeration is recommended.
Can I make these without honey for a vegan version?
Absolutely! Substitute the honey with maple syrup or agave nectar in equal amounts. Maple syrup adds a slightly different flavor—more caramel-like—but it works beautifully. Just note that maple syrup is a bit thinner than honey, so the mixture might be slightly stickier. Add an extra tablespoon of oats if needed to balance the moisture.
Why are my protein balls too dry and crumbly?
This usually happens when the peanut butter is too thick or the measurements are slightly off. Fix it by adding a tablespoon of honey or a splash of milk (dairy or plant-based) and mixing again. If you’ve already rolled them, you can crumble them back into the bowl, add the extra moisture, and re-roll. I’ve done this more times than I’d like to admit, and it always works.
Can I freeze these protein balls?
Yes, they freeze beautifully! Place them in a single layer on a baking sheet and freeze until solid (about 1-2 hours), then transfer to a freezer-safe bag or container. They’ll keep for up to 3 months. Thaw in the refrigerator overnight or at room temperature for about 30 minutes before eating. They’re great to grab straight from the freezer for a quick snack on hot days.
Pin This Recipe!
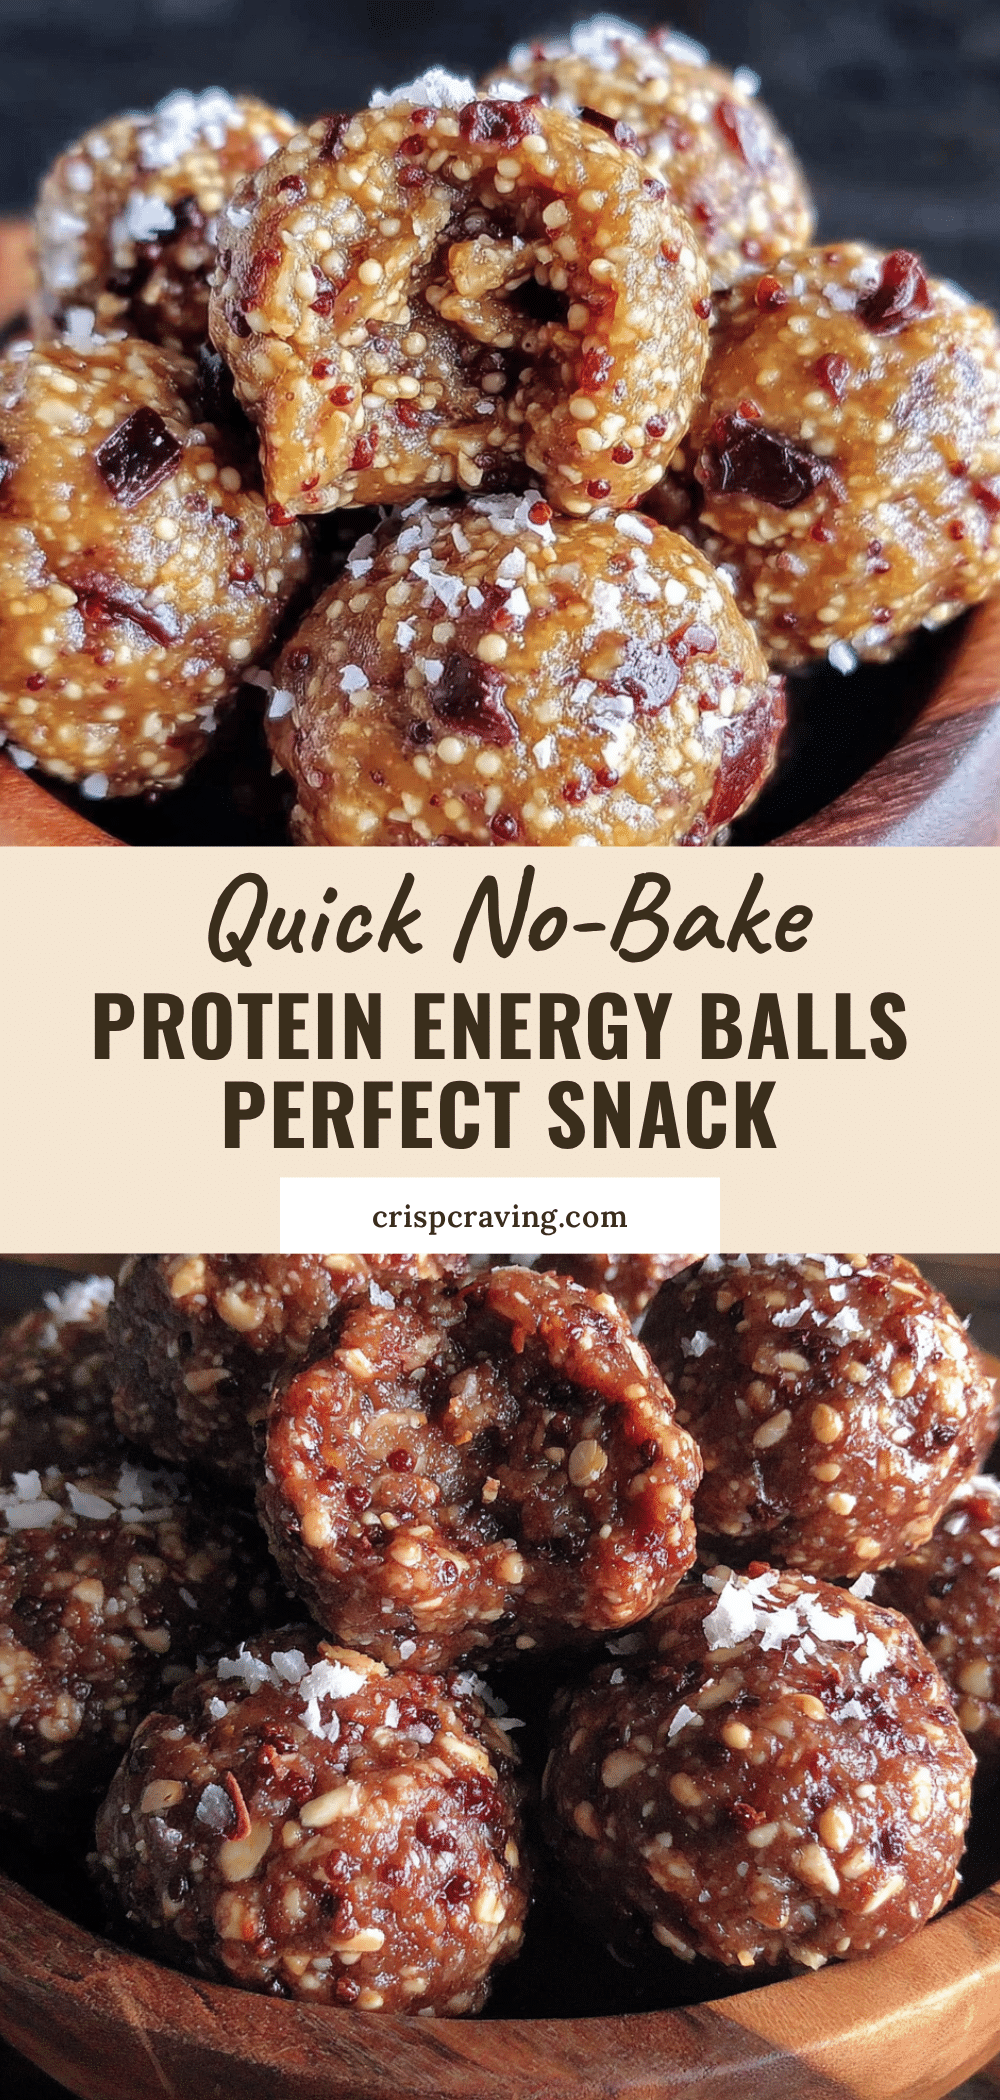
Quick No-Bake Protein Balls: Perfect Easy After-School Snack
These quick no-bake protein balls are the perfect after-school snack, made with simple pantry ingredients like oats, peanut butter, honey, and chocolate chips. Ready in under 15 minutes, they’re a crowd-pleaser that kids and adults love.
- Prep Time: 15 minutes
- Cook Time: 0 minutes
- Total Time: 45 minutes (includes chilling time)
- Yield: 16-18 balls 1x
- Category: Snack
- Cuisine: American
Ingredients
- 1 cup rolled oats (use certified gluten-free if needed)
- ½ cup creamy peanut butter (natural preferred)
- ¼ cup honey (or maple syrup for vegan)
- ⅓ cup mini chocolate chips (semi-sweet or dark)
- 2 tablespoons ground flaxseed (optional)
- 1 teaspoon vanilla extract
- Pinch of salt (if peanut butter is unsalted)
Instructions
- Combine the dry ingredients: In a large mixing bowl, add 1 cup rolled oats, 2 tablespoons ground flaxseed (if using), and a pinch of salt. Stir to distribute evenly.
- Add the wet ingredients: Spoon in ½ cup creamy peanut butter, ¼ cup honey, and 1 teaspoon vanilla extract. Spread them around for easier mixing.
- Mix until combined: Stir with a rubber spatula or wooden spoon using a folding motion until the mixture holds together when squeezed. If too dry, add another tablespoon of honey; if too sticky, add a tablespoon of oats.
- Fold in the chocolate chips: Add ⅓ cup mini chocolate chips and fold gently until evenly distributed.
- Chill the mixture (optional but recommended): Refrigerate for 15-20 minutes to make rolling easier.
- Roll into balls: Scoop about 1 tablespoon of mixture and roll between palms to form smooth balls. Place on a parchment-lined baking sheet. Makes about 16-18 balls.
- Let them set: Refrigerate for at least 30 minutes to firm up.
- Transfer to storage: Move to an airtight container, layering with parchment paper if stacking. Store in the fridge for up to 2 weeks.
Notes
For best texture, chill the mixture before rolling. Use slightly damp hands if mixture sticks. These taste even better after a day in the fridge. Can be frozen for up to 3 months.
Nutrition
- Serving Size: 1 ball
- Calories: 110
- Sugar: 7
- Sodium: 65
- Fat: 6
- Saturated Fat: 1.5
- Carbohydrates: 12
- Fiber: 2
- Protein: 4
Keywords: no-bake protein balls, after-school snack, peanut butter, chocolate chips, healthy snack, easy snack, gluten-free option, dairy-free option



